Initial SDK Setup
Initial SDK Setup
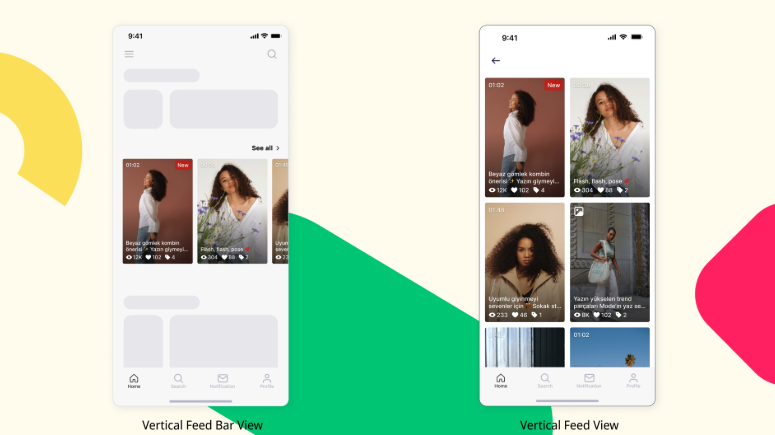
This walkthrough shows how to add Vertical Feed to your React Native application and show your first feed in it. This guide explains how to add and configure the Vertical
Feed in a React Native app, handle events, and implement features like wishlist/cart updates.
You can also check out the demo on GitHub
Installation
Storyly React Native package is available through npm. Source code is also available through the Storyly React Native Github page., contributions are more than welcomed 🙂
yarn add storyly-react-native
npm install --save storyly-react-native
Tip
You can find the latest version’s release notes here.
Android Installation
Storyly SDK is developed using Kotlin language. So, there are some requirements to use Kotlin plugin in the project. Especially if you're encountering a Plugin with id 'kotlin-android' not found. error, this part fixes that.
You need to add kotlin-gradle-plugin to Android project's main Gradle file (android/build.gradle)
buildscript {
    dependencies {
        classpath("org.jetbrains.kotlin:kotlin-gradle-plugin:1.x.x")
    }
}
Moreover, Storyly SDK is developed using the AndroidX library package instead of the Support Library. So, you need to ensure that your project also supports these packages. You can do this check and add related lines if it's missing in the application's Android project's Gradle properties file (android/gradle.properties)
android.useAndroidX=true
android.enableJetifier=true
Warning
Storyly SDK targets
Android API level 17 (Android 4.2, Jelly Bean)or higher.
iOS Installation
Storyly React Native contains platform-specific (native) code. Autolinking is needed to be done so that your project can discover and use this code.
If your application depends on react-native 0.60+, Autolinking is handled by react native as is mentioned in autolinking in react-native. Otherwise, react-native 0.60-, please refer for detailed explanation Linking Libraries in iOS for correct handling of autolinking.
// react-native 0.60-
react-native link storyly-react-native
After linking, you need to update Pods of the app;
// this should be executed inside 'ios' folder
pod update
npx pod-install
Warning
Storyly SDK targets
iOS 11or higher.
Warning
Please note that CocoaPods version should be 1.9+
Import Vertical Feed
Importing Vertical Feed in your React Native application is quite easy:
import { VerticalFeedBar } from 'storyly-react-native'; //top bar with group
import { VerticalFeed } from 'storyly-react-native'; //scrollable list of groups
import { VerticalFeedPresenter } from 'storyly-react-native'; //full-screen, playable feed
Initialize Vertical Feed
Below is a minimal example that renders the Vertical Feed presenter (full-screen), the feed bar, the feed
list.
<VerticalFeedBar
  style={{ width: '100%', height: 120 }}
  ref={ref => { this.verticalFeedBar = ref }}
  storylyId=STORYLY_INSTANCE_TOKEN/>
<VerticalFeed
  style={{ width: '100%', height: 120 }}
  ref={ref => { this.verticalFeed = ref }}
  storylyId=STORYLY_INSTANCE_TOKEN/>
<VerticalFeedPresenter
  style={{ width: '100%', height: 120 }}
  ref={ref => { this.verticalFeedPresenter = ref }}
  storylyId=STORYLY_INSTANCE_TOKEN/>
Warning
storylyId: It's required for your app's correct initialization.
Tip
Please do not forget to use your own token. You can get your token from the Storyly Dashboard -> Settings -> App Settings
Warning
If you can't see Storyly Vertical Feed in your application, please check that your token is correct. For more details please check console logs.
Vertical Feed Event Handling
This guide shows you how to handle Vertical Feed events in your app. Storyly events provide insight on what is happening on a VerticalFeed instance such as loading states, user redirections, user interaction.
Before you begin
You need to have the working Storyly integration as described in Initial SDK Setup
Vertical Feed Events
Vertical Feed component notifies application when an event occurs. You can register the callback functions using the following code example. Moreover, you can check the next sections to learn more about details of the events.
<VerticalFeedBar
  ...
  onLoad={VerticalFeedLoadEvent => console.log("[Vertical Feed Bar] onLoad")}
  onFail={errorMessage => console.log("[Vertical Feed Bar] onFail")}
  onVerticalFeedOpen={() => console.log("[Vertical Feed Bar] onVerticalFeedOpen")}
  onVerticalFeedClose={() => console.log("[Vertical Feed Bar] onVerticalFeedClose")}
  onPress={VerticalFeedPressEvent => console.log("[Vertical Feed Bar] onPress")}
  onEvent={VerticalFeedEvent => console.log("[Vertical Feed Bar] onEvent")}
  onUserInteracted={VerticalFeedItemInteractiveEvent => console.log("[Vertical Feed Bar] onStoryUserInteracted")}
/>
OnLoad Event
This event will let you know that Storyly has completed its network operations, and the story group list has just been shown to the user. In order to notified about this event, use the following example:
<VerticalFeedBar
  ...
  onLoad={VerticalFeedLoadEvent => {
    // console.log(storyGroupList.nativeEvent);
    console.log("[Vertical Feed Bar] onLoad");
  }}
/>
Check storyGroupList.nativeEvent member of function parameter:
[
  {
    "id": 1,
    "title": "...",
    "index": 1,
    "seen": true,
    "iconUrl": "...",
    "stories": [
      {
        "id": 1,
        "title": "...",
        "index": 1,
        "seen": true,
        "actionUrl": null,
      }
    ]
  }
]
OnFail Event
This event will let you know that Storyly has completed its network operations and had a problem while fetching your stories. In this case, users will see four empty story group icons, which we call skeleton view. In order to notified about this event, use the following example:
<VerticaLFeed Bar
  ...
  onFail={errorMessage => {
    console.log("[Vertical Feed Bar] onFail");
  }}
/>
Test Mode
Before you begin
You need to have the working Storyly integration as described in Initial SDK Setup
This guide shows how to show test groups created in Storyly Dashboard to the specific devices. The default value of storylyTestMode is false, you need to explicitly define to set test devices.
<VerticalFeedPresenter
  style={{ width: '100%', height: 120 }}
  ref={ref => { this.VerticalFeedPresenter = ref }}
  storylyId=STORYLY_INSTANCE_TOKEN
  storylyTestMode={true}
...
/>
Localization
This guide will walk you through the process of localizing all Storyly-related texts and content. You can deliver the appropriate content to each language/country pair by passing the locale parameter on the client side.
To set the locale, you need to use the IETF BCP 47 format as shown below:
<VerticalFeedPresenter
  style={{ width: '100%', height: 120 }}
  ref={ref => { this.VerticalFeedPresenter = ref }}
  storylyId=STORYLY_INSTANCE_TOKEN
  storylyLocale = "tr-TR"
...
/>
Tip
If you use the Translate option for Story Groups on the Storyly Dashboard, end user will see the content in their own
locale.
Updated 3 months ago