CleverTap Webhook Setup
How to do Webhook Setup on CleverTap for Storyly integration?
To use CleverTap <> Storyly Integration, a setup should be completed on the CleverTap Dashboard first.
This integration can either be done via Amazon EventBridge or via Webhook. In this how-to guide, Webhook Setup will be explained.
If you're using Amazon Event Bridge for any other partner of yours, the Webhook option can be used instead.
Webhook Setup
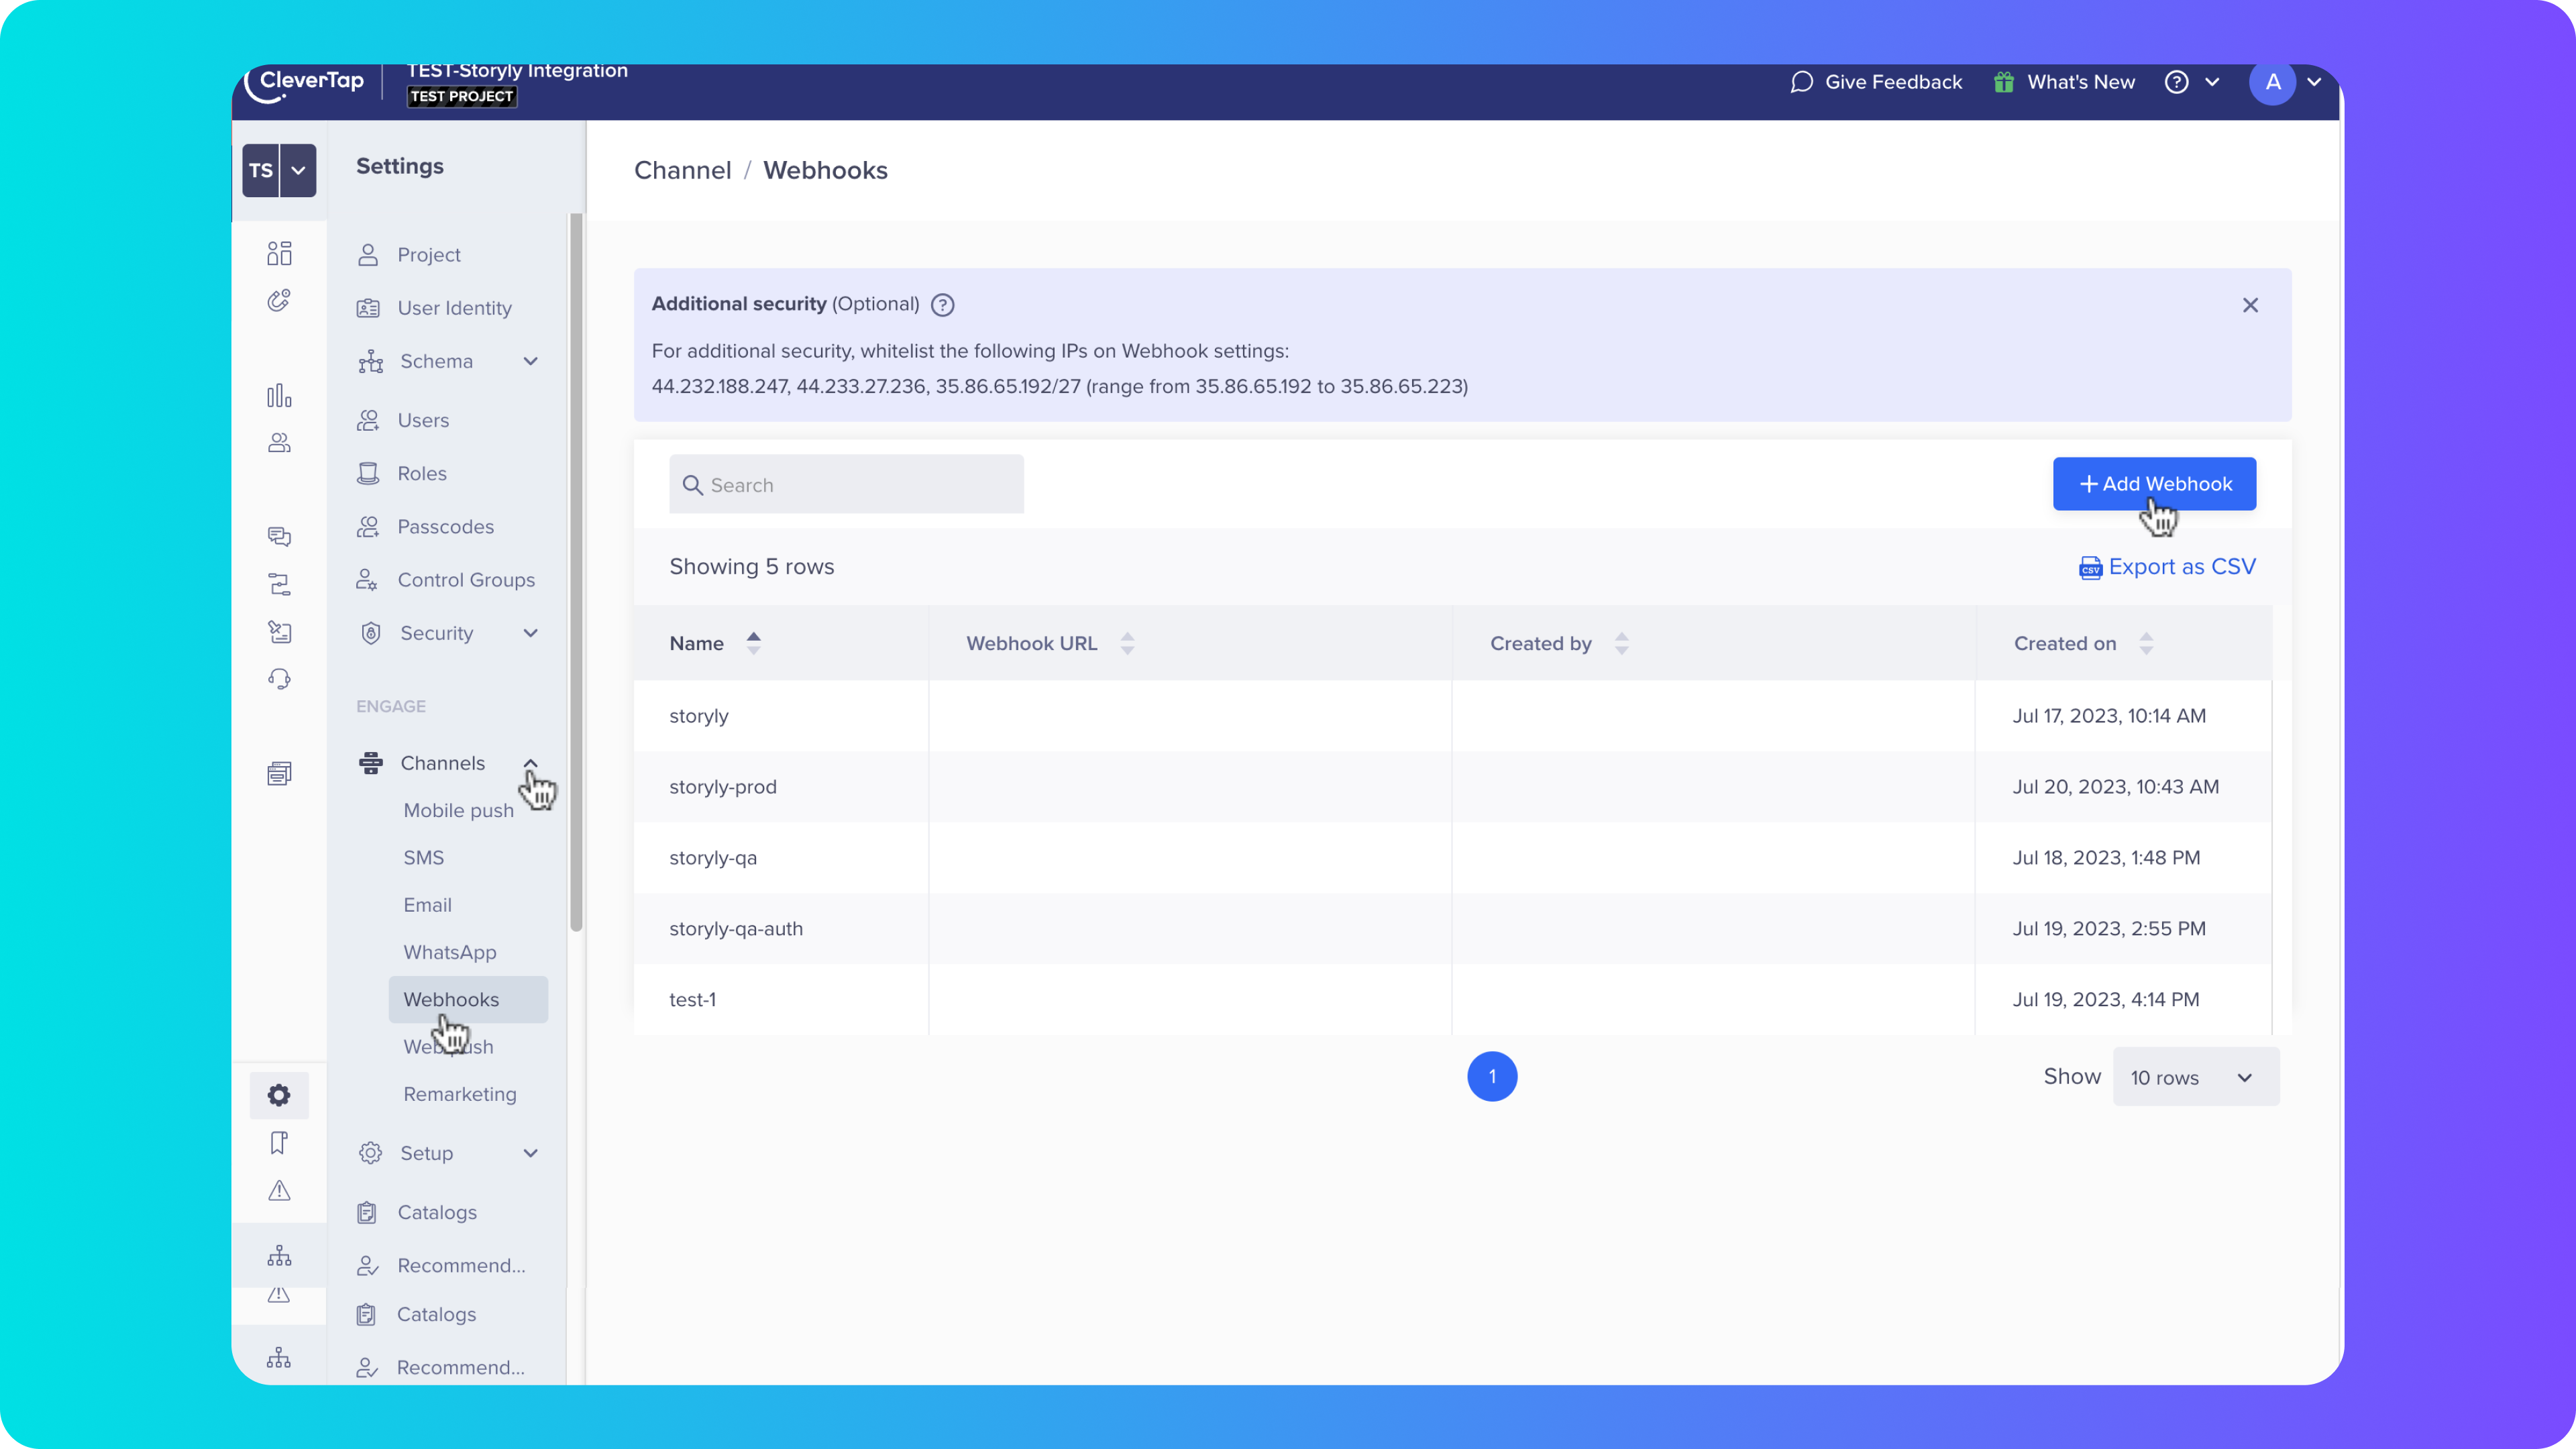
1. For setting up Webhook, on the CleverTap Dashboard, please navigate to Settings and under Channels section you'll find Webhooks.
At that screen, you'll see the + Add Webhook option at the top right corner. Please click on it to proceed.
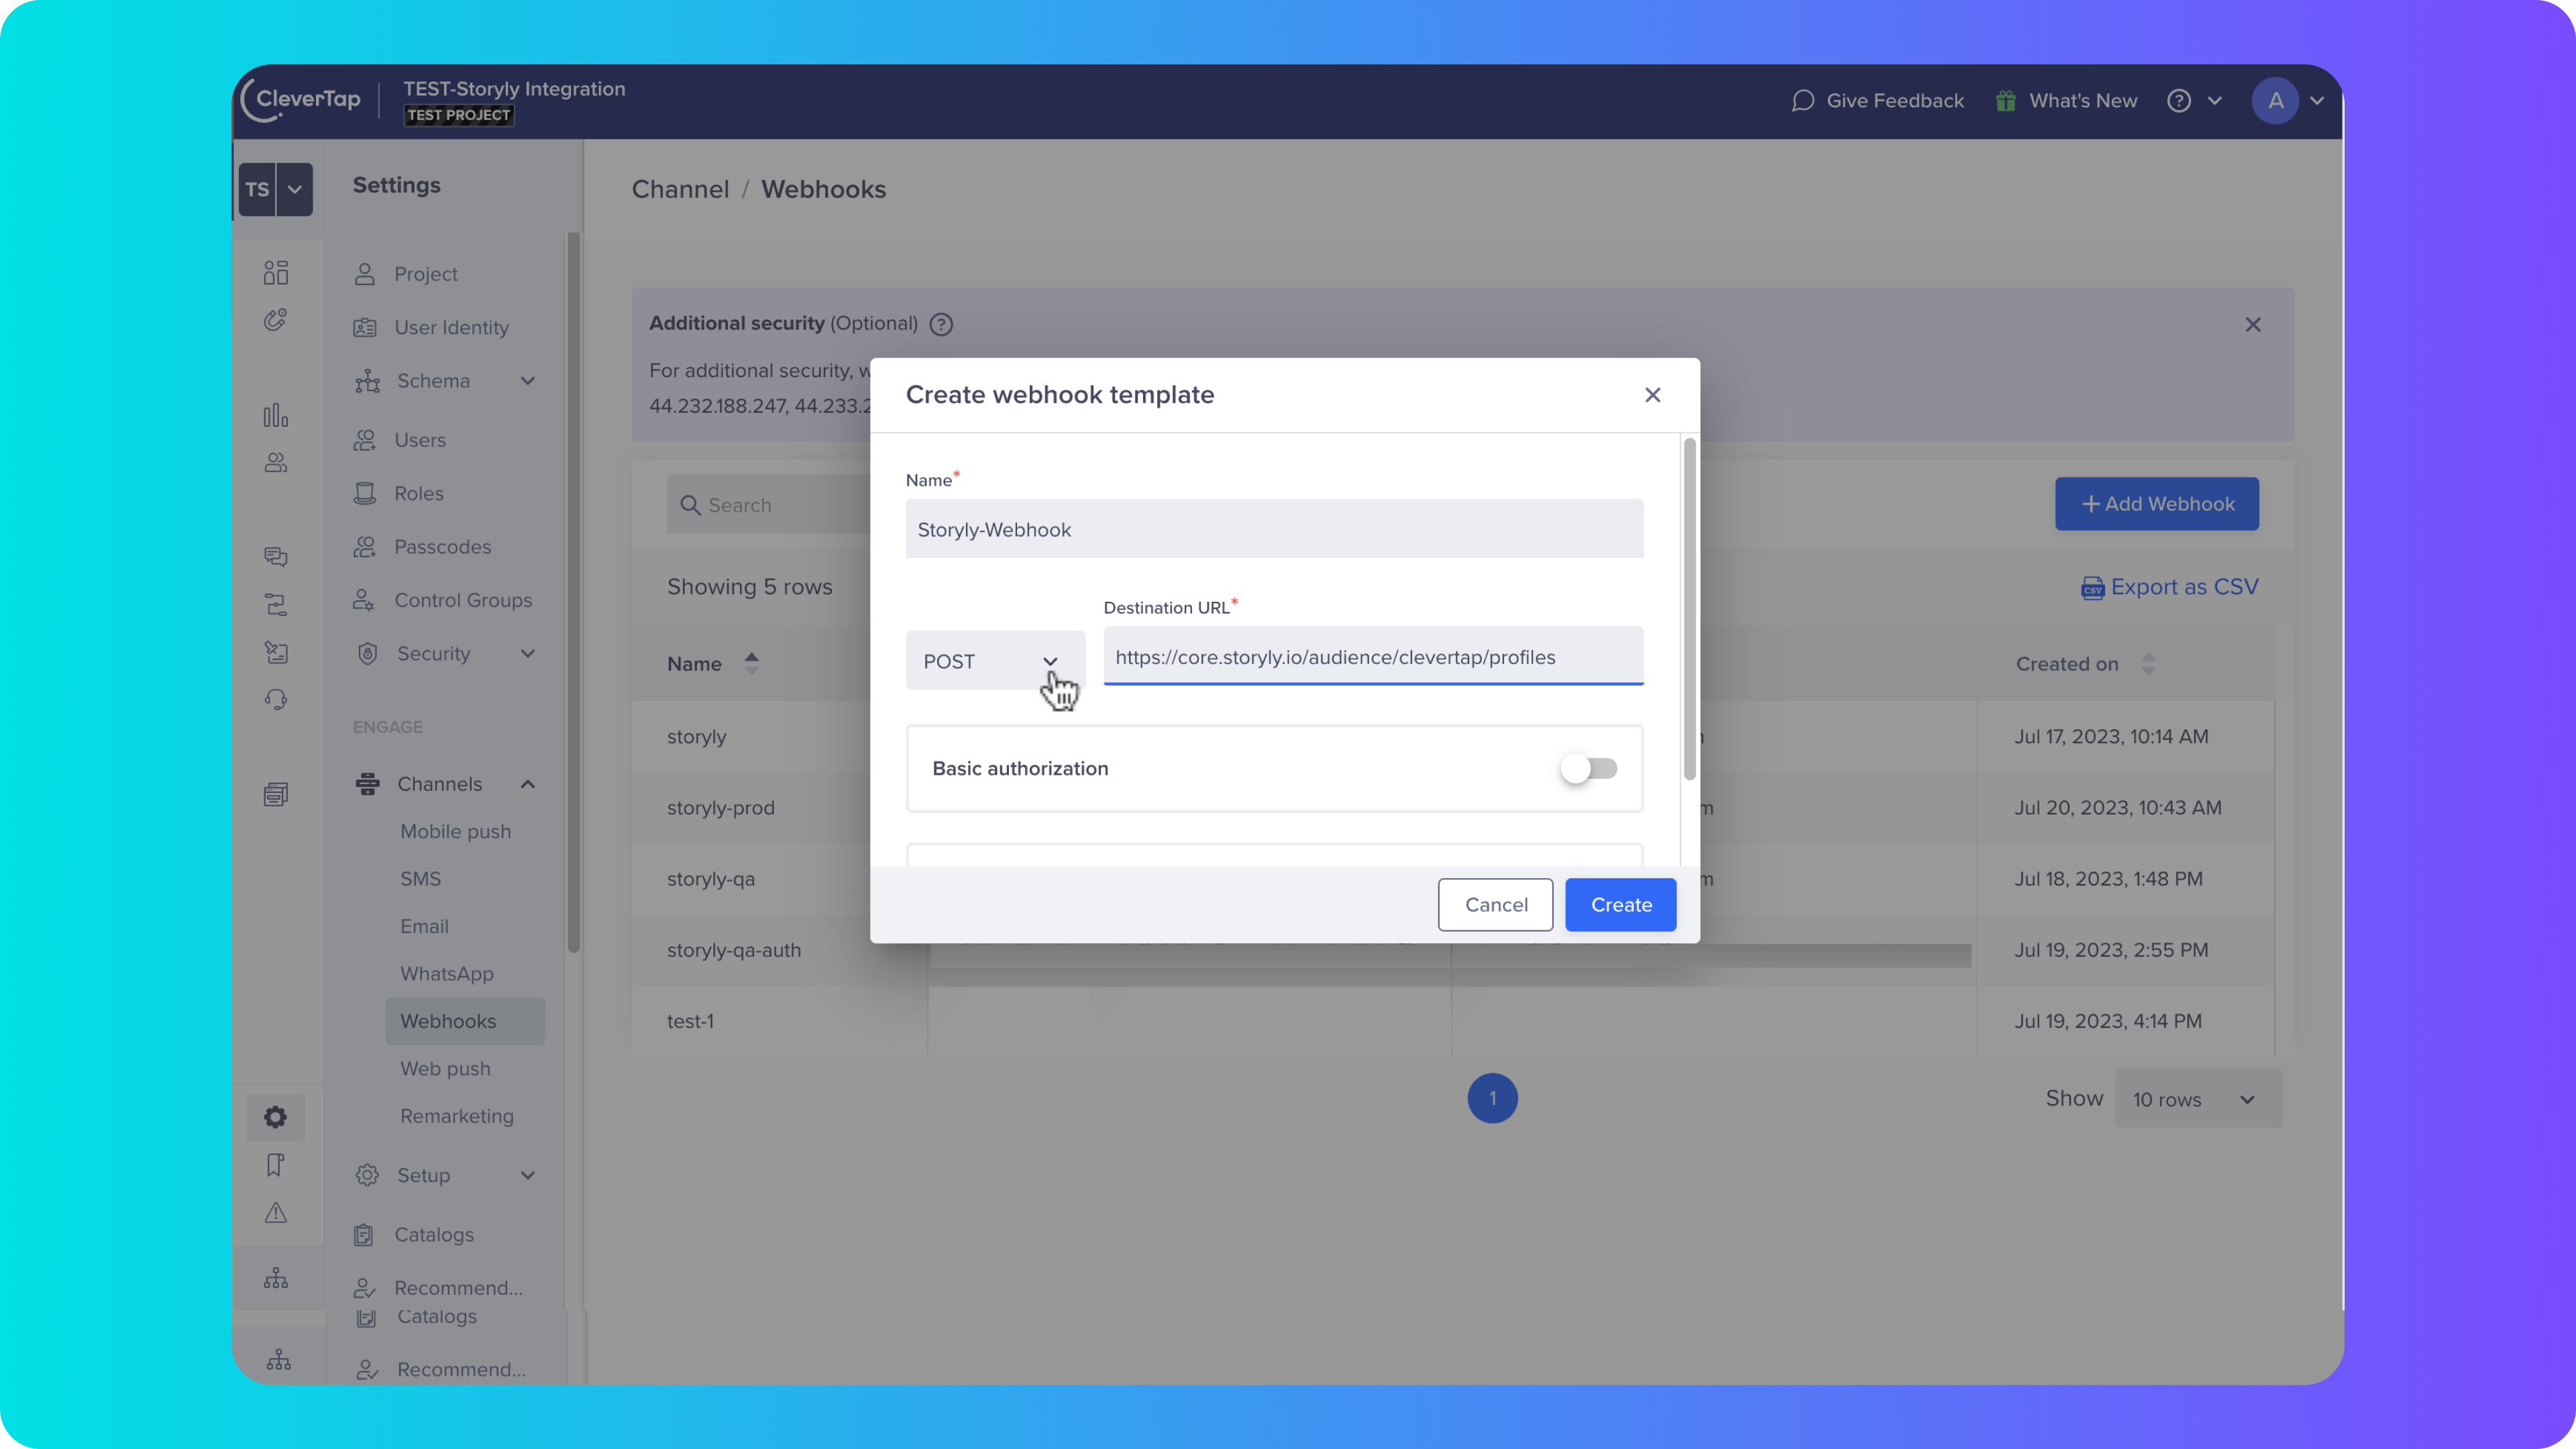
2. Then give a name to the Webhook, select POST option from the dropdown and copy & paste the Destination URL given below.
Webhook details
Method: POST
Destination URL: https://core.storyly.io/audiences/webhook/clevertap
Header parameters
Key: Authorization
Value: The Token generated for CleverTap Webhook Setup on Storyly Dashboard
3. After pasting the URL, please scroll down and turn on the Header parameters toggle. In this section, please enter the Key as Authorization and get the Value from Storyly Dashboard under Settings > Account Management.
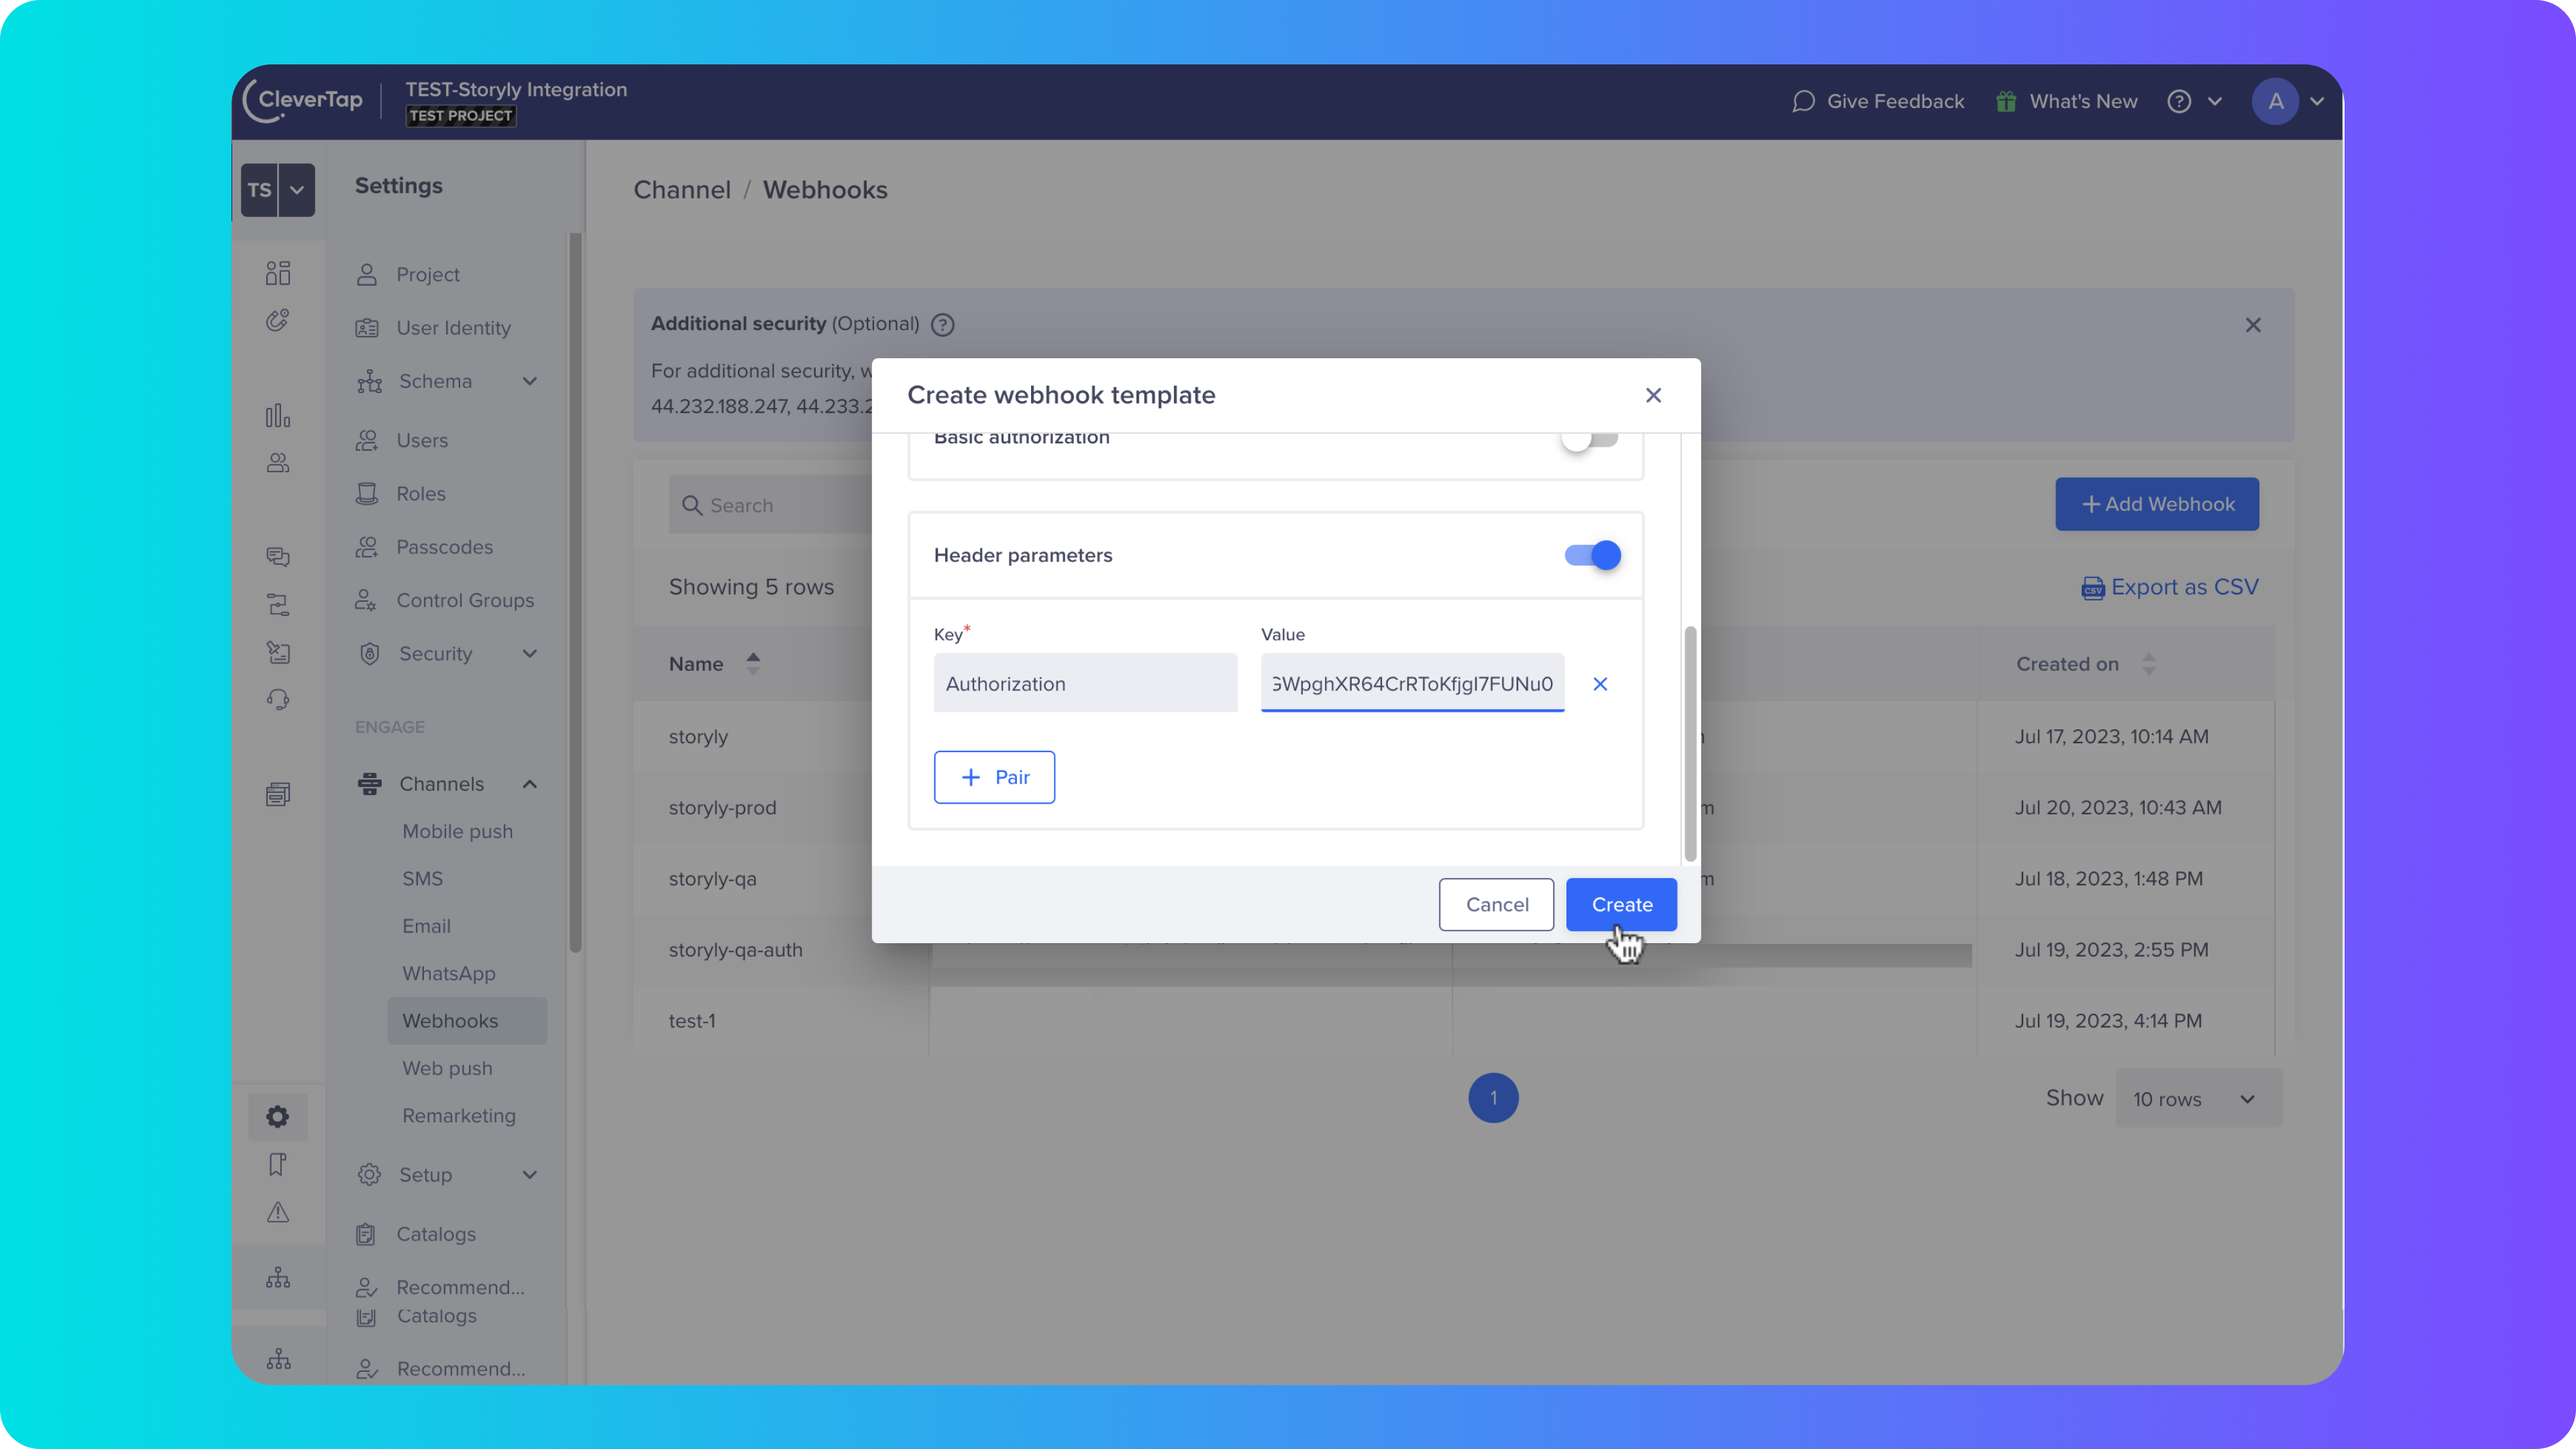
4. Once you click on Create, you can start creating Campaigns & Journeys with Webhook on CleverTap.
Creating an Audience for CleverTap on Storyly Dashboard
After setting up the Webhook on CleverTap, we need to create a unique token on the Storyly Dashboard to complete the connection.
5. Please go to Audiences section.
6. On the Audiences page, please click on + New Audience at the top right and select Create Audience for CleverTap option.

7. Give a name to your Audience and click on Continue.
8. At this step, Storyly will generate a Key and unique Token for your Audience. Please copy these values and we'll use these while creating Campaigns & Journeys on the CleverTap Dashboard.
Campaign & Journey Creation via Webhook
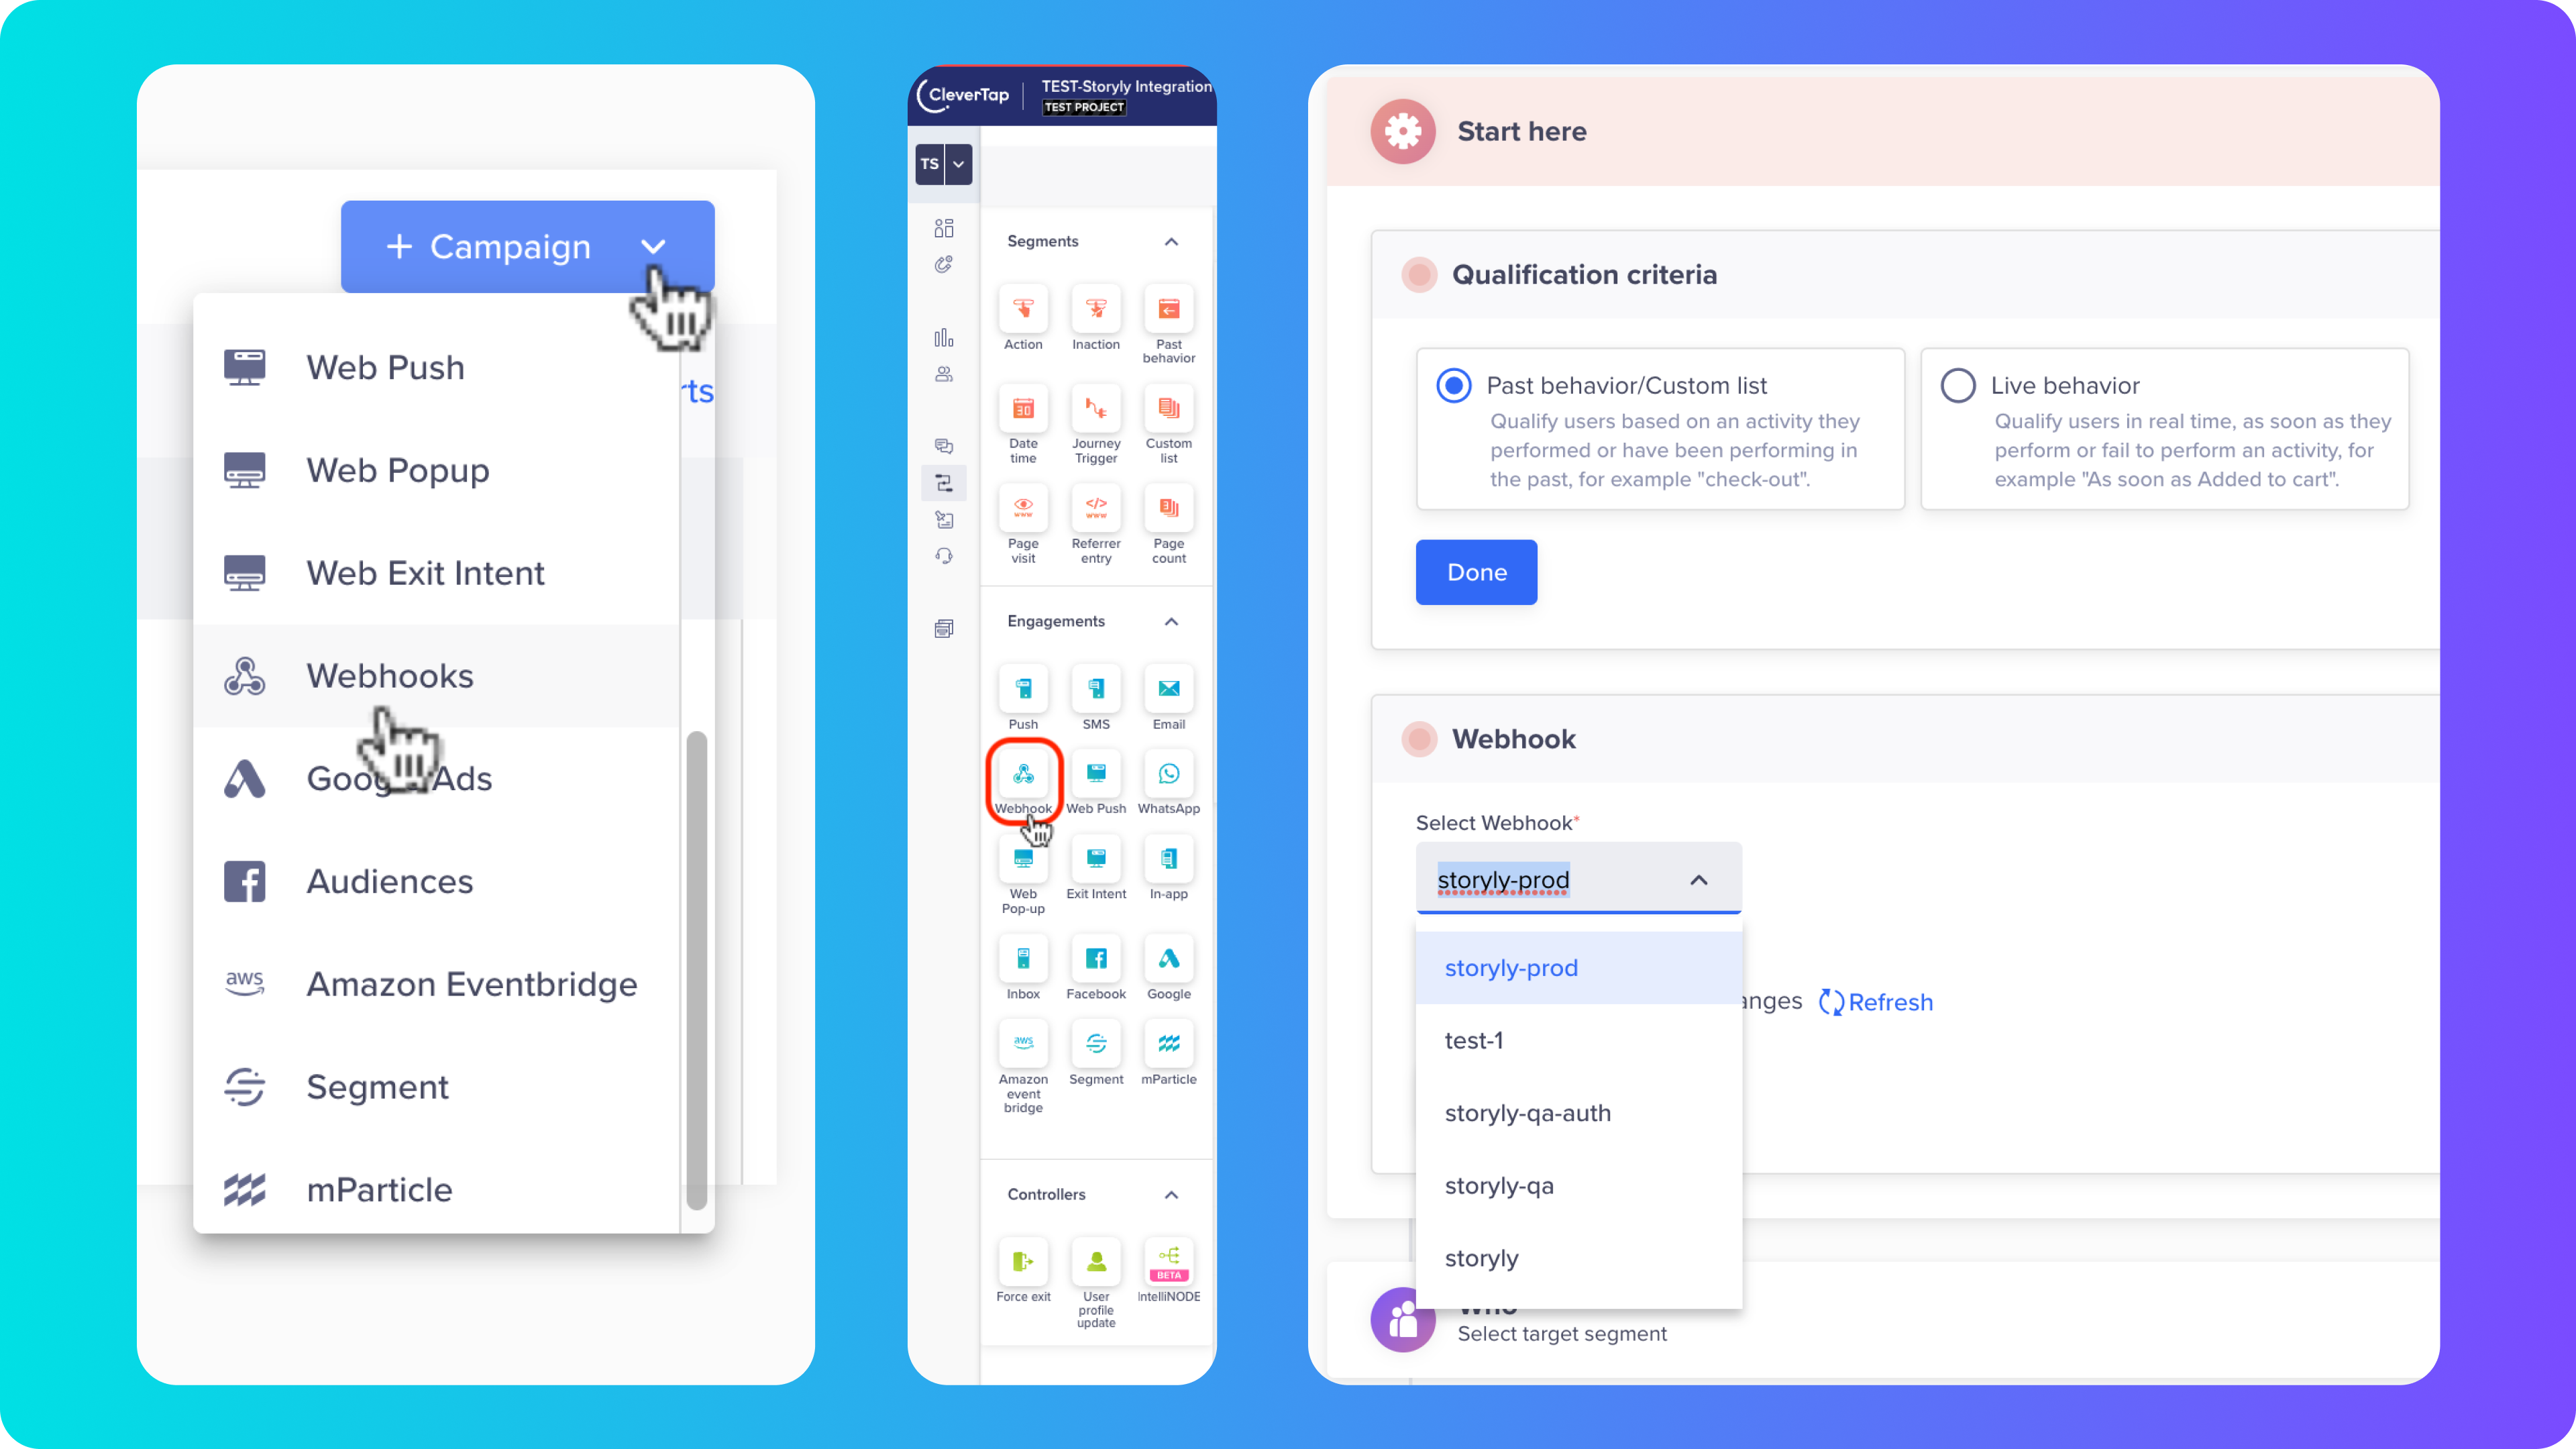
Since the Webhook setup is completed, and we've generated a unique Token on Storyly, it's time to create Campaigns & Journeys on the CleverTap Dashboard.
For each option, you'll see Webhook during creation.
Warning
After selecting Webhook option, please make sure that you've selected the Webhook that you've created for Storyly Integration.
9. While creating a Campaign or a Journey, at What step of each method there is an option to Edit the Message. Please go ahead and proceed with Edit the Message.

Campaign

Journey
10. Here, we need to select Custom Profile Attributes and add mandatory Key-Value Pairs given below.
Mandatory Key-Value Pairs
storyly_token
- Please paste the Token that we've created on the Storyly Dashboard at 8th step
operation
- For insert & update operations: upsert
- To delete user from the Audience: delete

11. Optionally, if you'd like to personalize content, at this step you can add user properties in the payload by adding new key-value pairs.
12. Last, you can click on Done button and Save&Close the Webhook Content drawer.
Updated over 2 years ago