Targeting: User Segments
Storyly offers two different structures to target specific segments with different content. Two main functionalities are:
- Labels: Labels can be considered as tags/segments assigned to specific content. There is no contextual limitation with labels. They help you to filter content and only show the relevant ones to the end user. Dashboard users can define and assign any set of Labels to content. If the end user's labels match them, they see the content otherwise, they don't.
- Audiences: Audiences can be considered as a list of users. This list of users can be uploaded manually as a CSV or can be imported via third-party integrations. (Braze, CleverTap, MoEngage, Iterable) This list includes unique identifiers for users. Dashboard users can assign any Audience to content. If the end user's identifier is included within the audience, they see the content otherwise, they don't.
Labels
This guide shows how to use Labels to target your user segments.
Before you begin
You need to have the working Storyly setup as described in Initial SDK Setup
Set Your Labels in the Storyly Dashboard
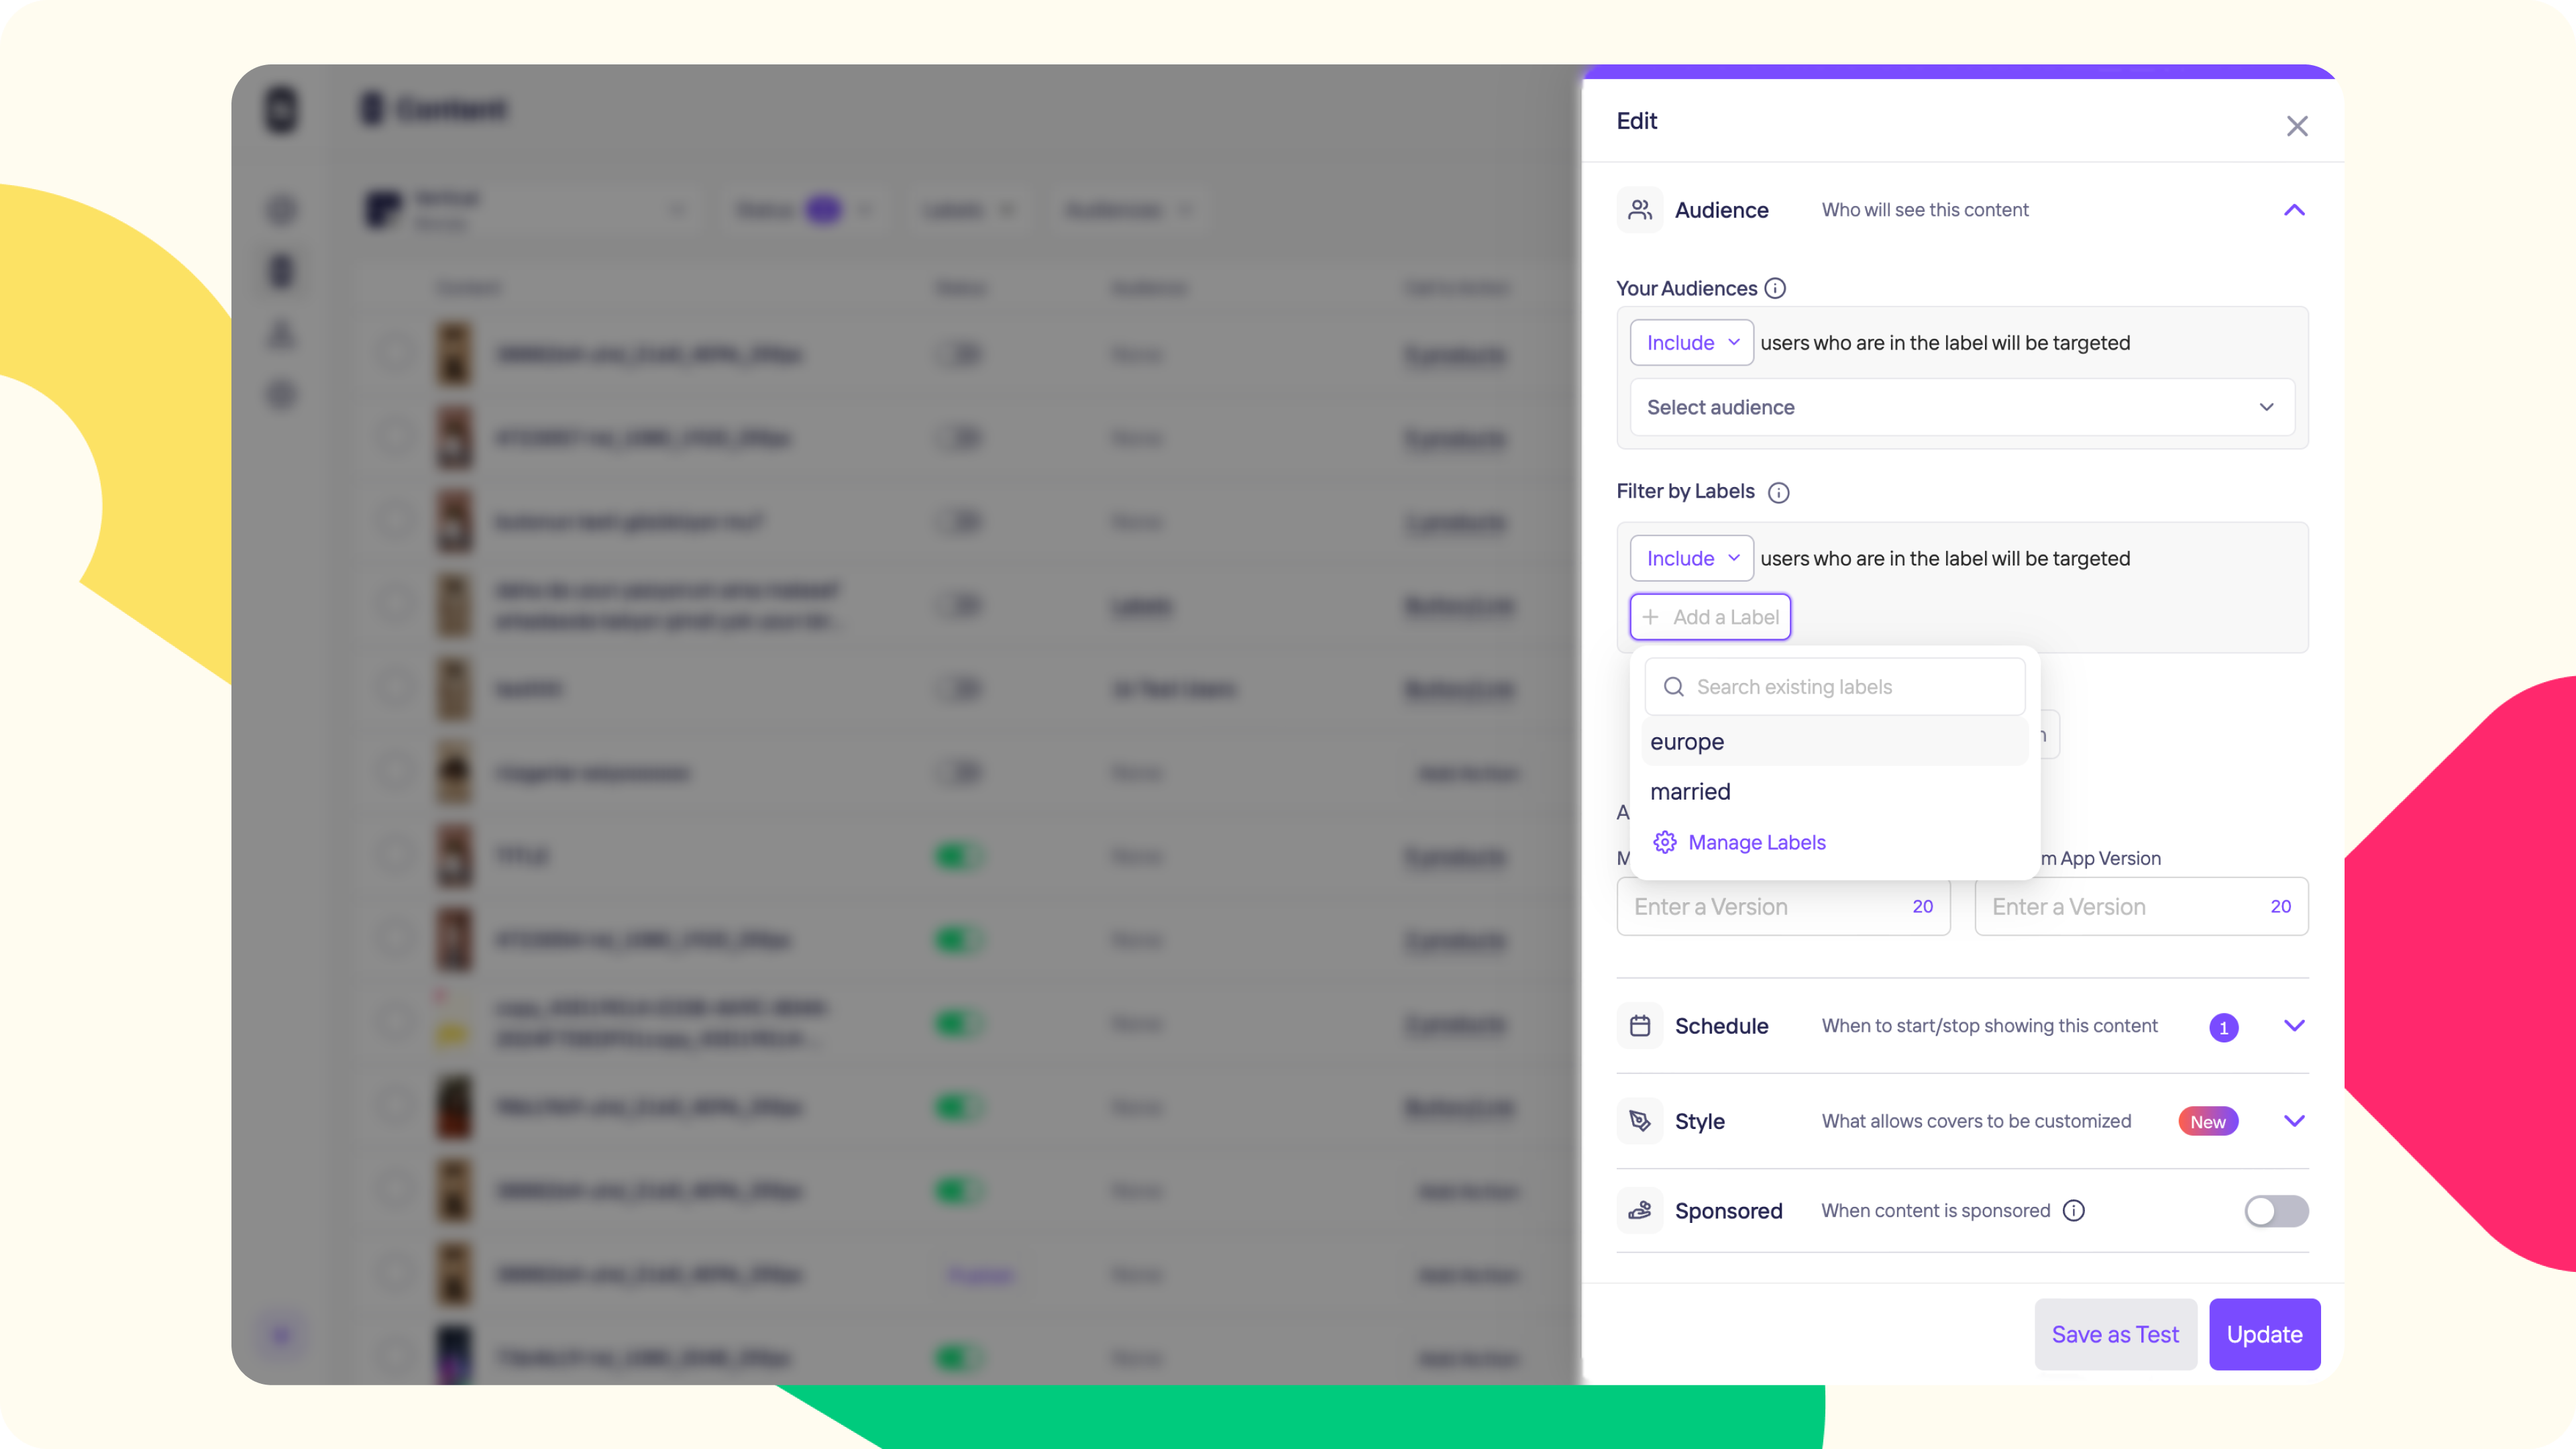
In the Storyly Dashboard, while creating content, you will see a dropdown menu called Audience under Edit.
Under Audience, there is an option to Filter by Labels. With this functionality, you can assign labels to the corresponding content.
You may use Include, Exclude, AND , OR options according to your targeting conditions.

Passing Segments to Storyly SDK
In Storyly SDK, labels are called labels, and the process is called setLabels. The application must set ["married", "Europe"] in labels parameters in StorylyVerticalFeedInit class while initializing the Storyly SDK.
self.StorylyVerticalFeedView.storylyVerticalFeedInit = StorylyVerticalFeedInit(
            storylyId: storylyToken,
            config: StorylyVerticalFeedConfig.Builder()
                .setLabels(labels: Set<String>?)
                .build()
        )
In setLabels class, the labels parameter takes an array of strings that will be used in the process of segmentation to show specific content to the users.
Example Usage
- If you do not give any parameters to
labels, Storyly SDK will show all active content with/withoutlabels. This is the default behavior. - If you use
ANDcondition for ["married", "europe"] labels inAudience, Storyly SDK will show the content if you give ["married"] and ["europe"] parameters tolabels. In this case, Storyly SDK will also show the content without labels. - If you use
ORcondition for ["married", "europe"] labels, Storyly SDK will show the content if you give ["married", "europe"], ["married"] and ["europe"] parameters tolabels. In this case, Storyly SDK will also show the content without labels. - If you set an empty value to the
labels, only the content without labels will be shown.
Audiences
This guide shows how to use Audiences to target your users.
Before you begin
You need to have the working Storyly setup as described in Initial SDK Setup
Set Your Audiences in the Storyly Dashboard
Audiences enable you to target specific users by matching the user identifier. The audience file must include the unique identifiers that your app passes to Storyly SDK.
You can navigate to the Audiences section on the Dashboard and upload your audience there first. You can also use any audience imported via third-party integrations.
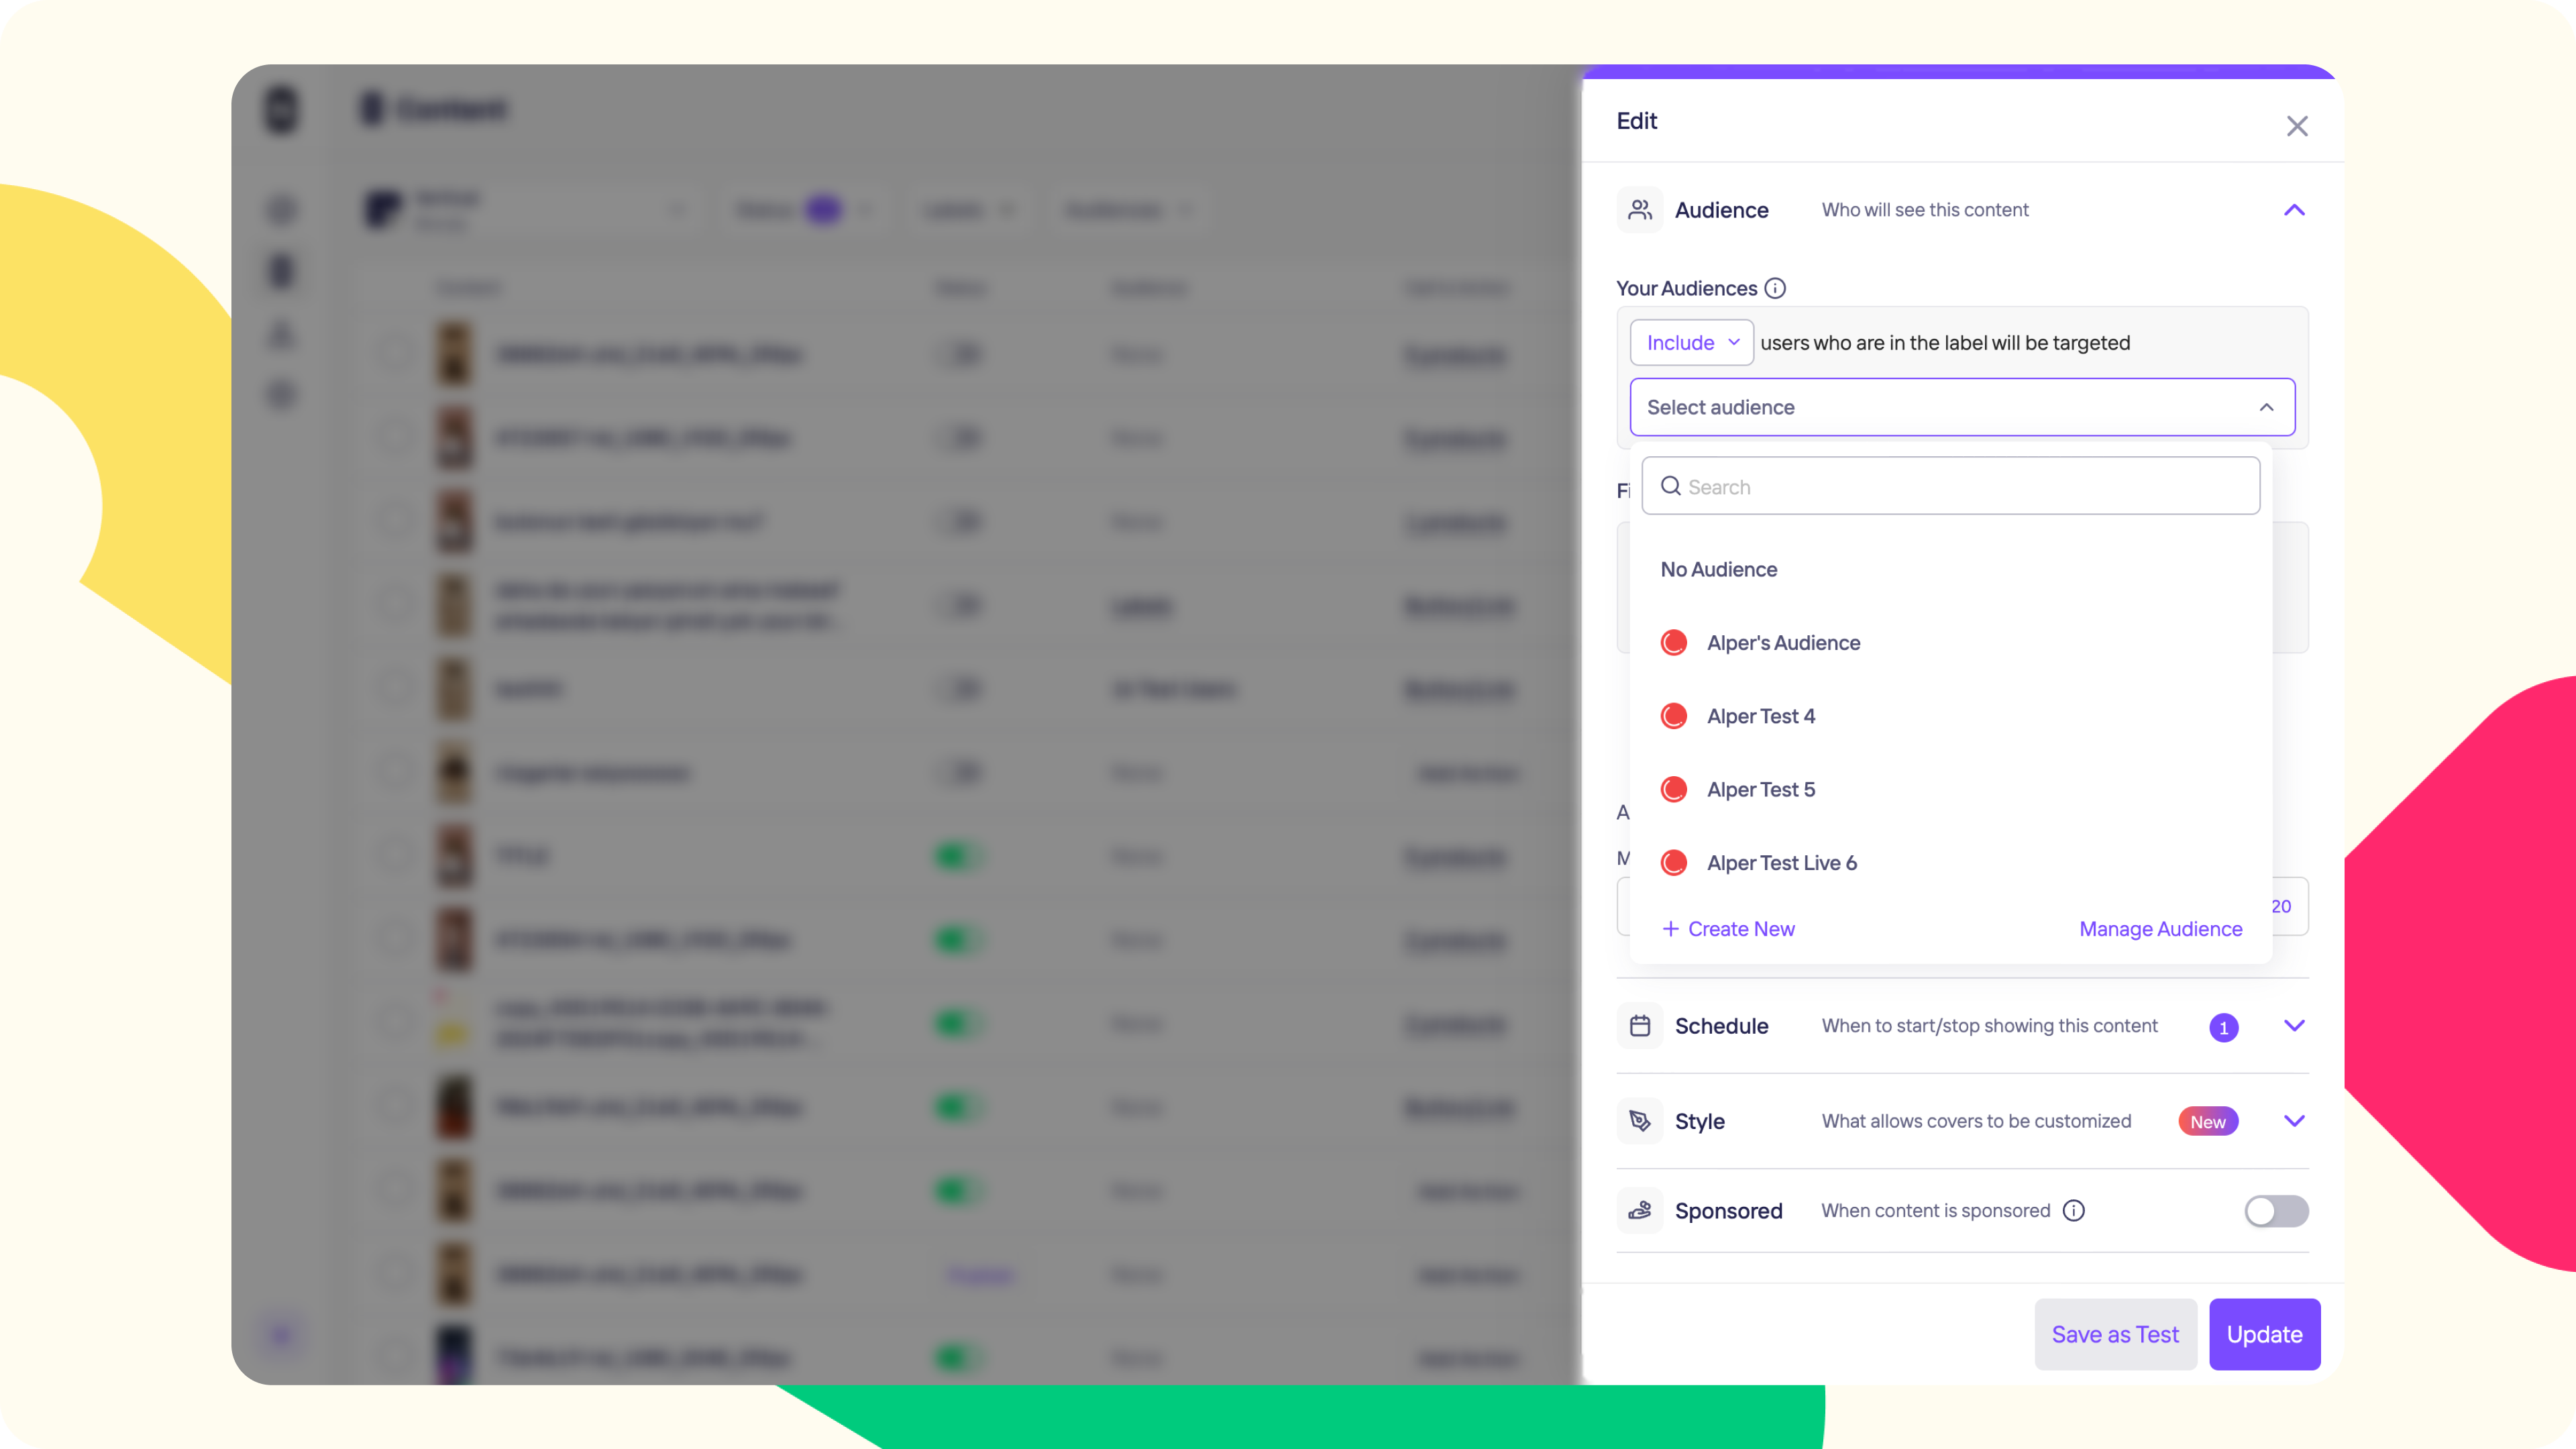
Then, in the Storyly Dashboard, while creating content, you will see a dropdown menu called Audience.
Under Audience, there is an option called Your Audiences. With this functionality, you can assign audiences to the corresponding content.

Passing Custom Parameter to Storyly SDK
This section shows you how to pass a unique identifier to Storyly SDK.
Storyly SDK allows you to send a string parameter in the initialization process. In StorylyVerticalFeedInit class, the setCustomParameter field is used for passing a unique identifier to Storyly SDK to match the user info included in the audience file.
self.StorylyVerticalFeedView.storylyVerticalFeedInit = StorylyVerticalFeedInit(
            storylyId: storylyToken,
            config: StorylyVerticalFeedConfig.Builder()
                .setCustomParameter(parameter: String?)
                .build()
        )
Warning
You are allowed to send a 200 characters string value with the
customParameterfield. If you exceed the size limit, your value will be set to null.
Attention
Custom Parameter's value will be kept on our database.
Updated over 1 year ago
