Personalization: Working with Users
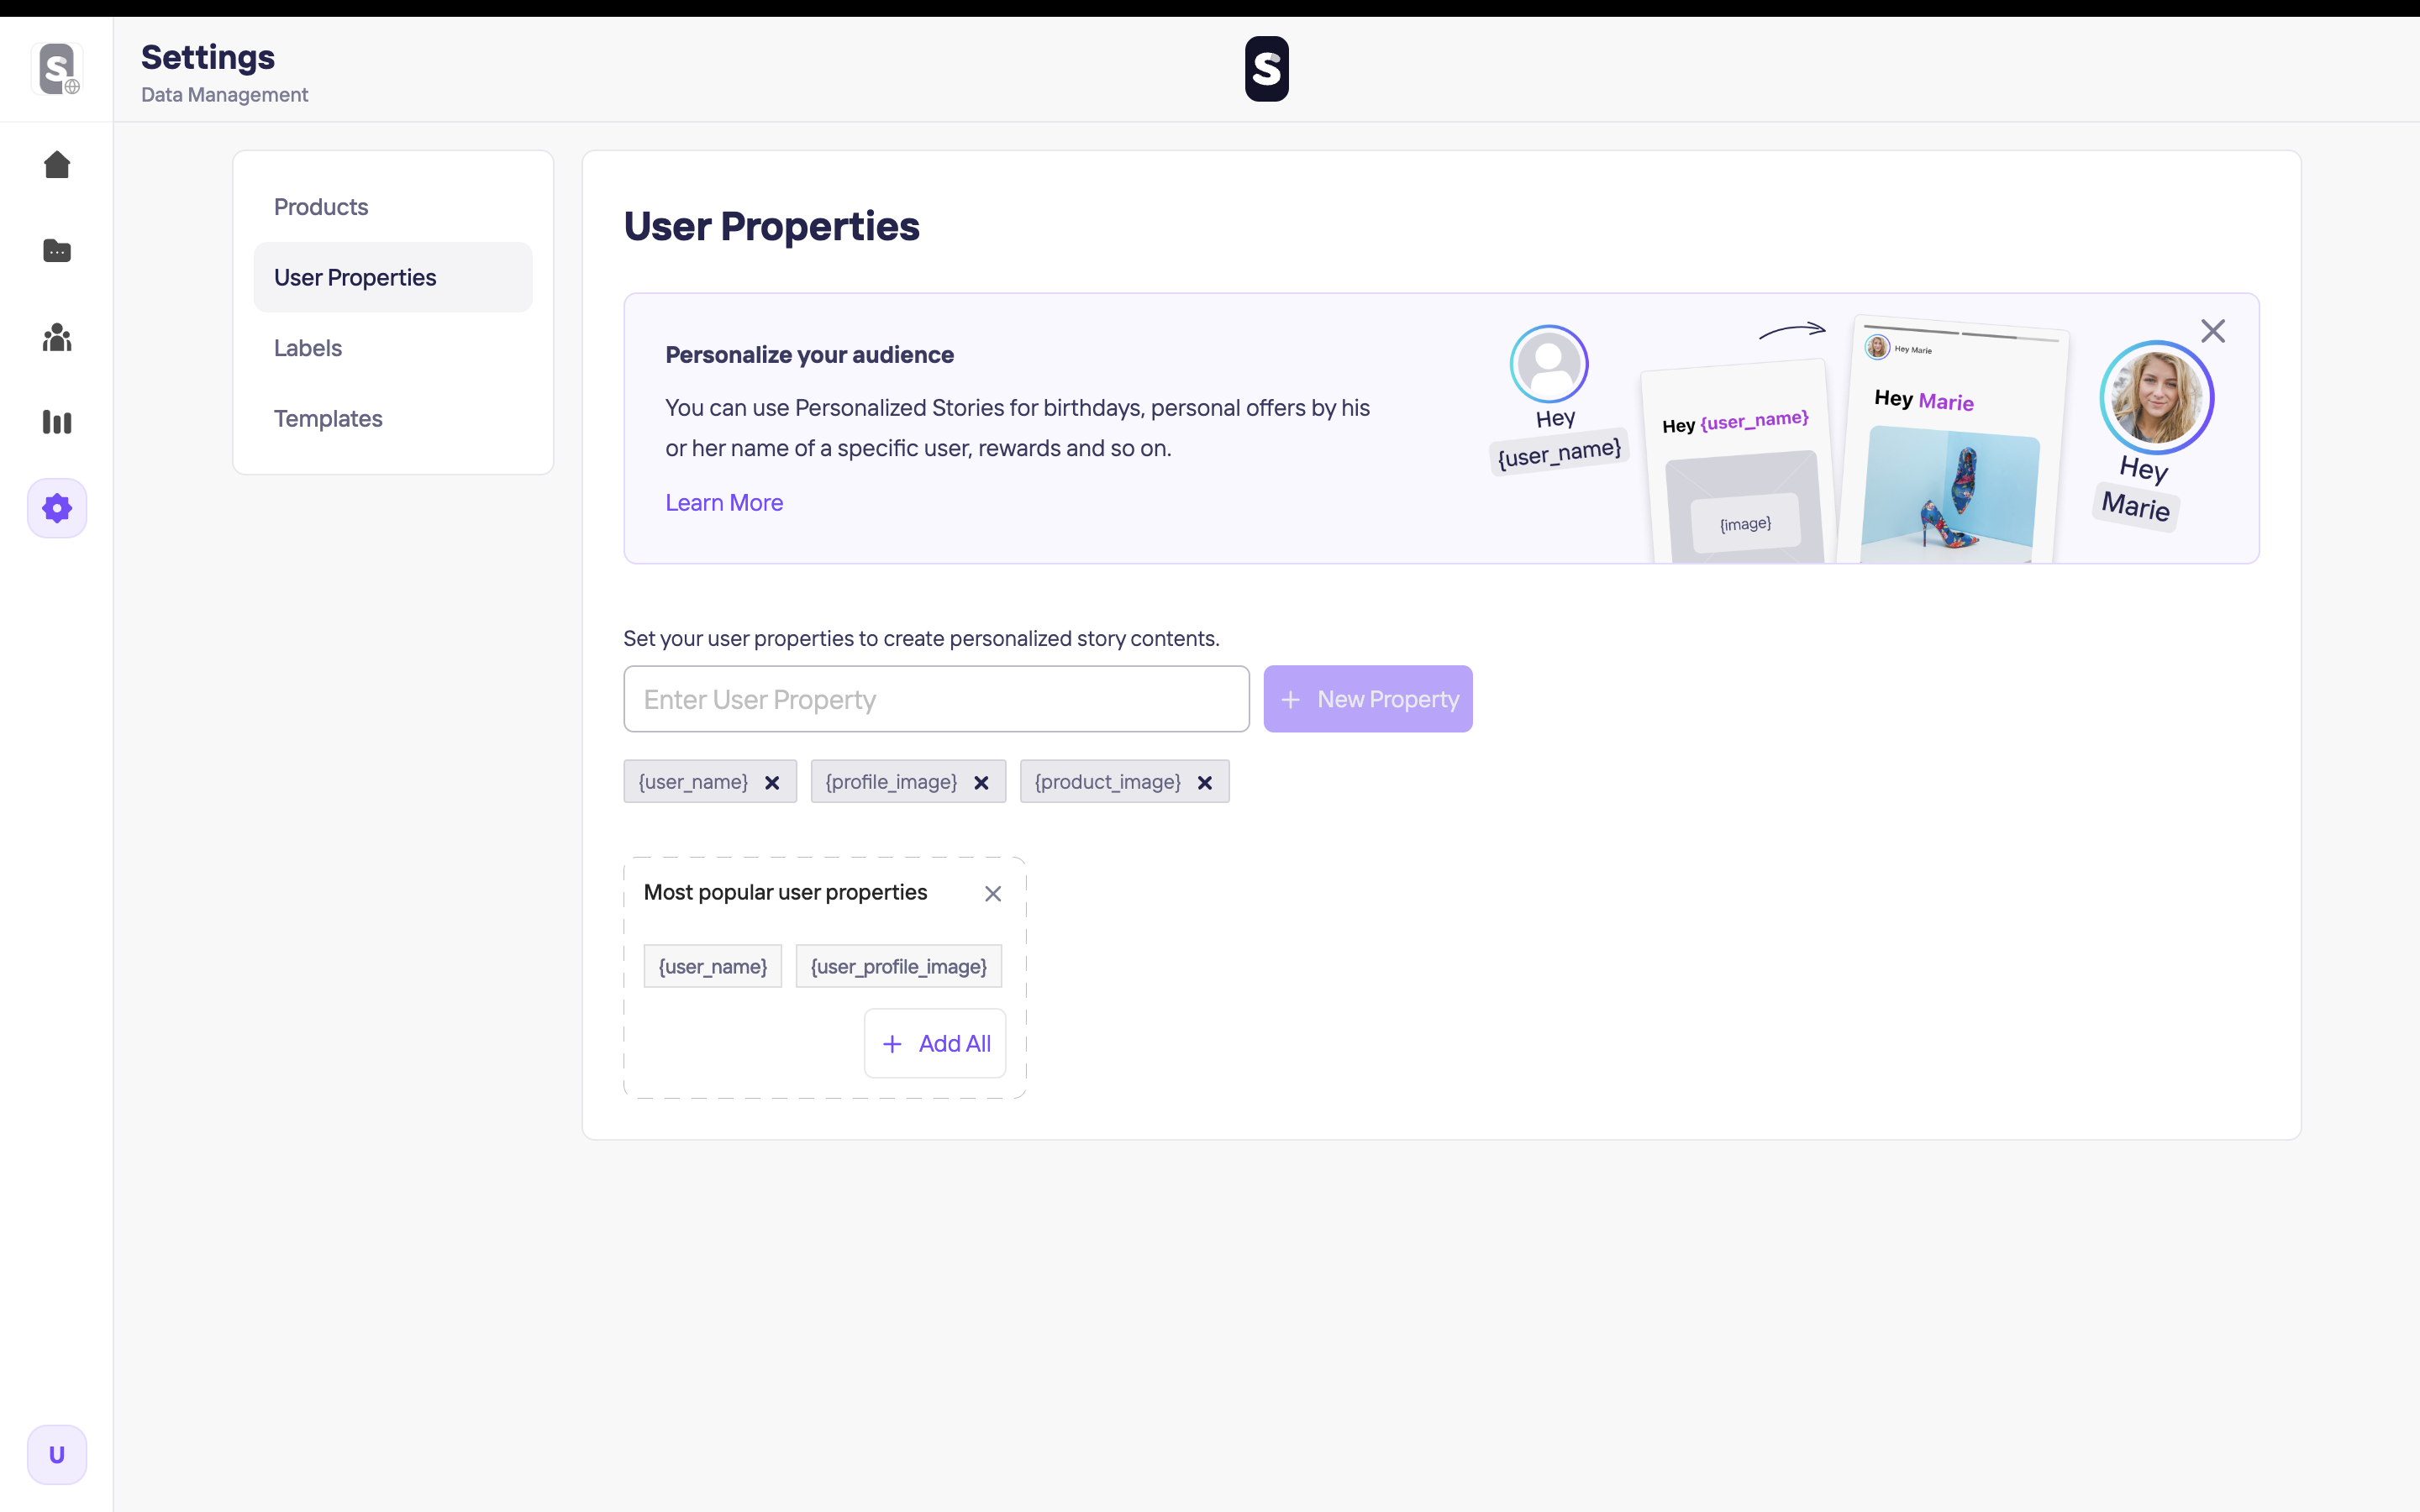
User Properties
You can use Personalized Stories for birthdays, personal offers by his or her name of a specific user, rewards, and so on.
You can create personalized Stories, a personalized Story Group cover image, or even a personalized title on your groups.
You can also check out the demo on GitHub
Before you begin
You need to have the working Storyly setup as described in Initial SDK Setup
Add User Properties
To be able to have user properties on your Story Groups or Stories, please go to Storyly Dashboard to add your properties.
Warning
Be sure to define unique property names in order to not to have problems while filling the user property fields in the application.
How to Use User Properties
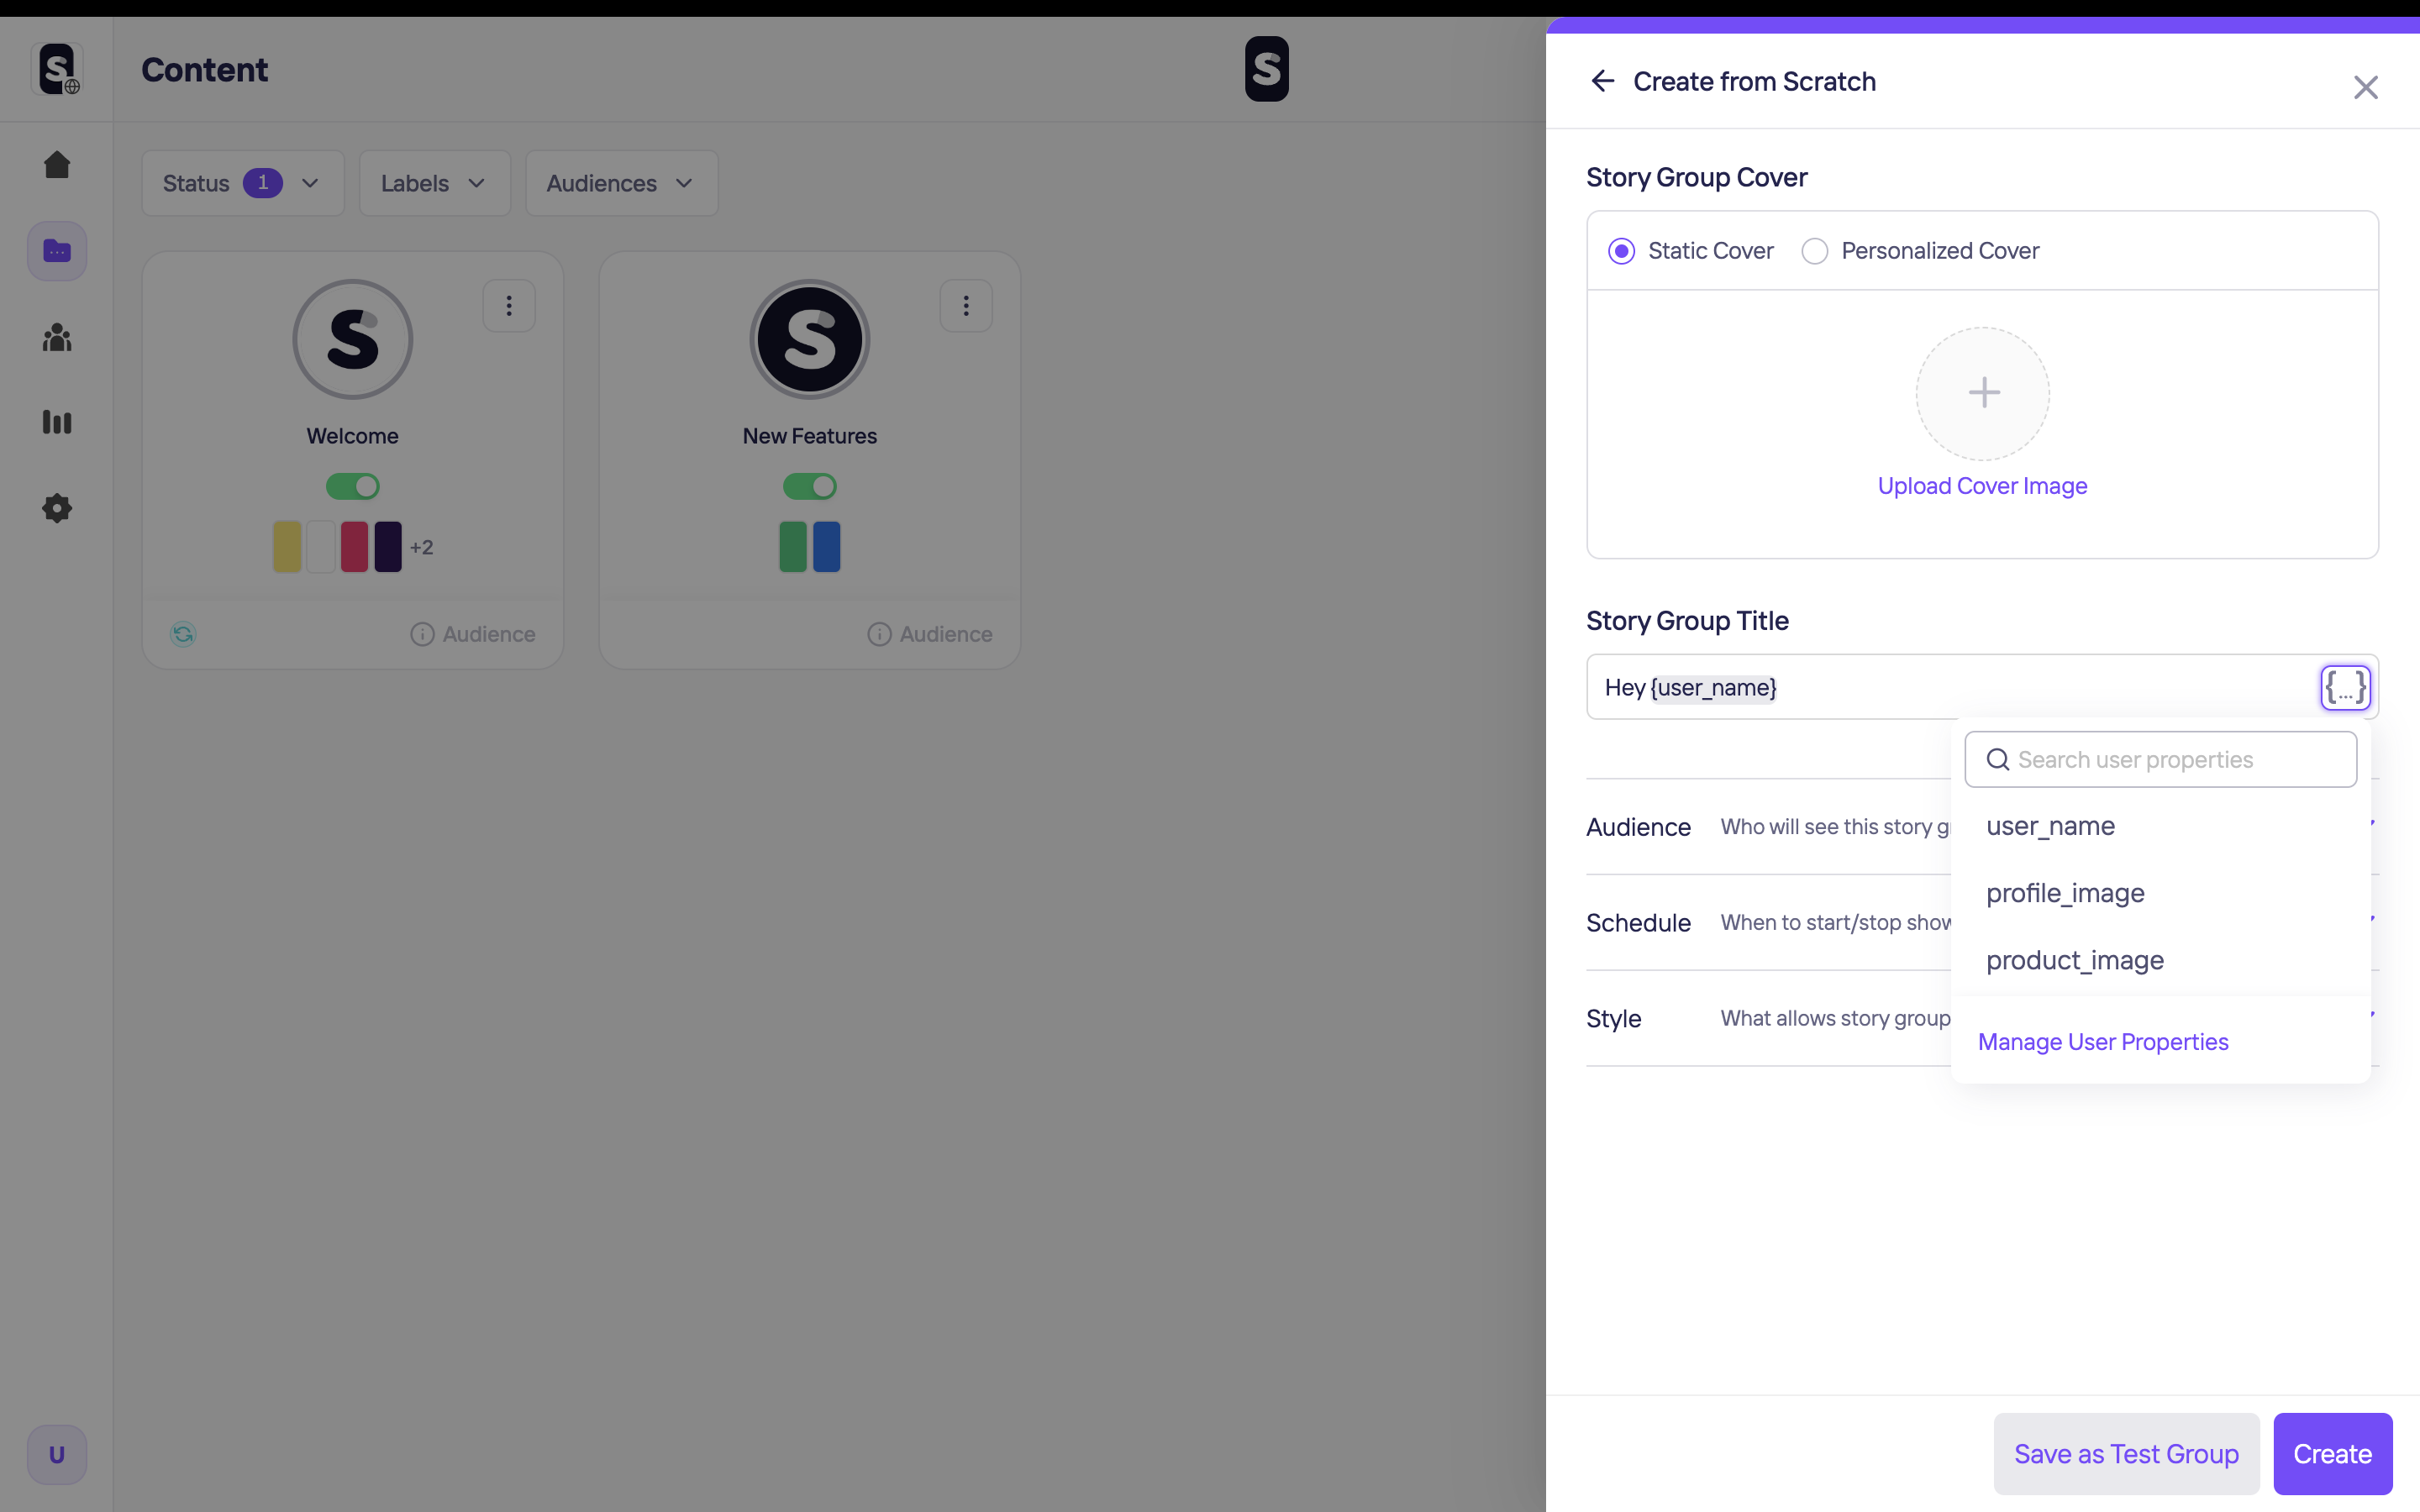
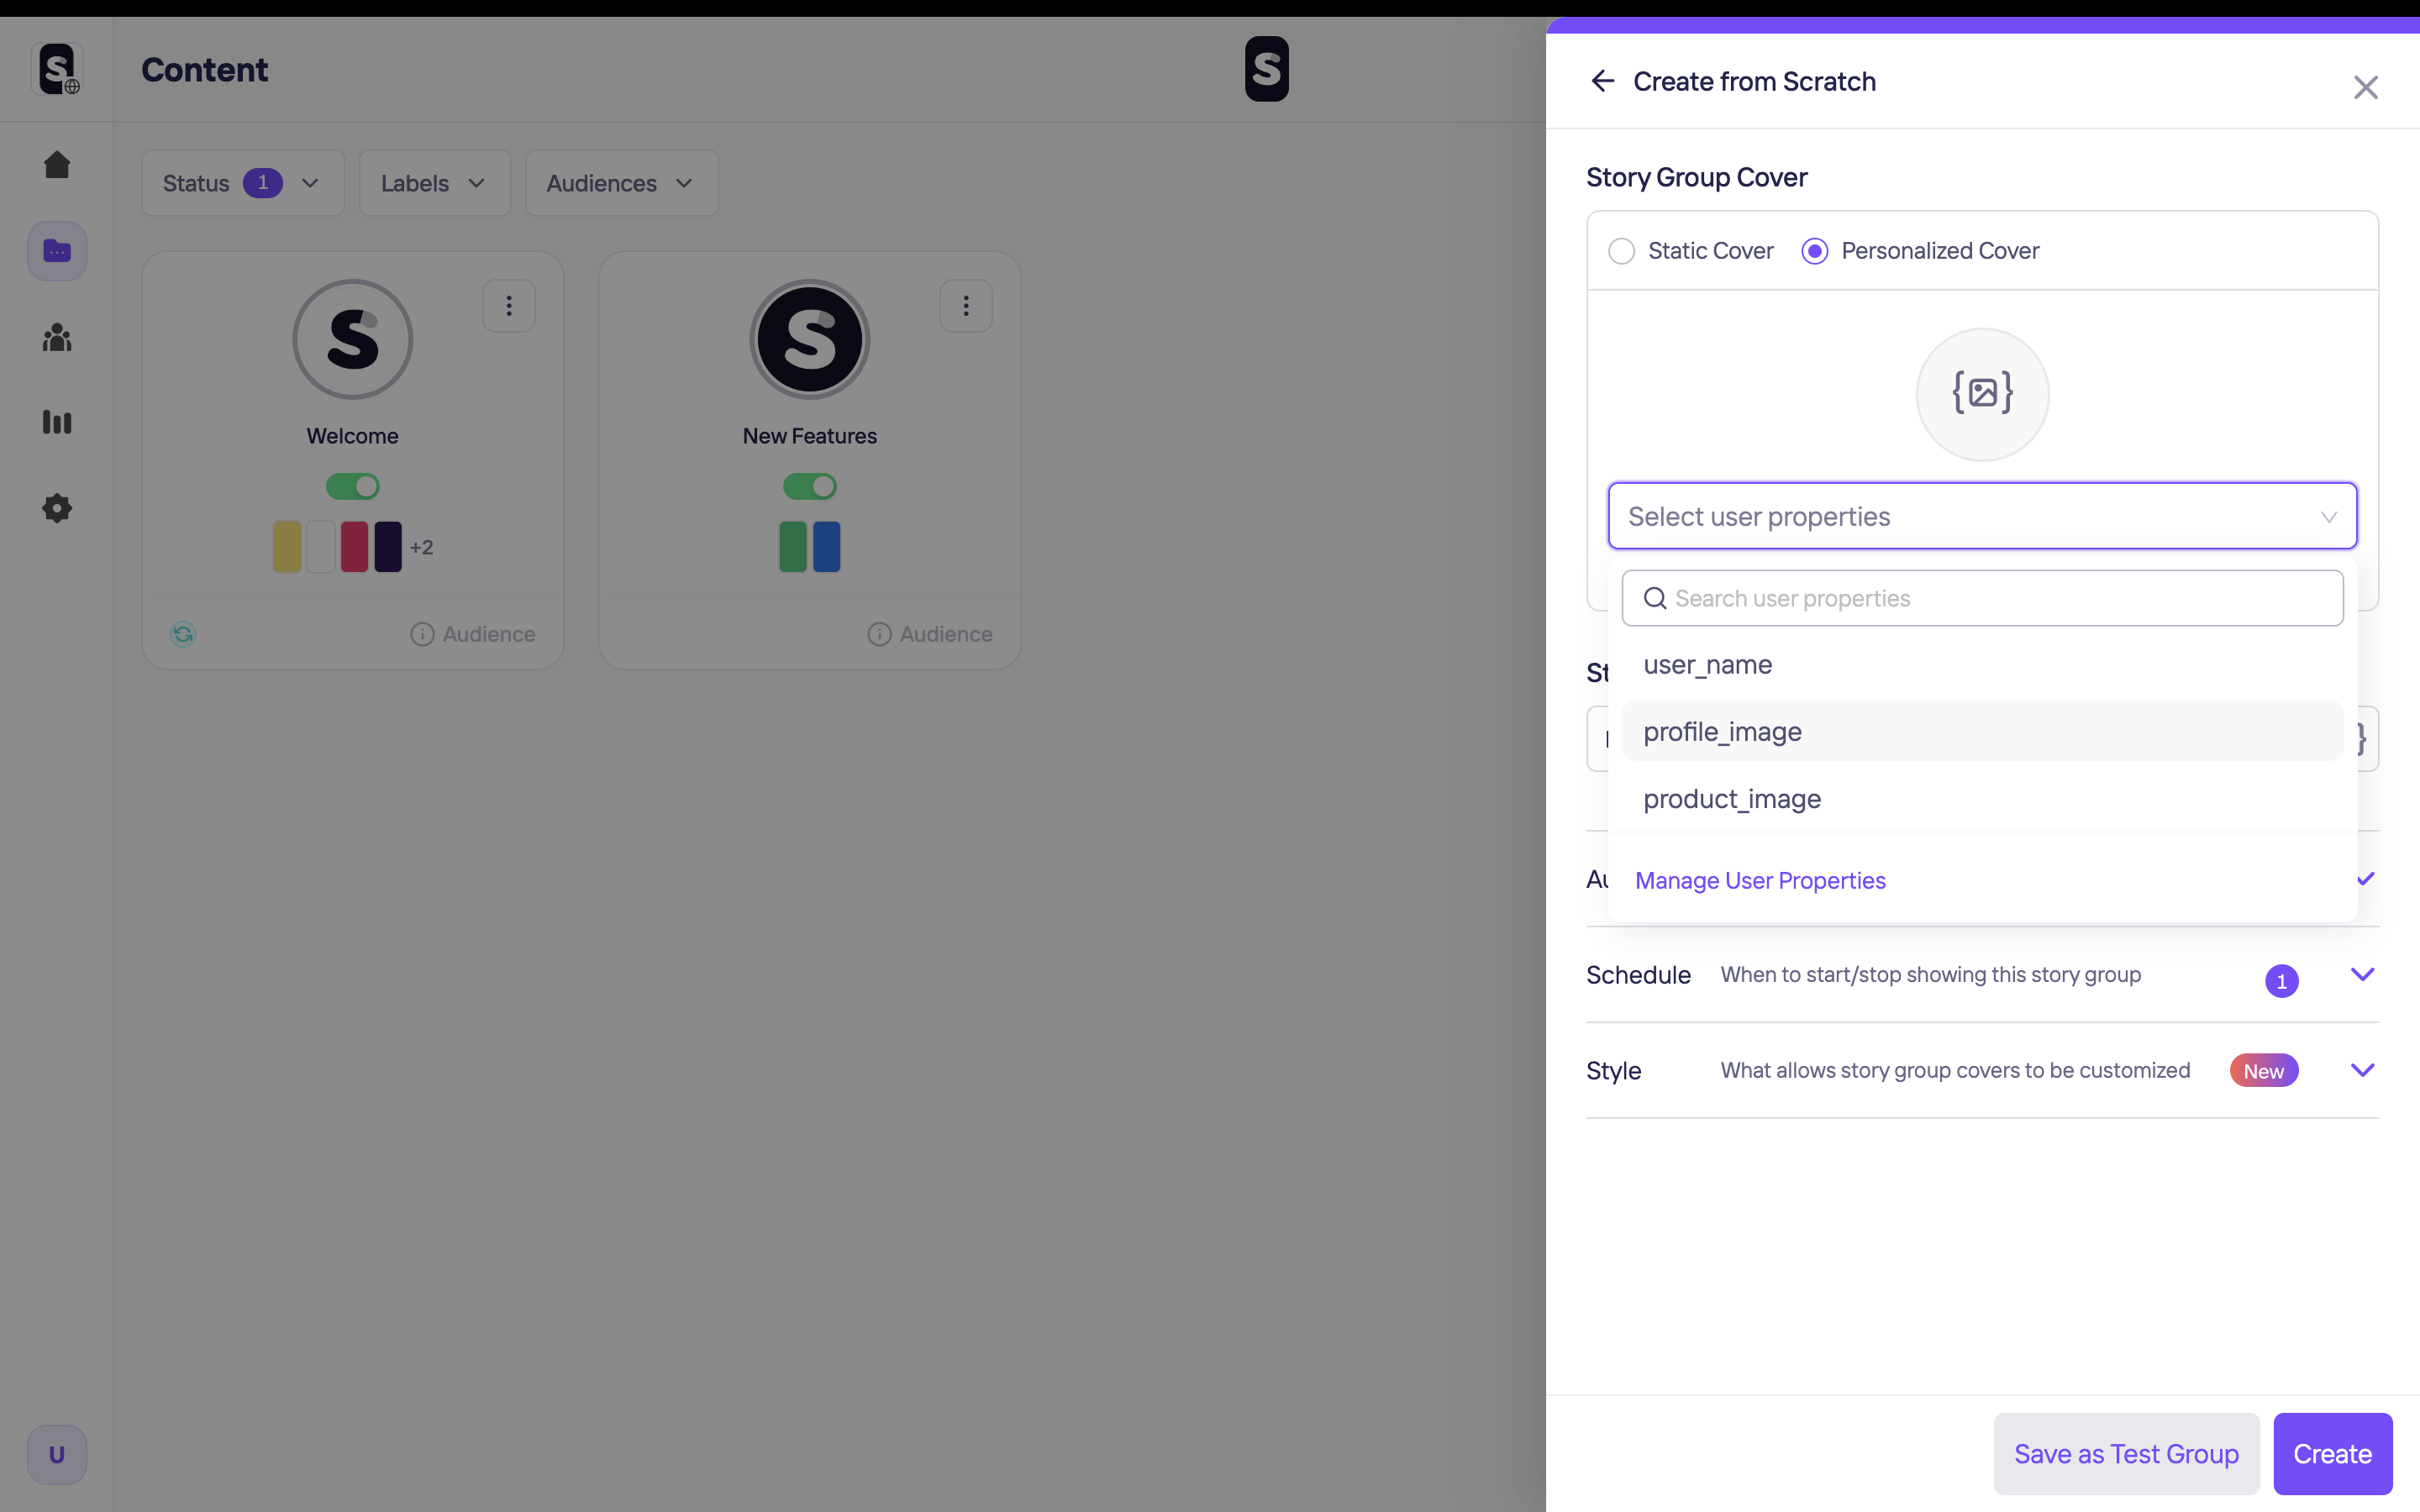
You can create a group from scratch once you've added your user properties in the previous section. It is so simple to have a personalized group cover image and title. Select Personalized Cover instead of Static and choose your related user property from the dropdown.
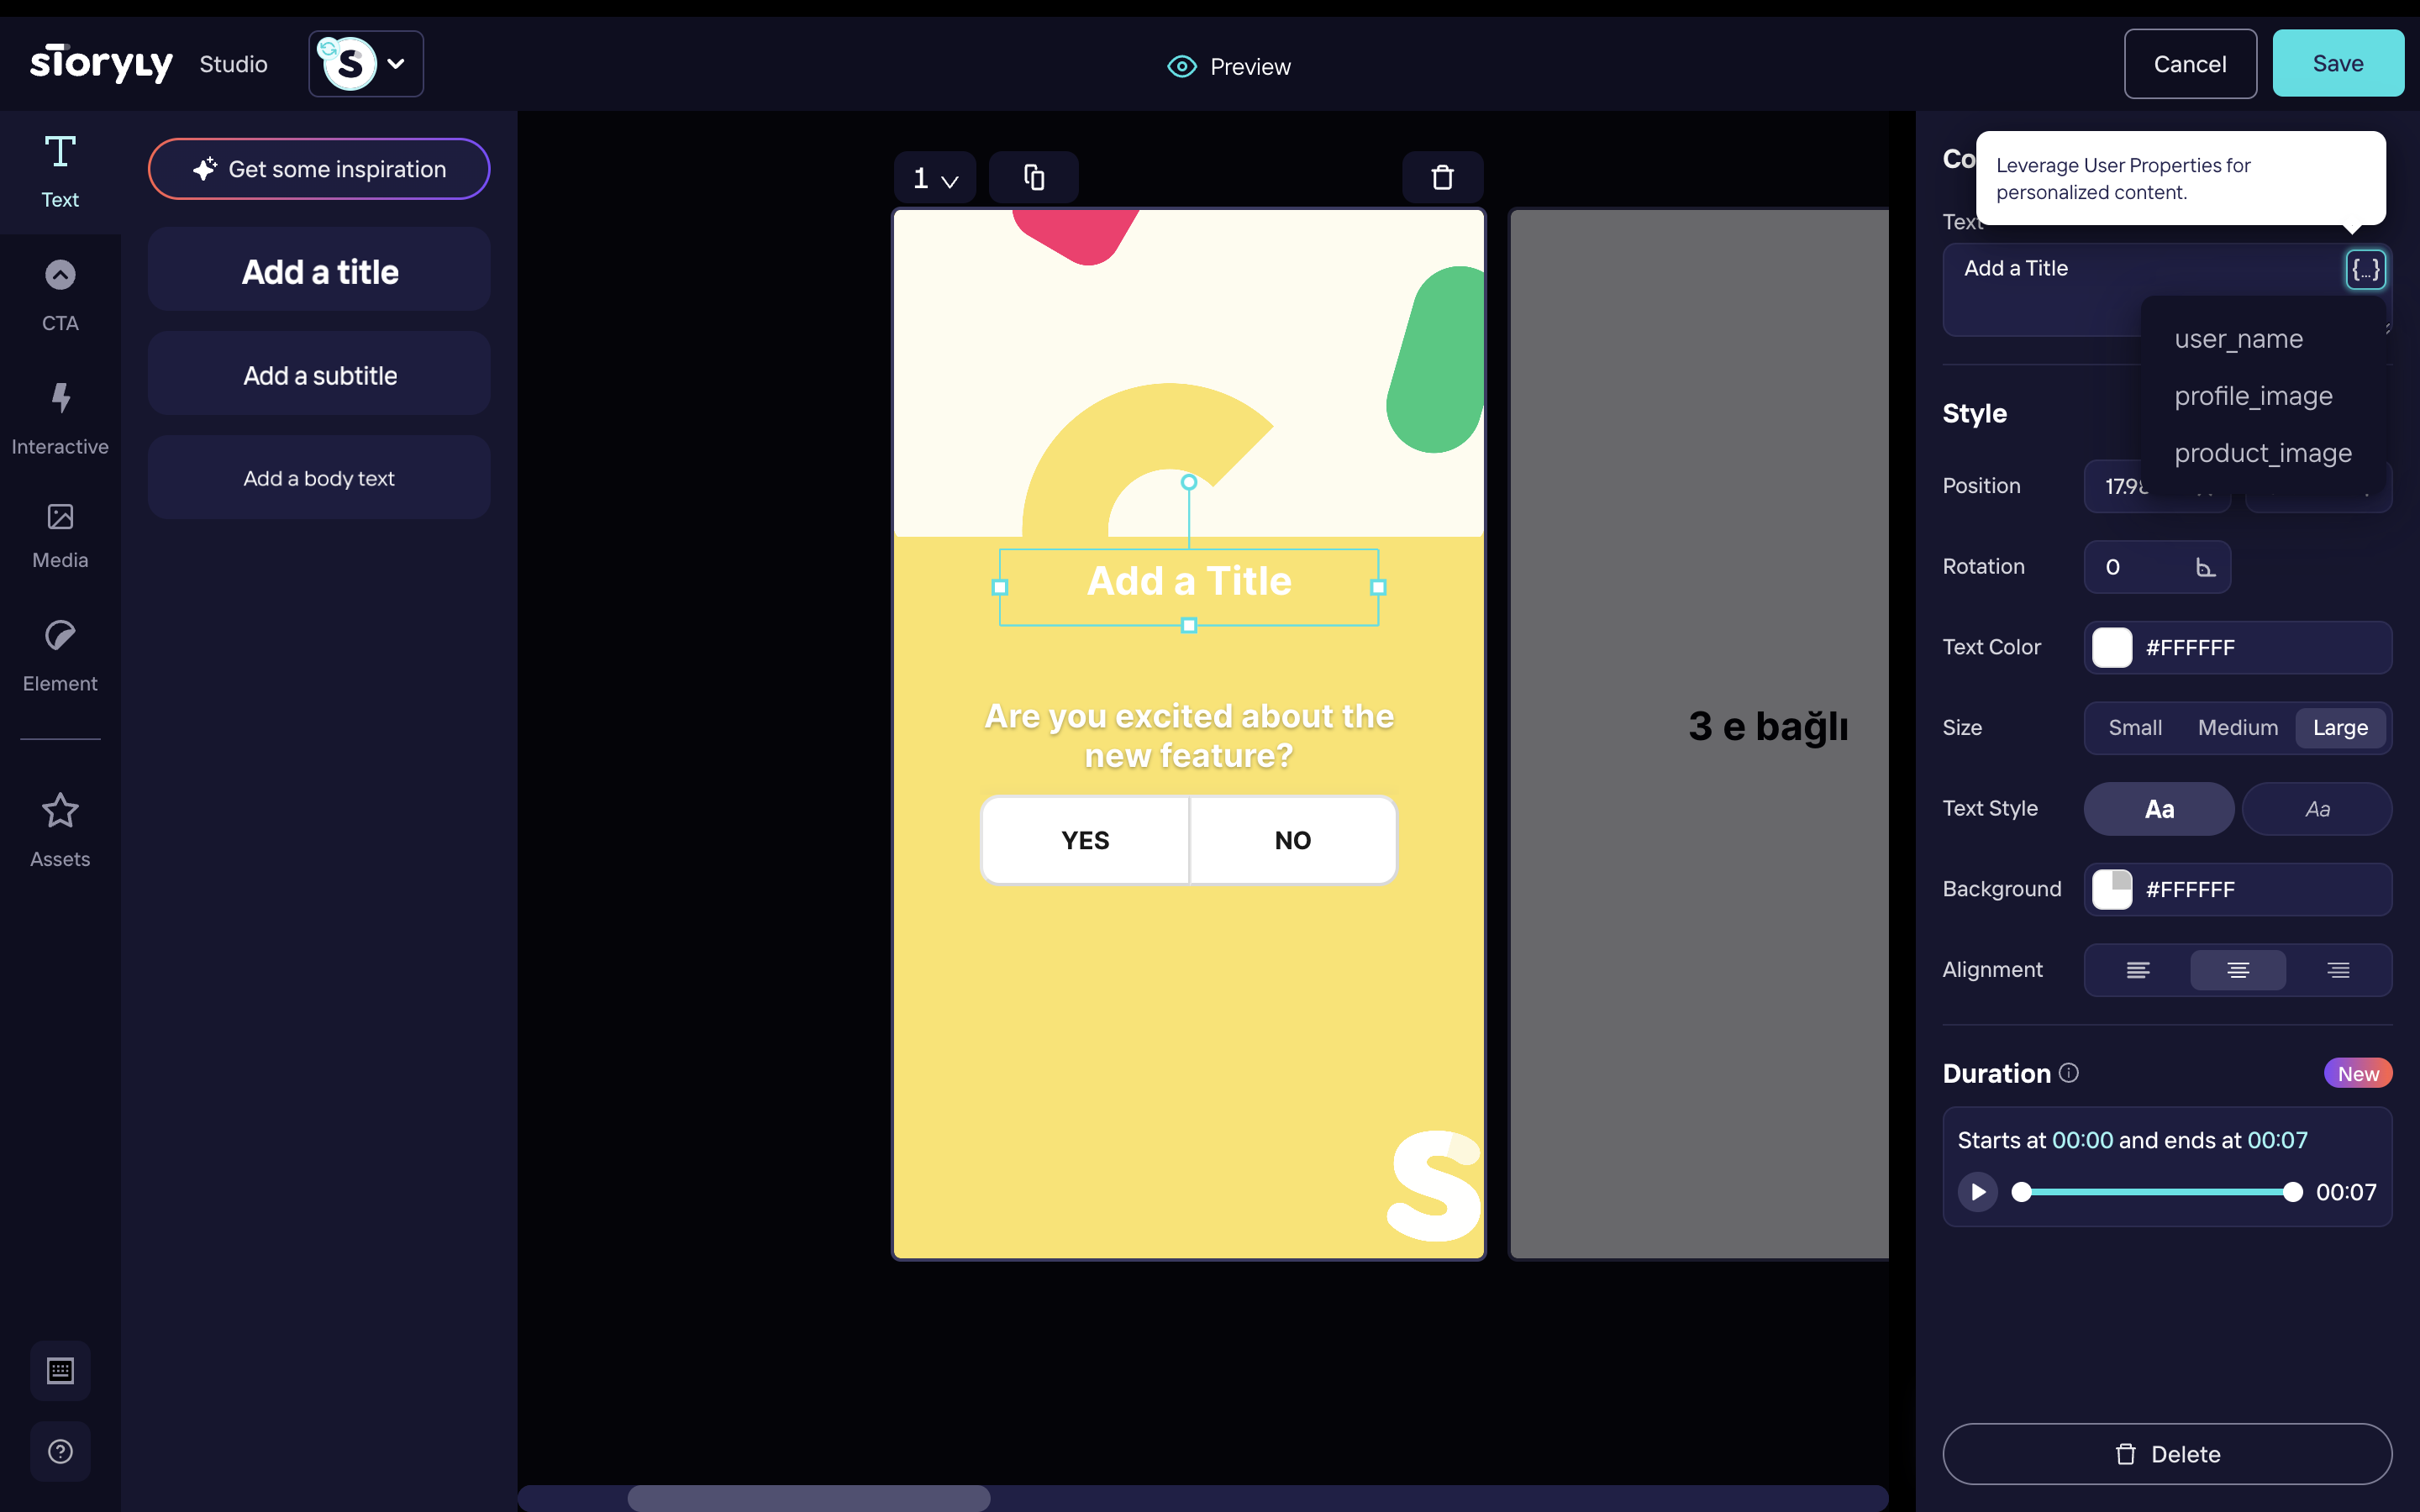
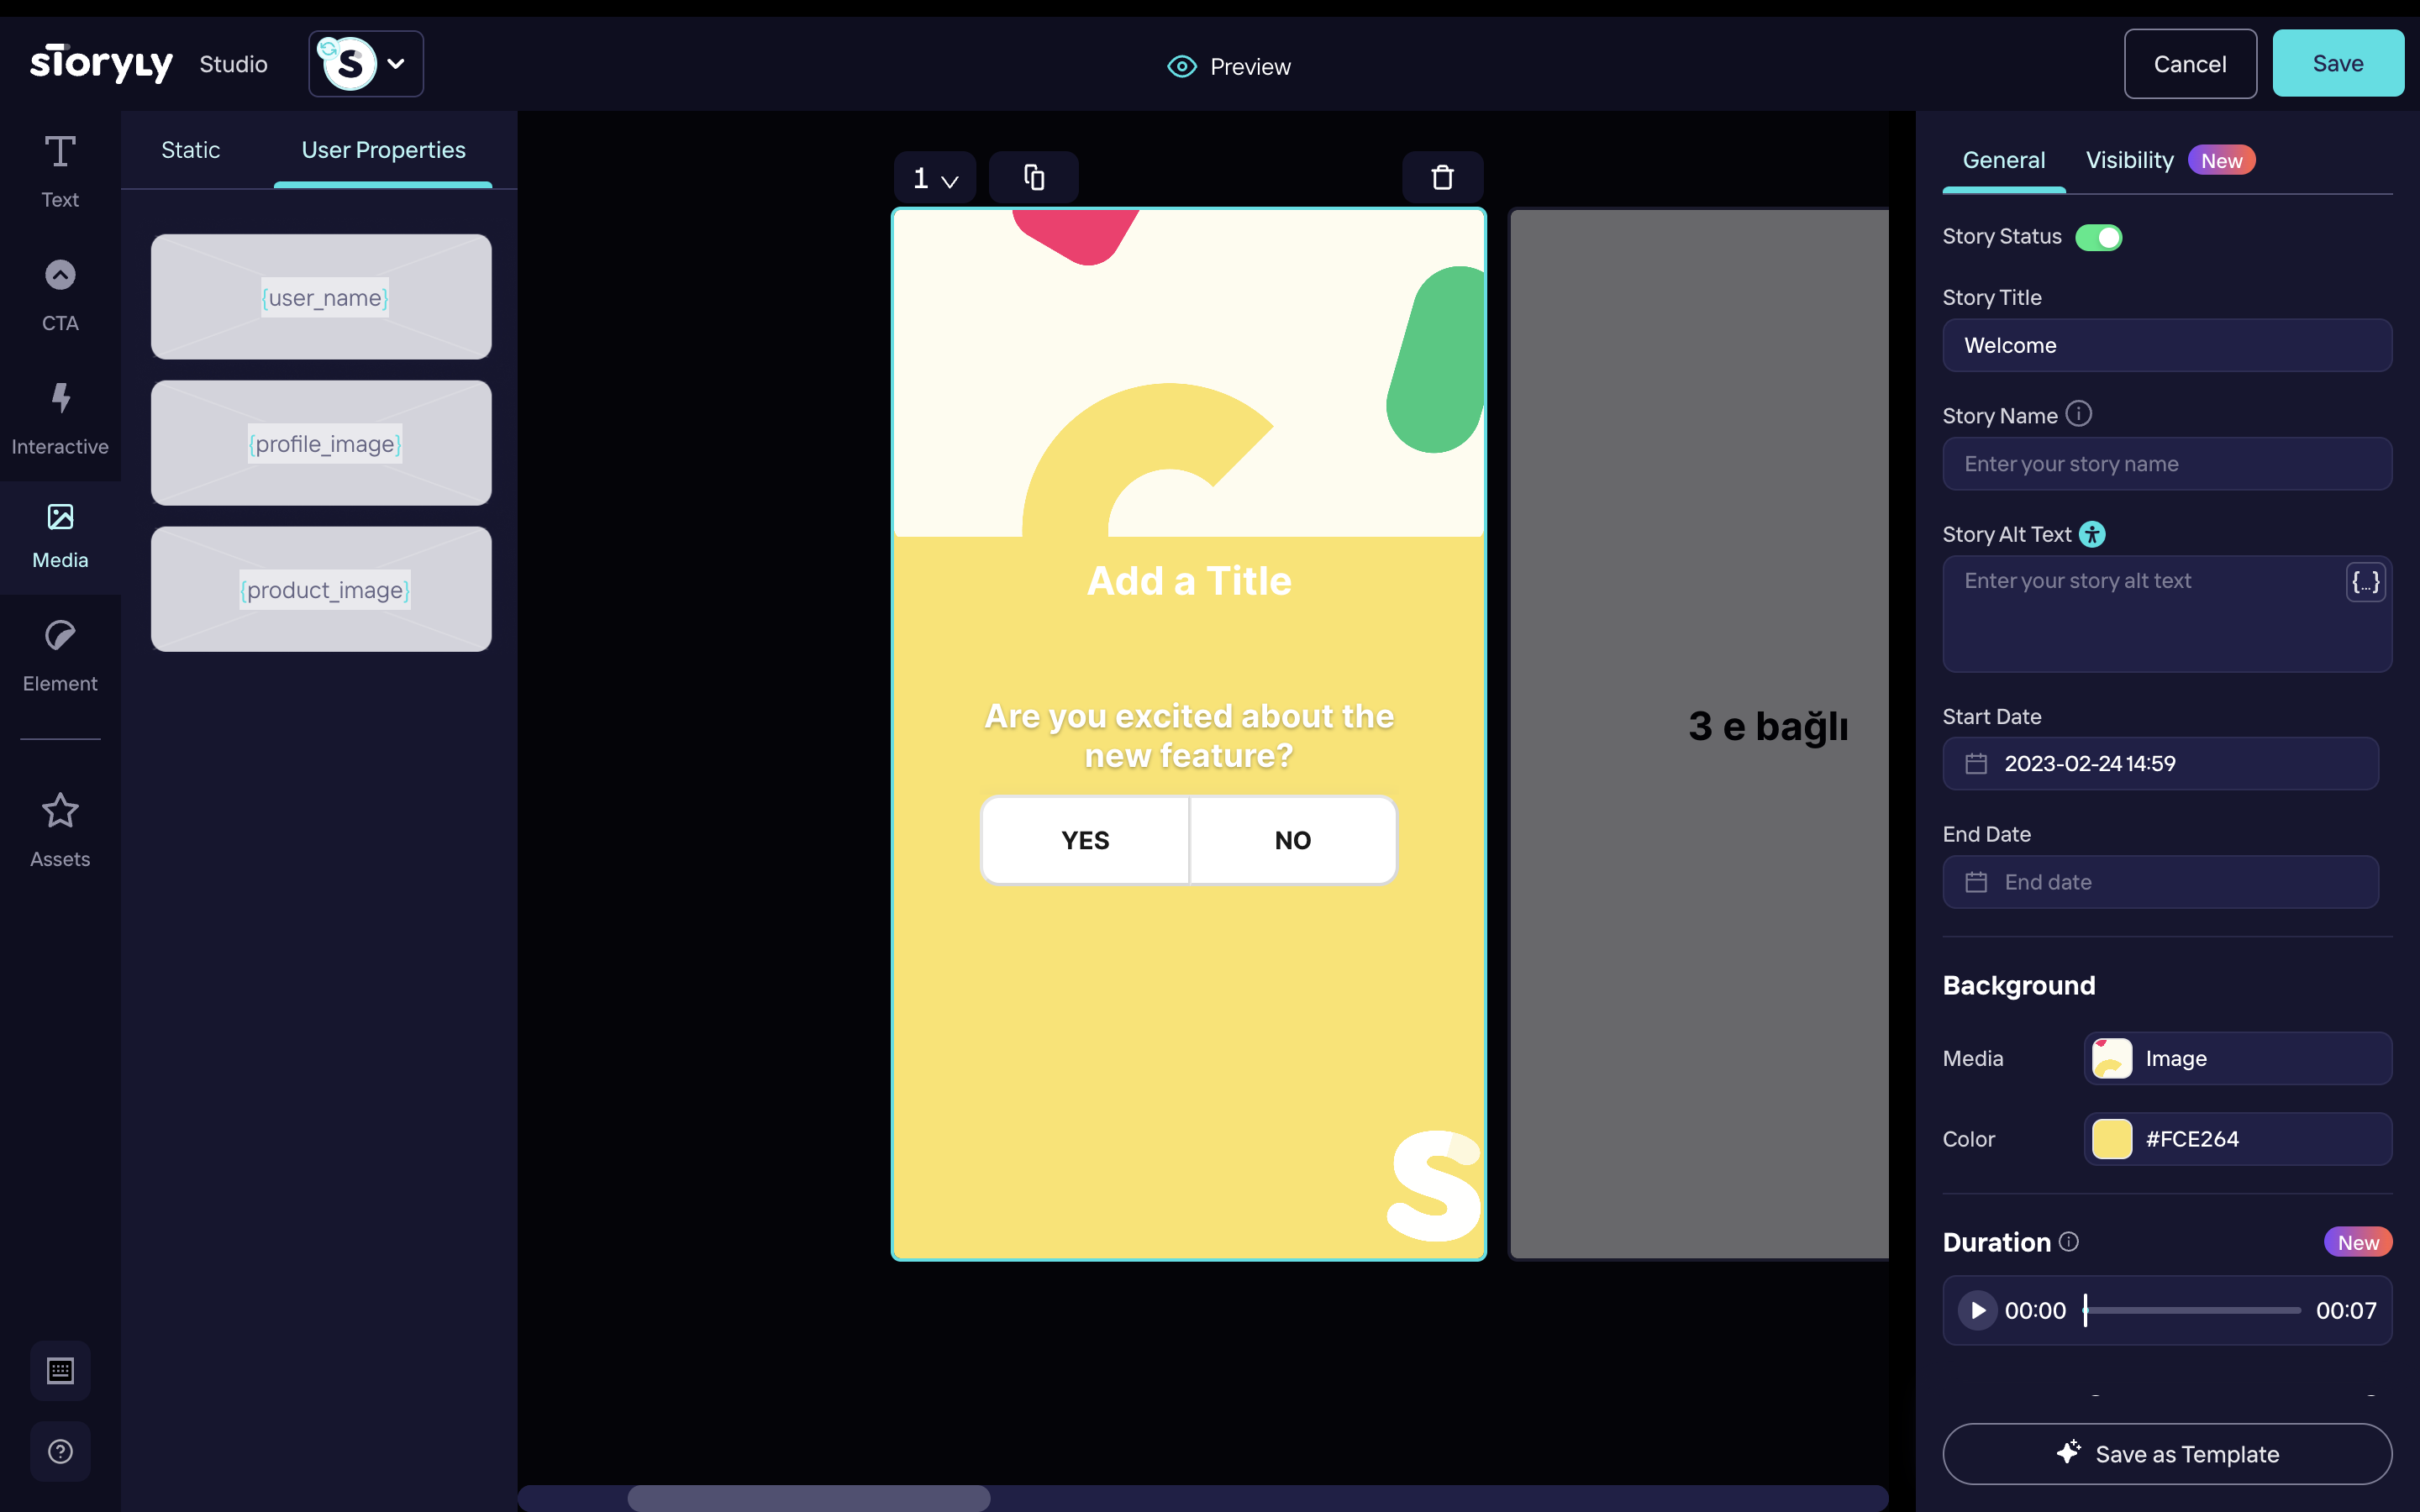
In the Studio, you can add texts and media to your Stories. If you select edit on a text and media, you'll be given two options Static & User Properties. To be able to create personalized texts and media, you have to select User Properties and choose whichever property you would like to use.
Setting User Property Data
You must set the data using the following methods so Storyly SDK can fill the user property fields and show the rendered Stories to your users. You may set the data while initializing the Storyly SDK:
storylyView.storylyInit.config.userData = Map<String, String>
Warning
If you miss a field in an index of your user properties data, respective story group to that index will be ignored.
Passing Custom Parameter to Storyly SDK
This section shows you how to send a custom parameter for personalized stories.
Storyly SDK allows you to send a string parameter in the initialization process. In StorylyInit class, the customParameter field is used as a user identifier for personalized stories.
storylyView.storylyInit = StorylyInit(
            storylyId: storylyToken,
            config: StorylyConfig.Builder()
                .setCustomParameter(parameter: String?)
                .build()
        )
Warning
You are allowed to send a 200 characters string value with the
customParameterfield. If you exceed the size limit, your value will be set to null.
Updated about 1 year ago