Translating Content
You can enhance the translation of your Stories with seamless language support. Use translate now button or upload translation files directly to the Storyly Dashboard, without having to create multiple Story Groups. This ensures that your audience can enjoy your content in their language, leading to better engagement and understanding.
What We Translate
We translate all text elements used on the Storyly Dashboard, including CTA texts, interactive texts, Story Group titles, and more.
Warning
To use this feature, ensure that your app has the Storyly SDK version 2.7.0 for native platforms and version 2.6.0 for cross-platforms.
Warning
Please ensure you've followed all the necessary steps for localization while integrating the SDK.
Auto Translation
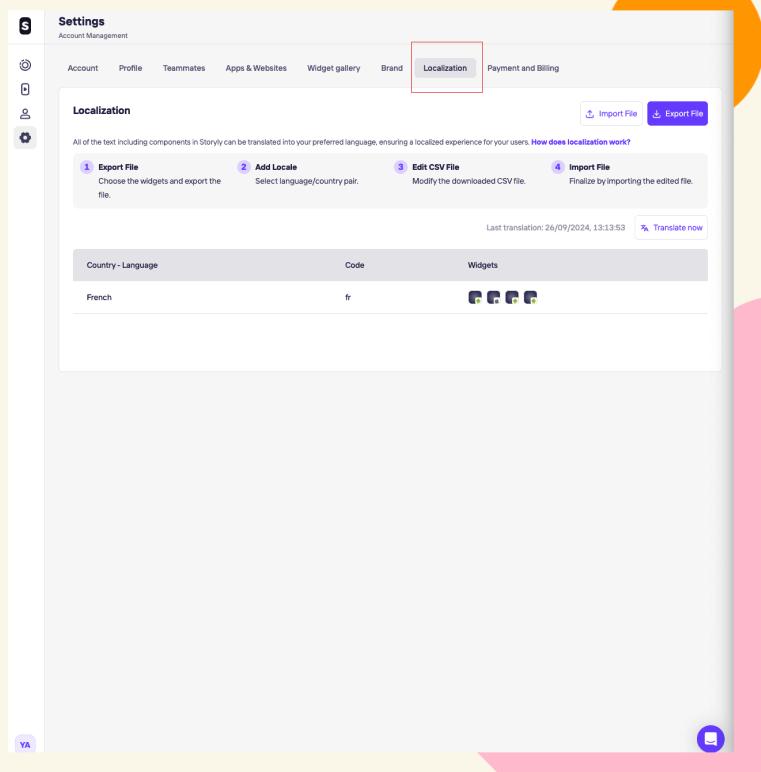
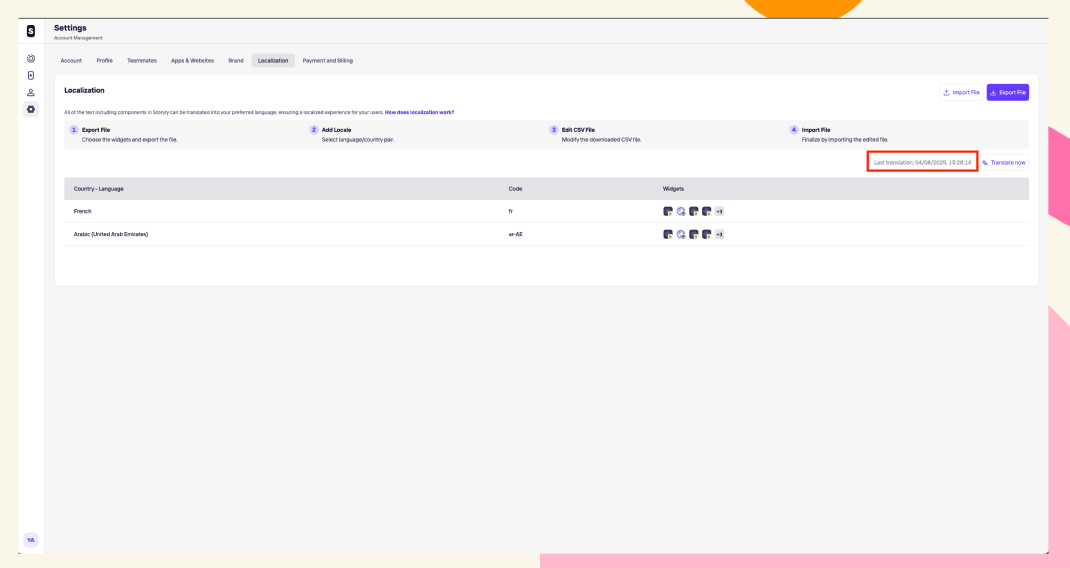
1. On the Storyly Dashboard, navigate to Settings > Account Management > Localization.
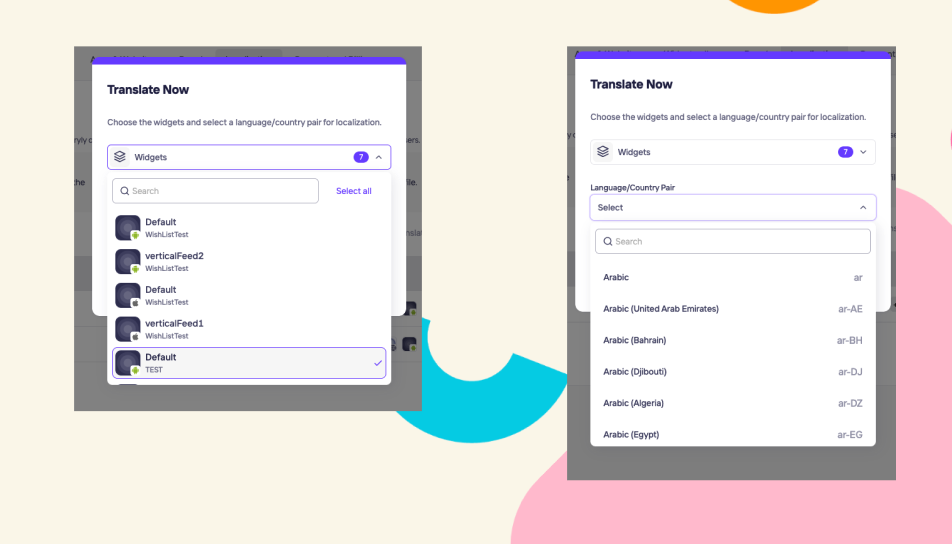
2. On the Storyly Dashboard, navigate to Translate Now, a popup will appear for you to select the widget and the language to use for translation.
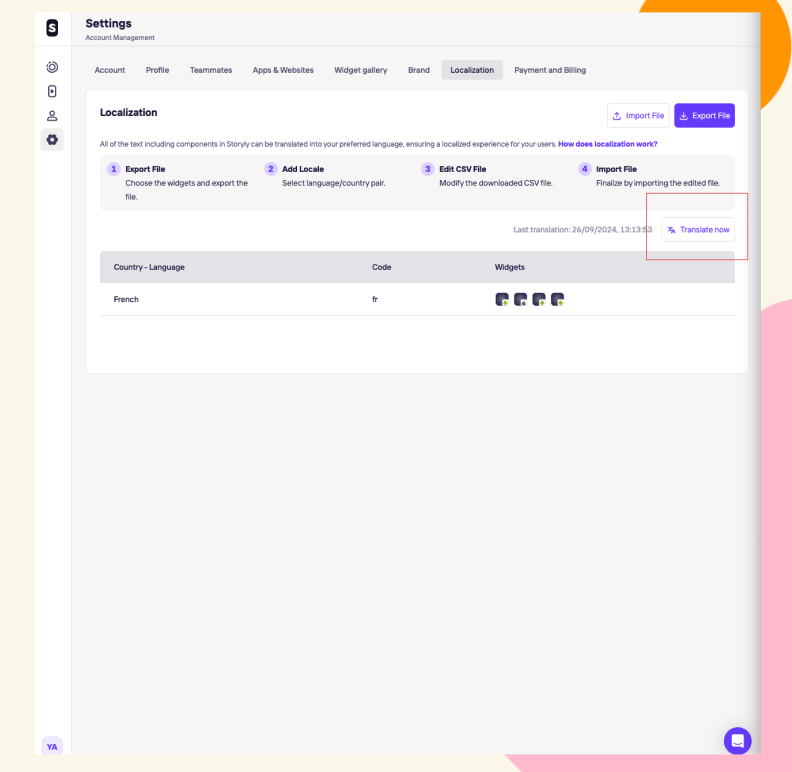
3. In the pop-up, you can select a range of languages for each widget's translation. Once you press save, the text will be automatically translated based on the selected language pairings. However, it is recommended that you review the translations to ensure accuracy. If needed, you can use the Export/Import feature to manage or adjust the translations further. Once the translation is completed you will see the last translation time and date as well on dashboard.
Note
Changes made on the export file will remain the same after using the auto Translation for the same widgets. Auto Translate only works for empty cells in your file.
Export Import Files
1. First, you need to prepare the translation file. To do that, start by clicking on Export File.

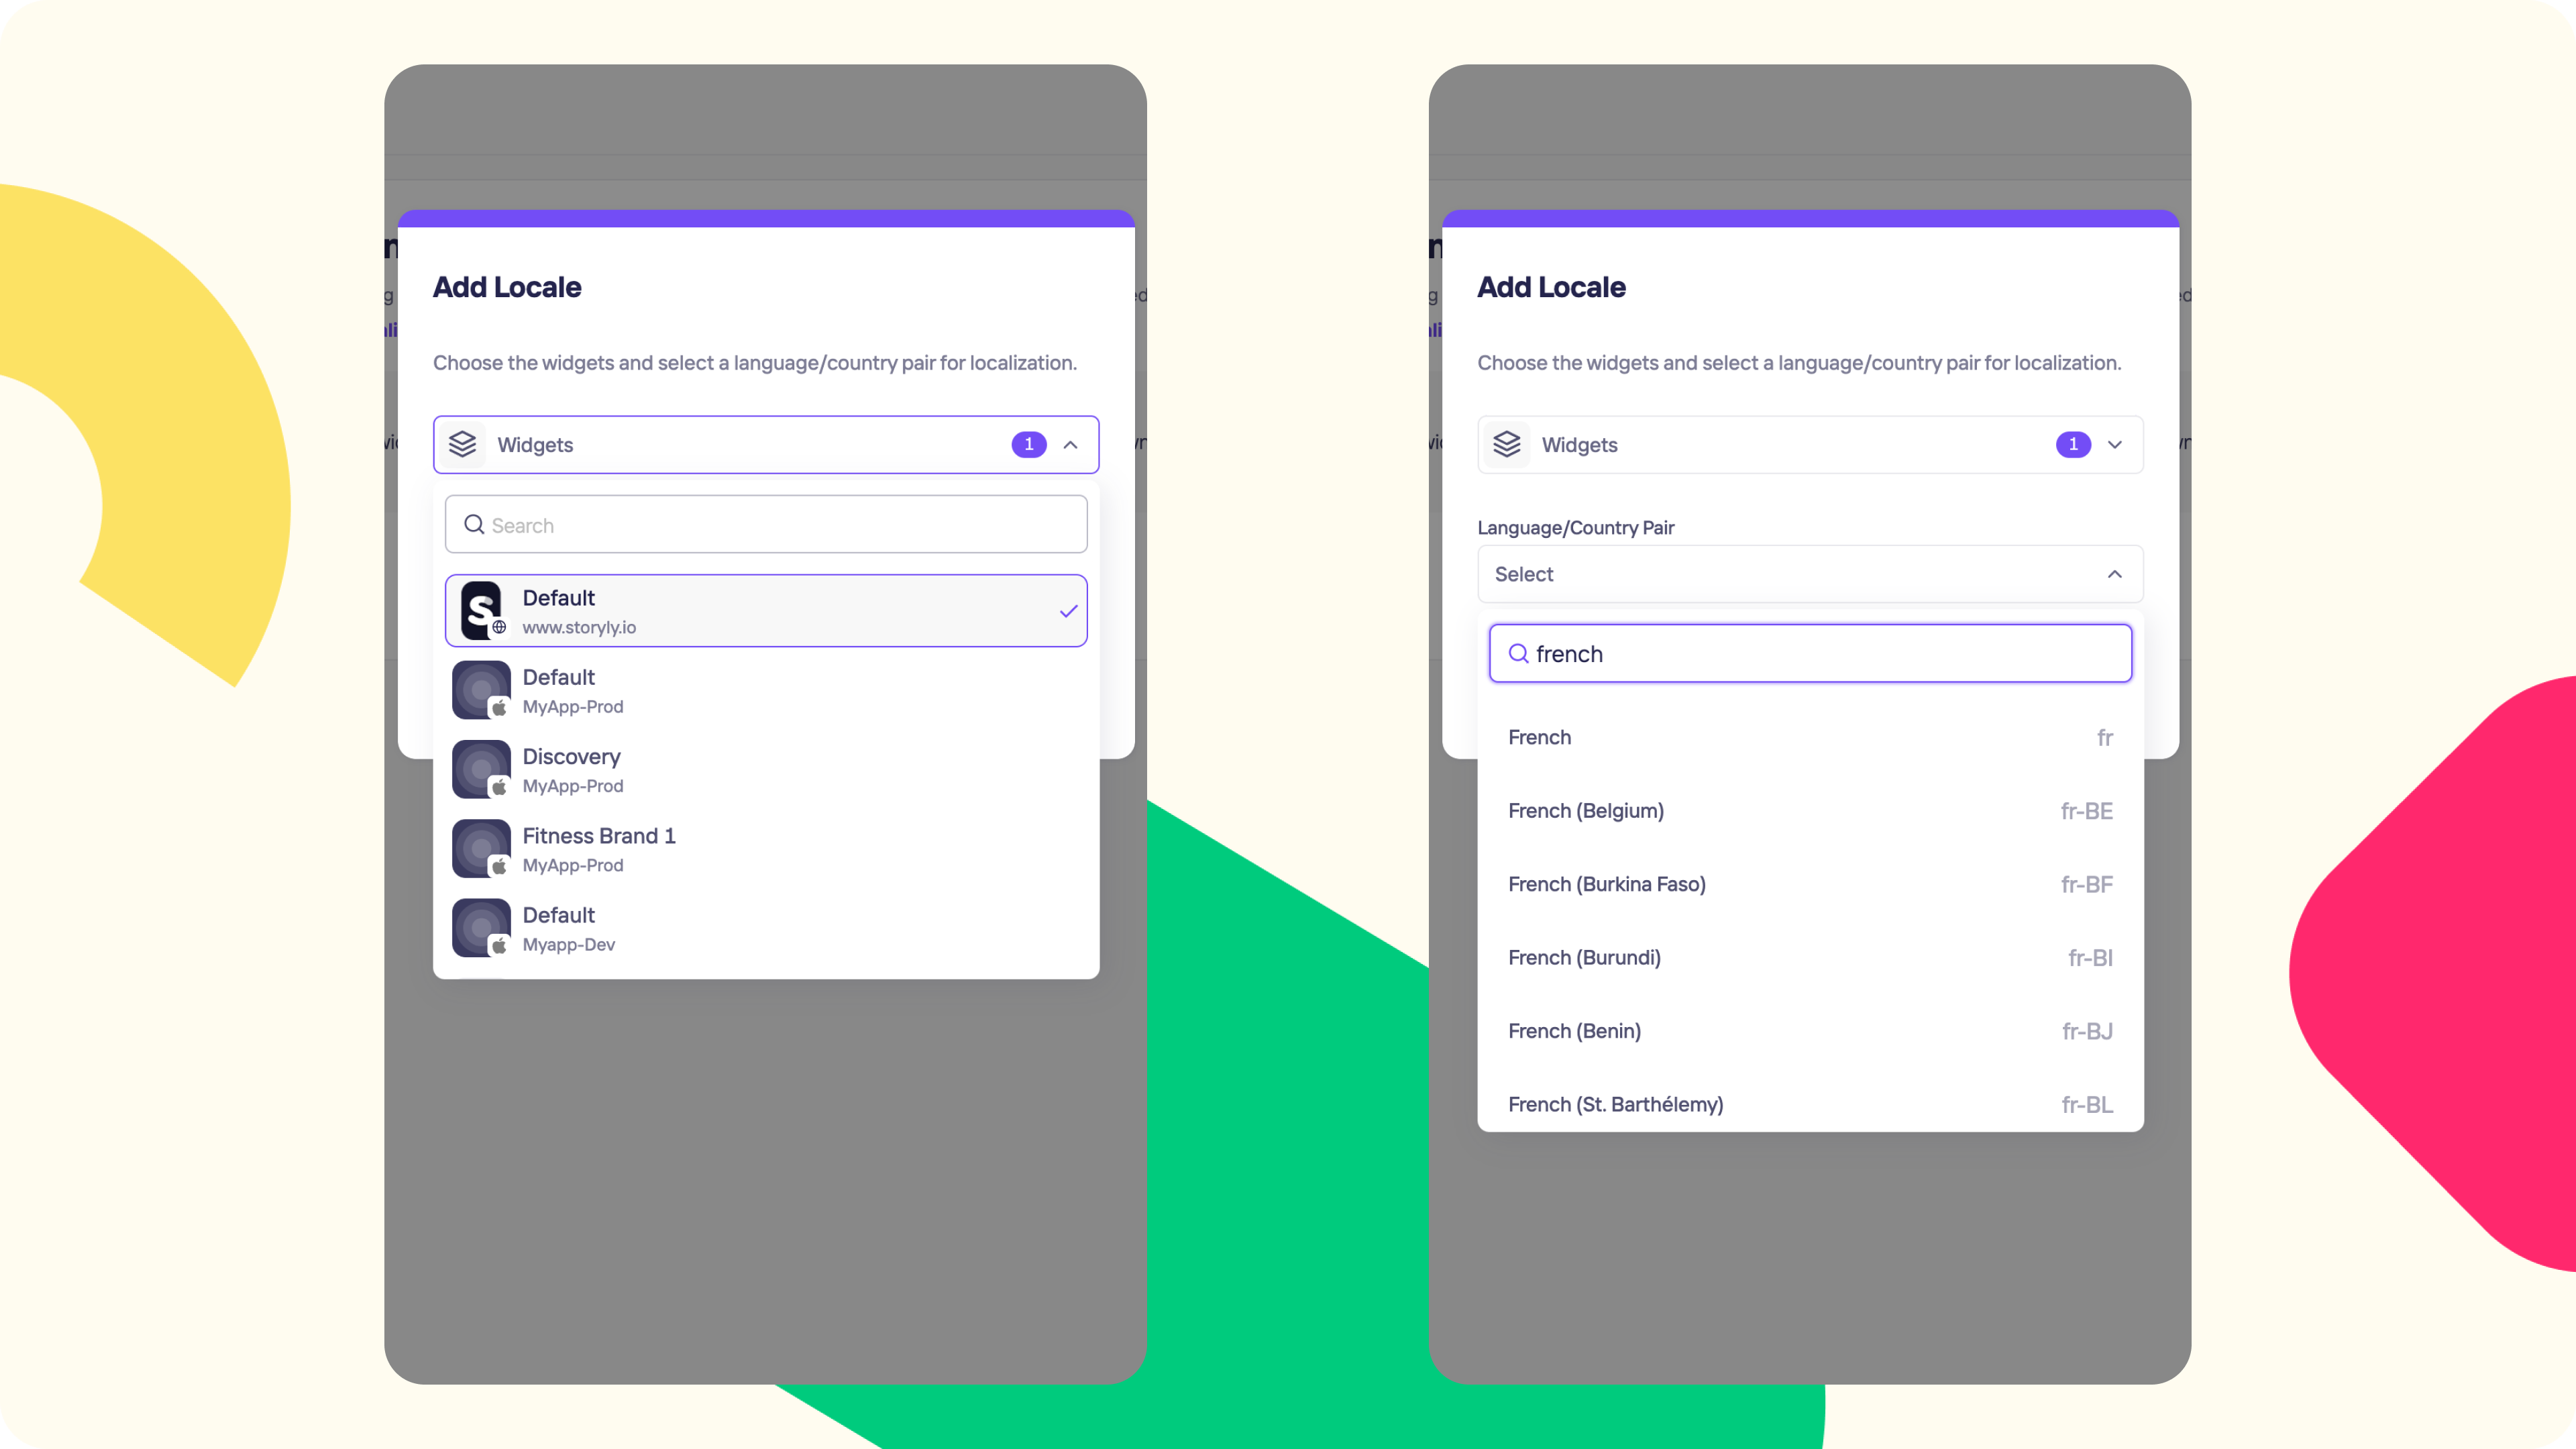
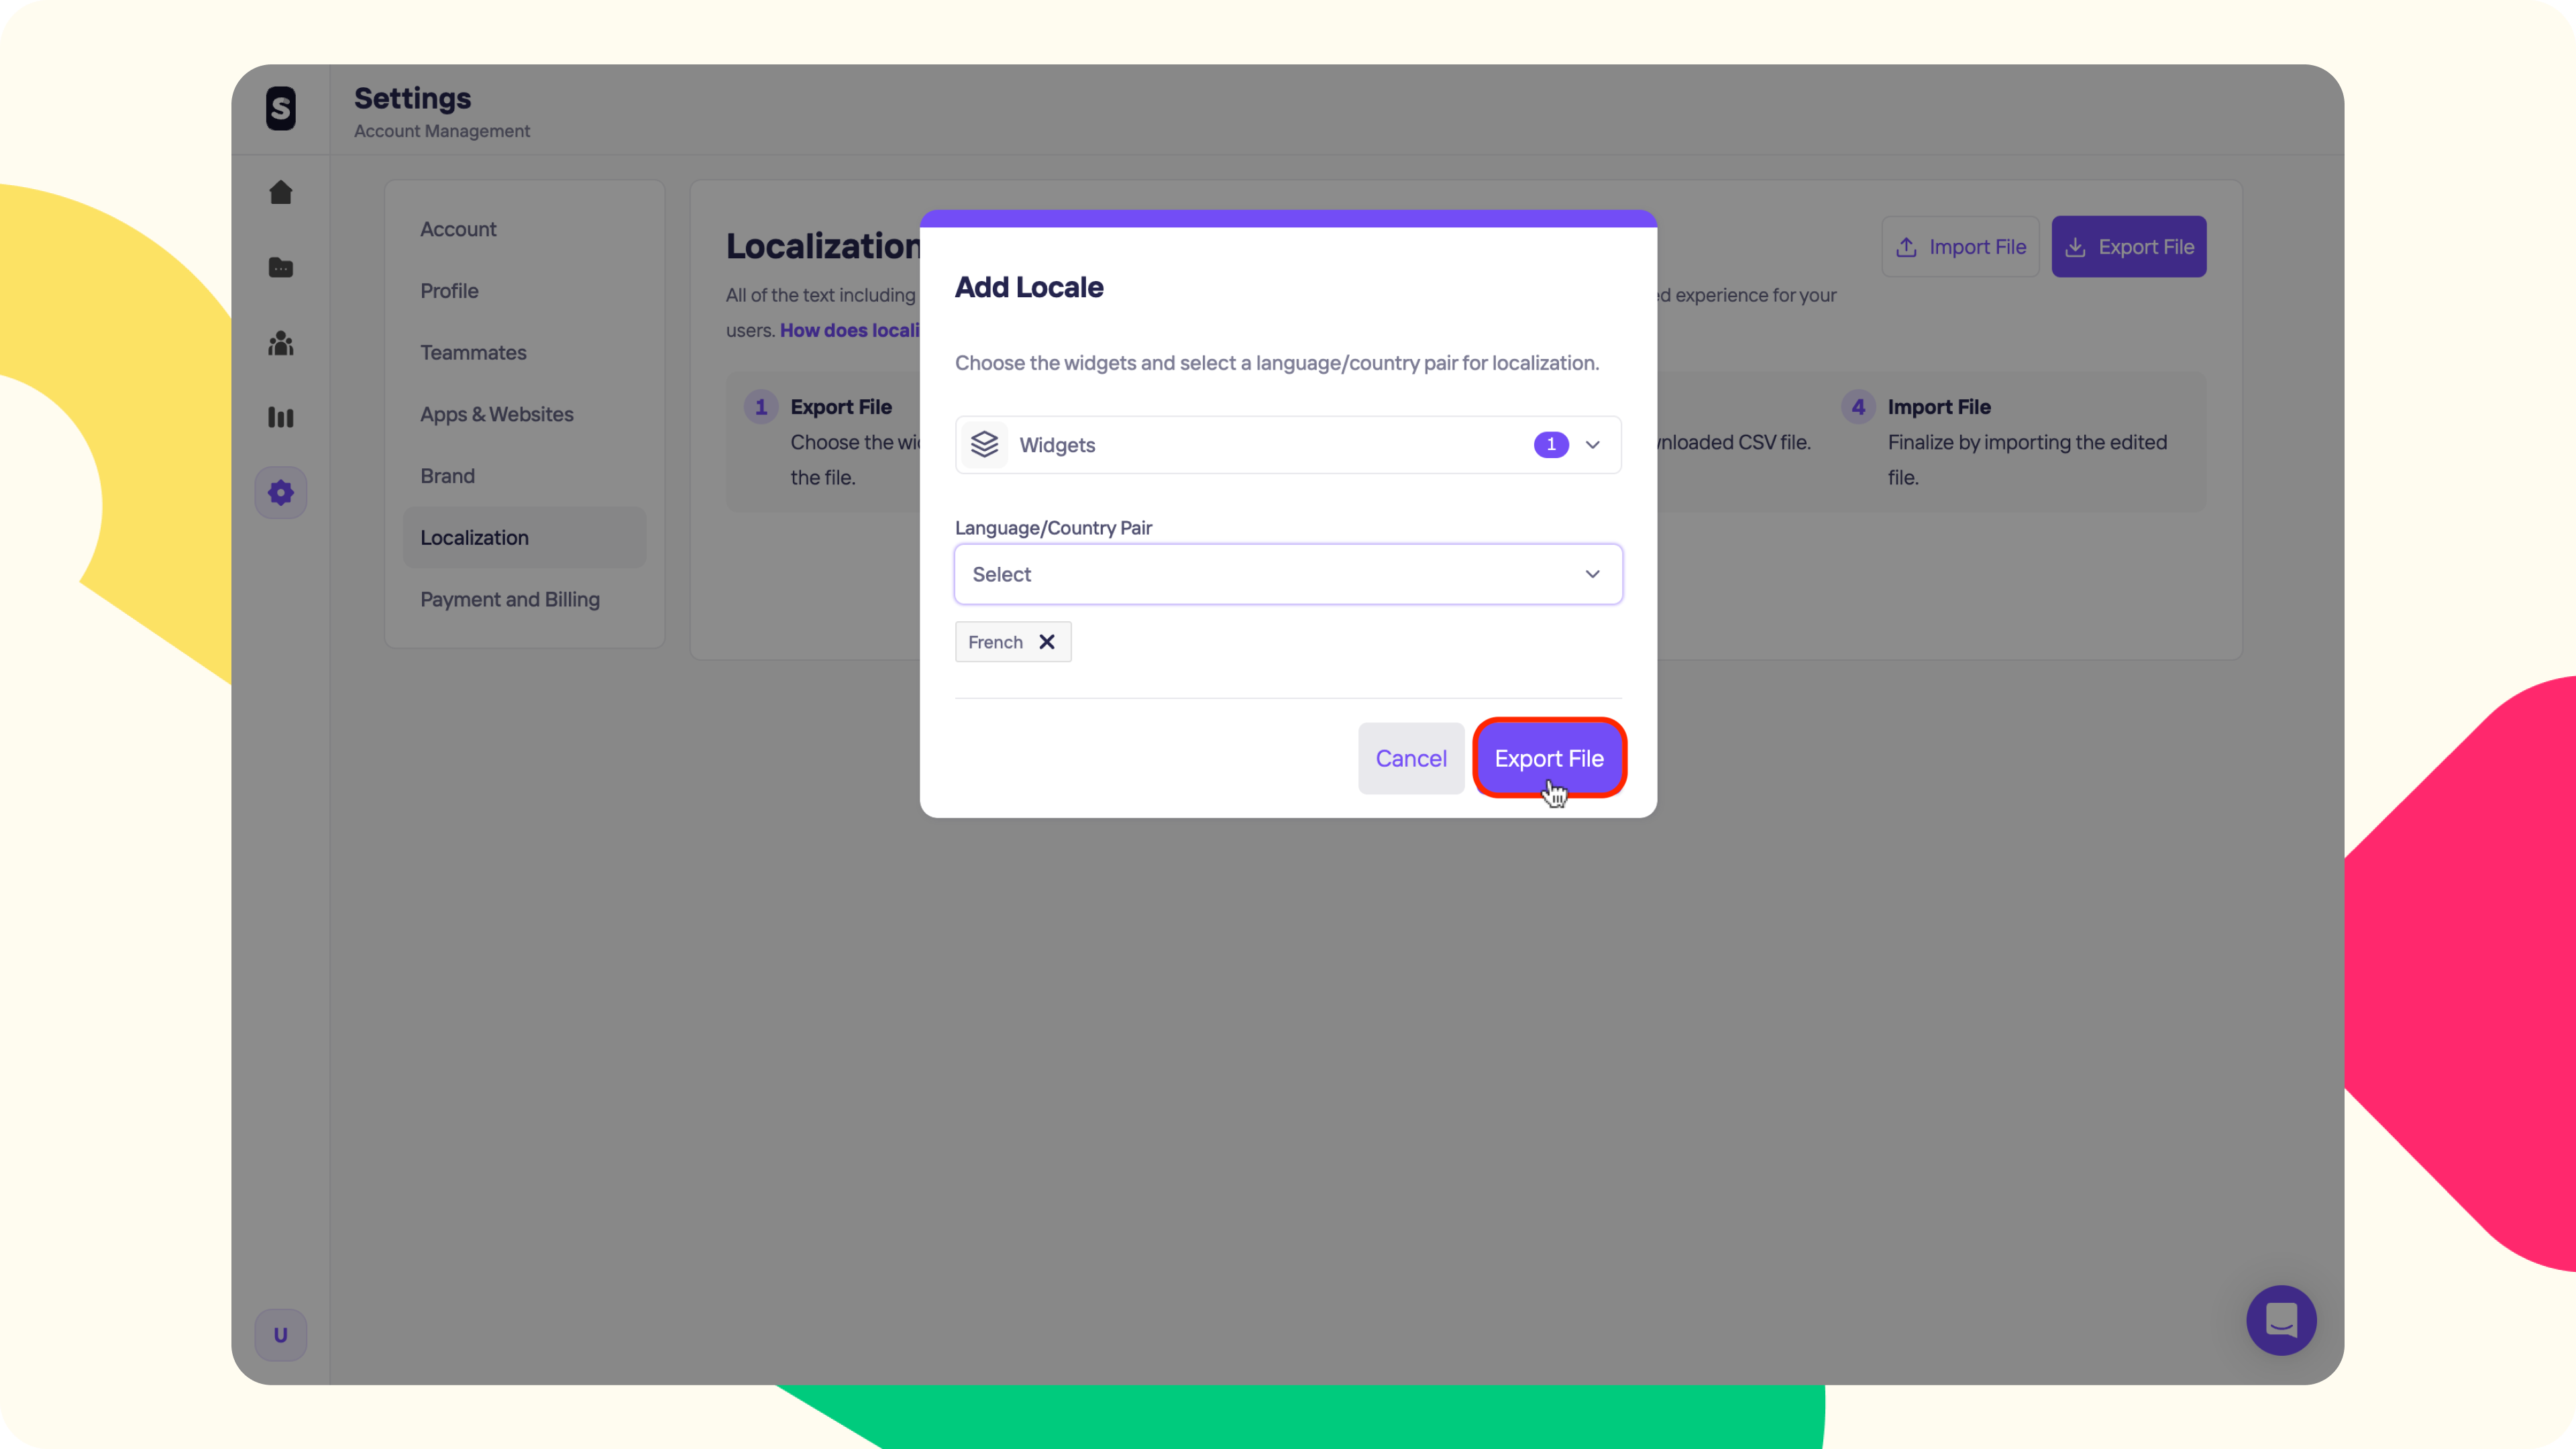
2. At the next step, you can multi-select the Widgets that you'll get the export of and the Language/Country pairs that you'd like to translate your texts into.
3. After selecting the Widget & Language/Country pairs, please go ahead and click on the Export File. We'll prepare a .csv file with the corresponding languages and it'll be downloaded to your computer within seconds.
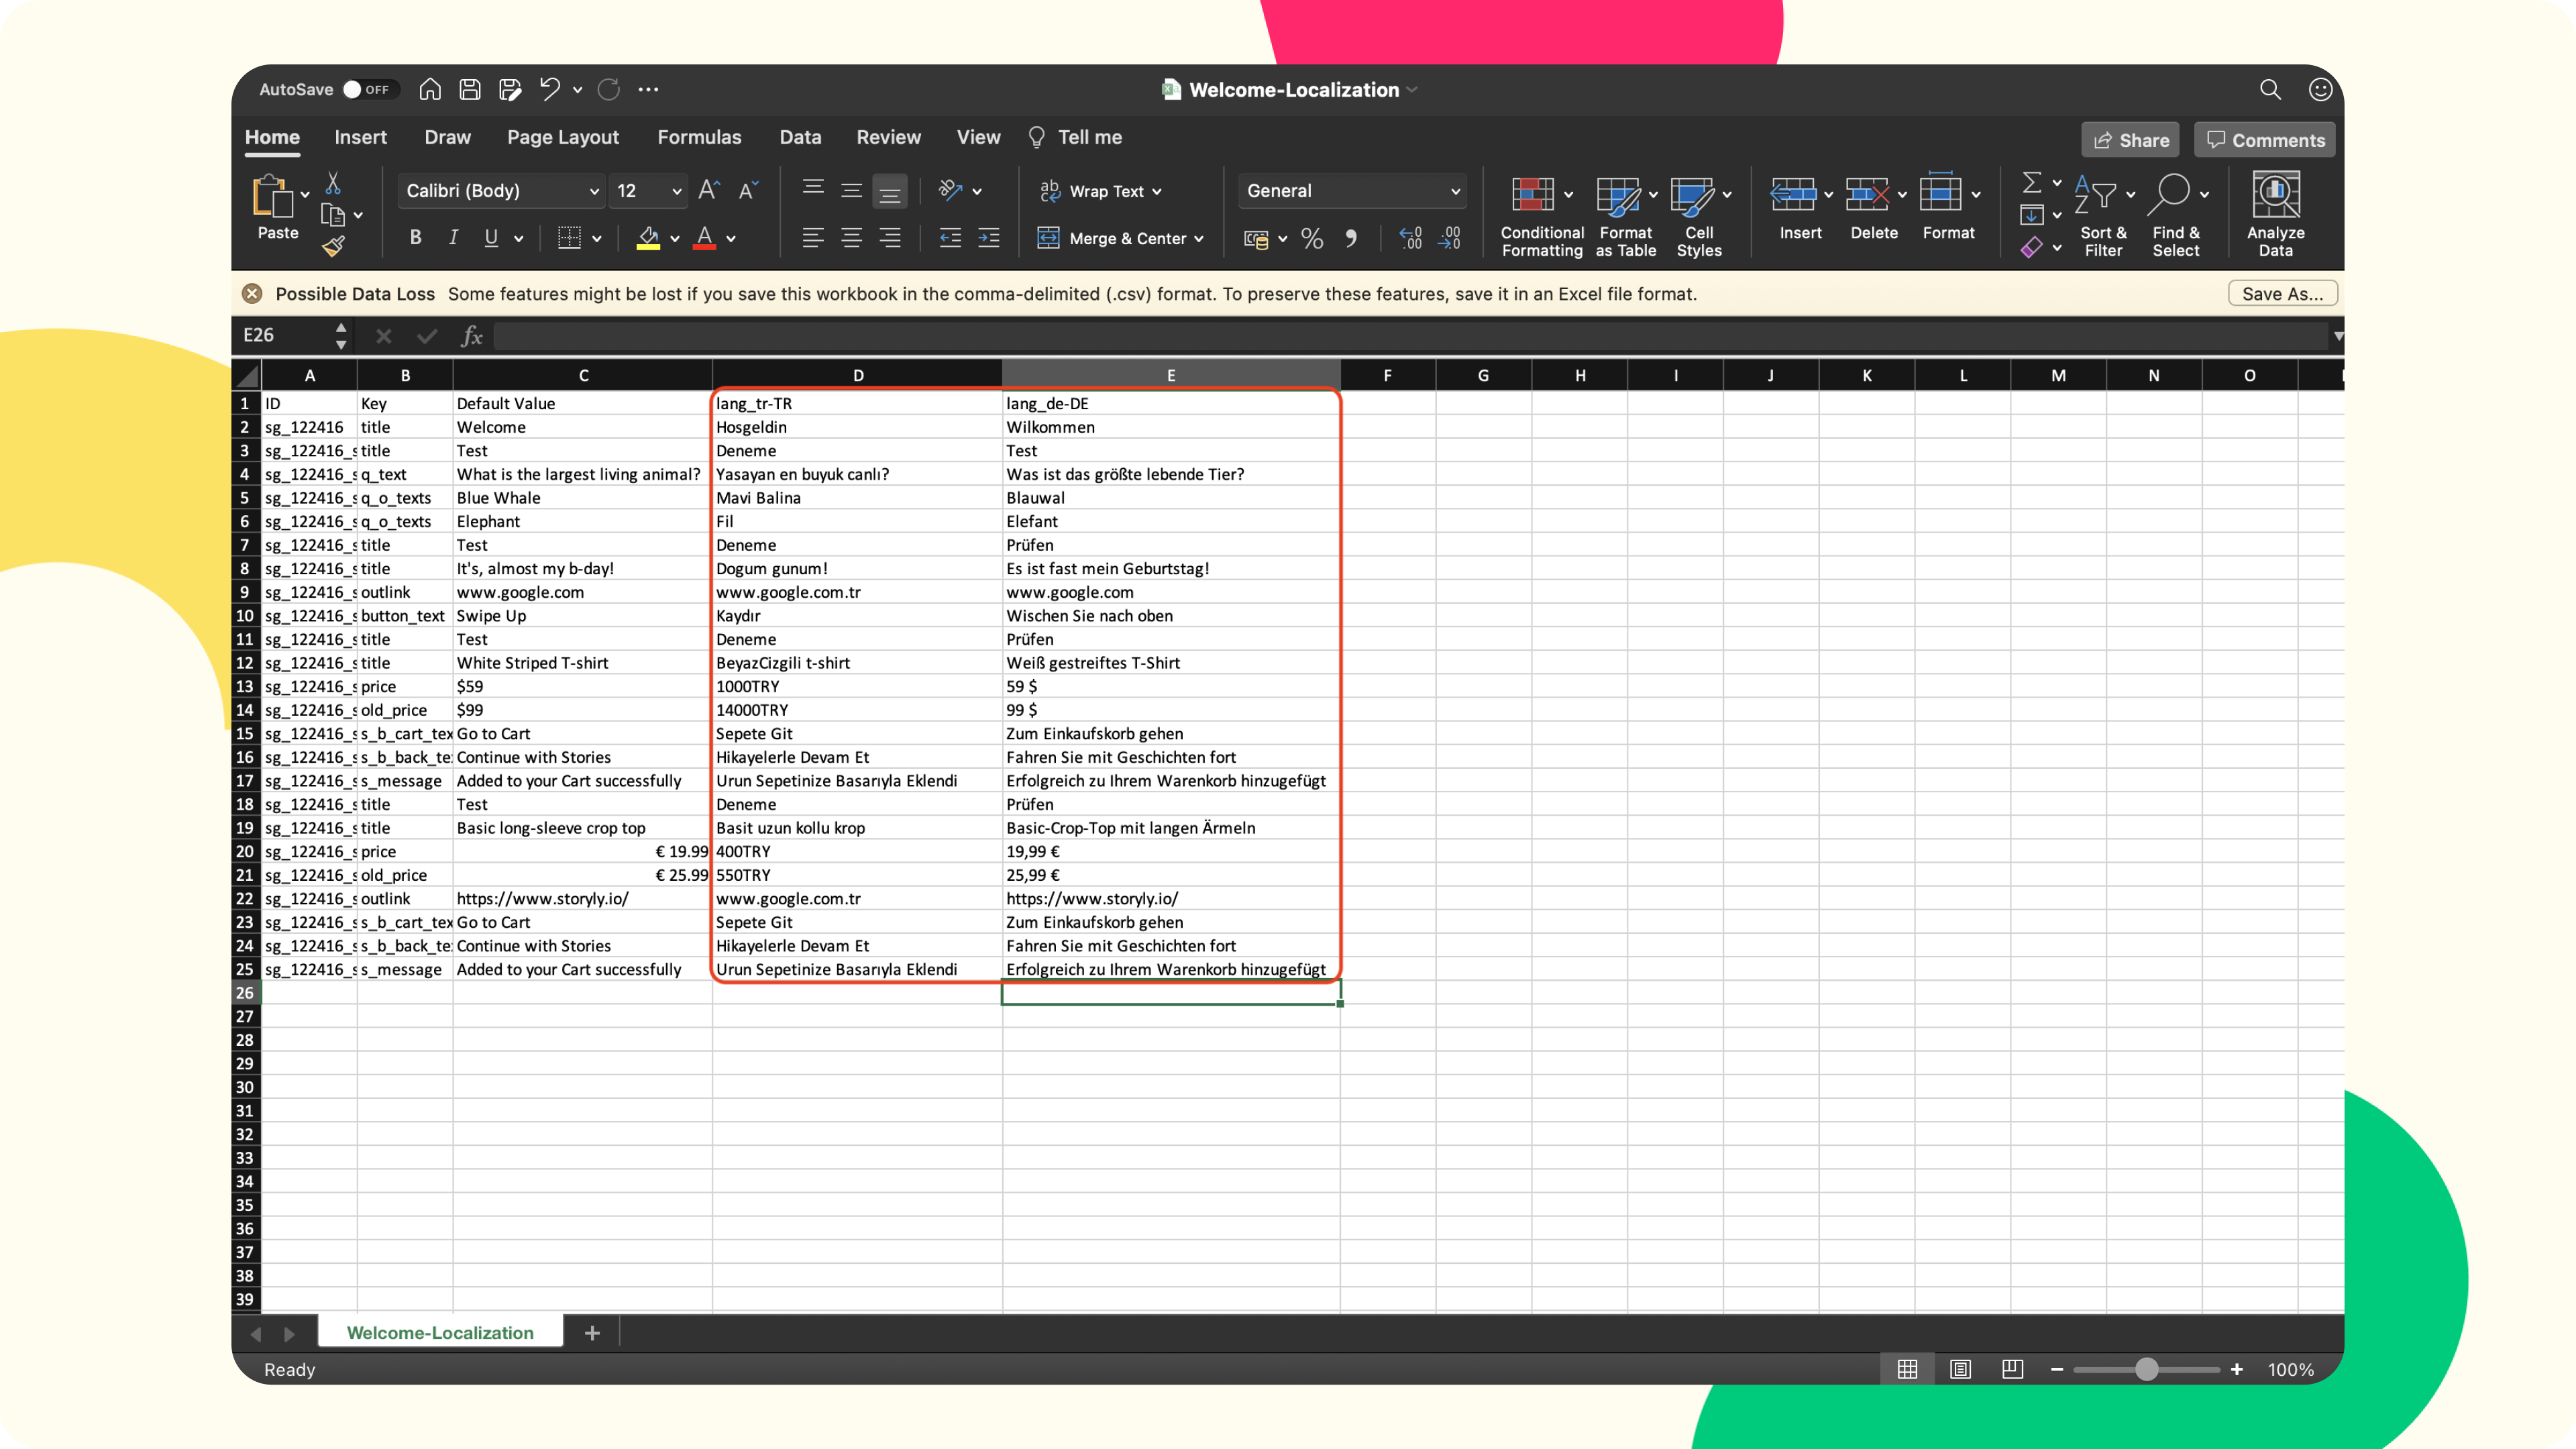
4. Please locate the downloaded file. In the .csv file, the columns for the selected Language/Country pair are already translated, placed next to the Default Value column. At this stage, you can either fill in the empty columns or modify the translations as needed.
Warning
Please do not change the values inside the cells of first column and rows or add new columns or rows to the files manually.
5. After completing the translations, please save the .csv file, and let's go back to the Storyly Dashboard.
Warning
Imported .csv files' title should be the exact same as the exported .csv file.
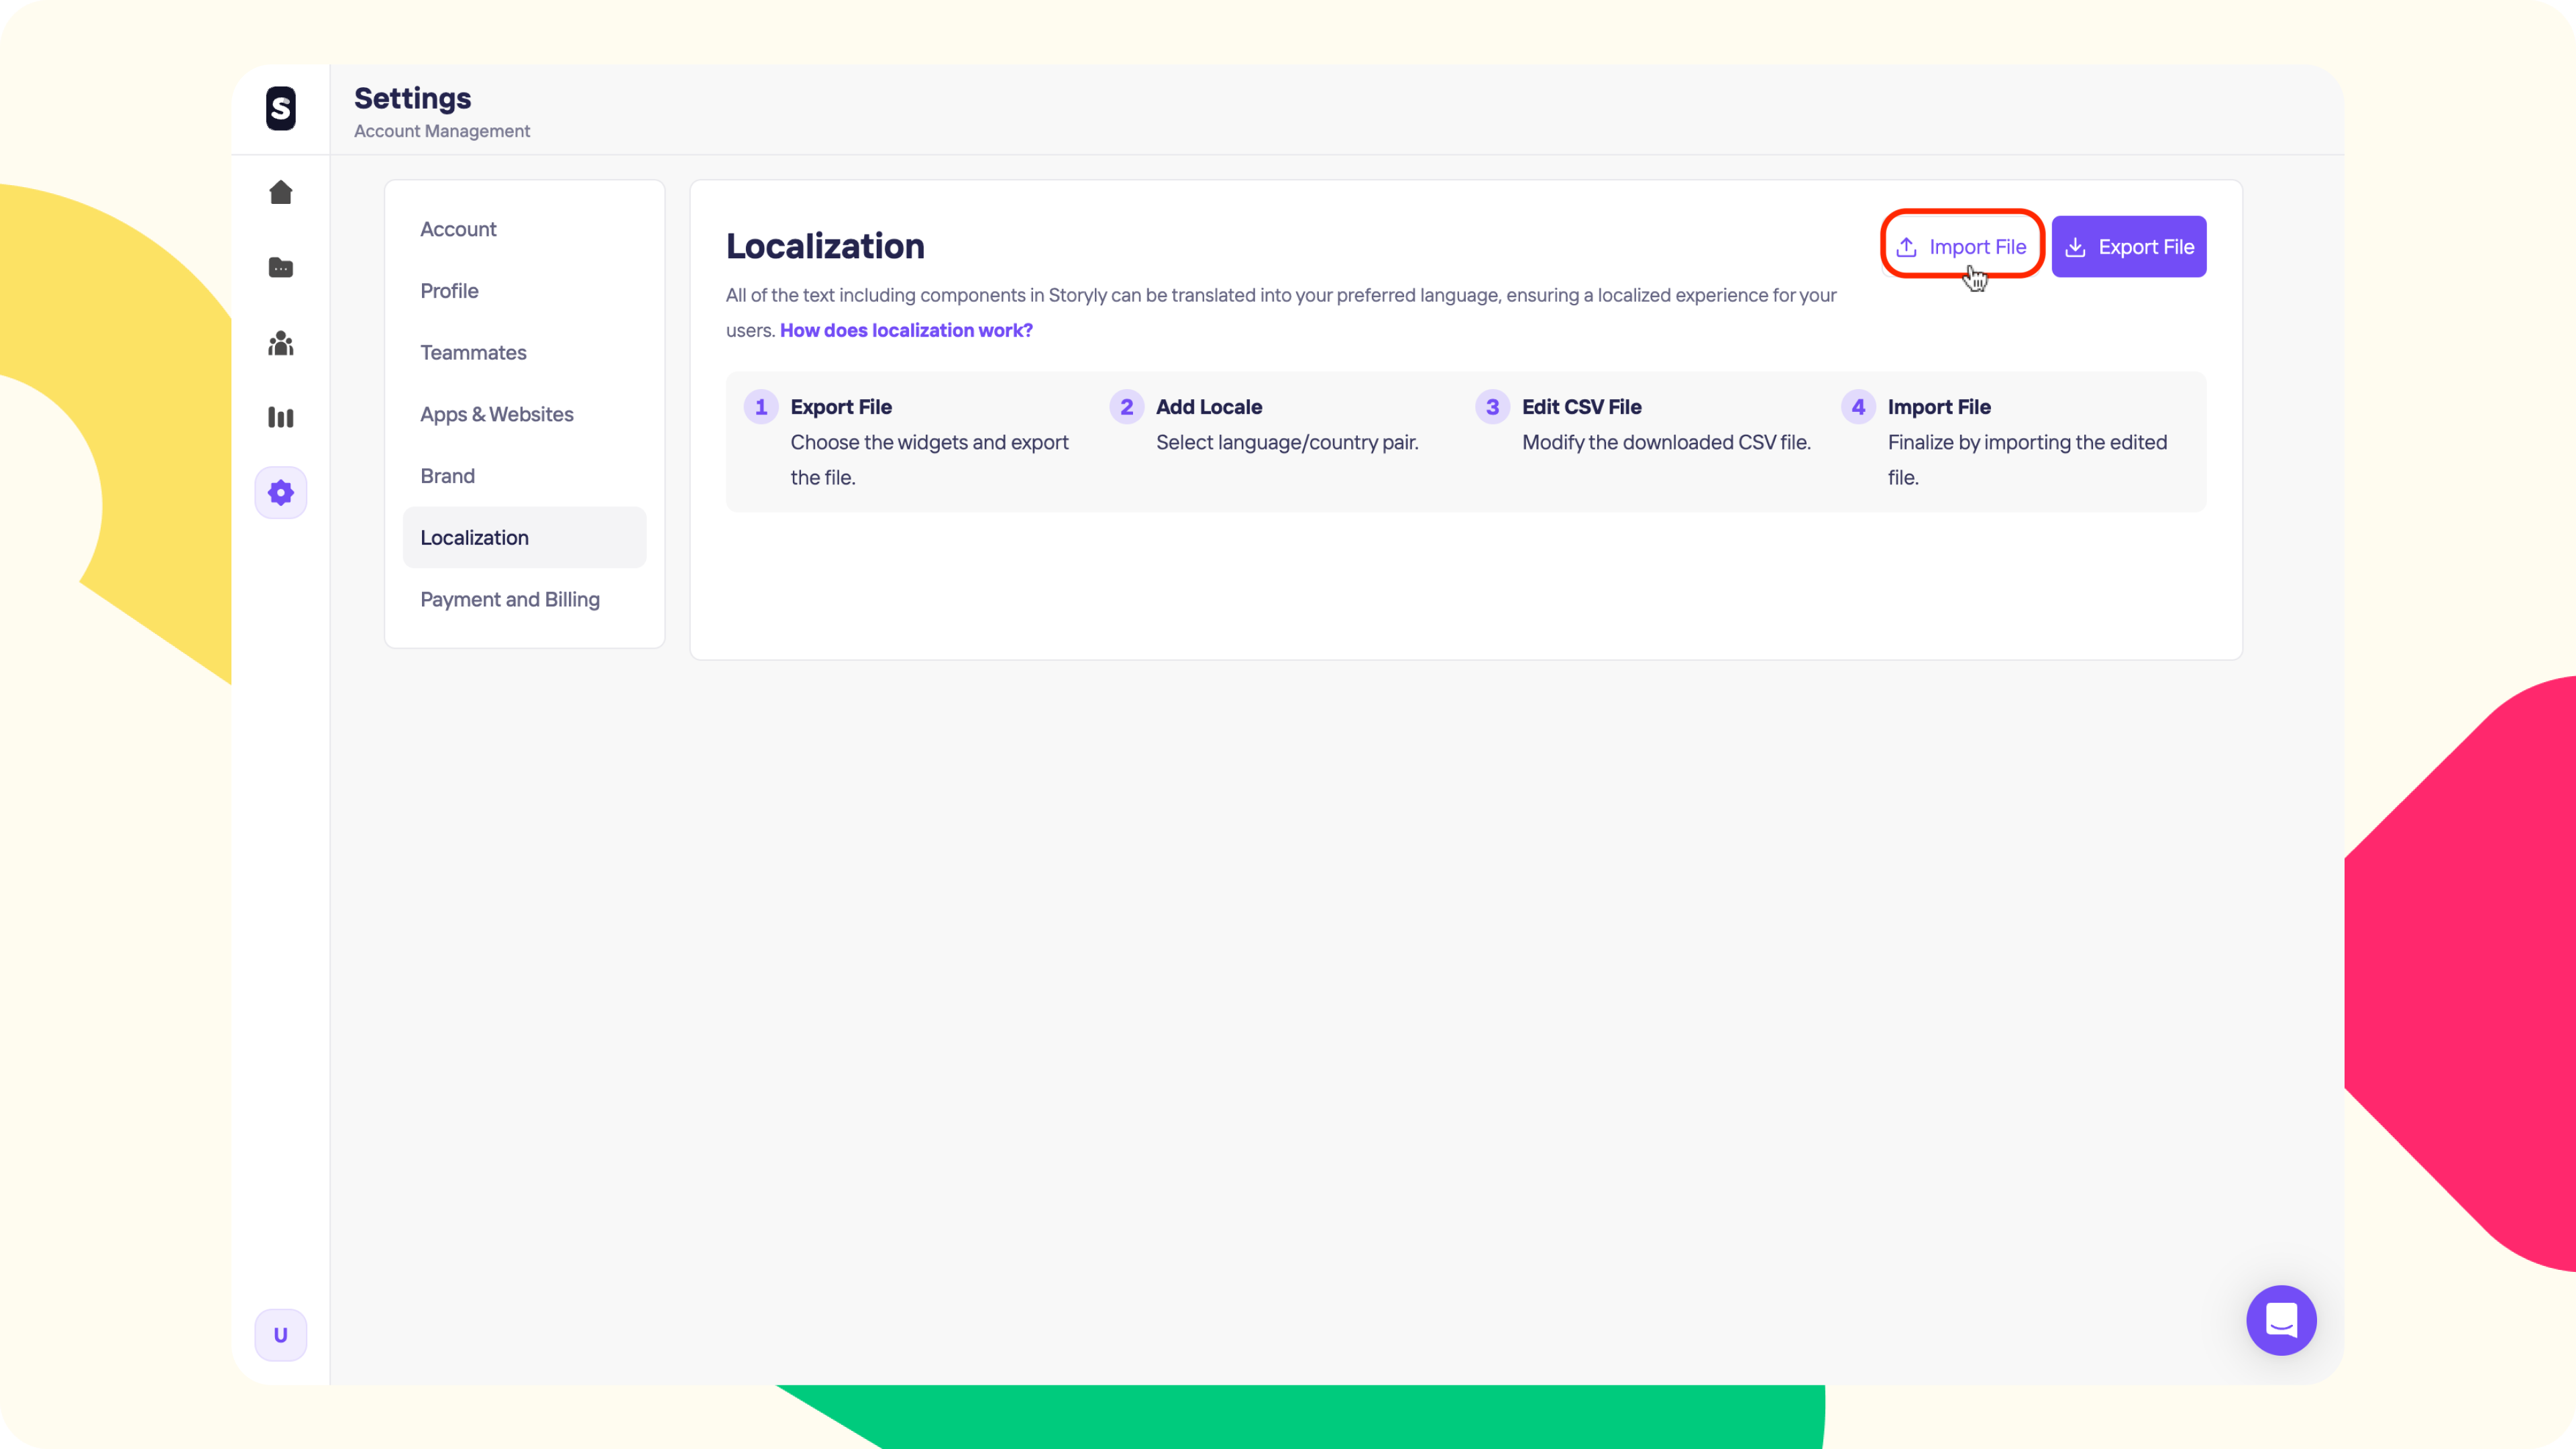
6. On the Storyly Dashboard, click on Import File.
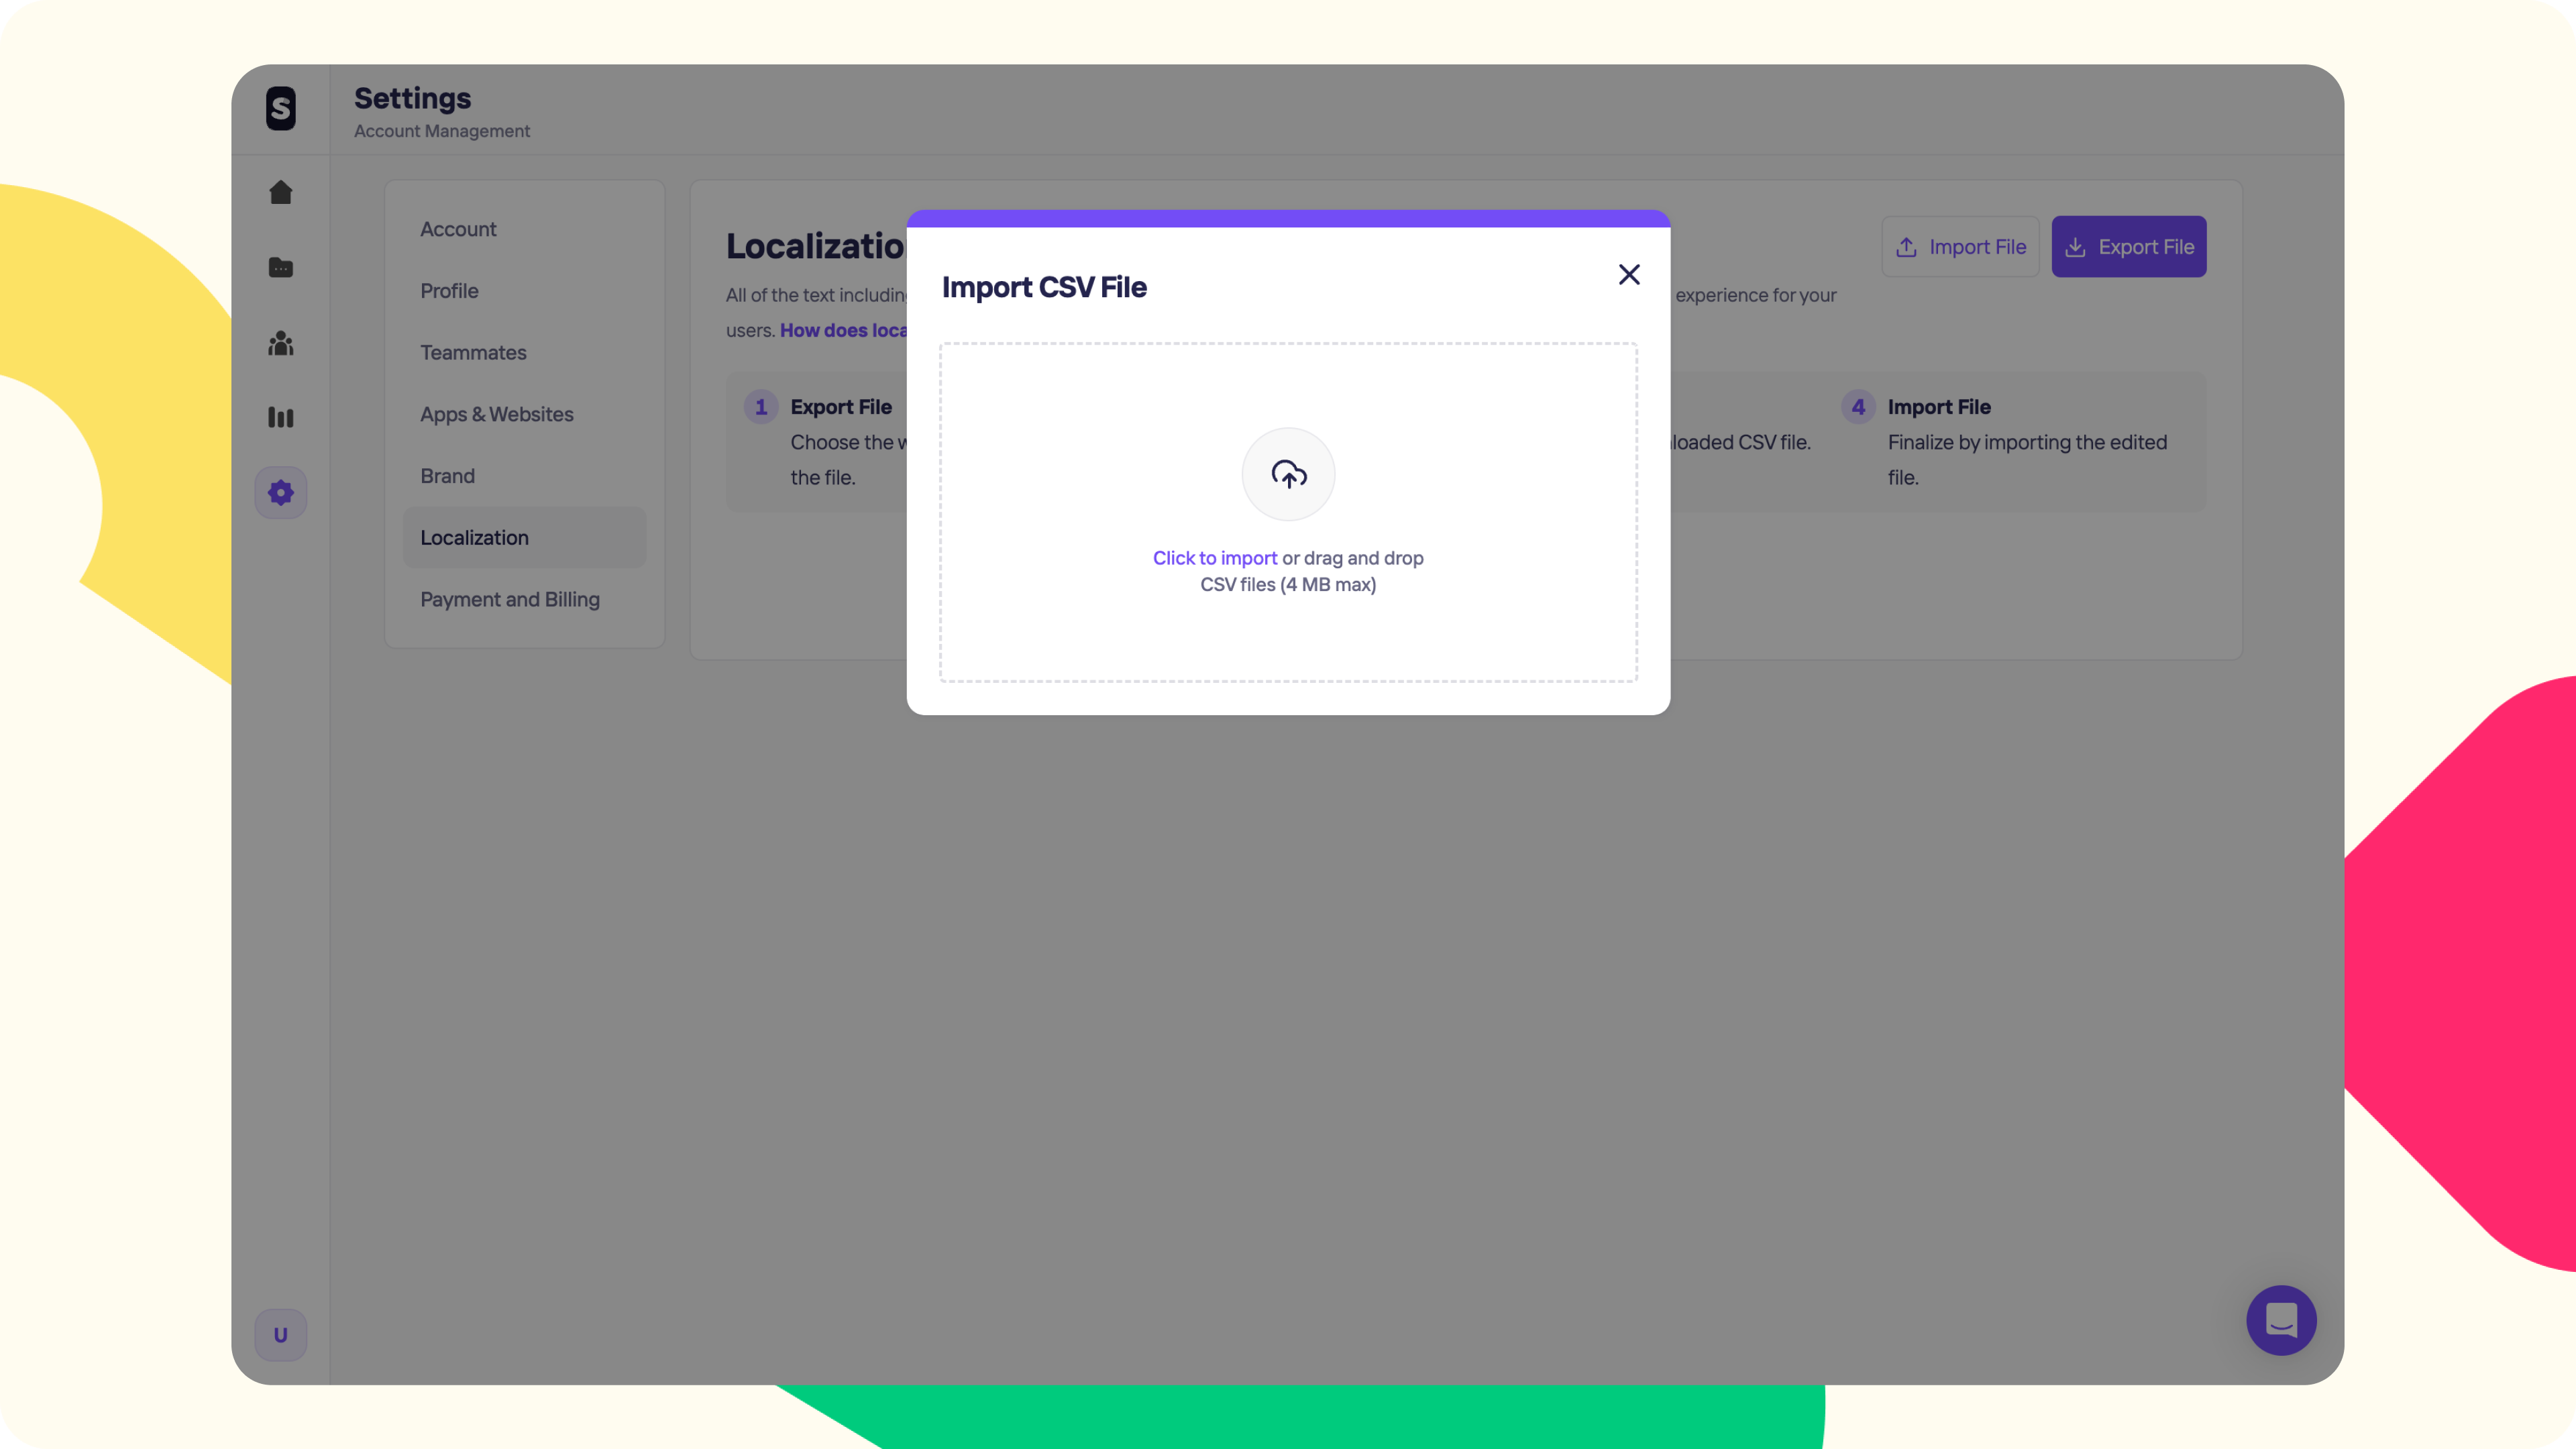
7. Then, upload the updated .csv file with the translations.
8. Once the upload is completed, you'll see the Language/Country pairs that you've added translation to. Also, next to Translate Now button, you can see the last update time, just for reference.
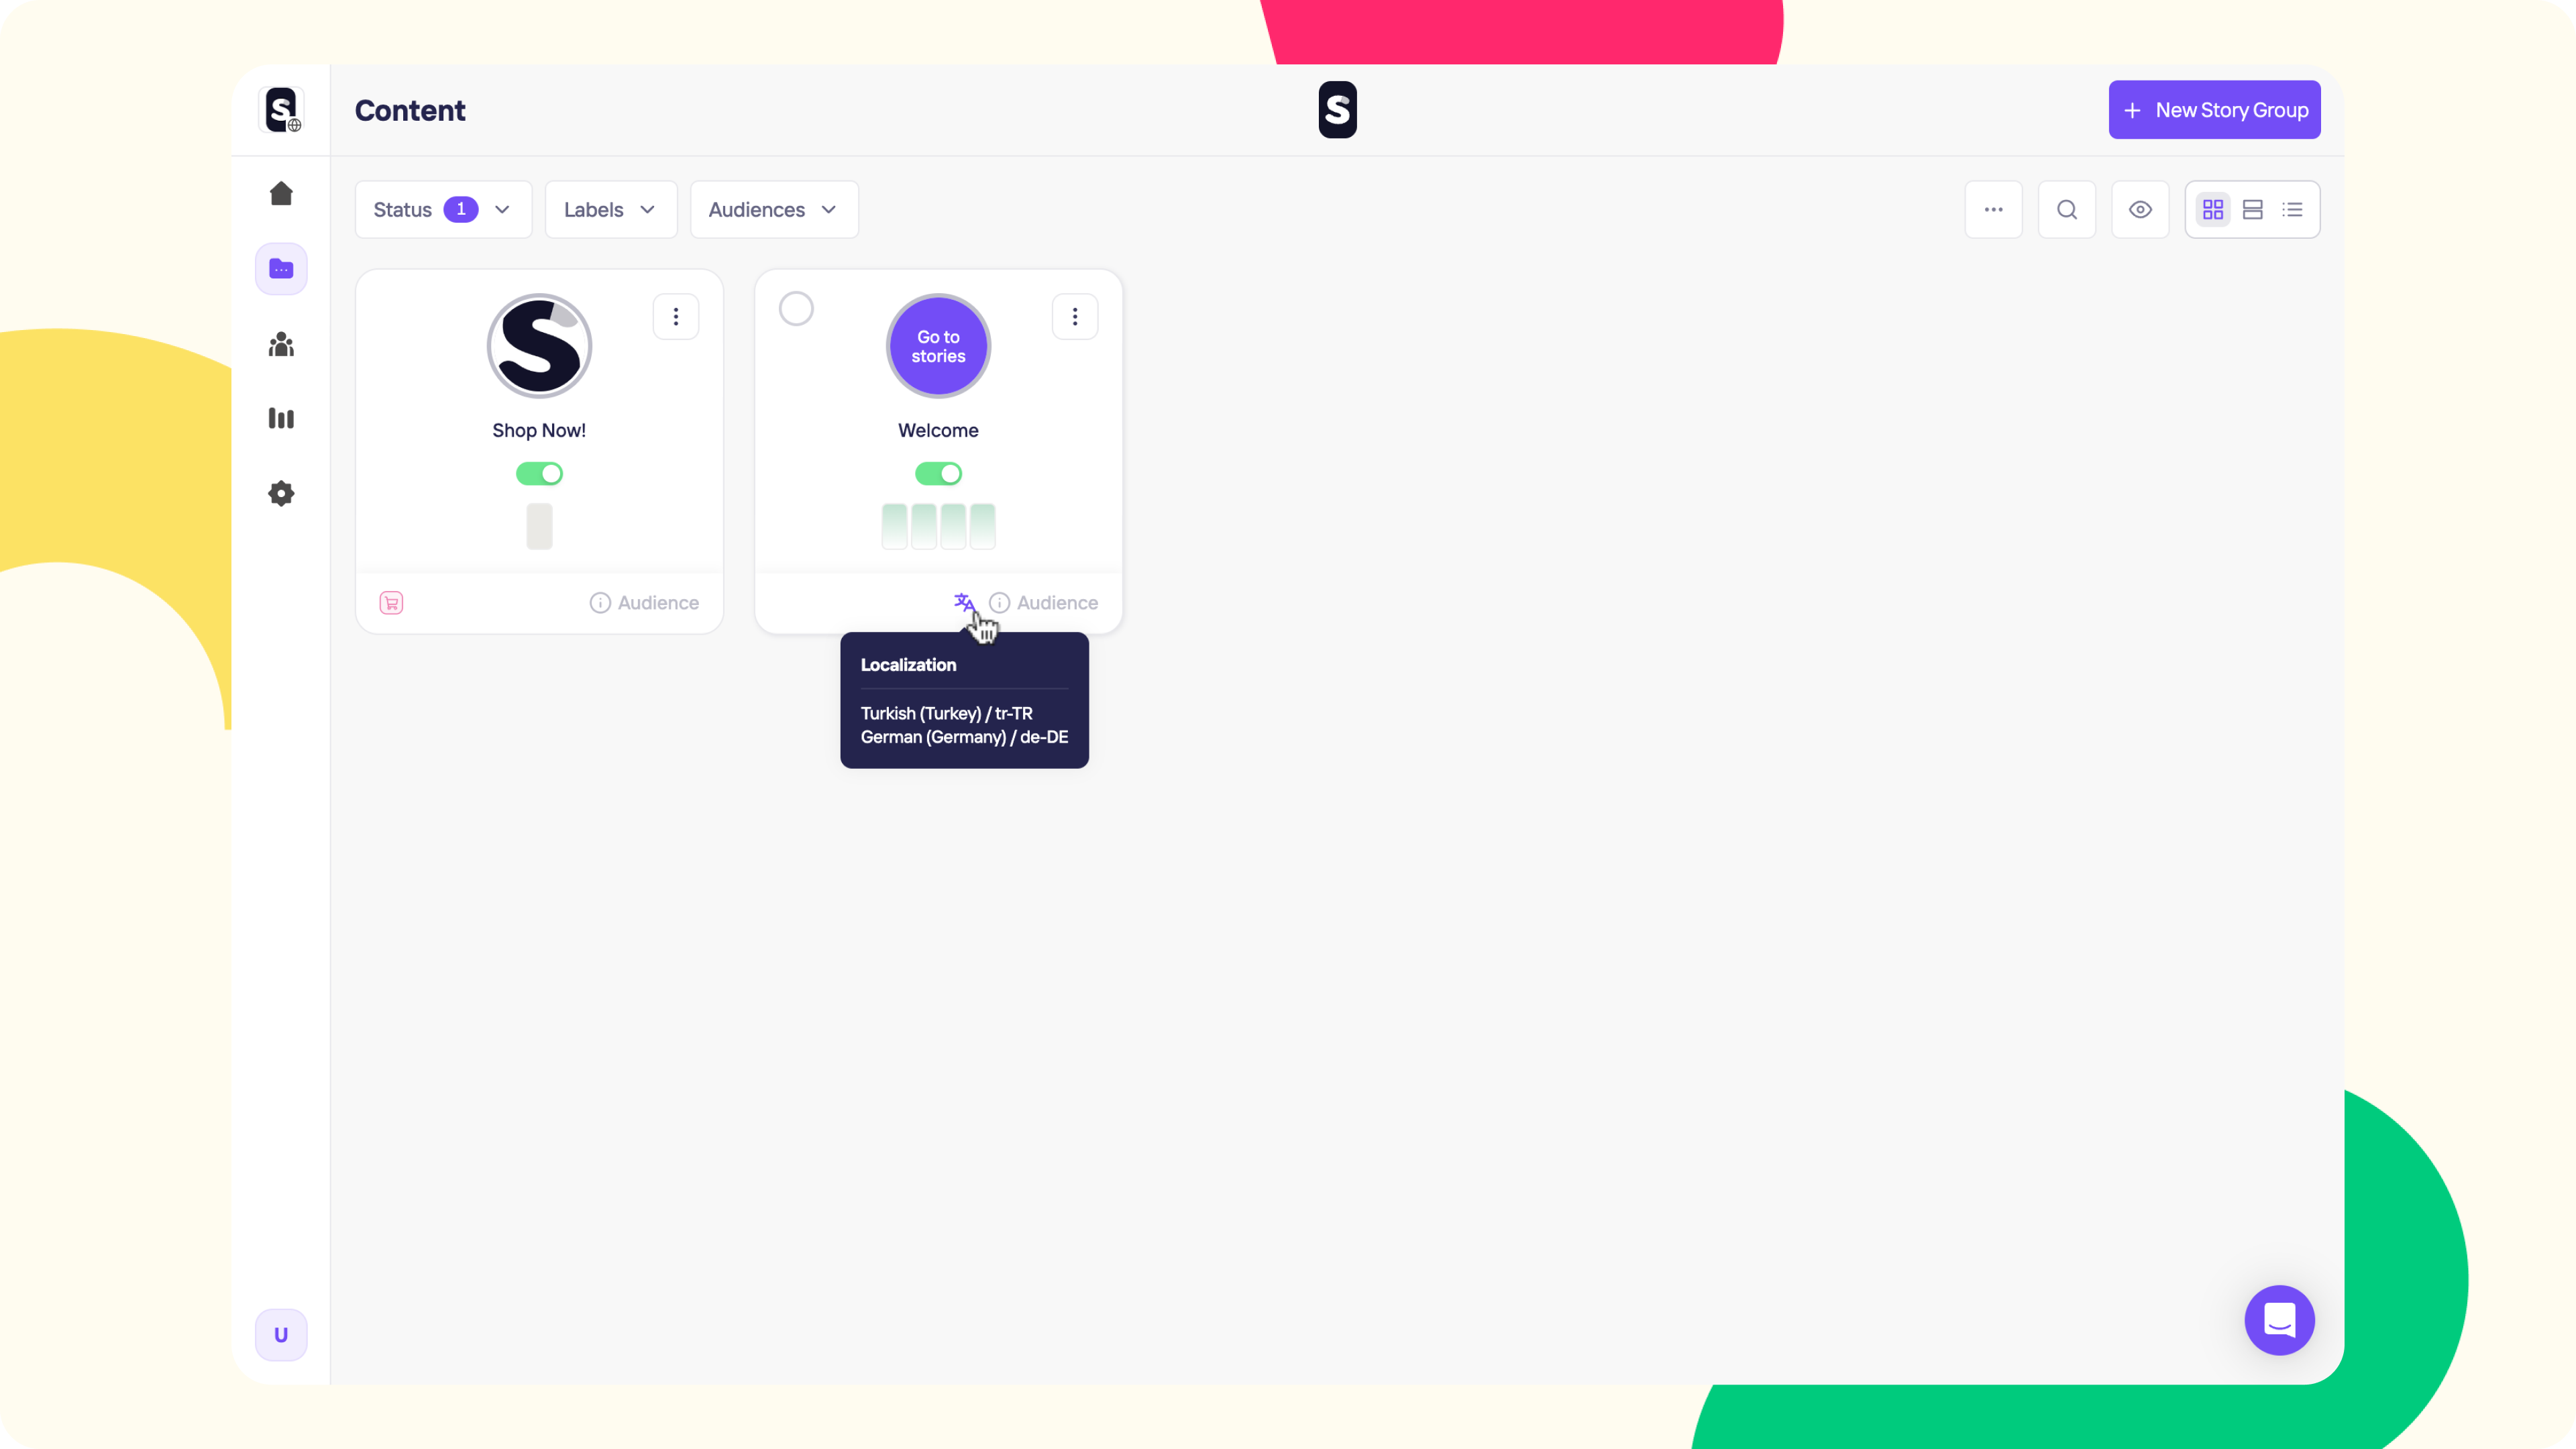
9. If a translation file is uploaded for the Story Group, you'll see a localization symbol appearing at the bottom of the Story Group card. When you hover over, you can see the translated languages there as well.
Warning
If you upload a new Story or make any changes for the texts included in the Story Group, make sure to update the localization file accordingly.
Tip
If you'd like to add a new language, you can follow the same steps. Storyly will always export the last imported file so that you don't loose any translation.
By utilizing this approach, you can seamlessly cater to a diverse audience without the hassle of managing numerous Story Groups.
Updated 6 months ago