Creating a Banner Content
How to create a Banner?
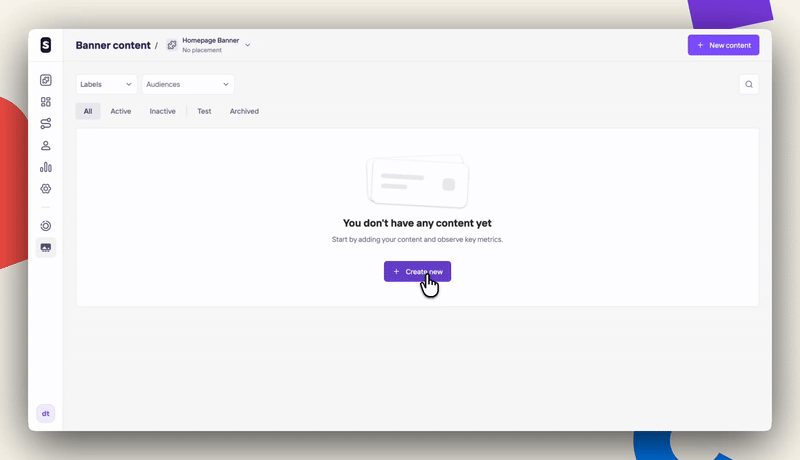
Once you have a Banner widget added at the Widget Library section and defined a design for it, you can go to the Banner content section to finally create them following the steps below:
Click on + New content button at the top left.
-
Step 1 of 3: Set up your slide
- Give your slide a name to help you identify it later. It's only visible to you. Then, choose one main goal of your banner so we can tailor the content. This part is optional, but helps us generate better suggestions for the future.
-
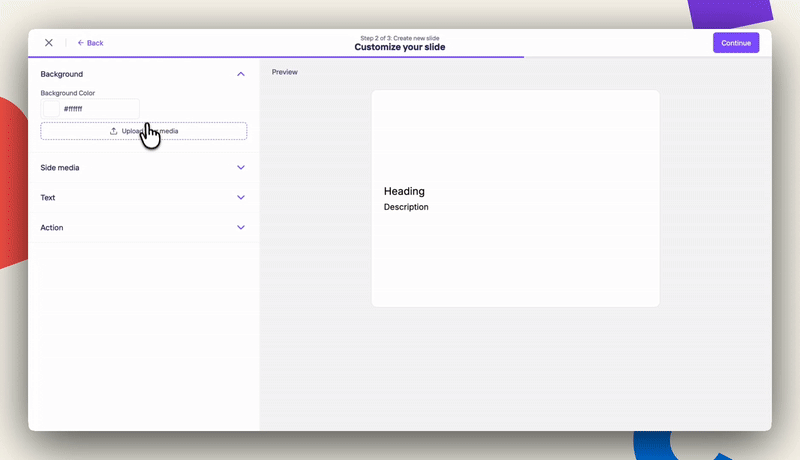
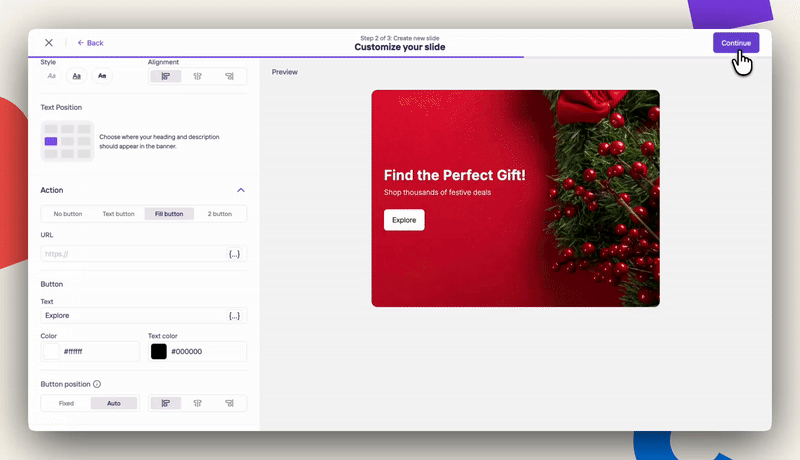
Step 2 of 3: Customize your slide
On this step, you will fully customize your banner content:- Choose a background color or upload a slide media
- Place text - Heading & Description (optional). You can choose the font, colors, alignment and also personalized it for each of your users.
- Finally, place a call-to-action to it (optional) and its position.
-
Step 3 of 3: Set schedule and targeting
- As usual, we provide you flexibility with the timing of your content. You can adjust the Start and End Dates under Schedule. If you don't set a specific end time, they'll be there forever.
- Under the Audience section, you can target different user segments by using either Labels or Audience structures.
Once you are done with the edition, click on Create button in the right corner.
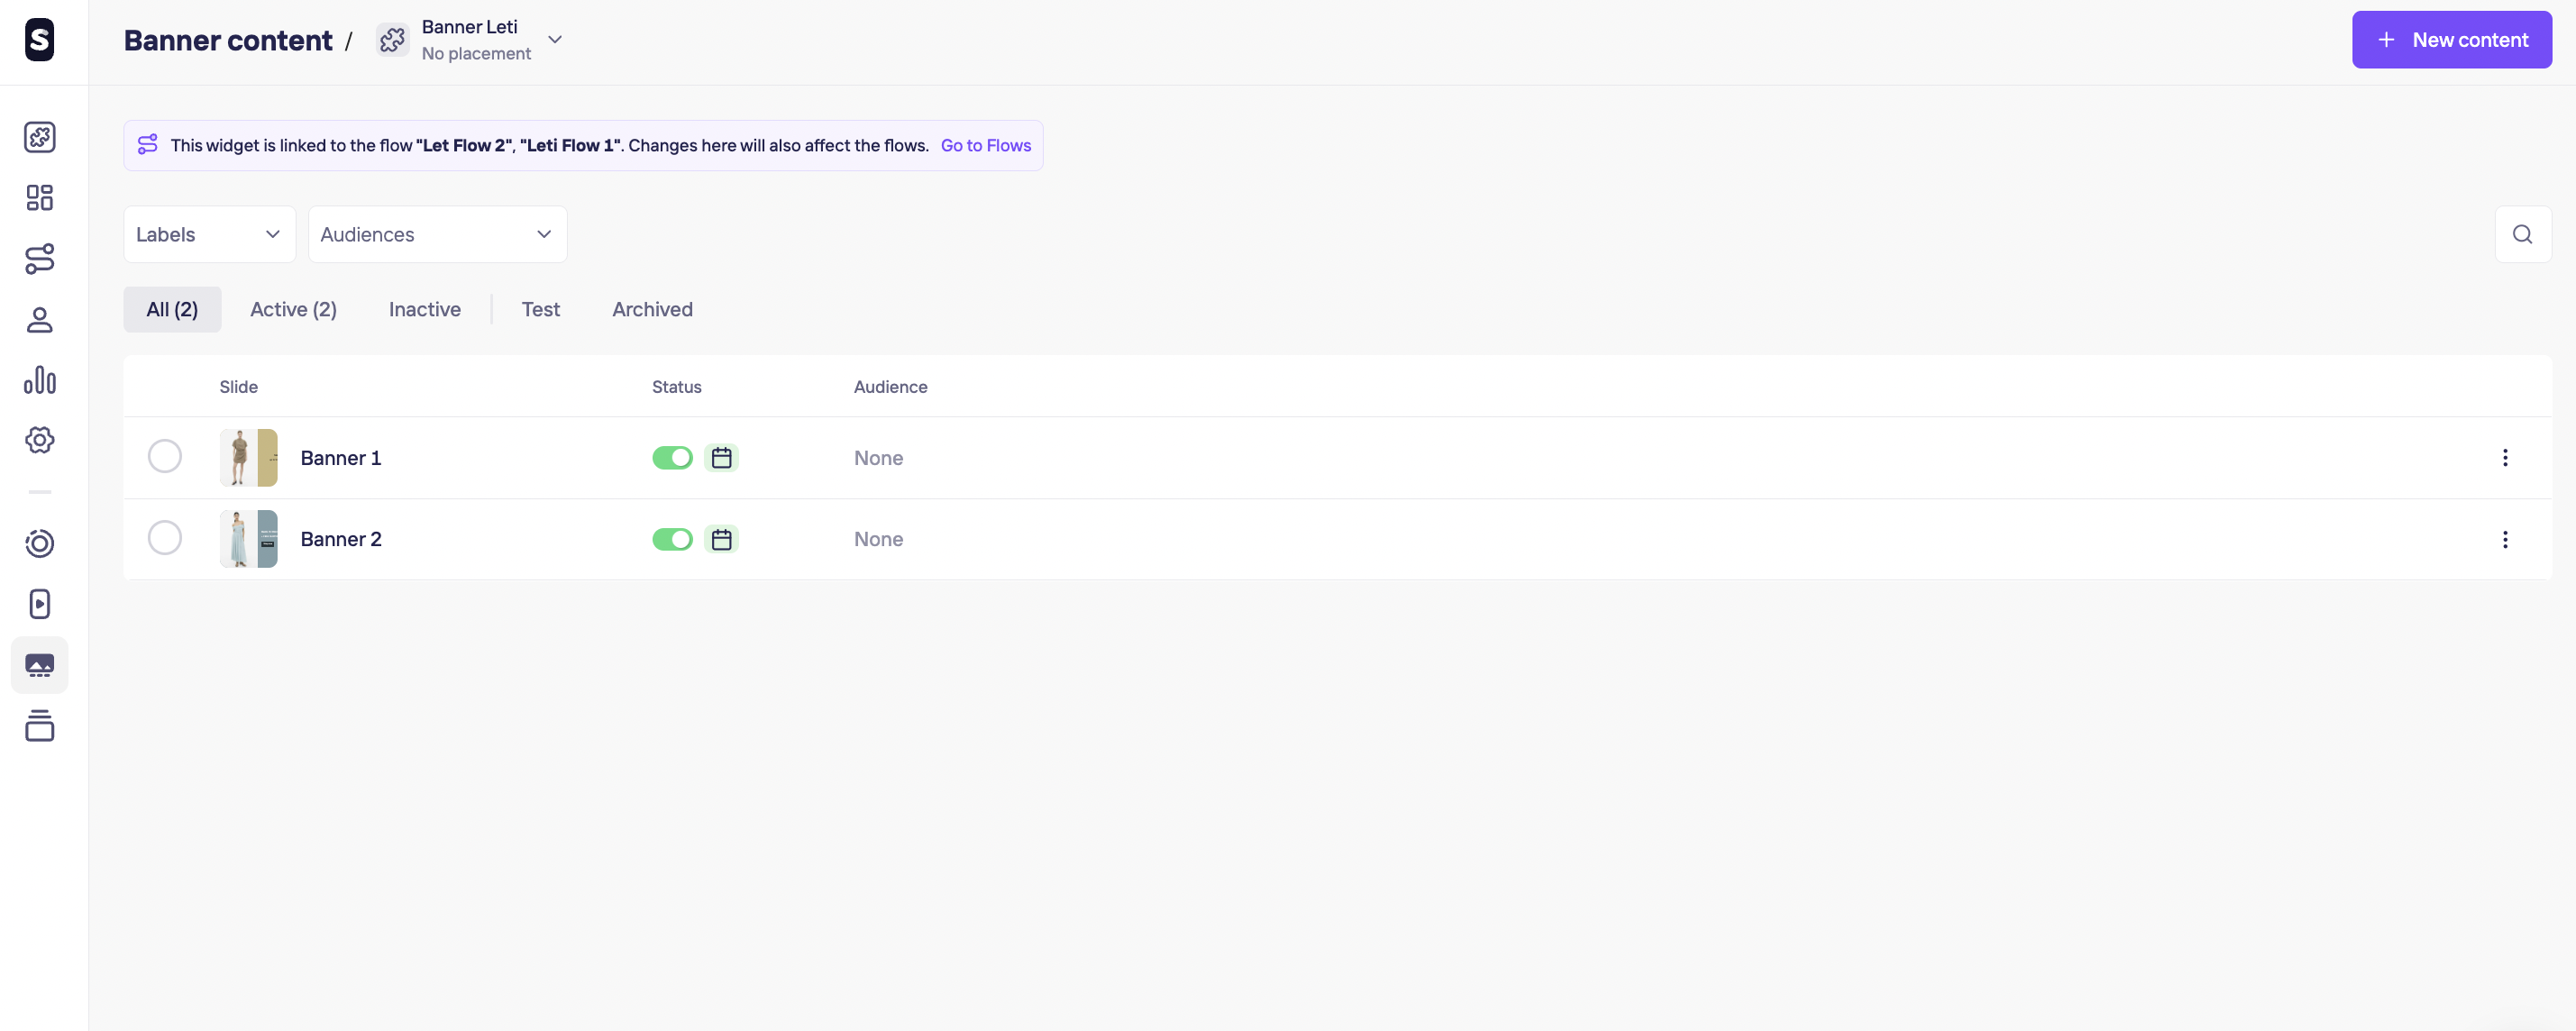
Now, you should see this and all the slides you have created under this widget. You can drag & drop to reorganize, activate, deactivate or archive the ones you don’t need anymore. If you need to delete them, you can do so after archiving them.
Note:
You can delete any content in the Archive section. If you delete them all analytics data related to that content will be deleted as well. You can keep them in the Archive section to have a much lighter dashboard experience and unarchive them back always when needed. If you still want to delete them, remember you should first Archive them > Go to the Archived section > Click on the Banner content three dots > Click on Delete.
Updated 4 months ago