Connecting CleverTap Audiences with Storyly
How to use CleverTap and Storyly integration?
Importing Audiences from CleverTap
CleverTap & Storyly Integration has 2 different aspects:
- With the Past behavior segments that you have on CleverTap, you can create Campaigns & Journeys to target that specific segment with Stories or personalize their Story experience.
- With the Live behavior segments, when your segments on CleverTap is updated by the actions taken in your app and, you can update your segment on Storyly accordingly.
This integration has been done with Amazon EventBridge and thanks to it, the connection in between is continuous and real-time.
Before Starting
- Please make sure that you've completed the Amazon EventBridge Setup.
- Please make sure that you're passing Custom Parameter to the Storyly SDK.
Custom Parameter
Custom Parameter is used to identify your user. Please make sure that you're passing the same identifier that you use with CleverTap.
After setting up the connection, there are 2 ways to use CleverTap & Storyly Integration.
- via Campaigns
- via Journeys
Let's think of a scenario where we will show certain Stories to users who are recently registered and have some items in their carts but not completed their purchase yet. Also, we don't want to show those Stories when the user completed the purchase. So, we might be showing a Story with a Discount Code in it for those users, as an incentive for them to complete their purchases 🙂
Since we need a dynamic structure where users will be added and removed from the audience according to actions taken, we'll move forward by creating a Journey for this flow.
Tip
If you already have ready-to-use Segments, you can also click on Journey button under Do more with this segment section in the Segment page.
1. On the CleverTap Dashboard, at the left pane, we'll click on Journeys and Create New Journey.
While defining journey settings, we've two options:
- At a specific time
- By an event trigger
If we choose At a specific time option, we'll be able to use Past Behavior of users as a criteria and if we choose By an event trigger option, we'll be using Live Behavior of users. Since we'd like to setup a real-time scenario, we'll move forward with the By an event trigger option.
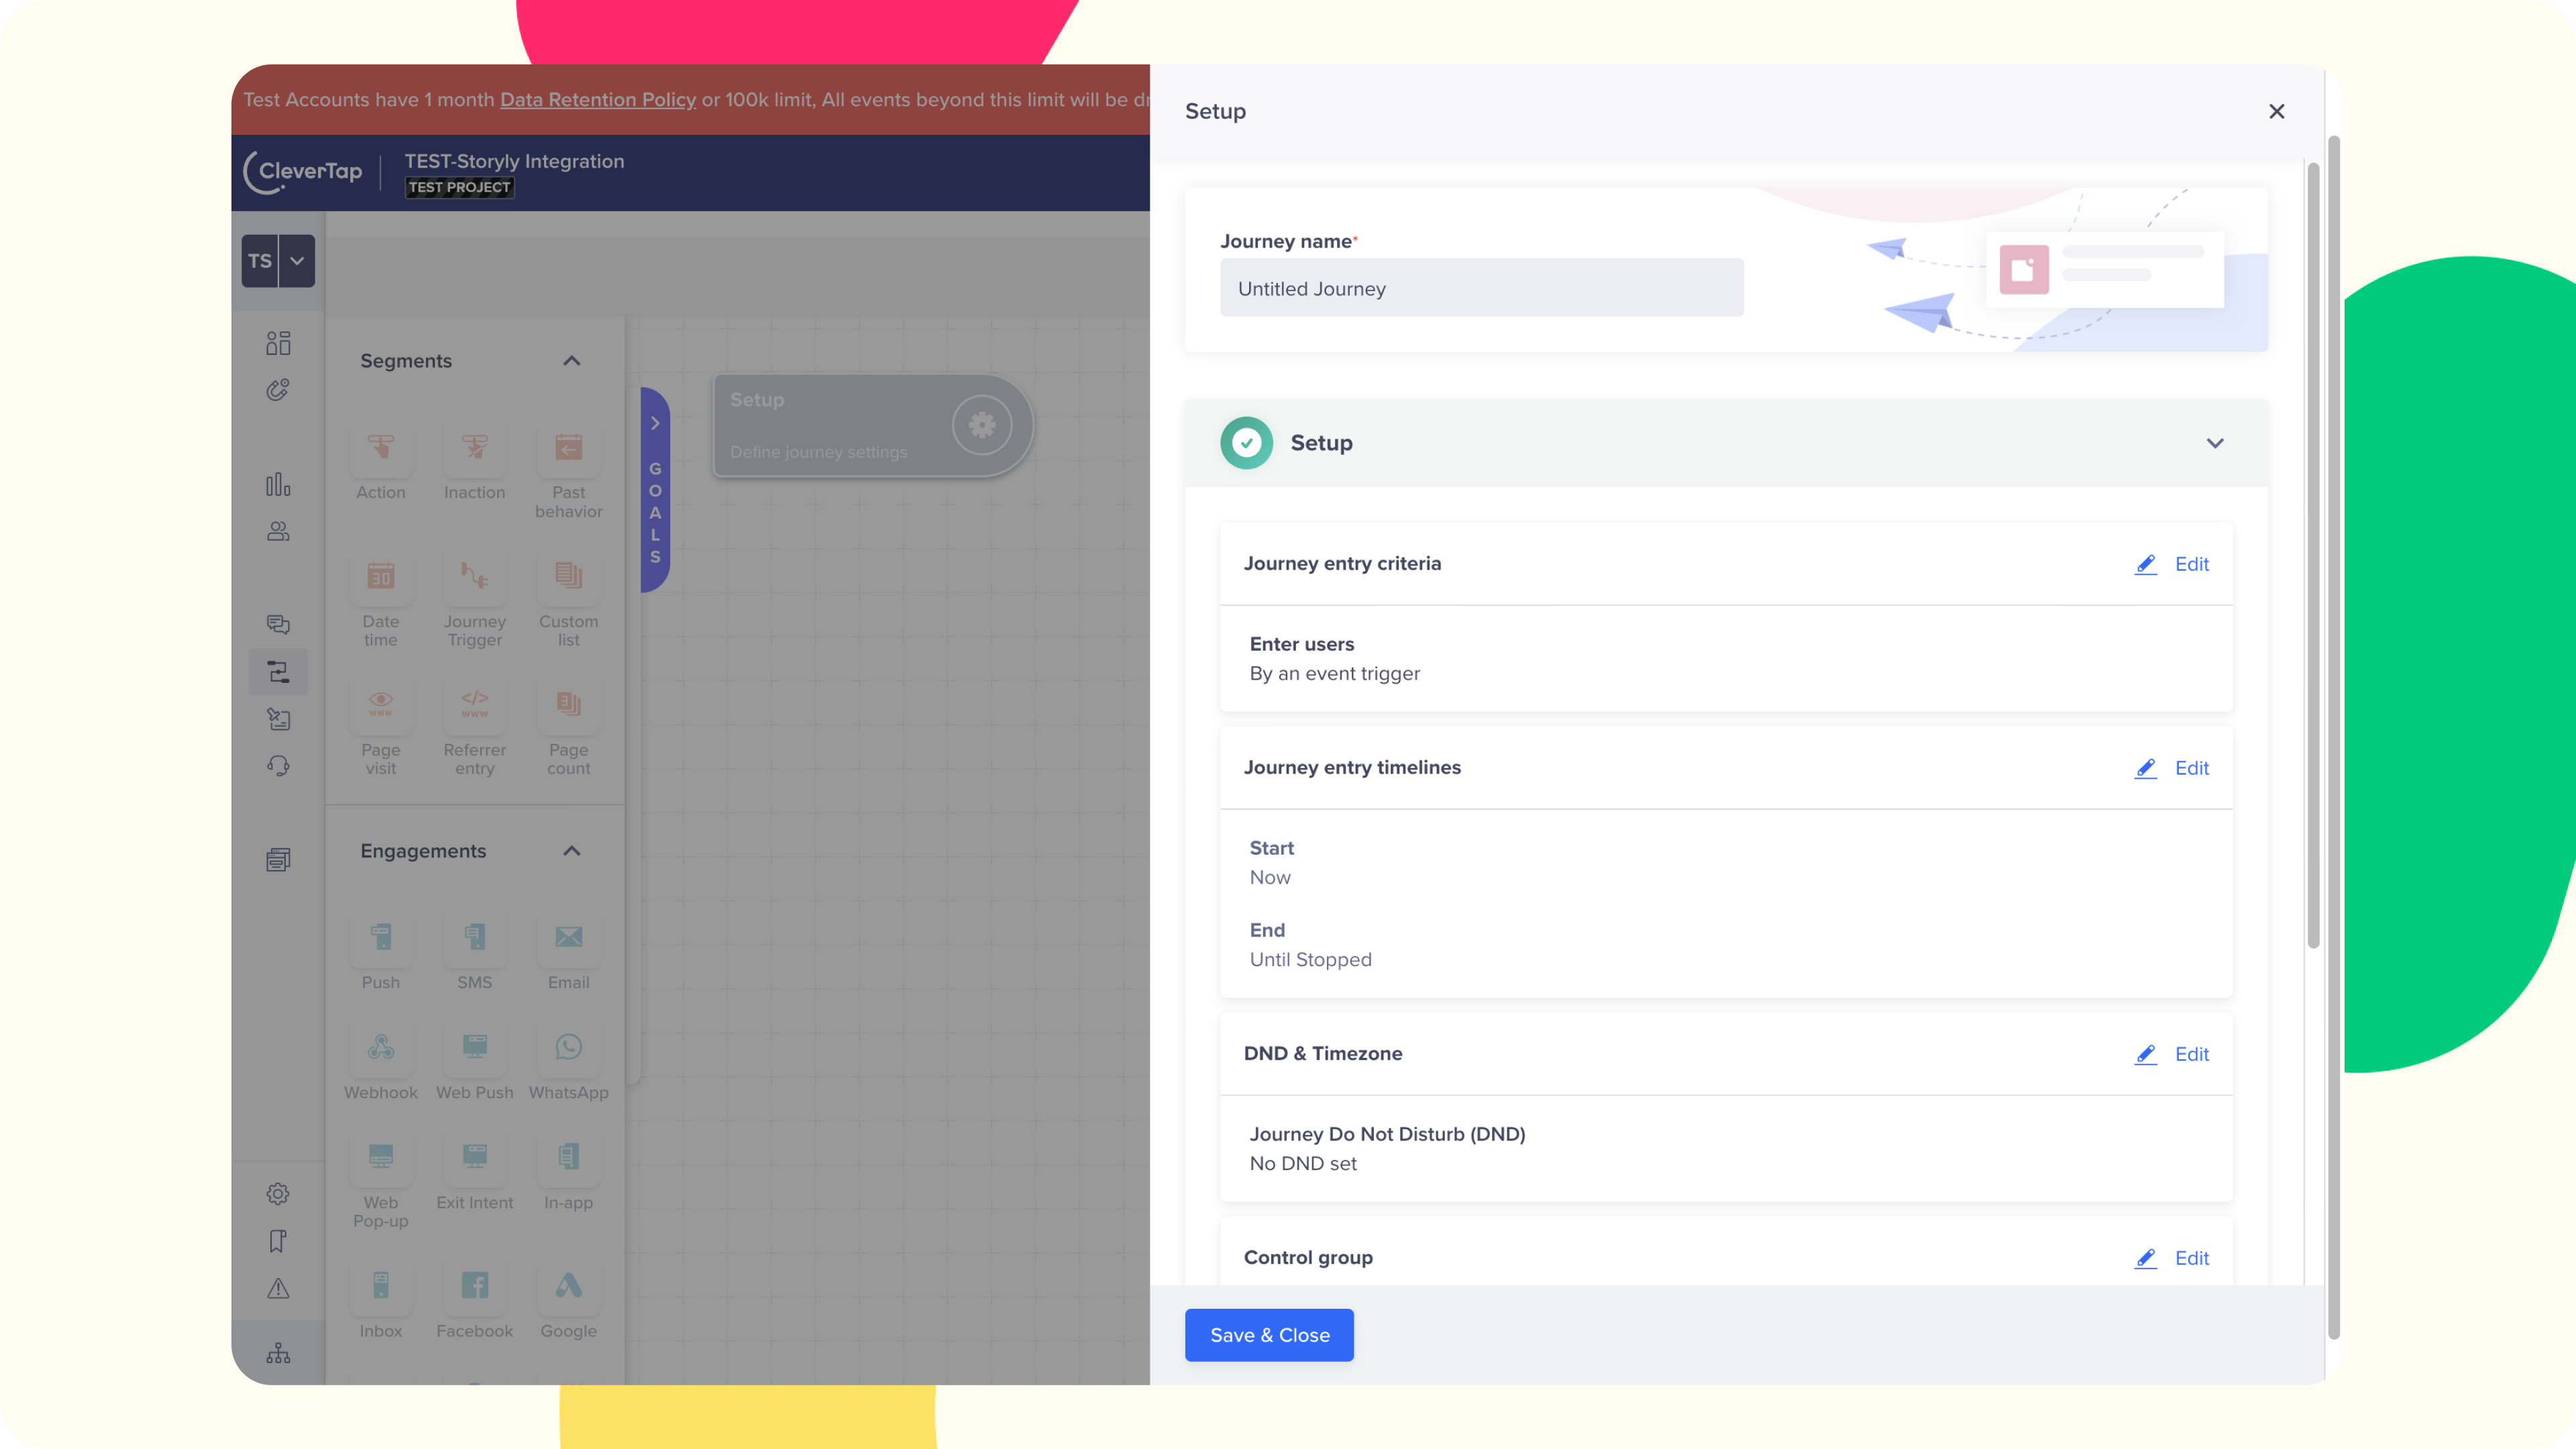
2. Once we define the journey settings, now, we can shape the user path. We can start with placing an Action. After giving a name to our segment, we can select who we'll target.
We need our users to be Registered first. So, we'll select Registered under As soon as user does selection. (You can use your own custom events here.)
3. Secondly, we need another Action which is AddToCart.
To connect these nodes, please hover over the door button on the first action and click on Yes then select the second node.
4. So, now, we've filtered registered users who have an item in their carts. At this stage, we need to put an Amazon EventBridge as a node and upsert (update & insert) the audience on the Storyly side.
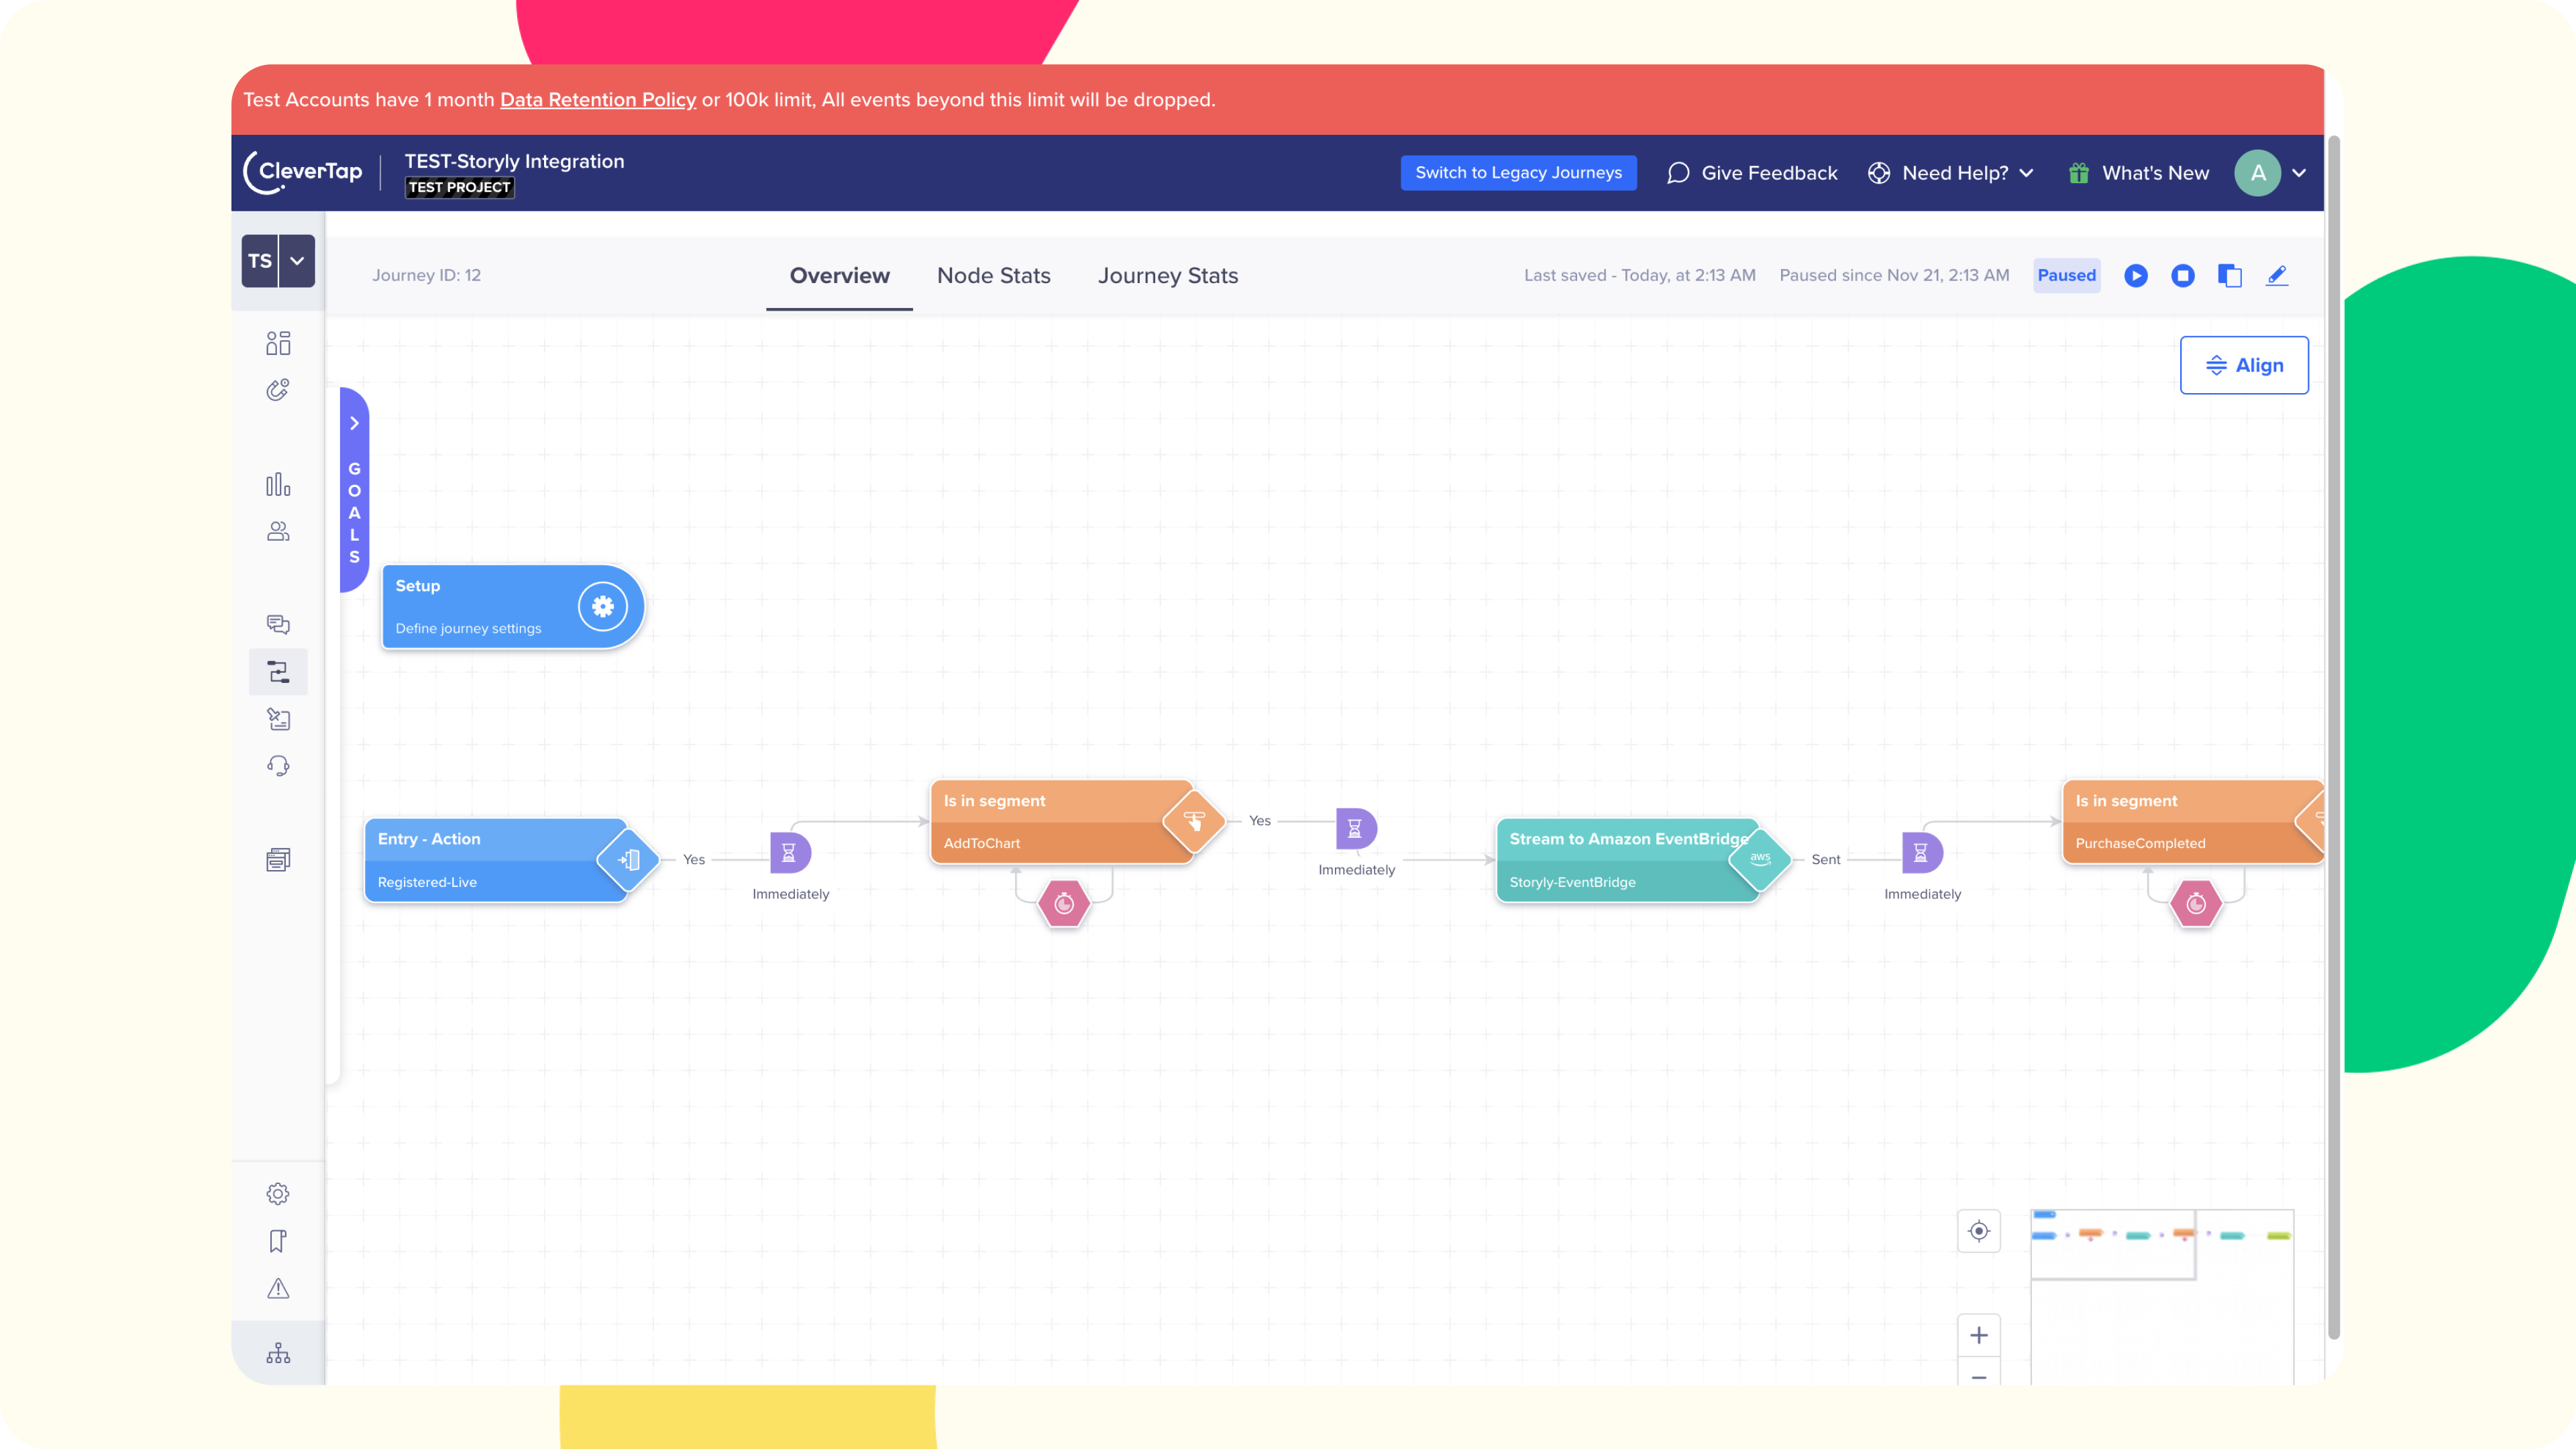
Amazon EventBridge setup
Please follow step 9 and 10 while editing the Amazon EventBridge node and use upsert operation.
5. Next, we need to remove users who completed their purchases from our audience so that they'll no longer see the "incentive" Story. To do that, we need to put another Action node right after Amazon EventBridge node. We'll choose PurchaseCompleted event for this node.
6. Then, again, we need to delete our user from the audience on the Storyly side, so that users who already purchased will not see the Story with discount code. We'll place one more Amazon EventBridge node after PurchaseCompleted event node.
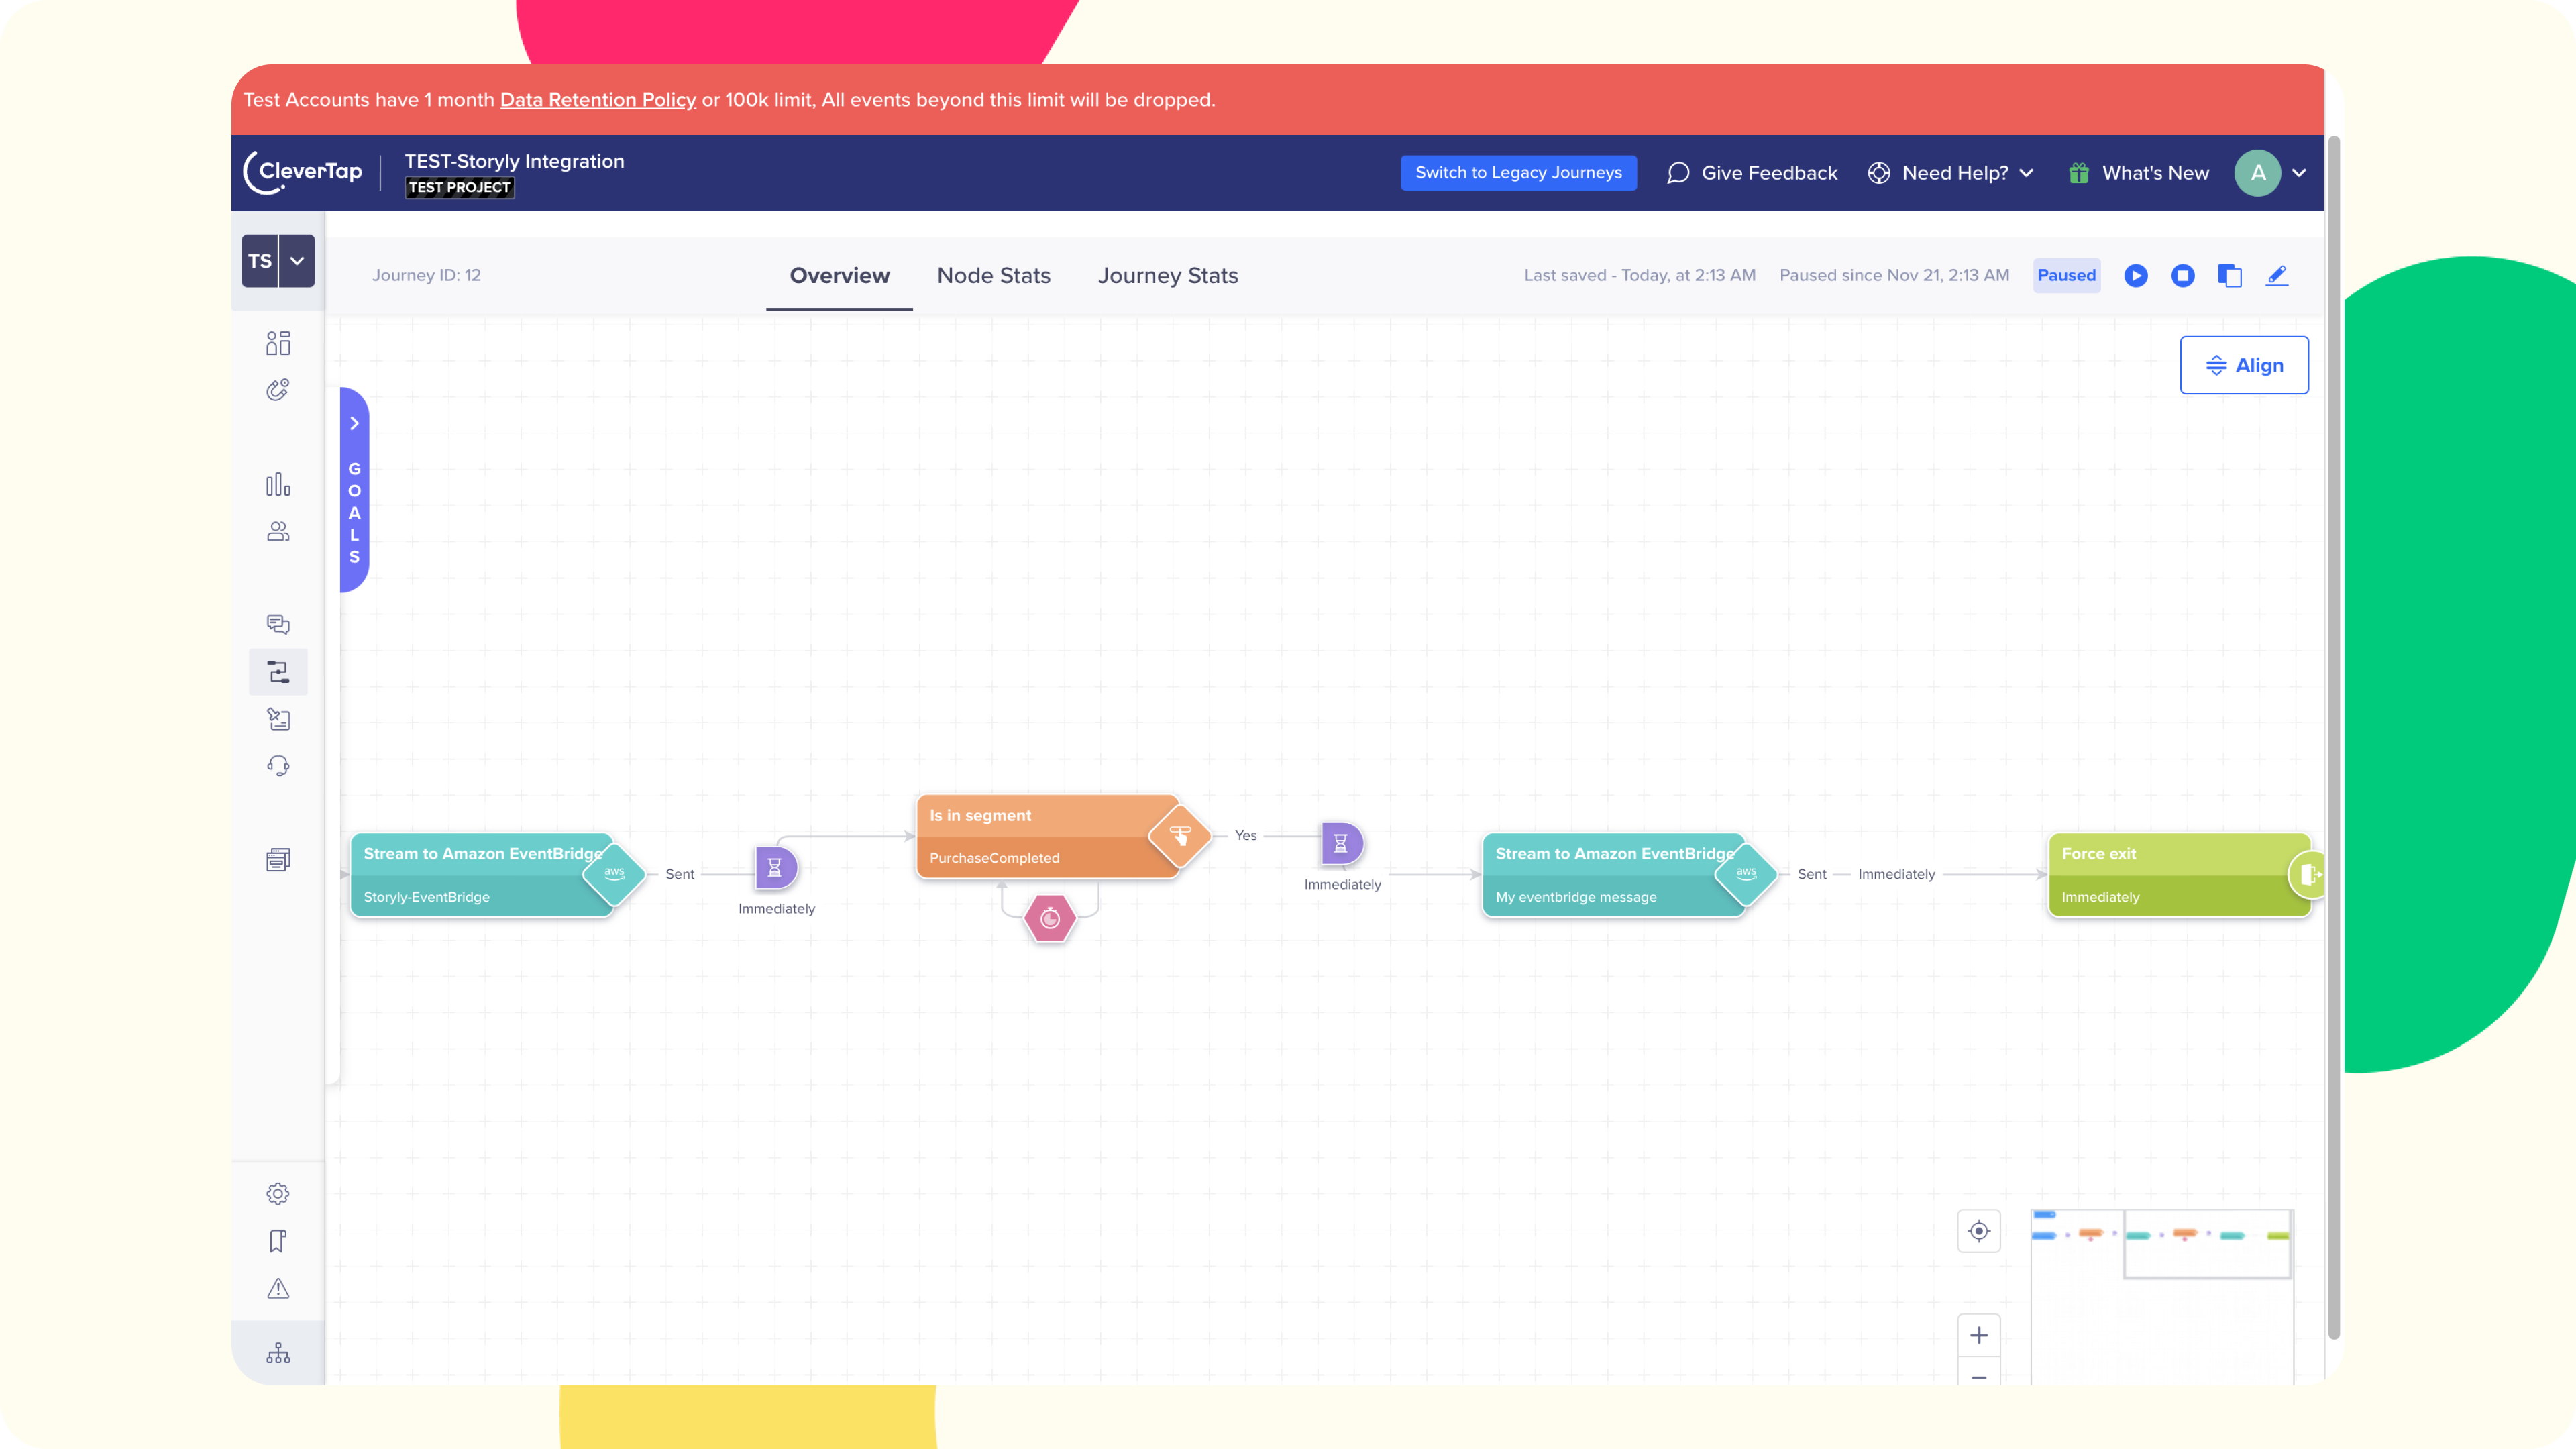
Amazon EventBridge setup
Please follow step 9 and 10 while editing the Amazon EventBridge node and use delete operation.
7. As the last step, we need to place Force exit node to let our users go through this flow.
This was an example way of using the CleverTap <> Storyly Integration. Since it's a continuous and real-time integration, it provides flexibility to create different scenarios. If you've any questions regarding the integration, please feel free reach out to us.
Exporting Audiences to CleverTap
With the CleverTap integration, now, you can leverage the Create Audiences from the Outcome of Interactive Components feature of Storyly and send these audiences from Storyly to CleverTap as User Properties.
Remember
You have to have your custom parameter setup between Storyly SDK & your app. For custom parameter setup, you can check our SDK documents:
There are a few steps you have to complete to connect the CleverTap account with Storyly.
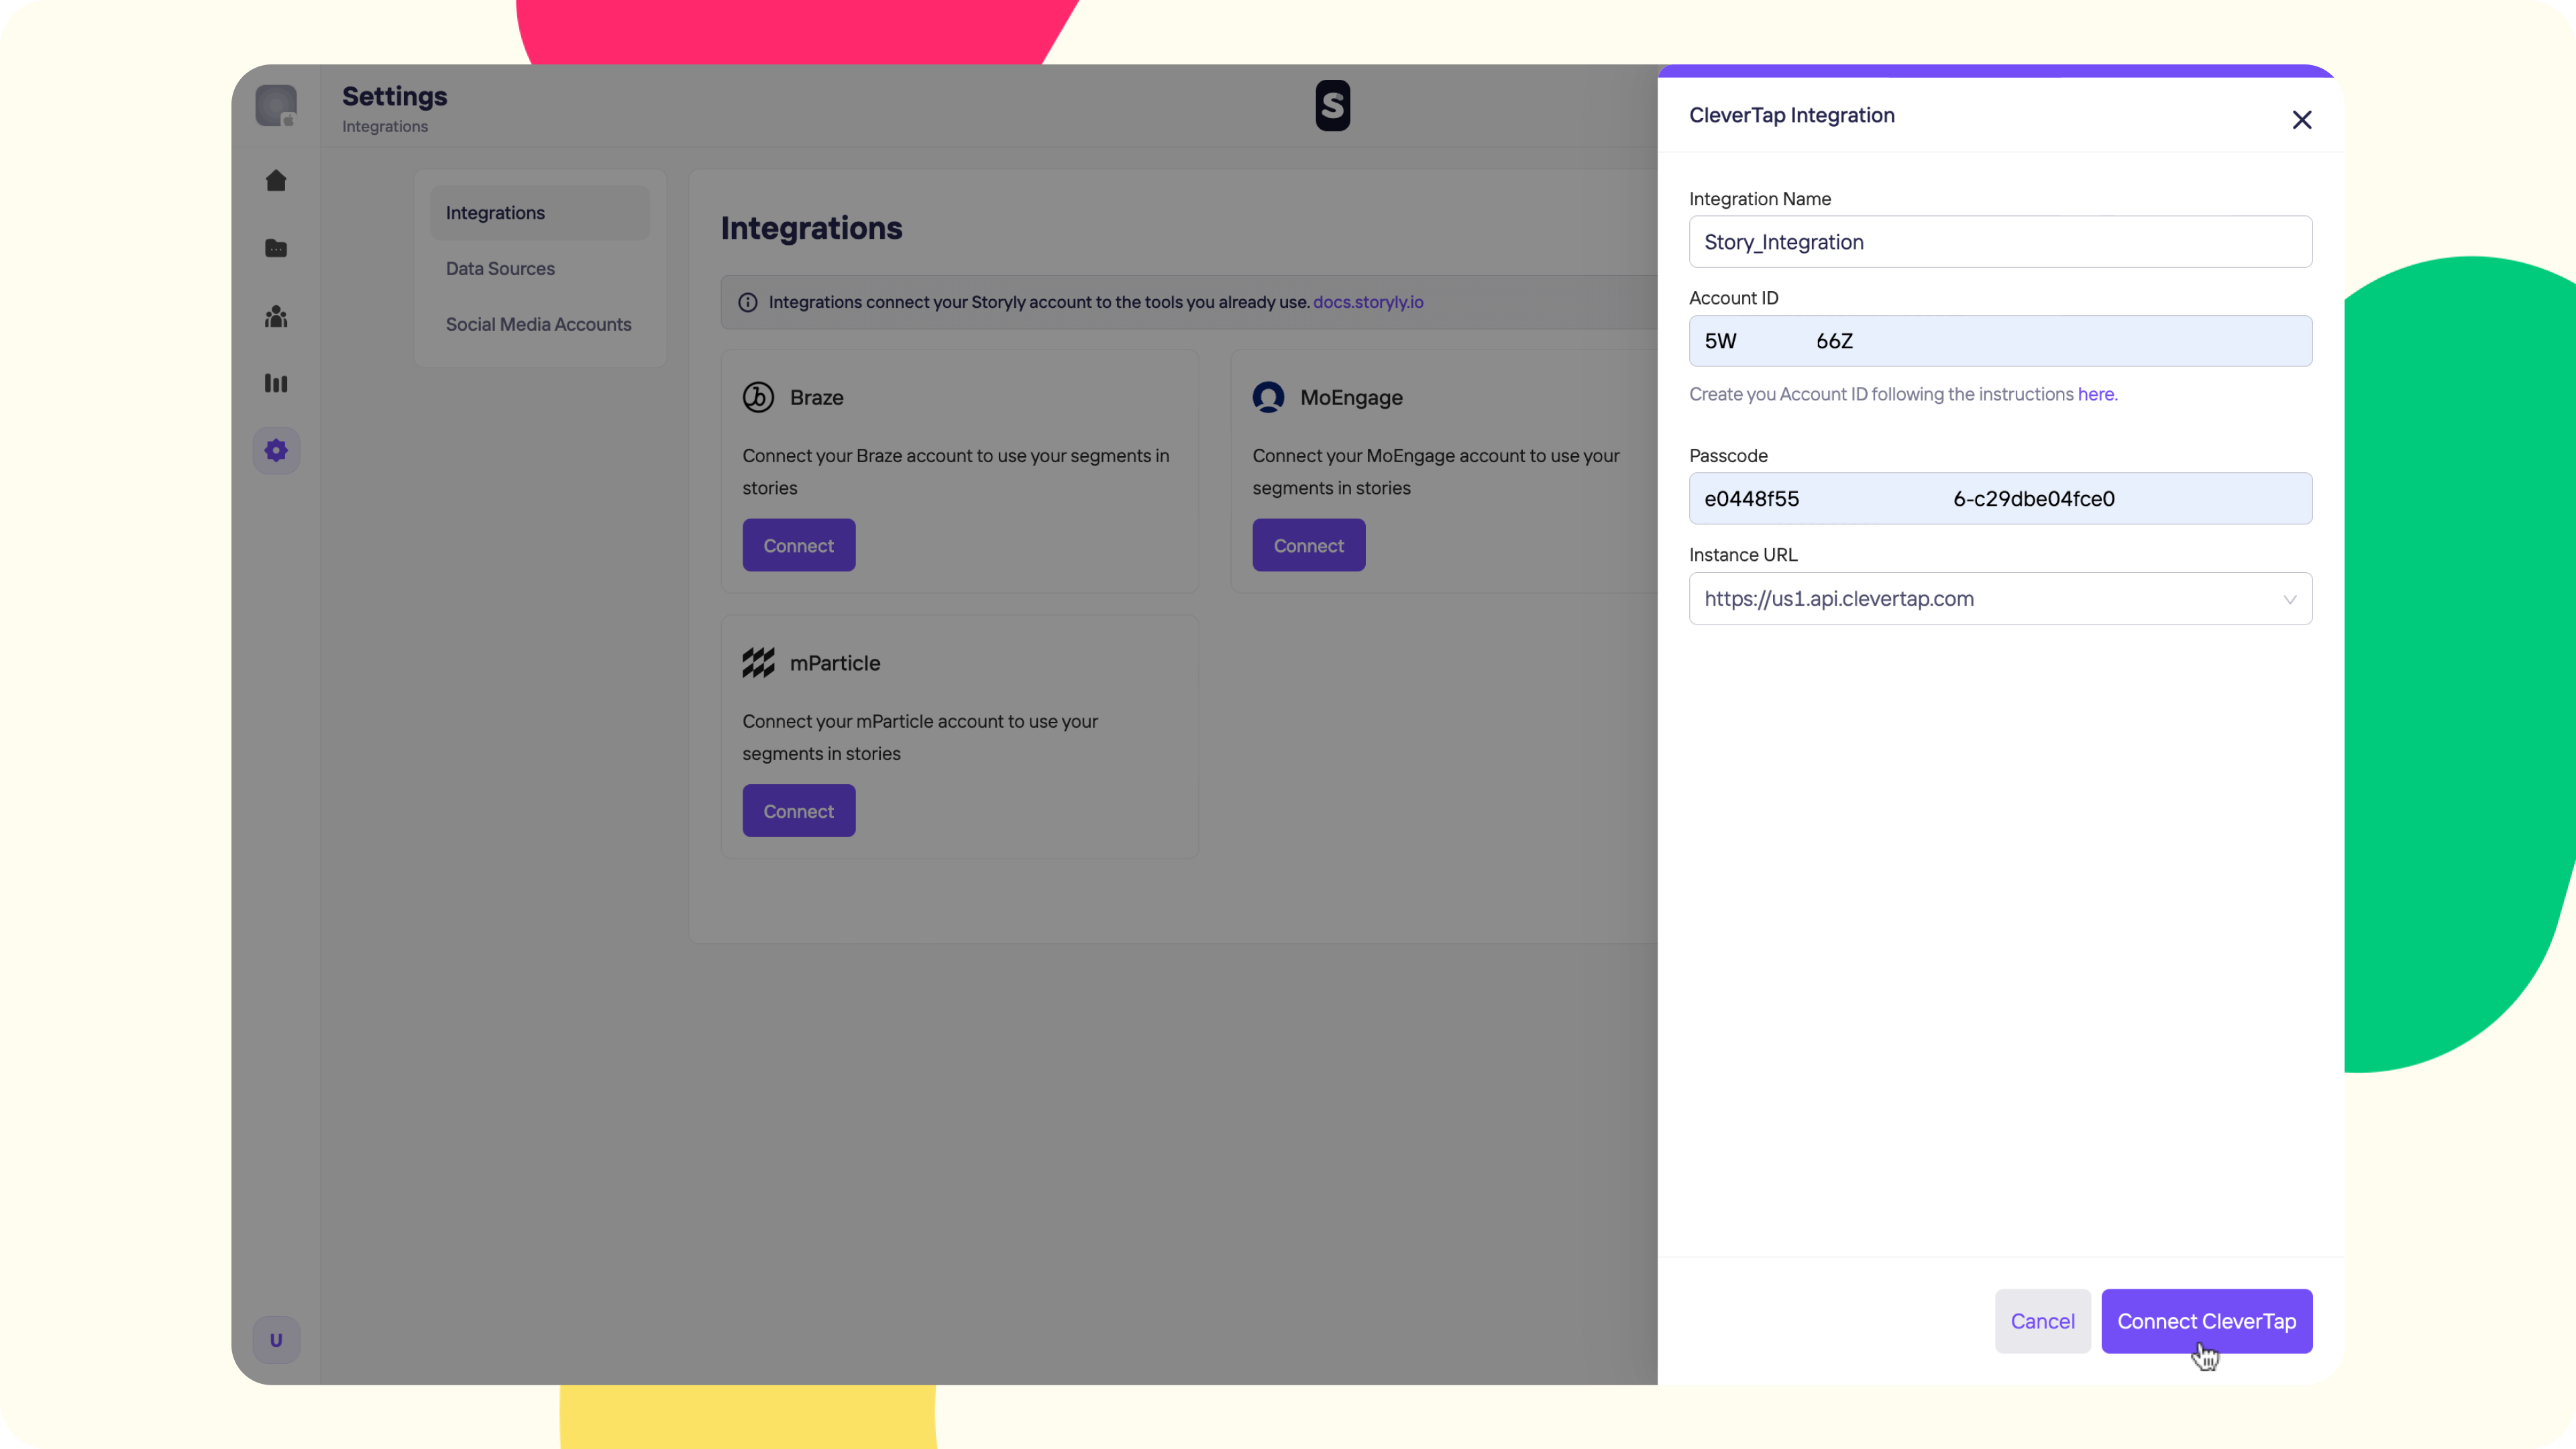
Let's start with connecting the CleverTap account on Storyly Dashboard. To do that, please go to Settings and find Integrations tab. Under Integrations, you'll see CleverTap. Please click on Connect.
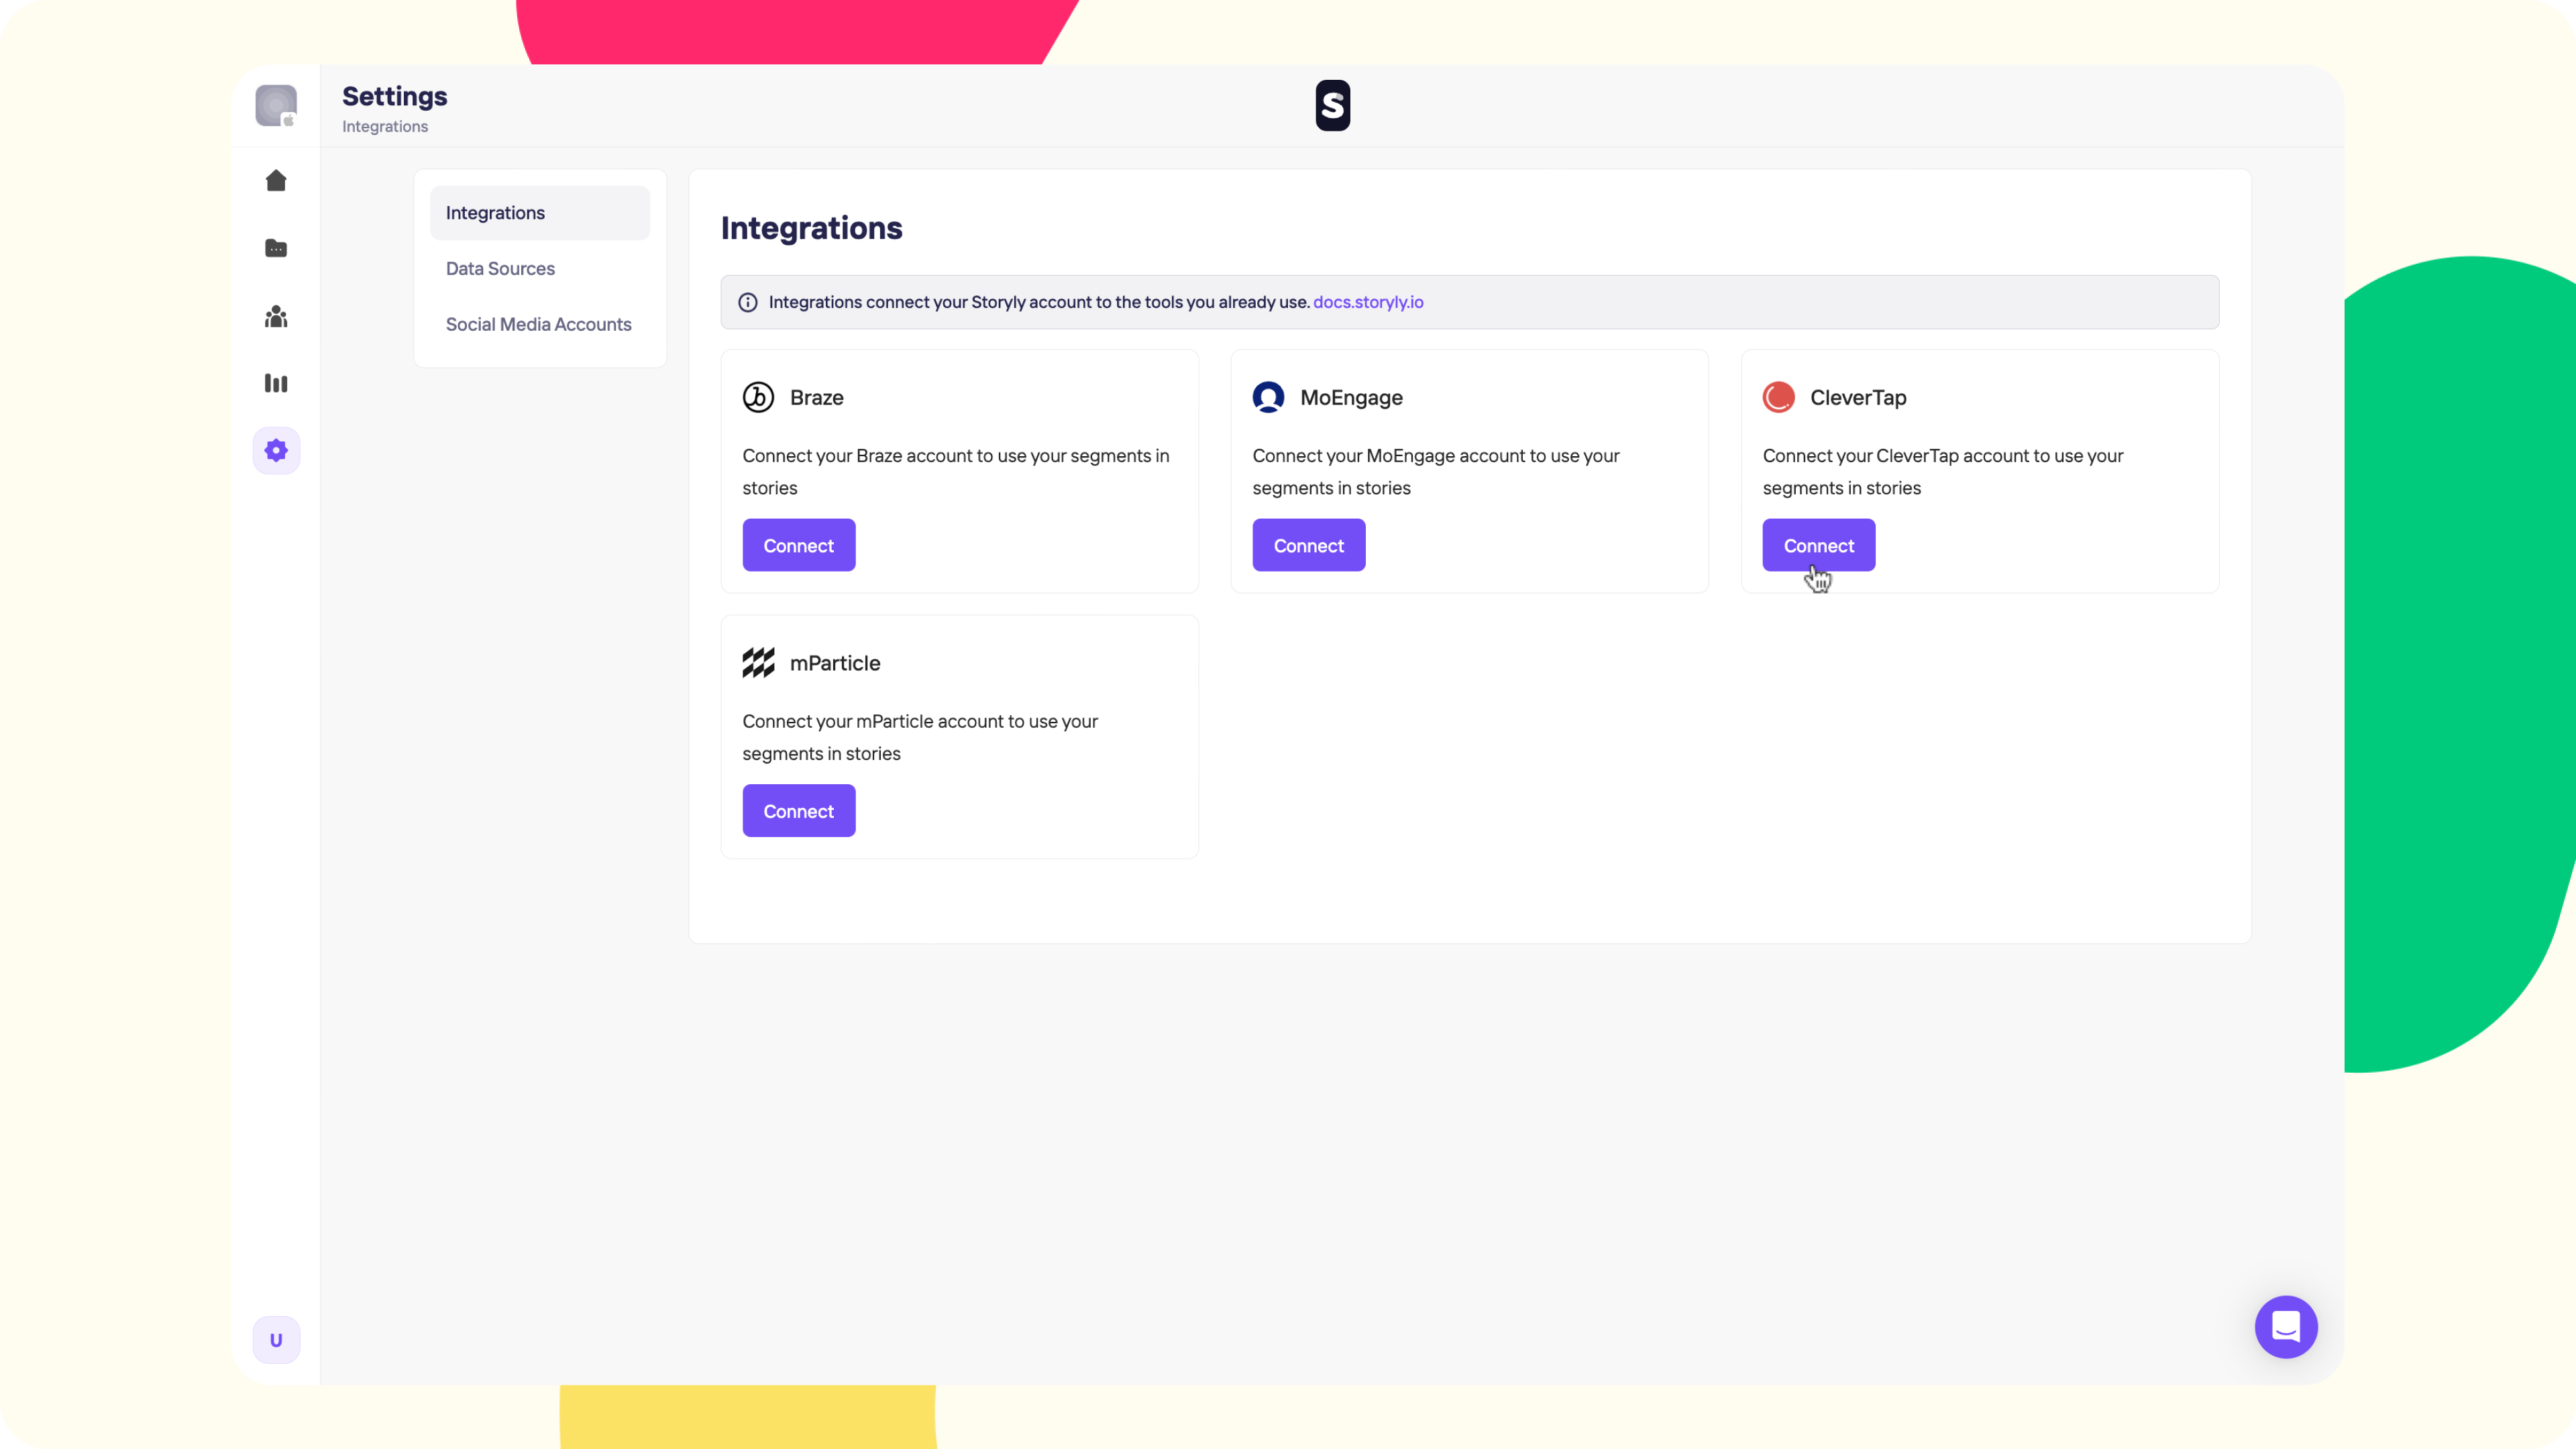
When you click on Connect, you'll be asked to fill in 4 fields which are:
- Integration Name
- Account ID
- Passcode
- Instance URL
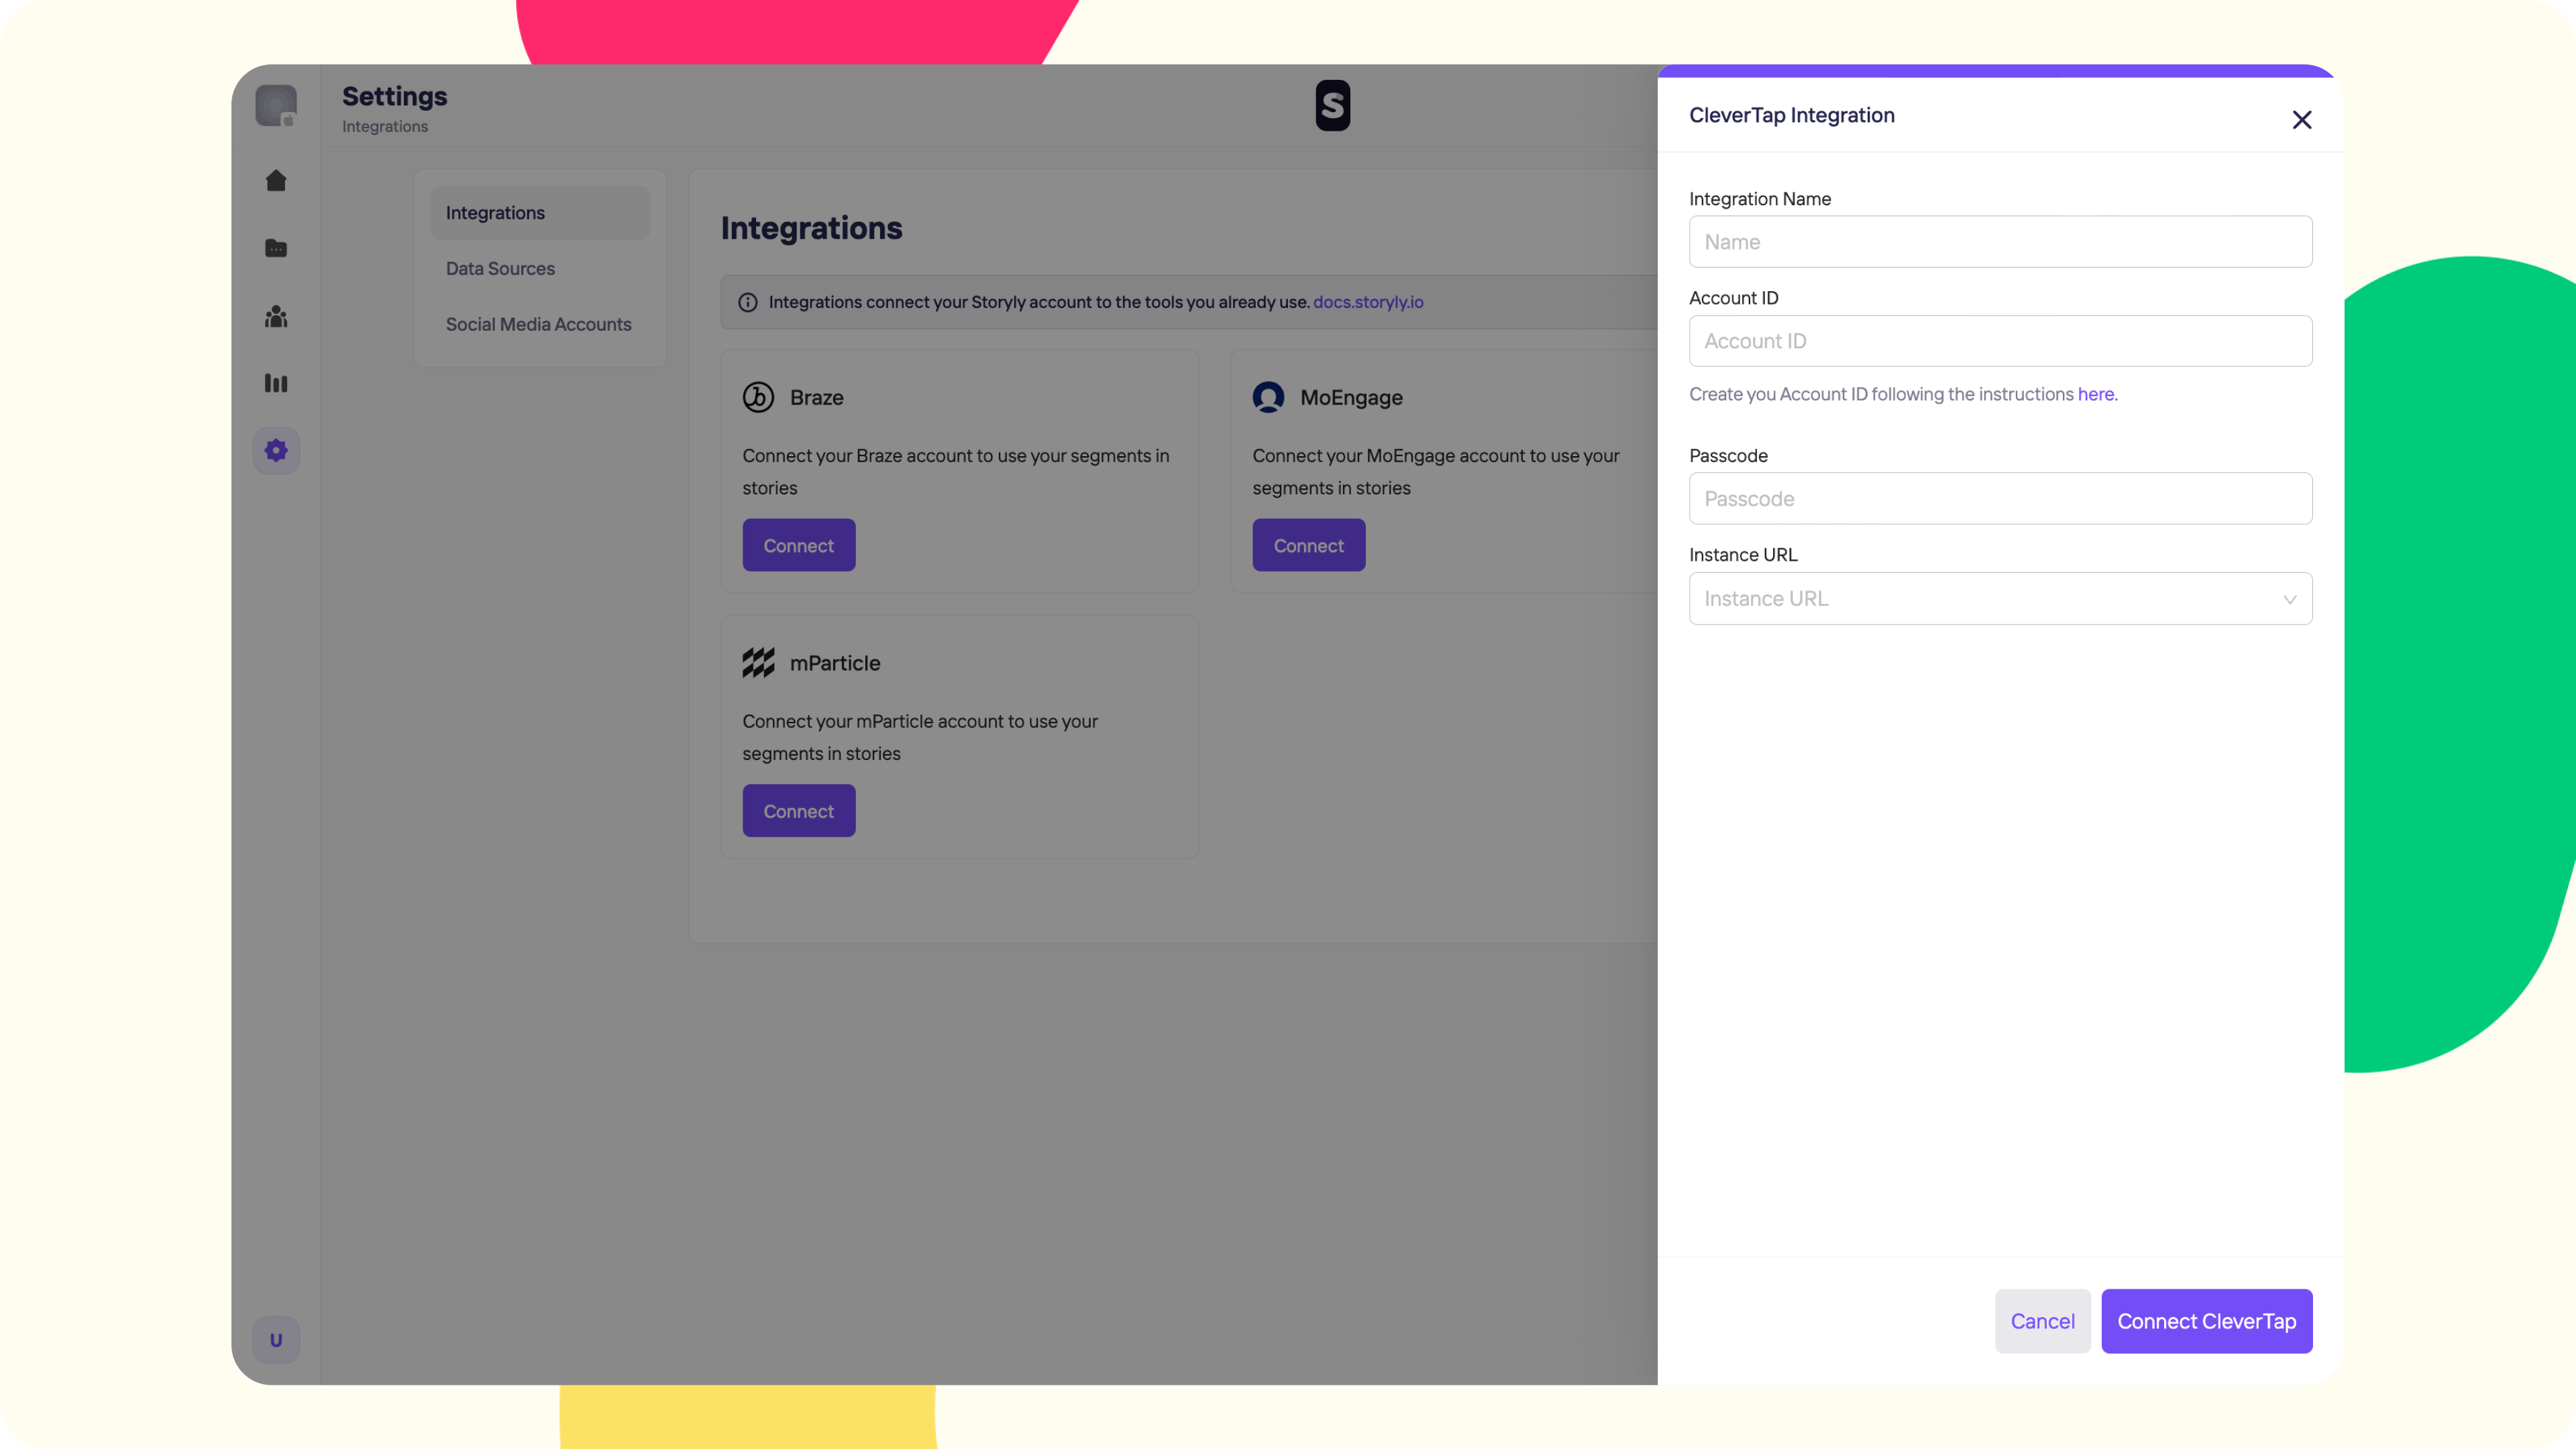
1. You may have more than 1 integration, that's why you can give any name to Integration as you want, to differentiate one from another.
2. To fill in Account ID, Passcode, and Instance URL, please go to the CleverTap Dashboard, click on Settings on the left pane, and find the Project section.
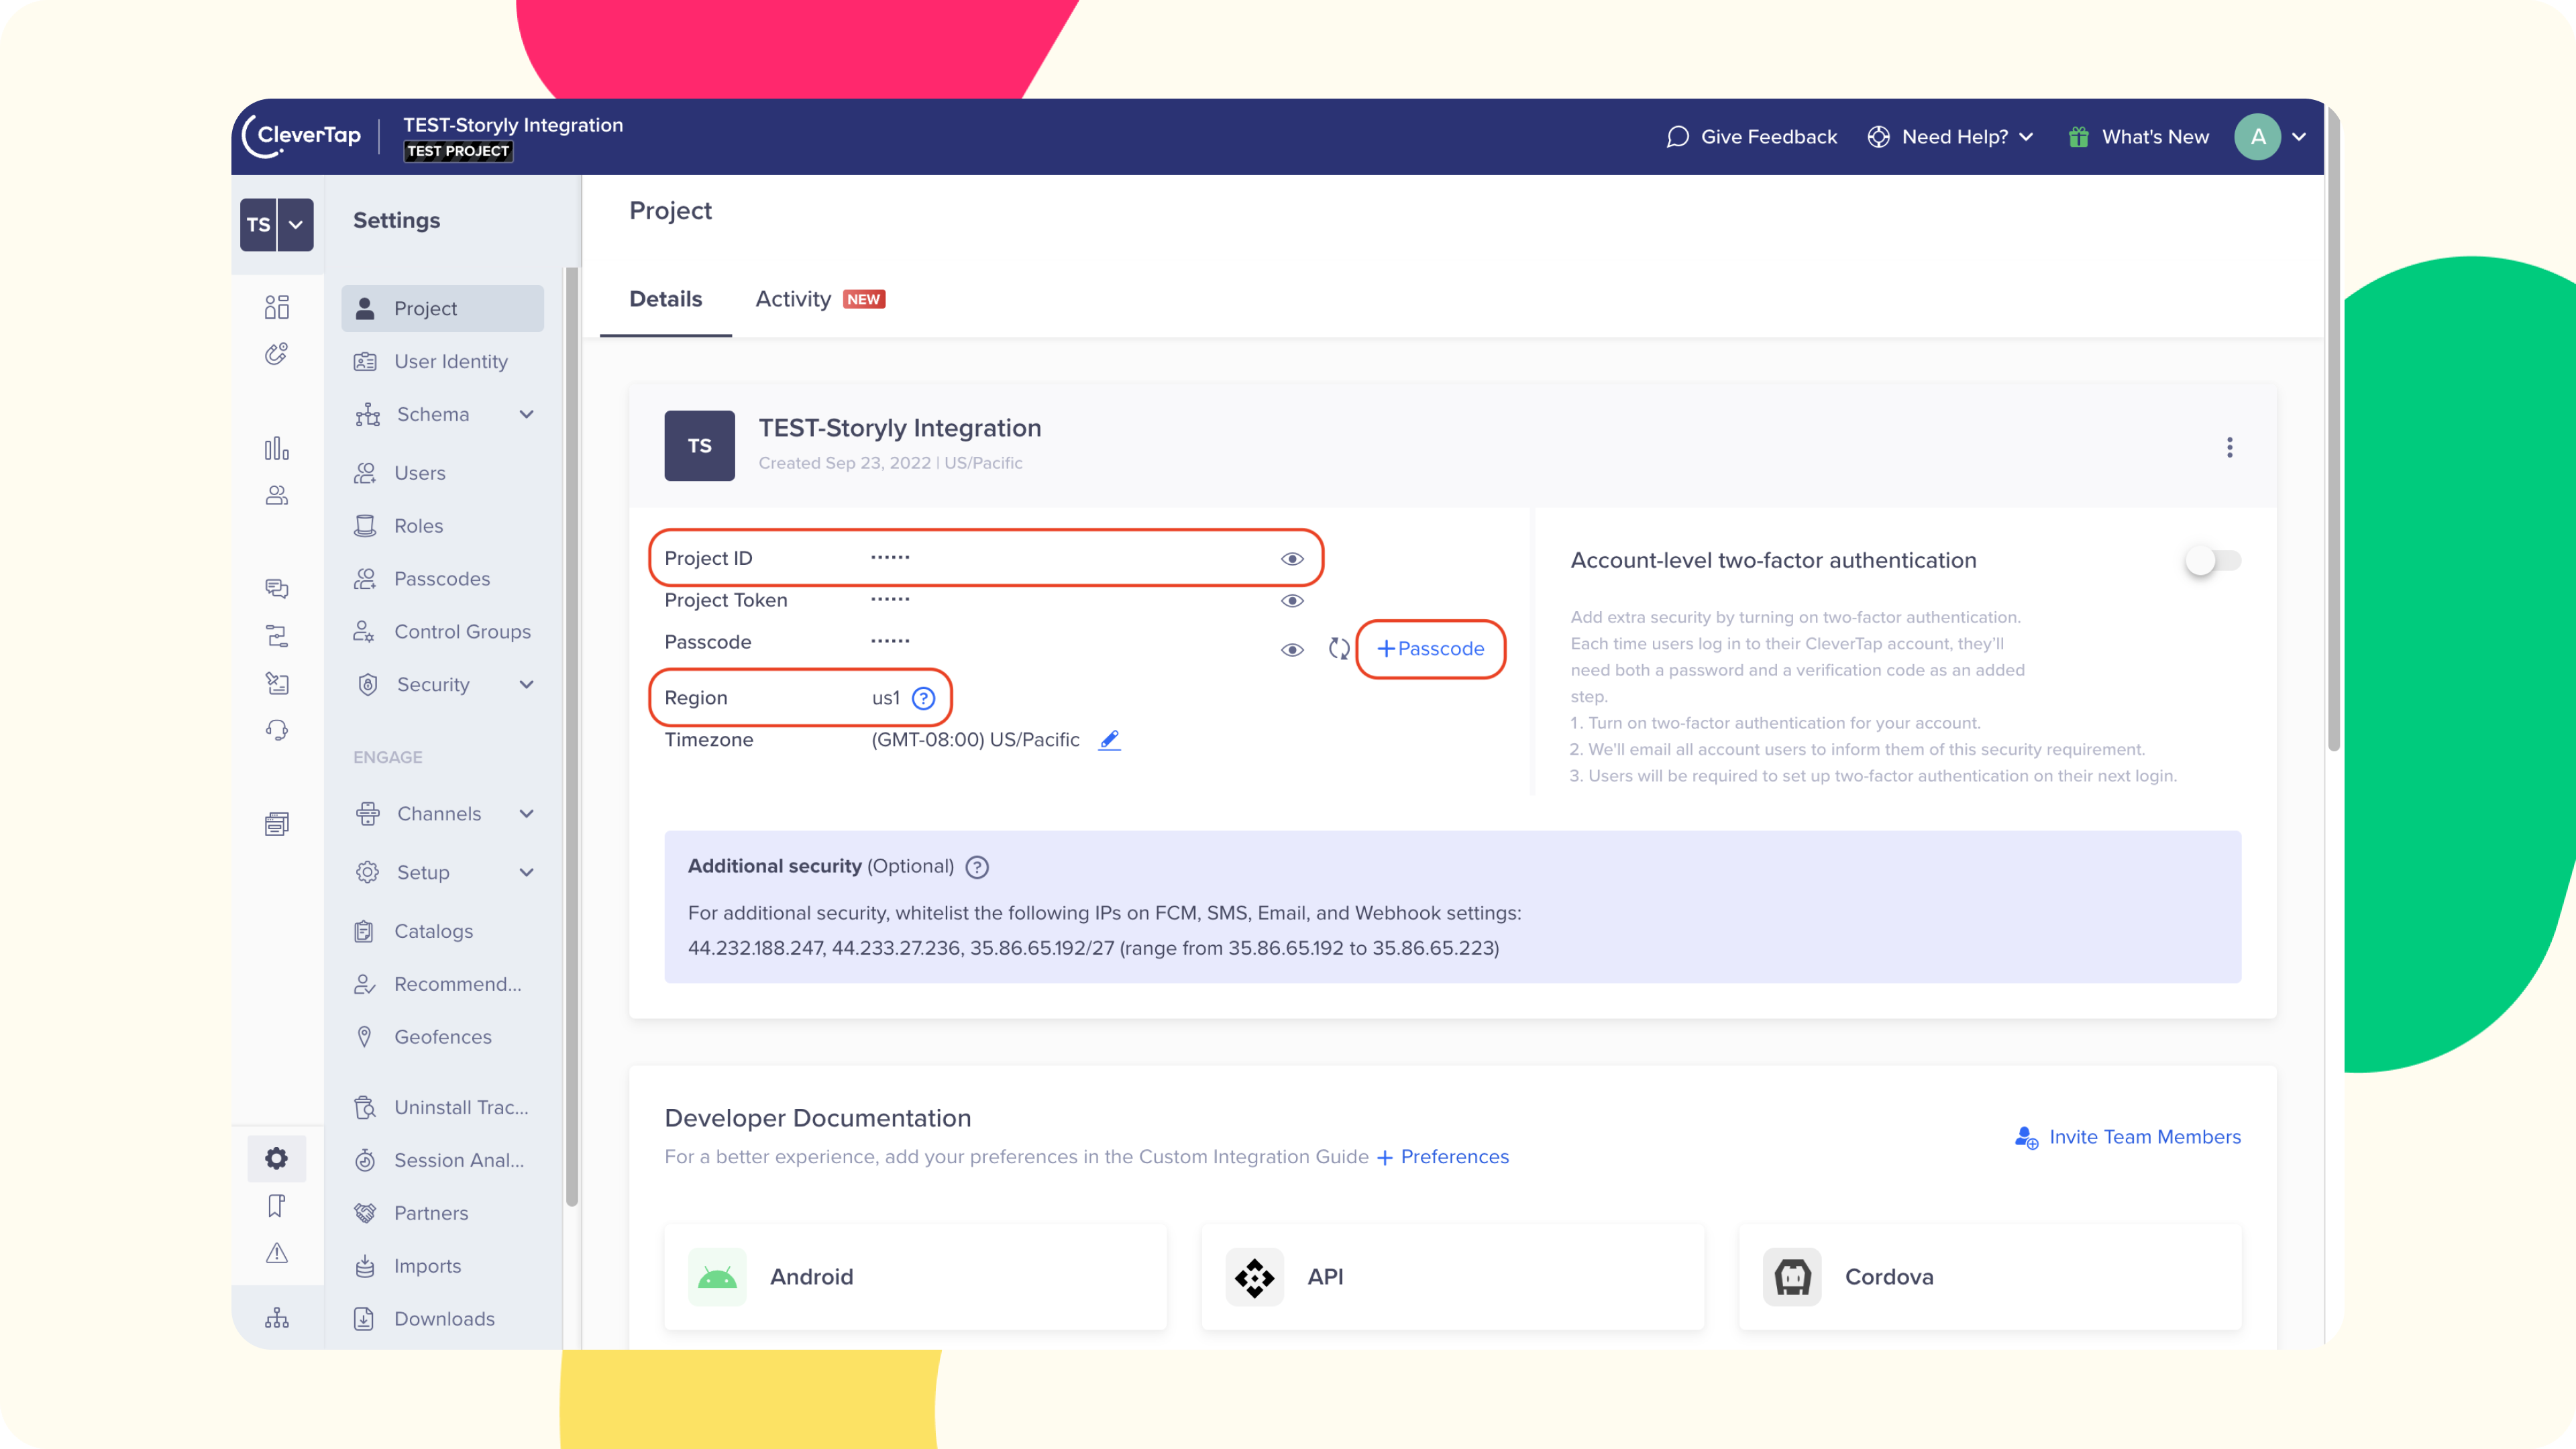
3. Please copy Project ID, then paste it in the Account ID field on the Storyly Dashboard.
4. For the Instance URL on Storyly, please select the URL with the same Region that you see on the CleverTap Dashboard.
5. For Passcode, instead of using the Account's Passcode, let's create a new one by clicking on the +Passcode button.
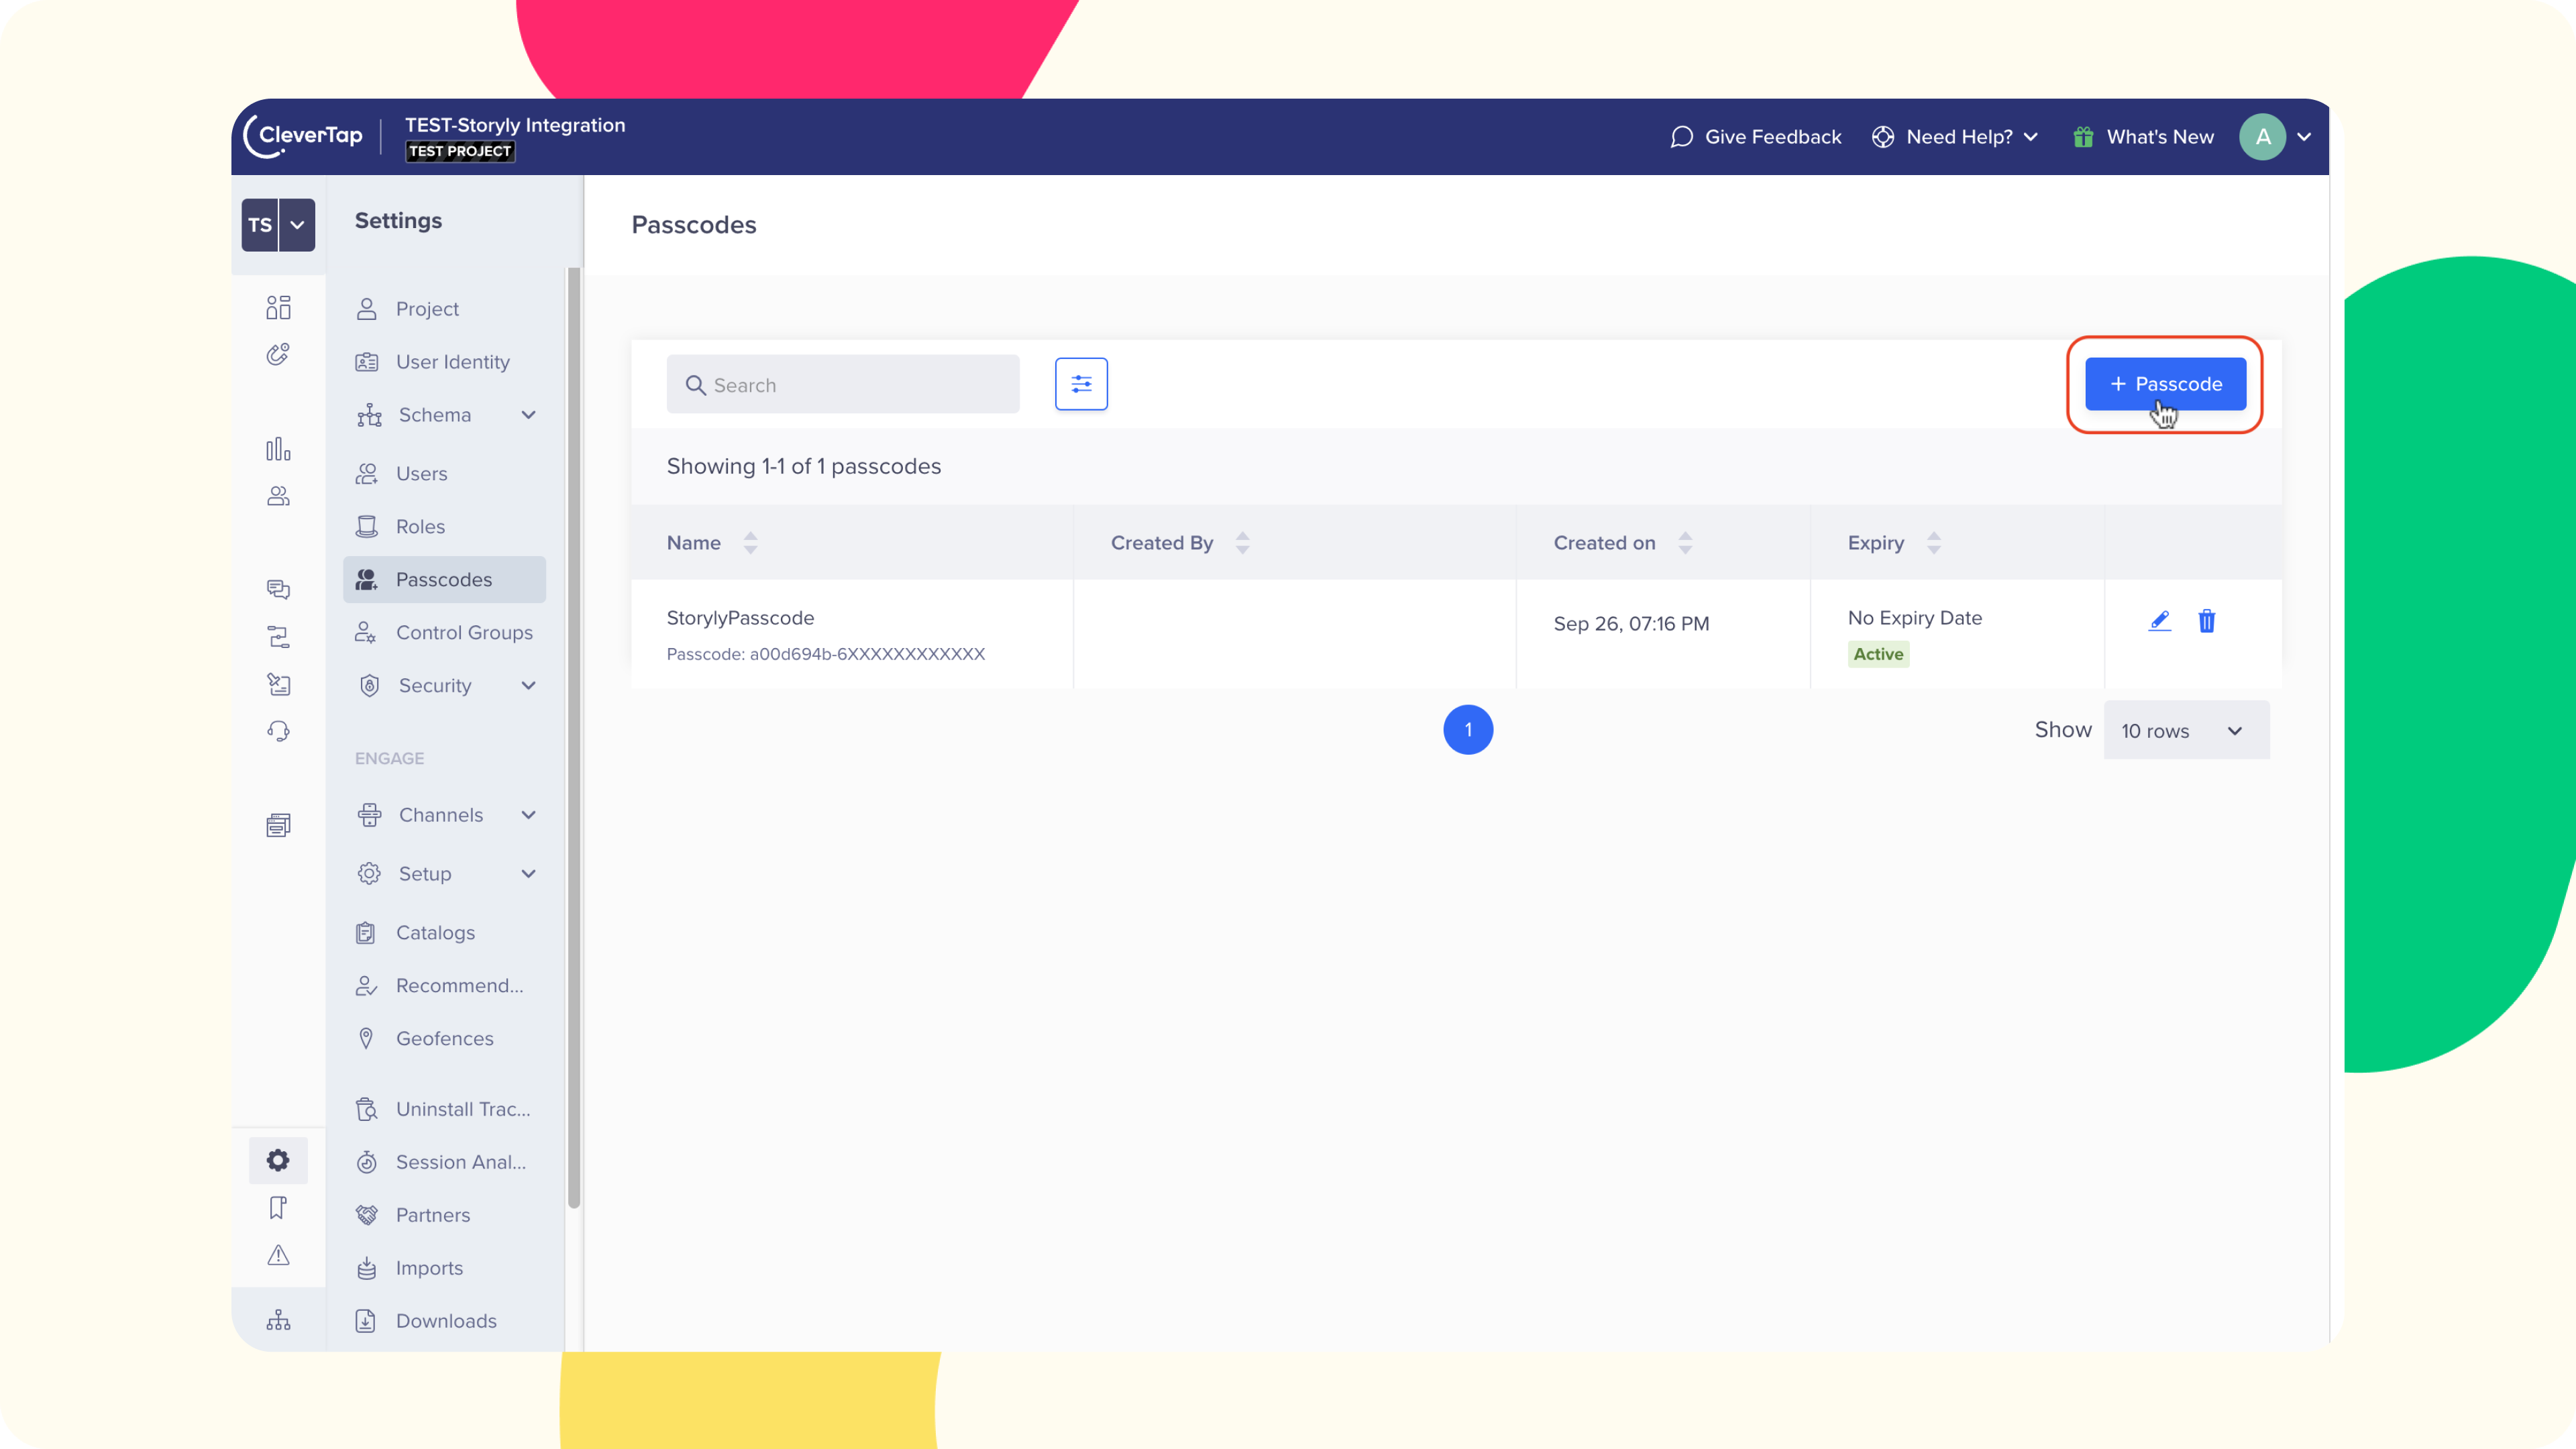
6. After creating the Passcode, please copy & paste it to the Storyly Dashboard.
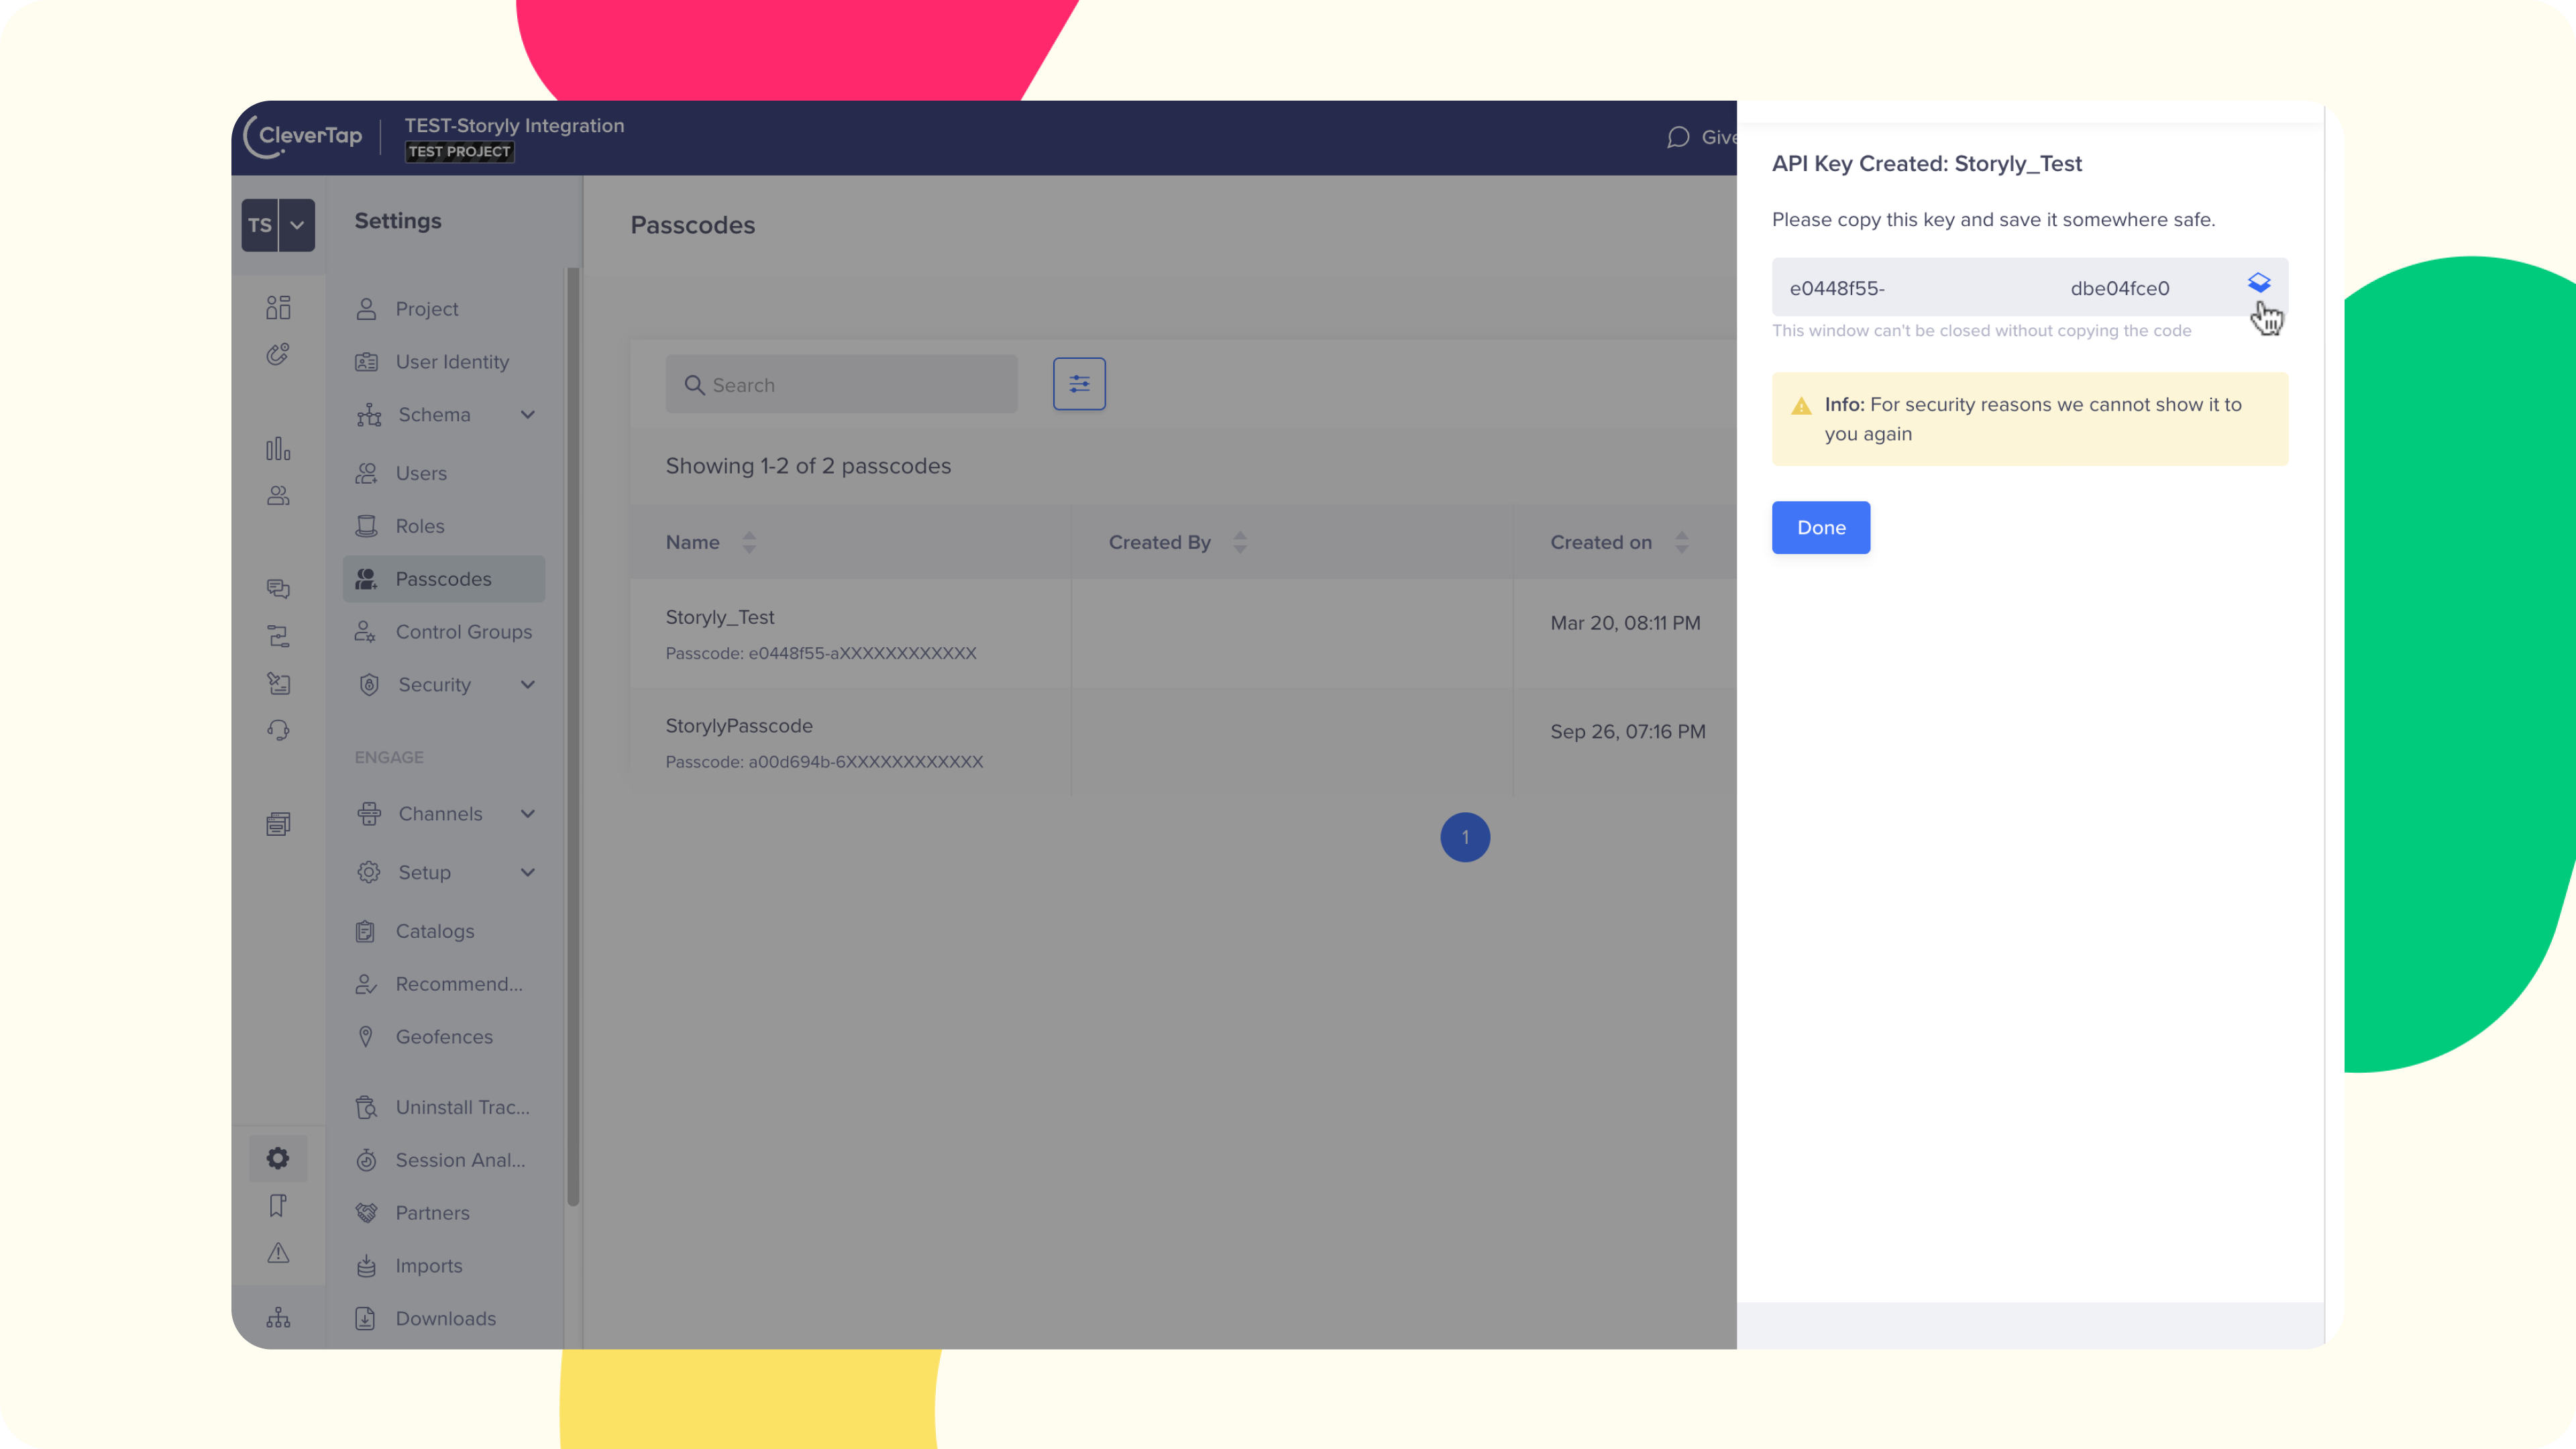
7. We're ready to complete the integration, please click Connect CleverTap.
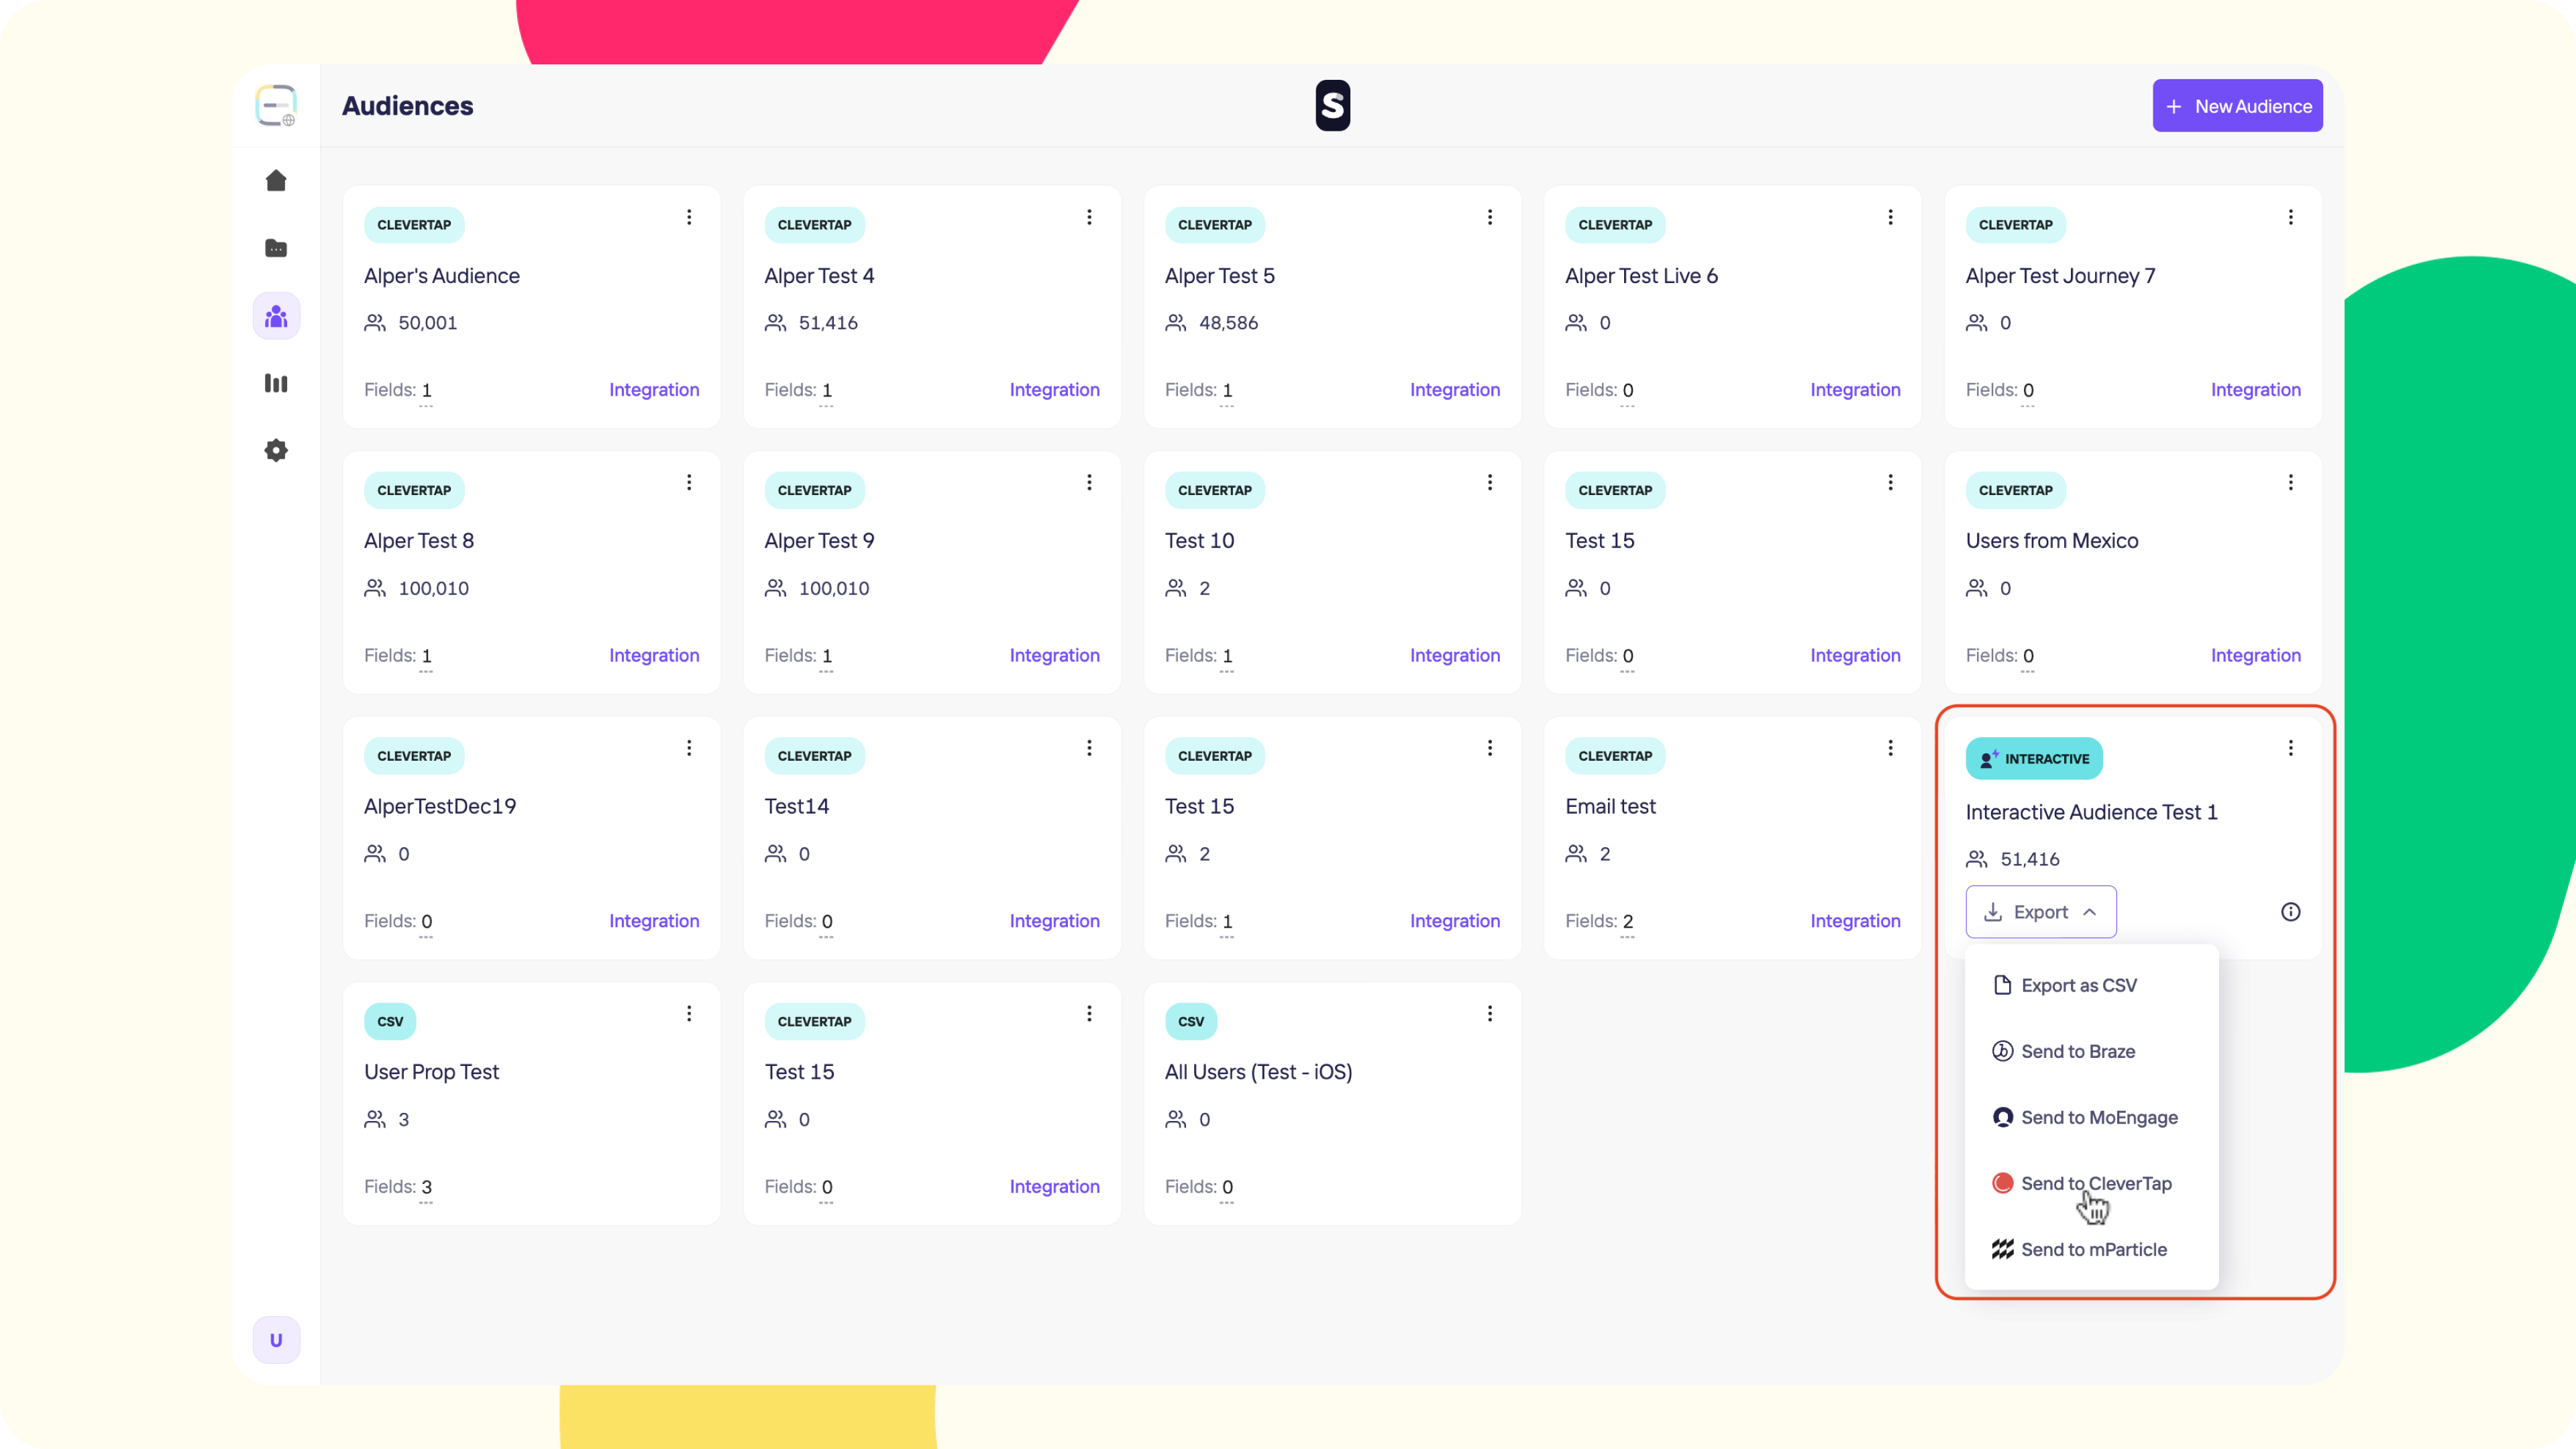
From here, as referenced above, if you've created audiences from the outcome of interactive components in Storyly, you'll have the option to Export these Audiences to CleverTap.
8. Under Audiences, you can see audiences that you've created. If you click on the Export button, you'll see the Send to CleverTap option.
9. When you click on Send to CleverTap, you'll be asked to choose which integration you'd like to use and to give a Key Title for the User Property that you'll see on CleverTap.
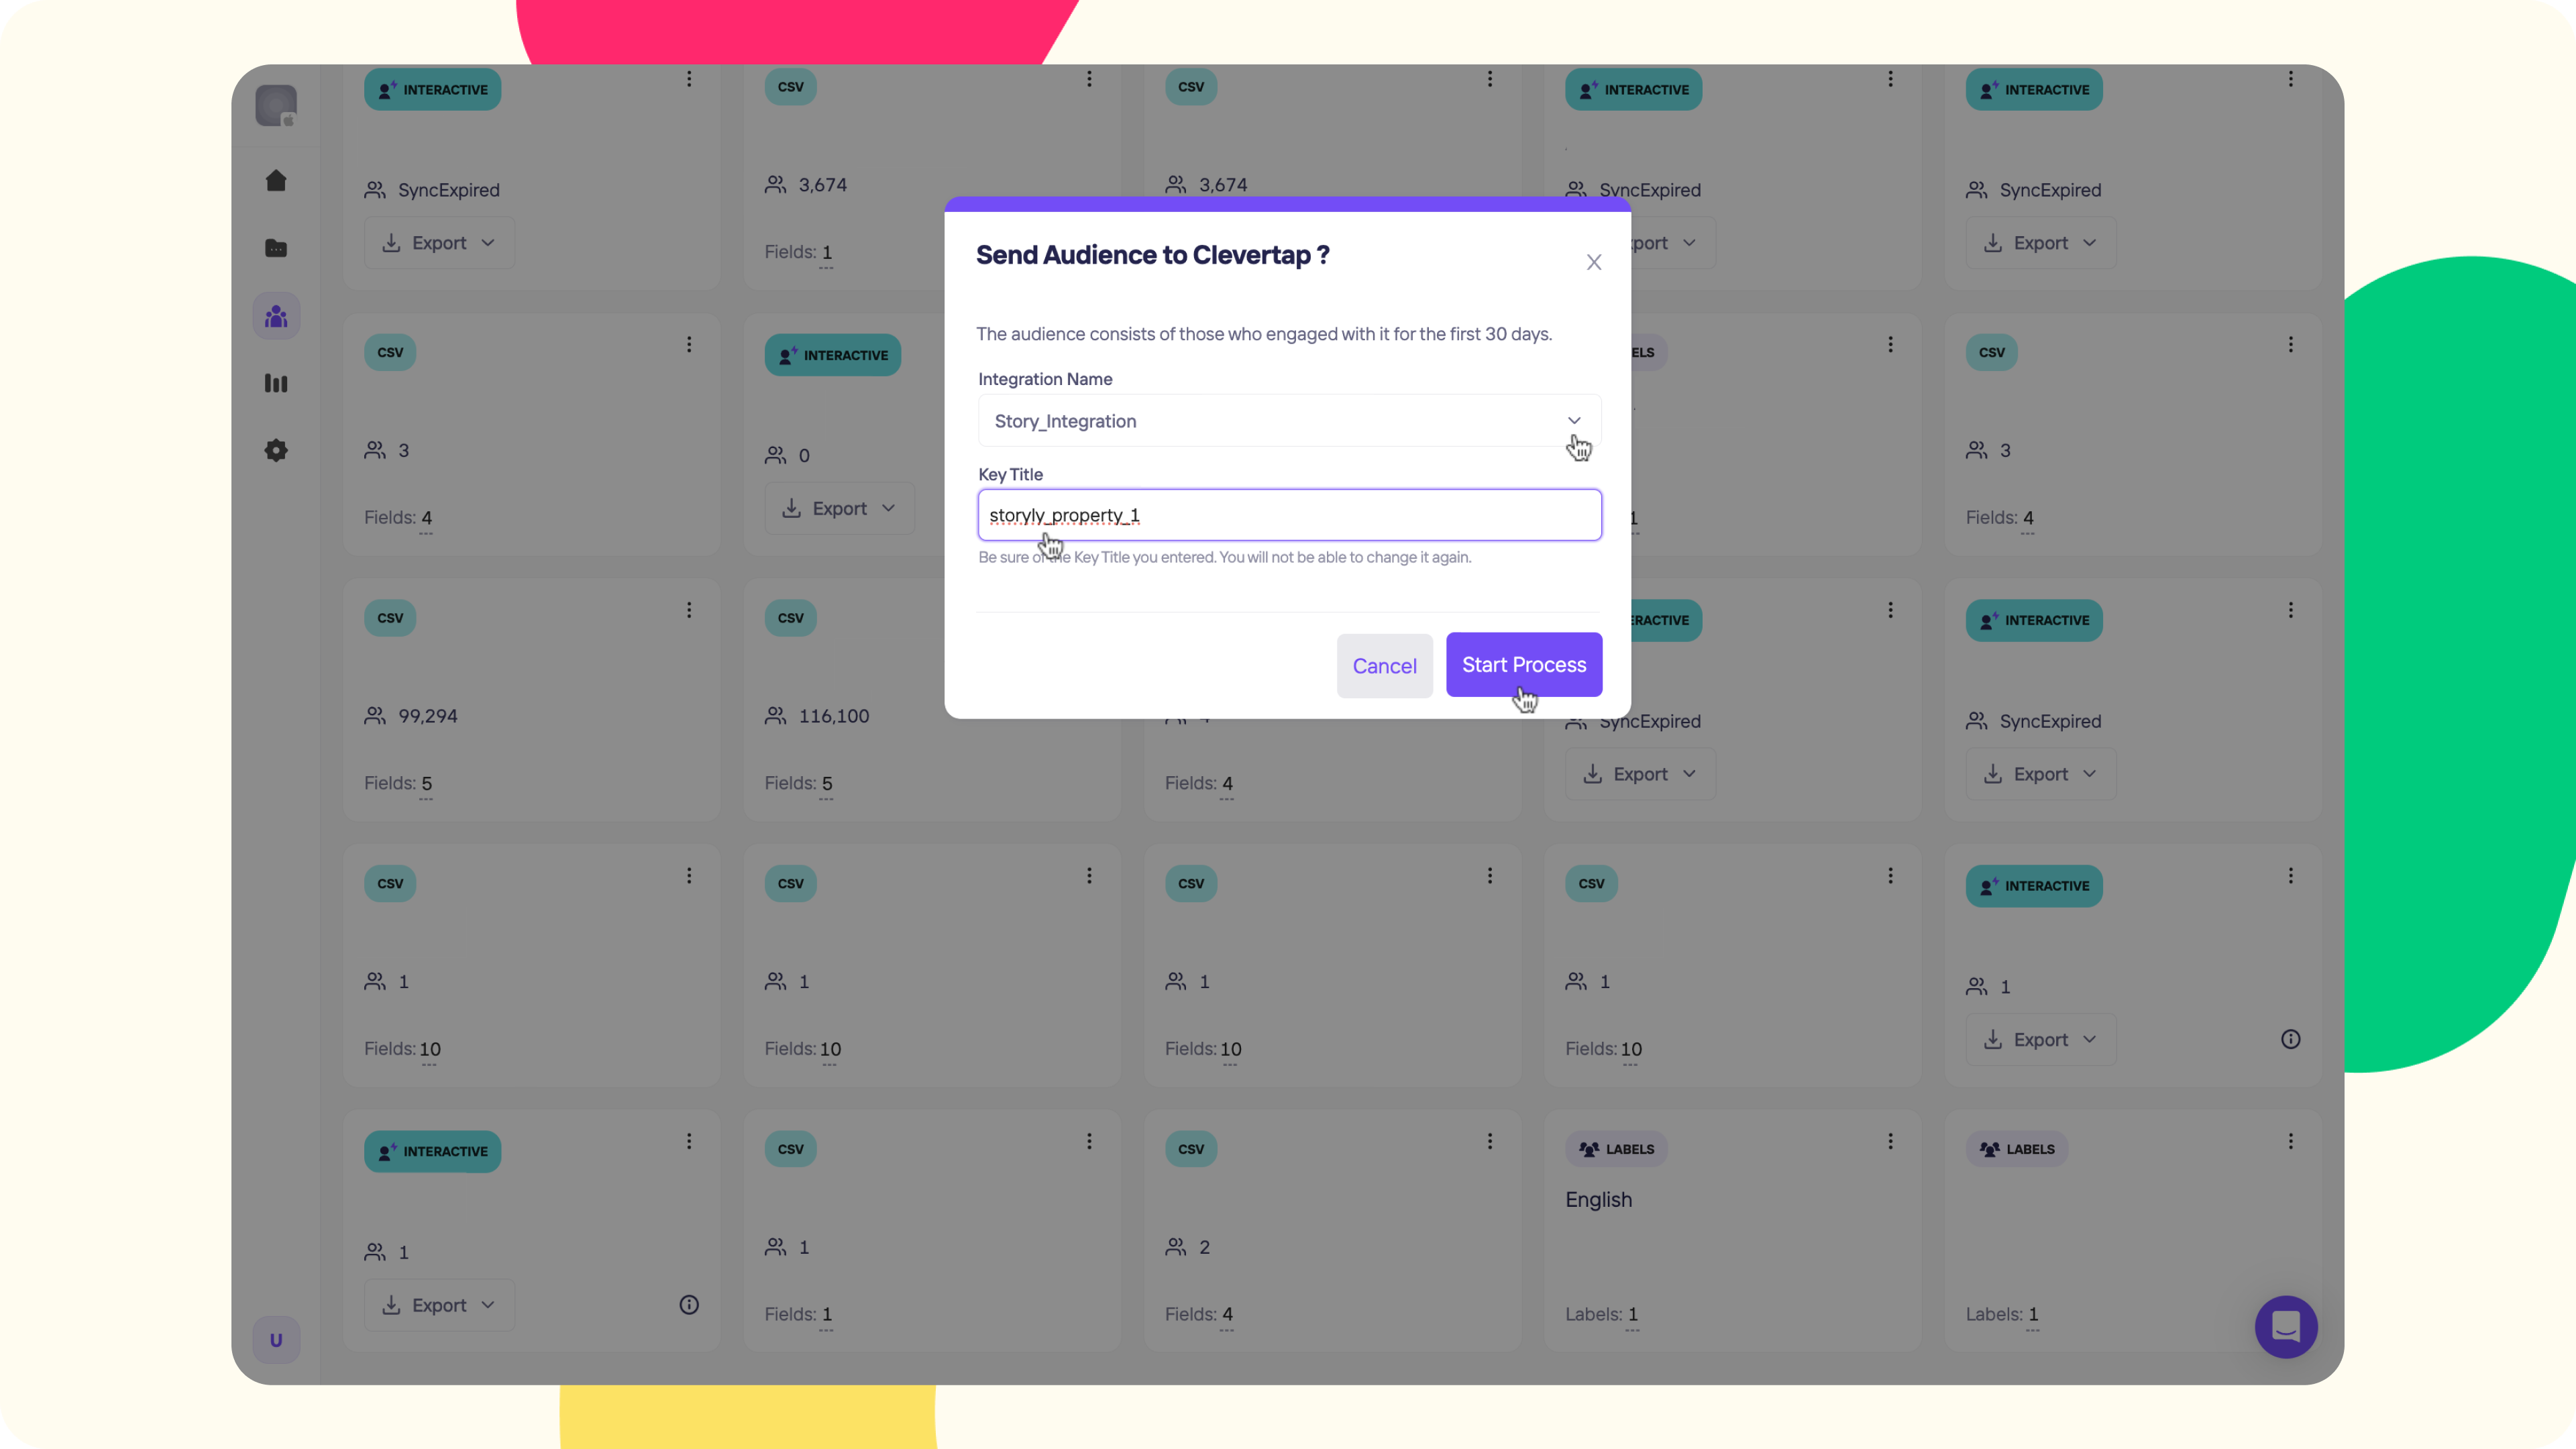
After you click on Start Process, depending on the audience's size, it'll take a couple of minutes for the process to be completed.
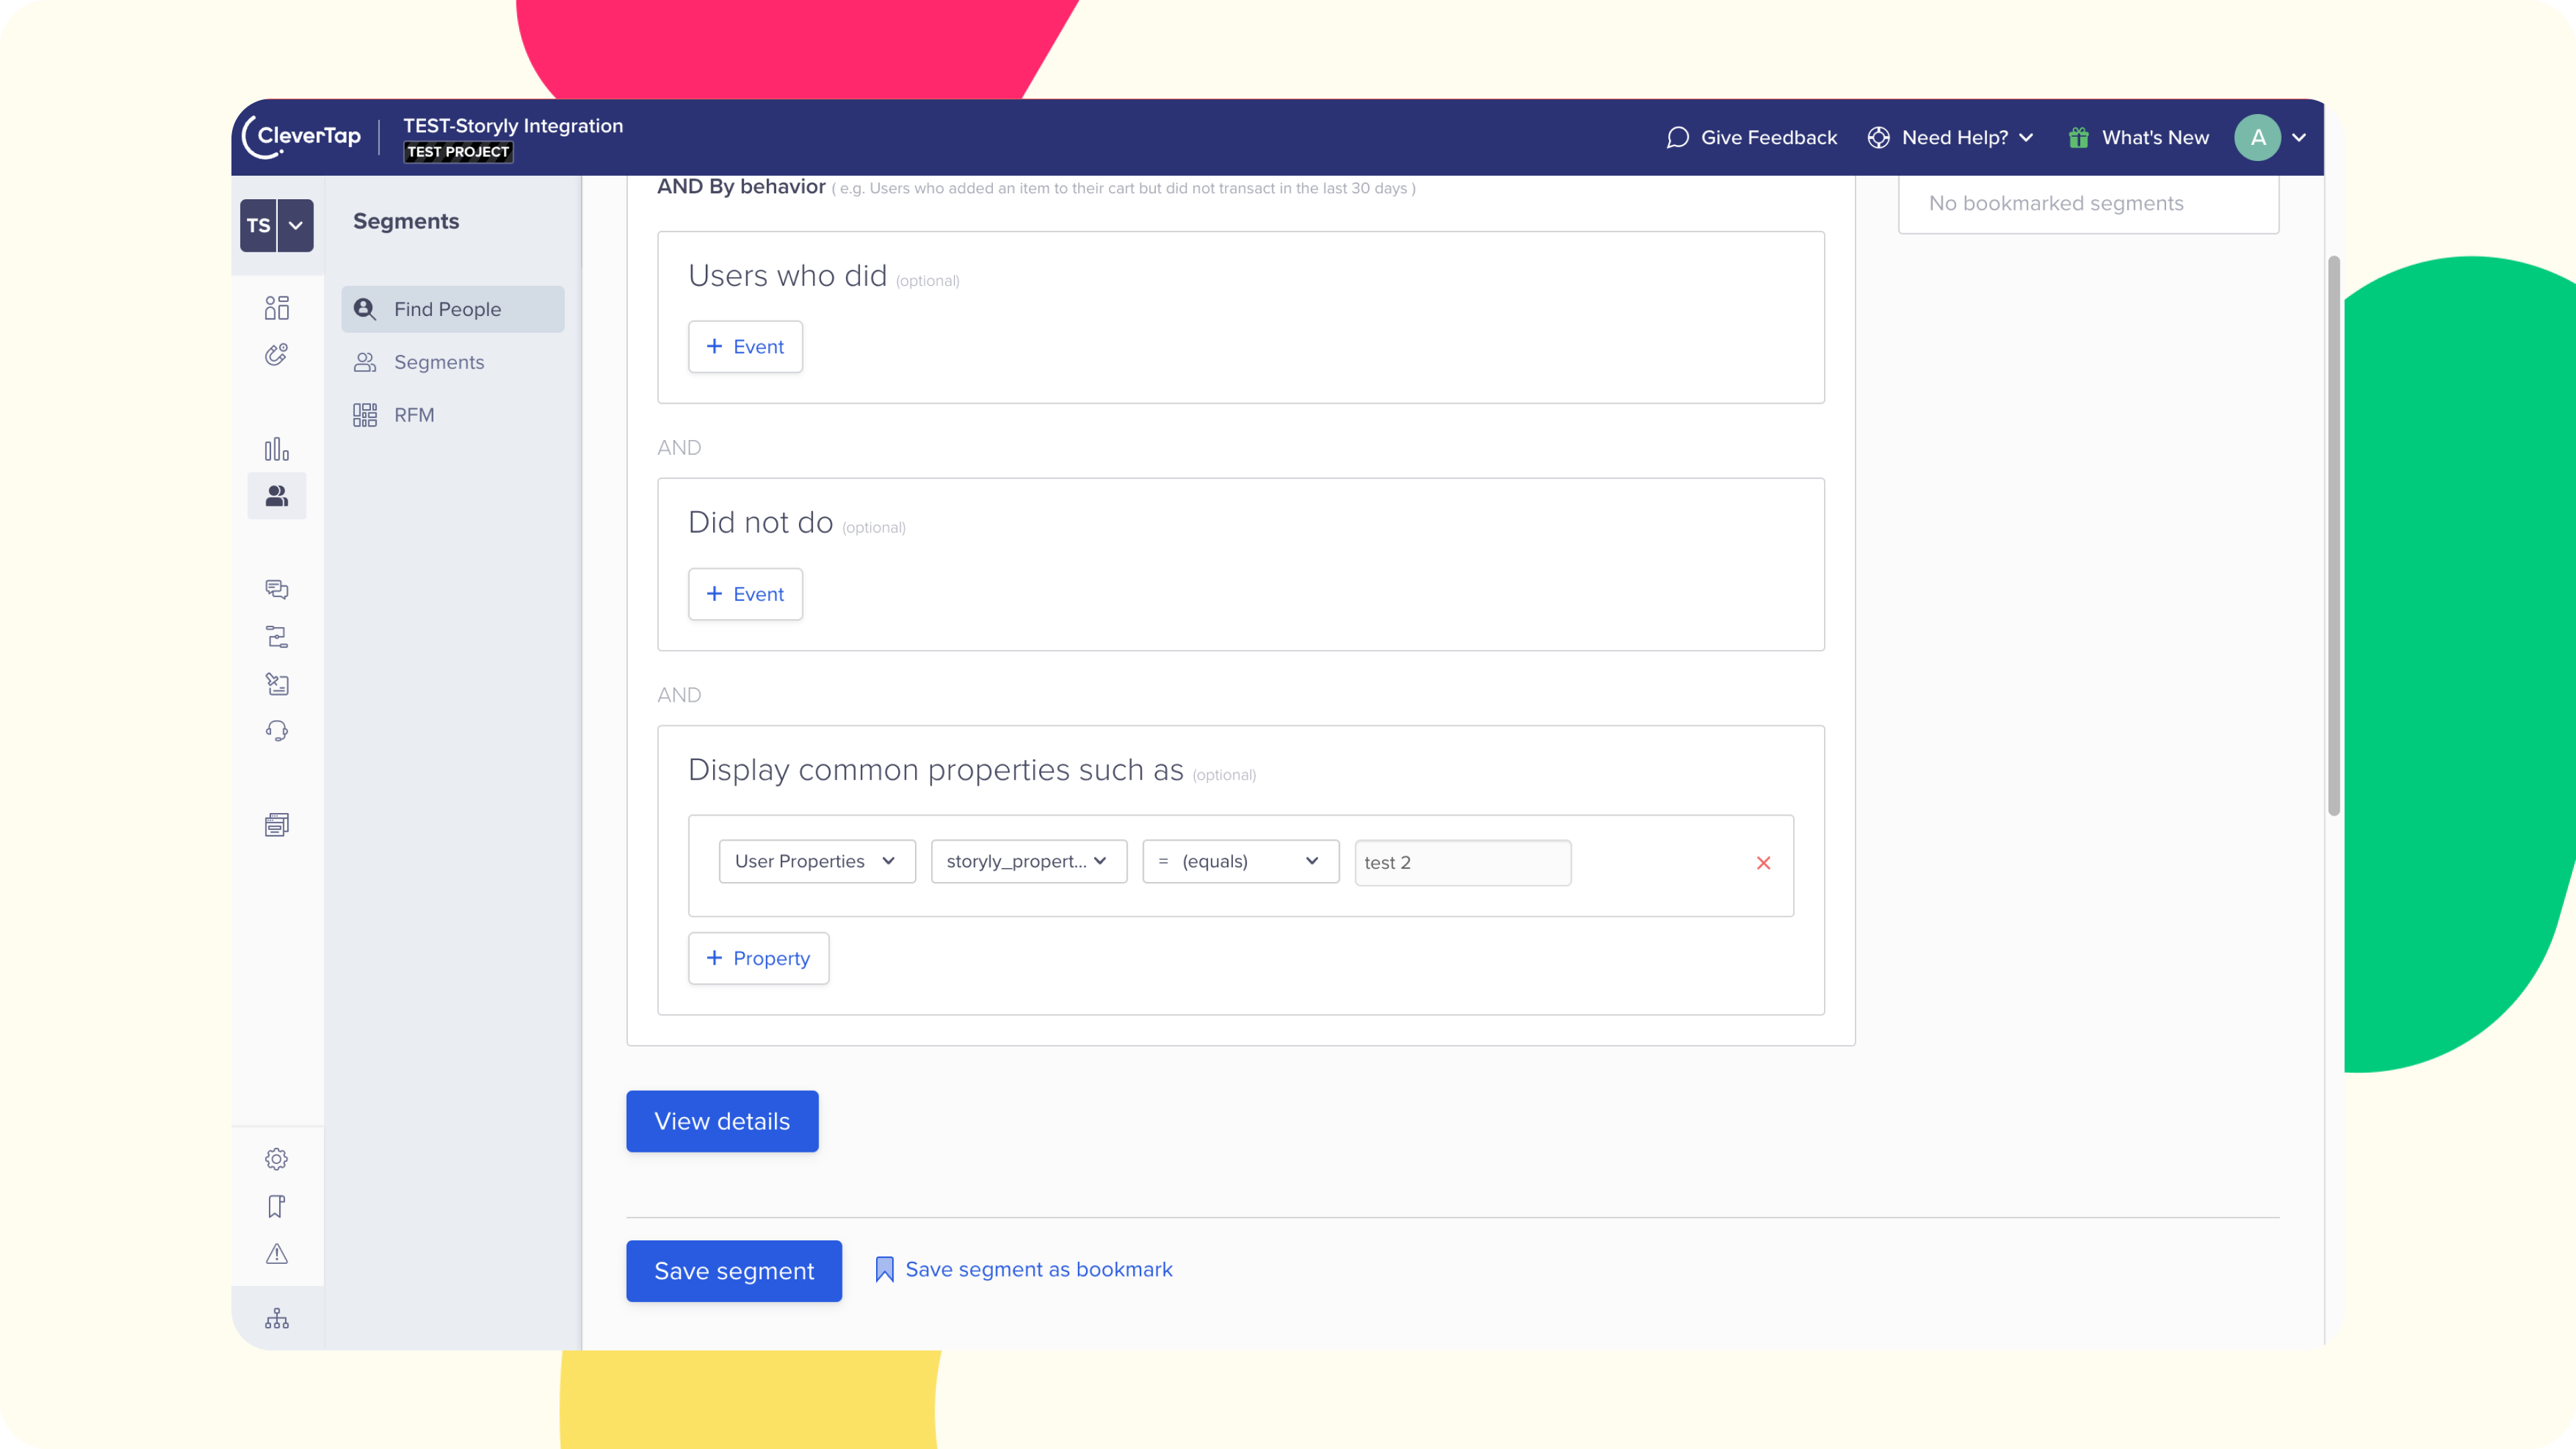
10. Once the process is completed, you can go to CleverTap Dashboard, and navigate to Segments from the left pane. While searching for people on this screen, please click on User Properties and scroll down to find the custom properties that you've exported from Storyly.
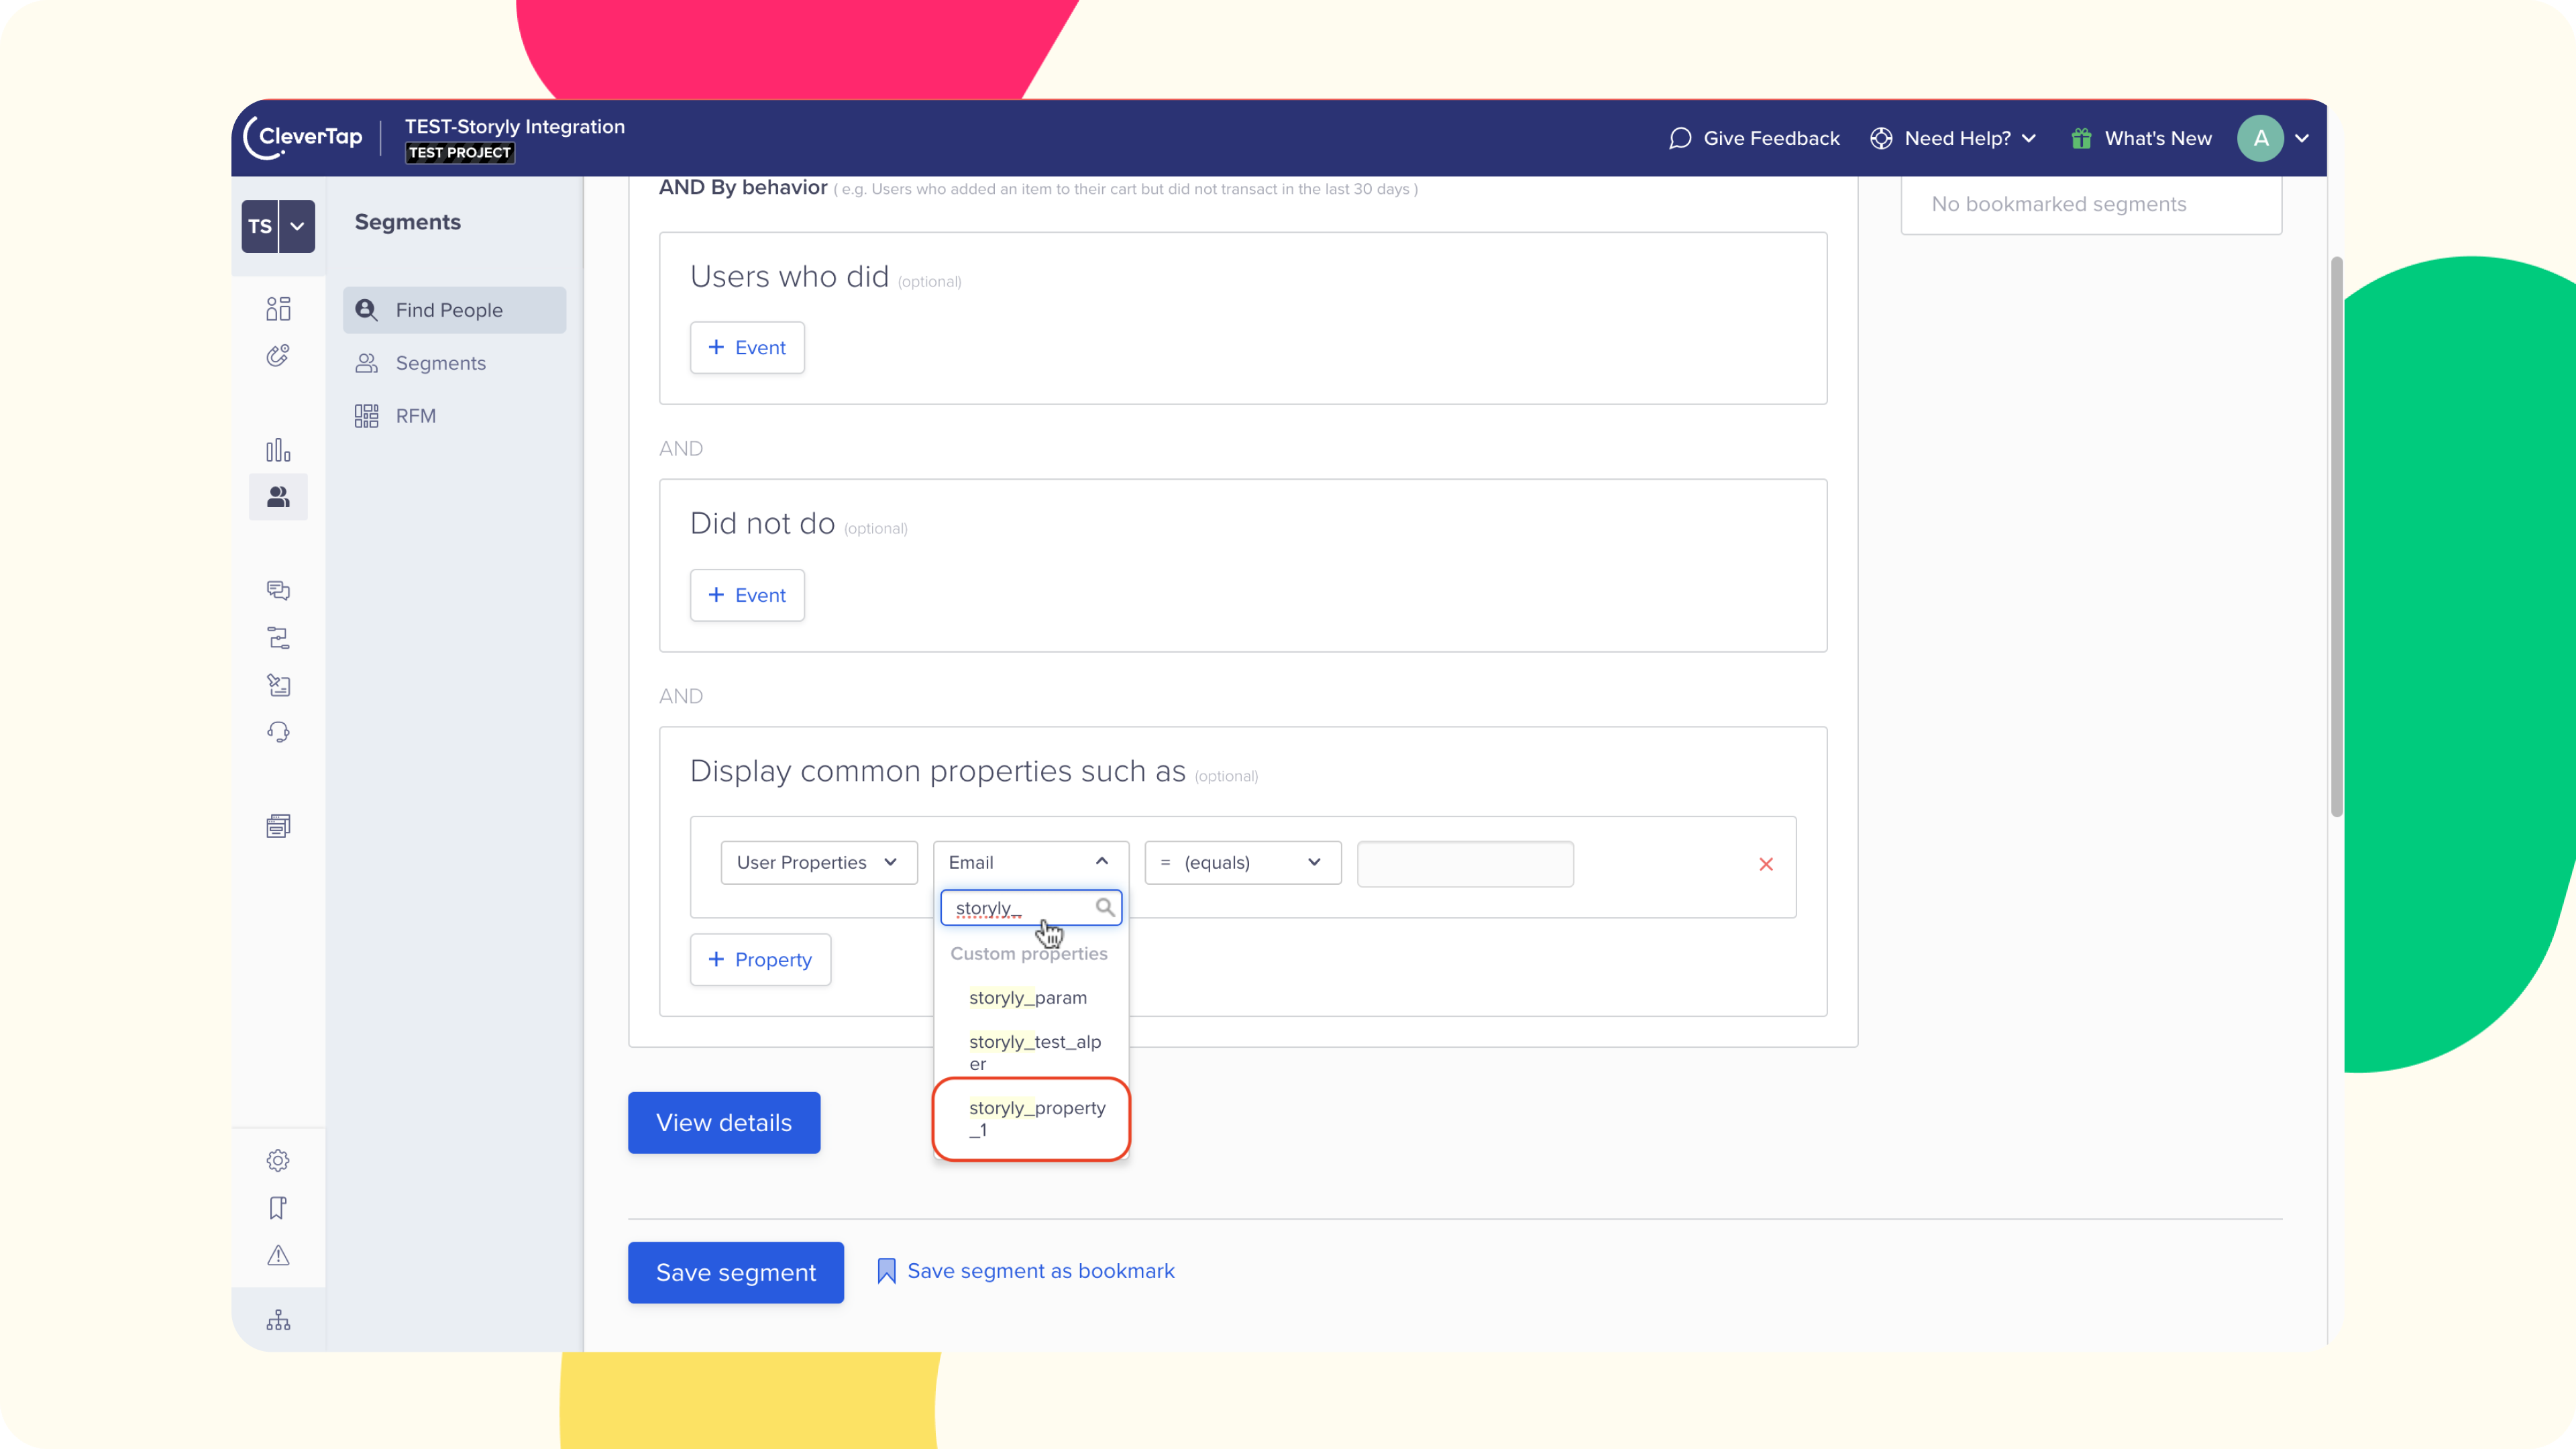
11. After selecting the custom property, if you go with the "equals" and type in the name of your Audience on Storyly Dashboard, you'll be able to create a segment that includes all of the users in that Audience.
Updated about 2 years ago
