Initial Web SDK Setup
Web Application Frameworks
This walkthrough shows how to add Storyly to your web application and show your first story in it.
Before you begin
Please login into Storyly Dashboard and get your instance token. You can get your token from the Storyly Dashboard -> Settings -> App Settings
Installation
Using npm
storyly-web package is also available through npm. To add Storyly Web SDK to your project using npm, please use one of the following methods:
yarn add storyly-web
npm install storyly-web
Import storyly-web to where you register global components, like main.js.
That way, you would not need to import storyly-web under different pages several times.
import 'storyly-web';
Info
If you import
storyly-webusing npm, please consider that we'll try to keep the release cycle in a timely manner.
In Browser
If you do not use any framework, you can simply import storyly-web by copying the below line to your project:
<script custom-element="storyly-web" src="https://web-story.storyly.io/sdk/3.6.23/storyly-web.js"></script>
Info
The latest version of the Storyly Web SDK is
4.1.0. You can follow the latest version from here.
Info
https://web-story.storyly.io/sdk/{version}/storyly-web.js
- If you want to use latest version of Storyly Web SDK, you can use
4.*instead of{version}.- if you want to use latest version of Storyly Web SDK under
4.1, you can use4.1.*instead of{version}.- if you want to use any spefic version of Storyly Web SDK under
4.1.*, you can use4.1.0instead of{version}.
Initialization
After importing storyly-web, you can initialize it on your page as follows:
<storyly-web></storyly-web>
<script>
    const storylyWeb = document.querySelector('storyly-web');
    storylyWeb.init({
      token: '<YOUR_TOKEN_HERE>',
    });
</script>
If you're using one of the following frameworks, please check references accordingly:
Now, you should be able to enjoy Storyly 🎉!

Using Multiple Instances at the Same Page
If you'd like to place several instances at the same page, please make sure that you give a different ID to the other instance. Then, without adding the script again, you can use lines given below:
<storyly-web id="otherInstance"></storyly-web>
    <script>
      otherInstance.init({
        token: '<YOUR_TOKEN_HERE>',
      });
    </script>
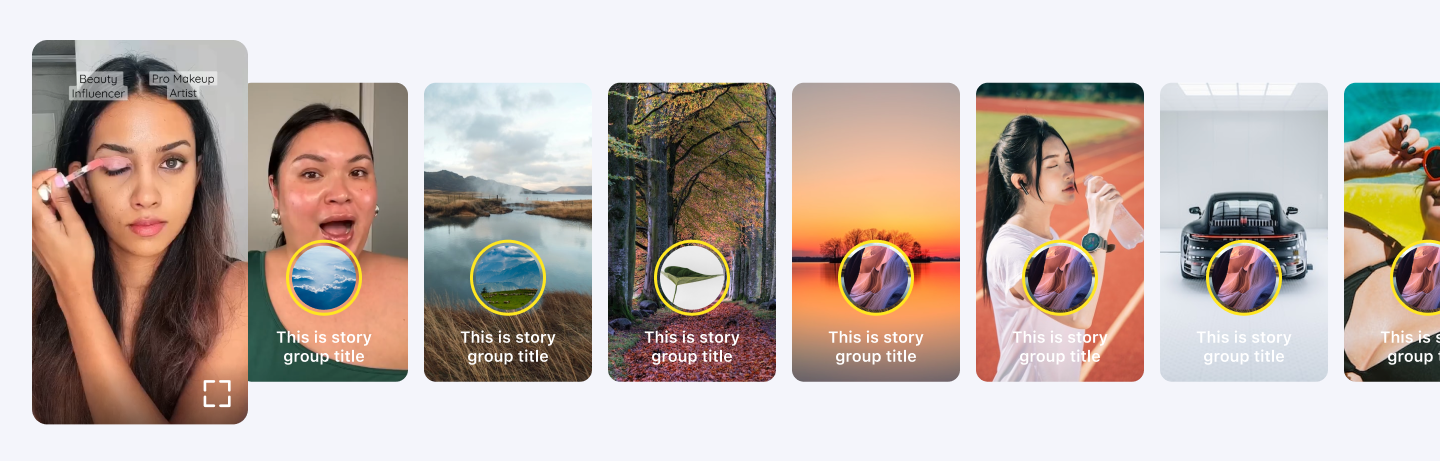
Story Bar Layout
The default Story Bar Layout is, as shown above, circles or squares.
If you'd like to have a more energized Story Bar Layout like this:
You can set it as below:
storylyWeb.init({
  ...
  barLayout: {
    view: 'energized',
    style: {
       height: 320, //default height is 320 and the min. is 200.
     }
  }
});
If you'd like to modify the pre-defined energized layout, you may take a look at the recipe given below:
Story View Layout
There are 2 different Story View Layouts that you can choose between.
The 1st option is the Modern Layout:

In order to use the Modern Layout, set the layout parameter as:
storylyWeb.init({
  ...
  layout: 'modern',
  props: {...},
});
Tip
Modern Layout is the default layout. If you do not set this parameter, you’ll have the Modern Layout by default.
The 2nd option is the Classic Layout:

In order to use the Classic Layout, set the layout parameter as:
storylyWeb.init({
  ...
  layout: 'classic',
  props: {...},
});
JavaScript Frameworks
You can use storyly-web with Javascript Frameworks such as React, Angular, and Vue.
React
First of all, you need to install storyly-webas shown here,
and then you need to put the below tag on the page where you want to show your stories.
<storyly-web ref={storylyRef} />
Finally you can initialize Storyly in your useLayoutEffect lifecycle event. Please remember to replace <YOUR_TOKEN_HERE> with your own.
const storylyRef = useRef();
useLayoutEffect(() => {
  storylyRef.current.init({
    token: '<YOUR_TOKEN_HERE>',
  });
}, []);
Vue
First of all, you need to install storyly-webas shown here,
and then you need to put below tag to the page where you want to show your stories.
<storyly-web ref="storylyWeb"></storyly-web>
Finally you can initialize Storyly in your mounted lifecycle event. Please remember to replace <YOUR_TOKEN_HERE> with your own.
<script>
export default {
  mounted() {
    this.$refs.storylyWeb.init({
      token: '<YOUR_TOKEN_HERE>',
    });
  }
}
</script>
Angular
Storyly is implemented as a web component so you need to enable custom elements schema in your configuration.
@NgModule({
  ...
  schemas: [ CUSTOM_ELEMENTS_SCHEMA ]
})
Then you need to install storyly-webas shown here,
and then you need to put below tag to the page where you want to show your stories.
<storyly-web #storylyweb></storyly-web>
As the last step you need to initialize your component. Please remember to replace <YOUR_TOKEN_HERE> with your own.
import { AfterViewInit, Component, ElementRef, ViewChild } from '@angular/core';
@Component({
  ...
})
export class AppComponent implements AfterViewInit{
  @ViewChild("storylyweb") storylyWebDom!: ElementRef;
  ngAfterViewInit(){
    this.storylyWebDom.nativeElement.init({
      token: '<YOUR_TOKEN_HERE>',
    });
  }
}
Warning
If you can't see Storyly in your website, please check that your token is correct. For more details please check console logs.
Marketing Tools
This walkthrough shows how to add Storyly to your marketing tool and show your first story in it.
Before you begin
Please login into Storyly Dashboard and get your instance token. You can get your token from the Storyly Dashboard -> Settings -> App Settings
Google Tag Manager
You can import and init Storyly by copying below lines to Google Tag Manager, please remember to replace <YOUR_TOKEN_HERE> with your own.
<script>
  (function (targetClass) {
    var storylyScript = document.createElement("script");
    storylyScript.setAttribute("custom-element", "storyly-web");
    storylyScript.setAttribute(
      "src",
      "https://web-story.storyly.io/sdk/3.*/storyly-web.js"
    );
    document.body.appendChild(storylyScript);

    var storylyTag = document.createElement("storyly-web");
    var heading = document.querySelector("." + targetClass);

    if (heading) {
      heading.parentElement.insertBefore(
        storylyTag,
        heading.previousSibling
      );
    }

    storylyScript.onload = function () {
      storylyTag.init({
        token: "<YOUR_TOKEN_HERE>",
      });
    };
  })("CLASS_NAME");
</script>
Tip
Storyly will be positioned before the section named CLASS_NAME. Please do not forget to put correct class name into this field.
Warning
If you can't see Storyly in your website, please check that your token is correct. For more details please check console logs.
Website Builders
This walkthrough shows how to add Storyly to your website builder and show your first story in it.
Before you begin
Please login into Storyly Dashboard and get your instance token. You can get your token from the Storyly Dashboard -> Settings -> App Settings
Shopify
The Custom HTML section allows you to add additional code to your homepage.
- From your Shopify admin, go to Online Store > Themes.

- Find the theme you want to edit, and then click Actions > Edit code.

- In the Sections directory, click Add a new section with the name
section-custom-html.

- You can import and init Storyly by copying below lines to custom html section, please remember to replace <YOUR_TOKEN_HERE> with your own.
<script custom-element="storyly-web" src="https://web-story.storyly.io/sdk/3.*/storyly-web.js"></script>
<storyly-web></storyly-web>
<script>
    const storylyWeb = document.querySelector('storyly-web');
    storylyWeb.init({
      token: '<YOUR_TOKEN_HERE>',
    });
</script>

{% schema %}
  {
    "name": "Storyly Embed",
    "settings": [
      {
        "type": "text",
        "id": "title",
        "label": "Title"
      },
      {
        "type":"textarea",
        "id": "custom_html",
        "label": "HTML"
      }
    ],
    "presets": [
      {
        "name": "Custom HTML",
        "category": "Web Stories",
        "settings": {
        }
      }
    ]
  }
{% endschema %}
- Click Save.
Warning
If you can't see Storyly in your website, please check that your token is correct. For more details please check console logs.
Storyly Events
This section shows you how to observe Storyly's basic functionality events.
loaded Event
This event will let you know that Storyly has completed its network operations, and the Story Group list has just been shown to the user. In order to be notified about this event, use the following example:
storylyWeb.on('loaded', (data) => {
    	console.log(data);
    });
loadFailed Event
This event will let you know that Storyly has completed its network operations and had a problem while fetching your Stories. In this case, users will see four empty Story Group icons, which we call skeleton view. In order to be notified about this event, use the following example:
storylyWeb.on('loadFailed', (data) => {
    	console.log(data);
    });
renderedStoryGroups Event
An event that’s fired when a Story Group is rendered on the screen.
storylyWeb.on('renderedStoryGroups', (groups: Array) => {
  // Triggered when a Story Group is rendered.
   console.log(groups: Array);
    });
renderedStoryGroups event returns the following response data in an array for each Story Group that is rendered:
[
  {
    group_id: Number,
    icon_image_url: String,
    media_host: String,
    order: Number,
    pinned: Boolean
    stories: Array,
    title: String
  }
]
Localization
This guide will walk you through the process of localizing all Storyly-related texts and content. You can deliver the appropriate content to each language/country pair by passing the locale parameter on the client side.
Words like Next Stories, Previous Stories, Close Story, and Average Answer that you see in the Storyly Web interface can be localized.
Info
Supported languages are English, Spanish, Portuguese, Turkish, and Hebrew for now.
To set the locale, you need to use the IETF BCP 47 format as shown below:
storylyWeb.init({
  token: token,
  props: {},
  locale: "en-GB" / "es-ES" / "pt-PT"  / "tr-TR" / "he-IL"
});
Tip
If you use the Translate option for Story Groups on the Storyly Dashboard, end user will see the content in their own
locale.
Besides, if the desired language is not in the list above, you may pass the Json which includes the translated strings as follows:
storylyWeb.setLang({
  ...
  json: {JSON_DATA} / json should be an object, not a file.
});
You can ask your Technical Account Manager for the list of strings.
To change the already set language on the go, you may use the following method:
storylyWeb.setLang({
          language: string,
          json: json,
});
Test Mode
This guide shows how to show test groups created in Storyly Dashboard to the specific devices. The default value of isTestMode is false, you need to explicitly define to set test devices.
storylyWeb.init({
  ...
  isTestMode: true
});
Updated about 1 year ago