Setting Up Google SAML for Storyly
How to set Google SAML SSO on Storyly?
Storyly supports single-sign-on for Google SAML. If your organization is using Google served mail (G-Suite), you can set up Google SAML on Storyly and let all your organization members sign in to Storyly with single-sign-on.
Reach out to us!
If you'd like to use Google SAML for Storyly, please reach out to us.
There are multiple steps to set-up your Google SAML connection.
Let's get started!
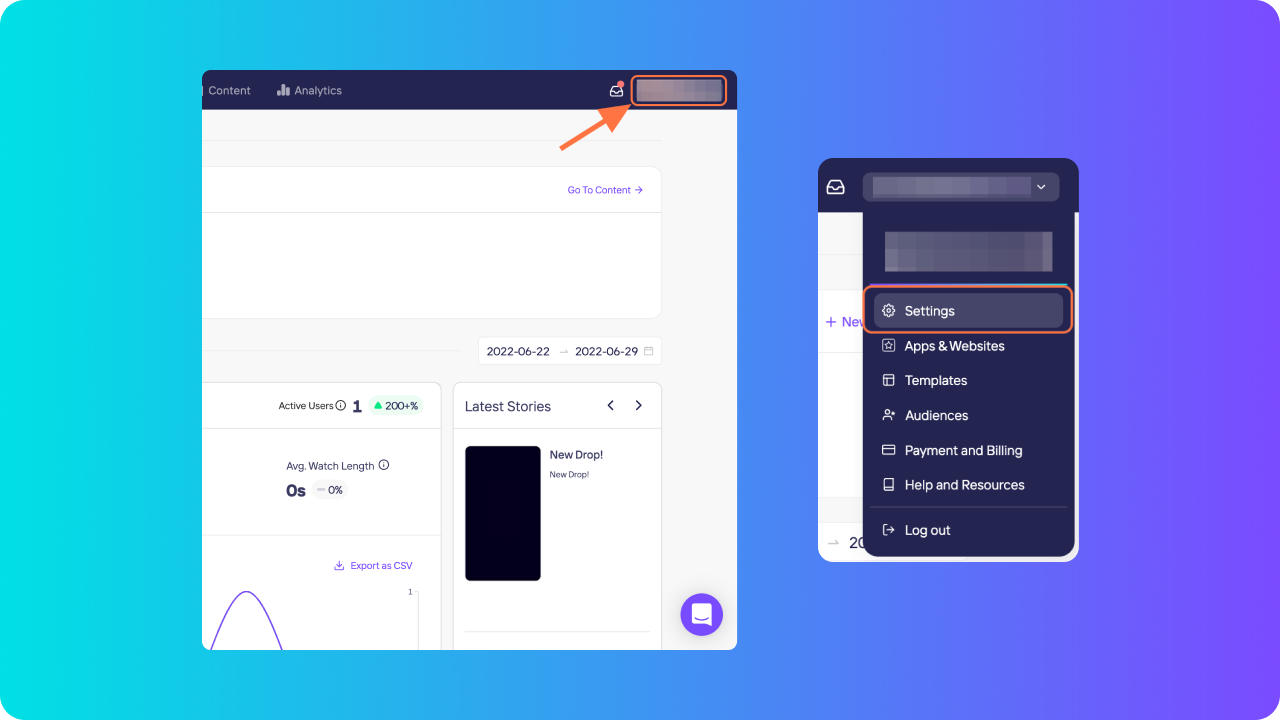
On Storyly dashboard, click on your name at the top right and go to Settings.
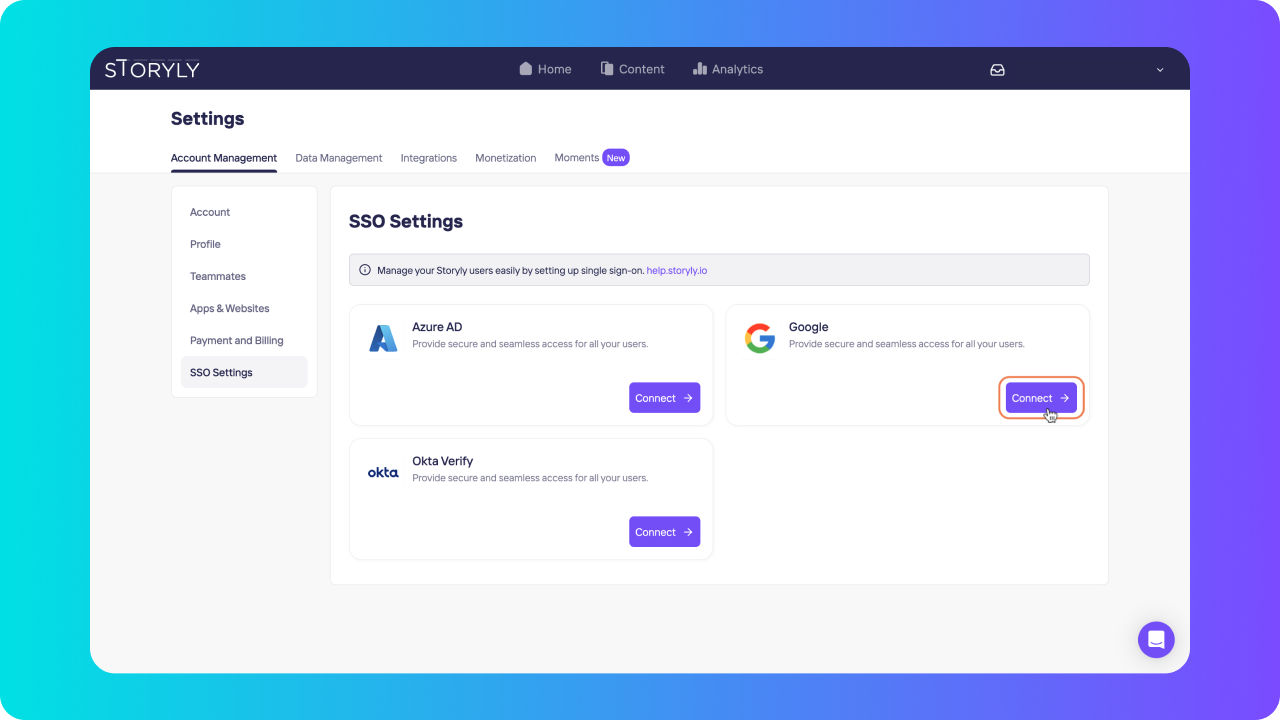
Navigate to SSO Settings under Account Management and let's Connect with Google.
Here, you'll be needing Target (SSO) URL, Entity ID and Certificate.
To get these go to Google Admin console
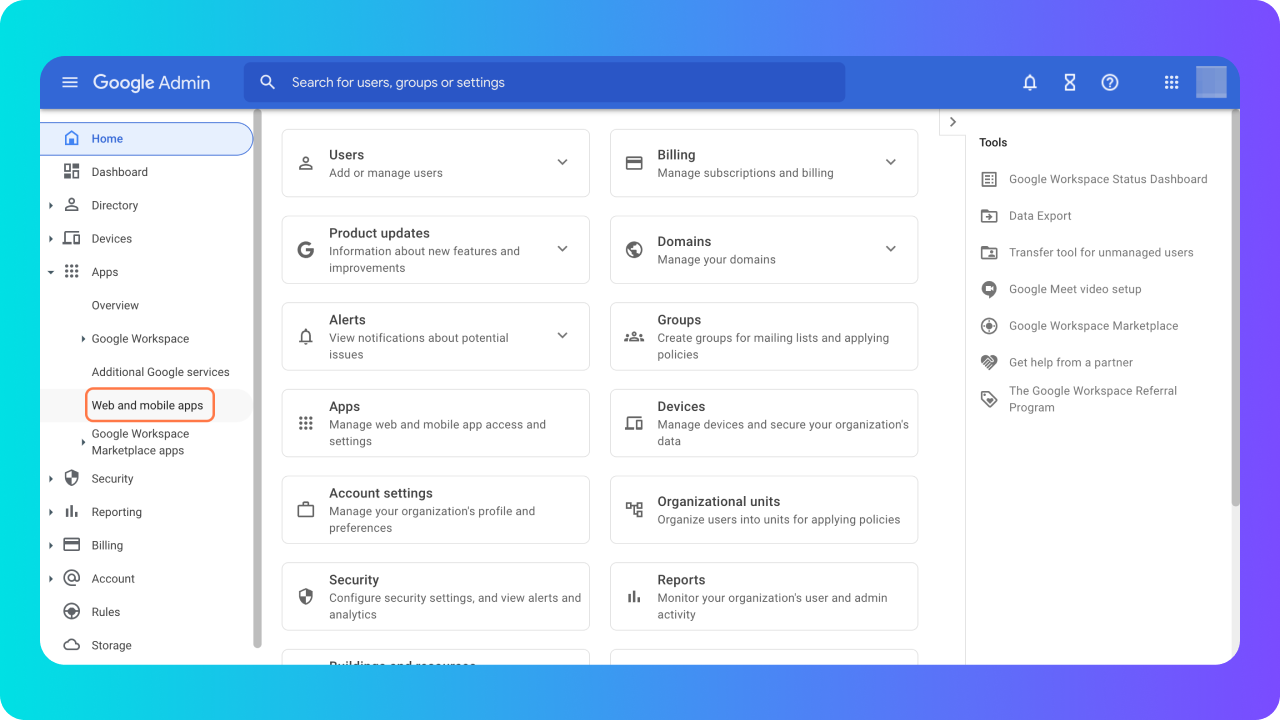
Click on Apps from the menu and select Web and mobile apps.
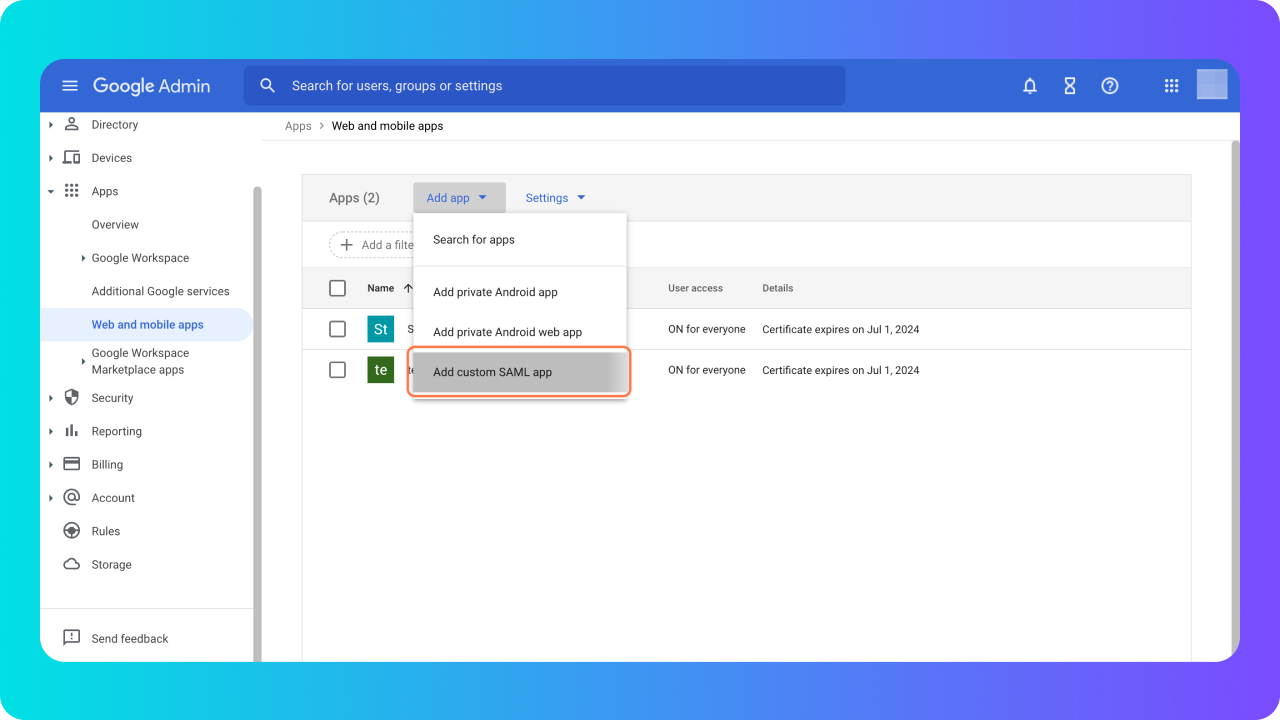
Click on Add app, here click the Add custom SAML app option.
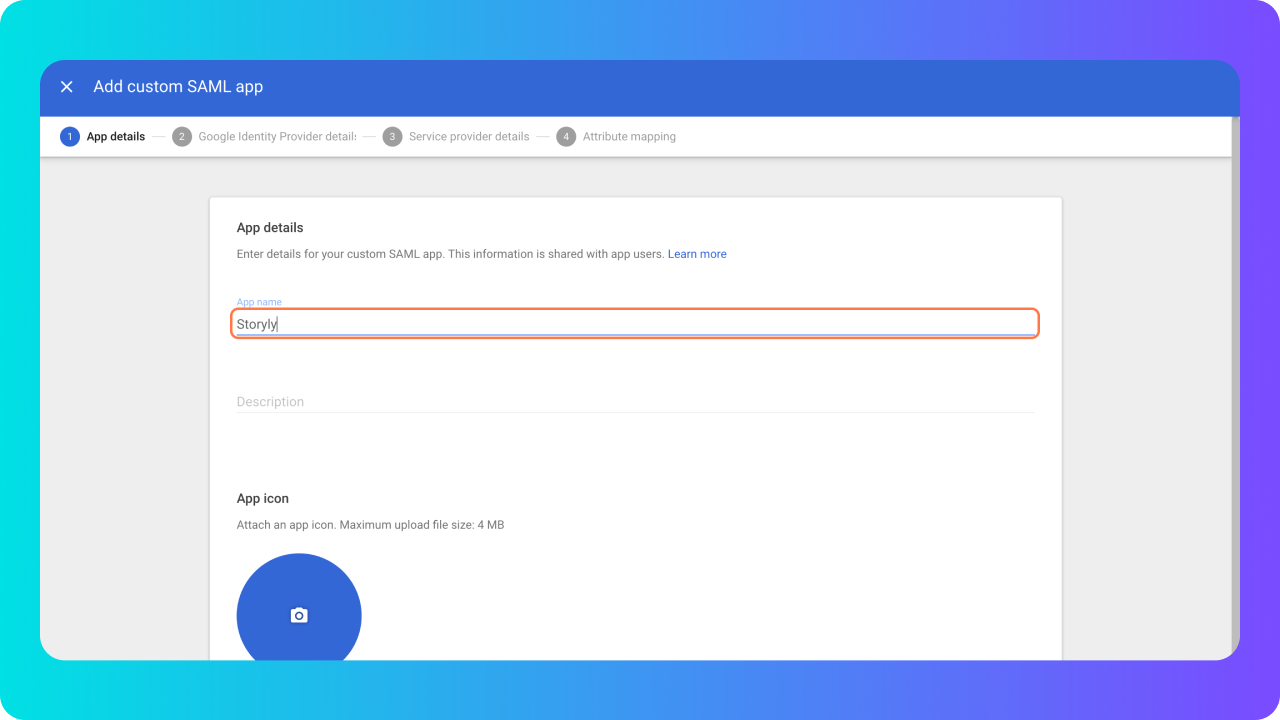
App name is mandatory, you can type Storyly and fill other fields as you wish.
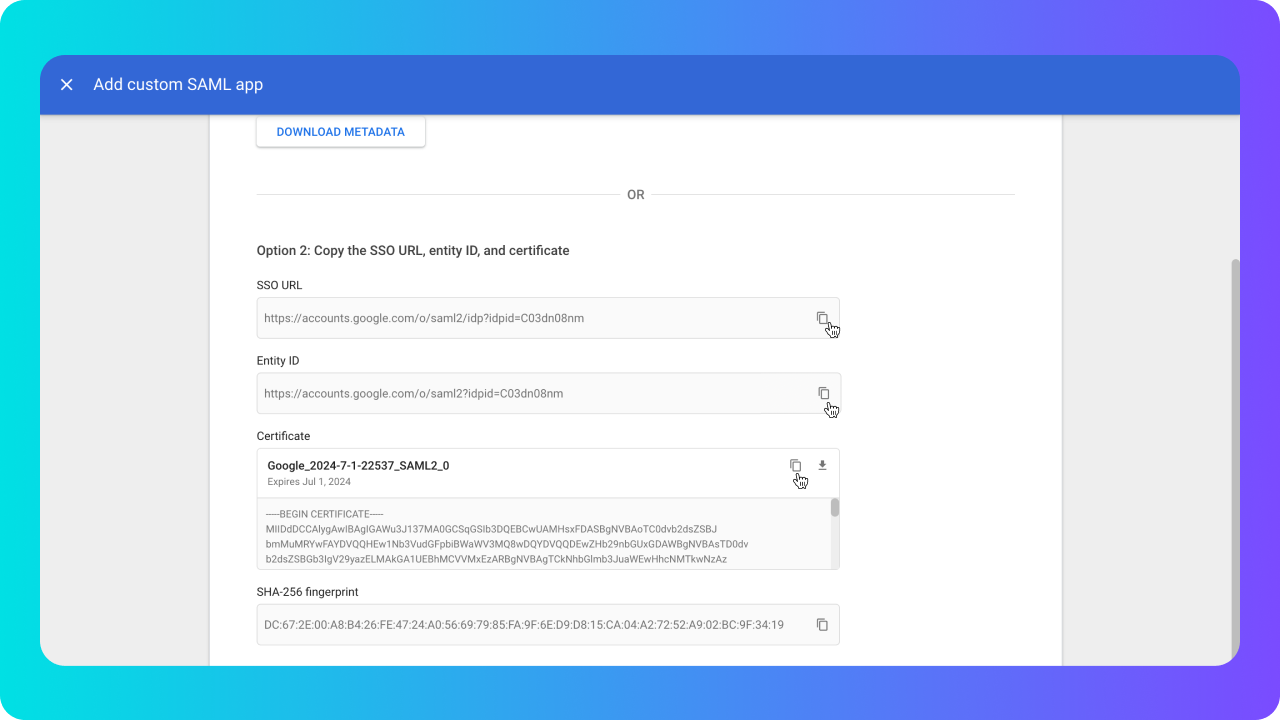
Now you need to copy multiple things and paste them to the relevant places on Storyly dashboard.
- SSO URL
- Entity ID
- Certificate
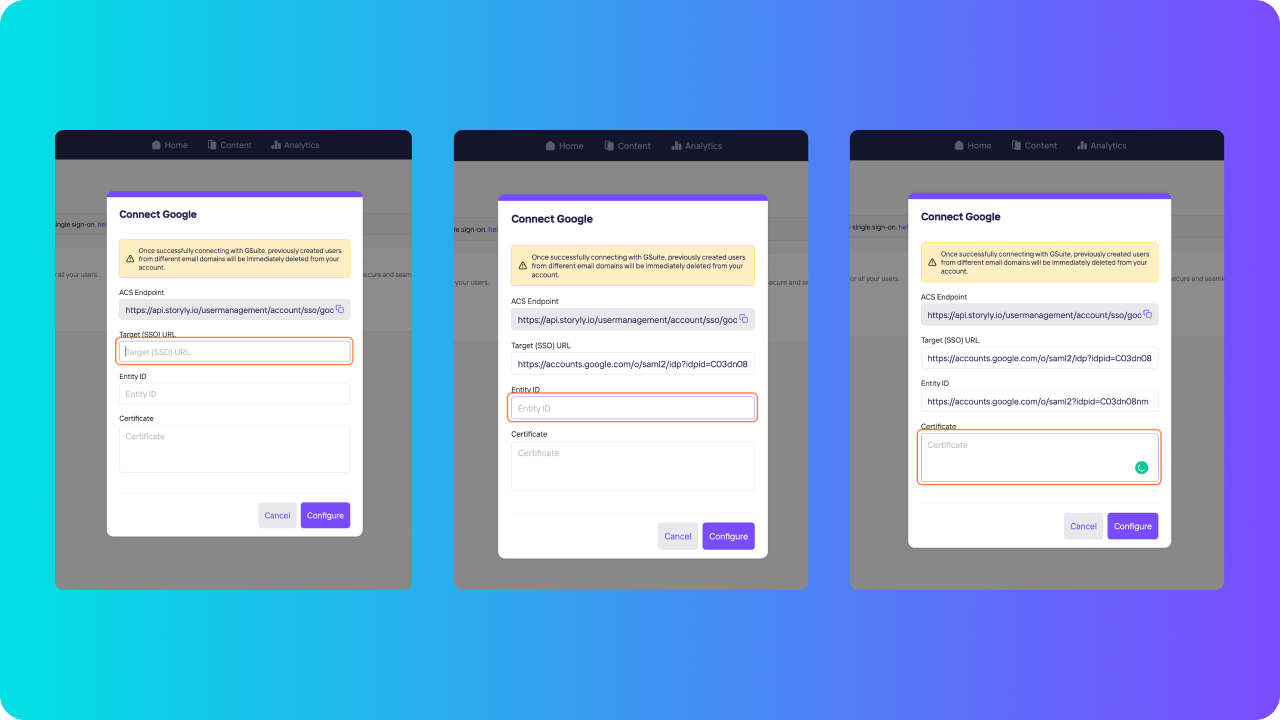
Here are the relevant inputs on Storyly dashboard for you to paste related information. Once you've filled all the information, click on Configure.
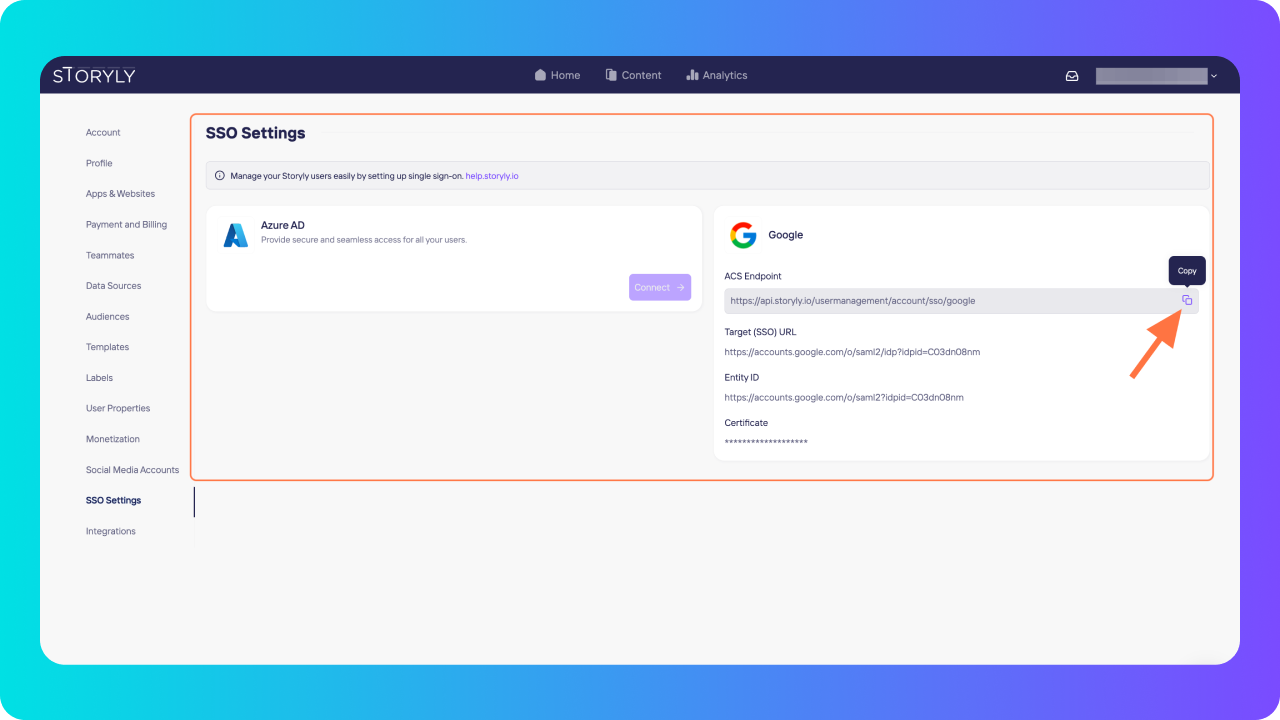
After configuration is completed, let’s copy the ACS Endpoint.
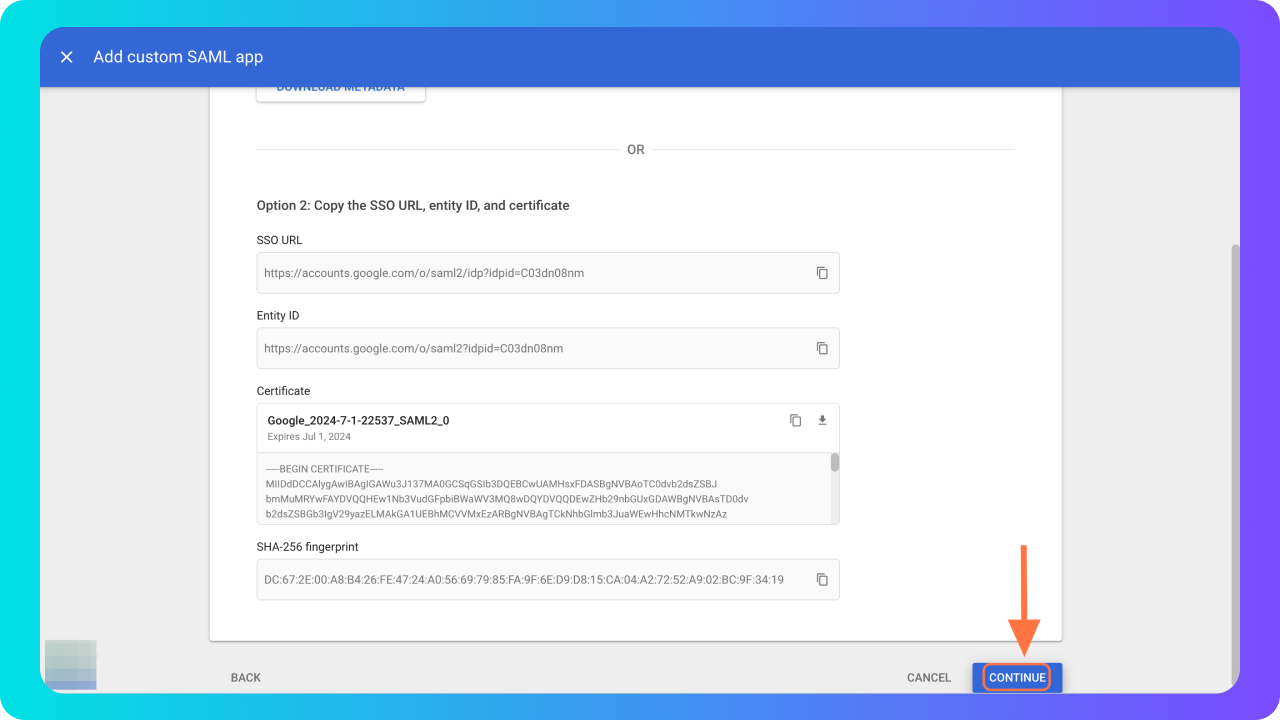
Go back to the Google Admin console, click on Continue.
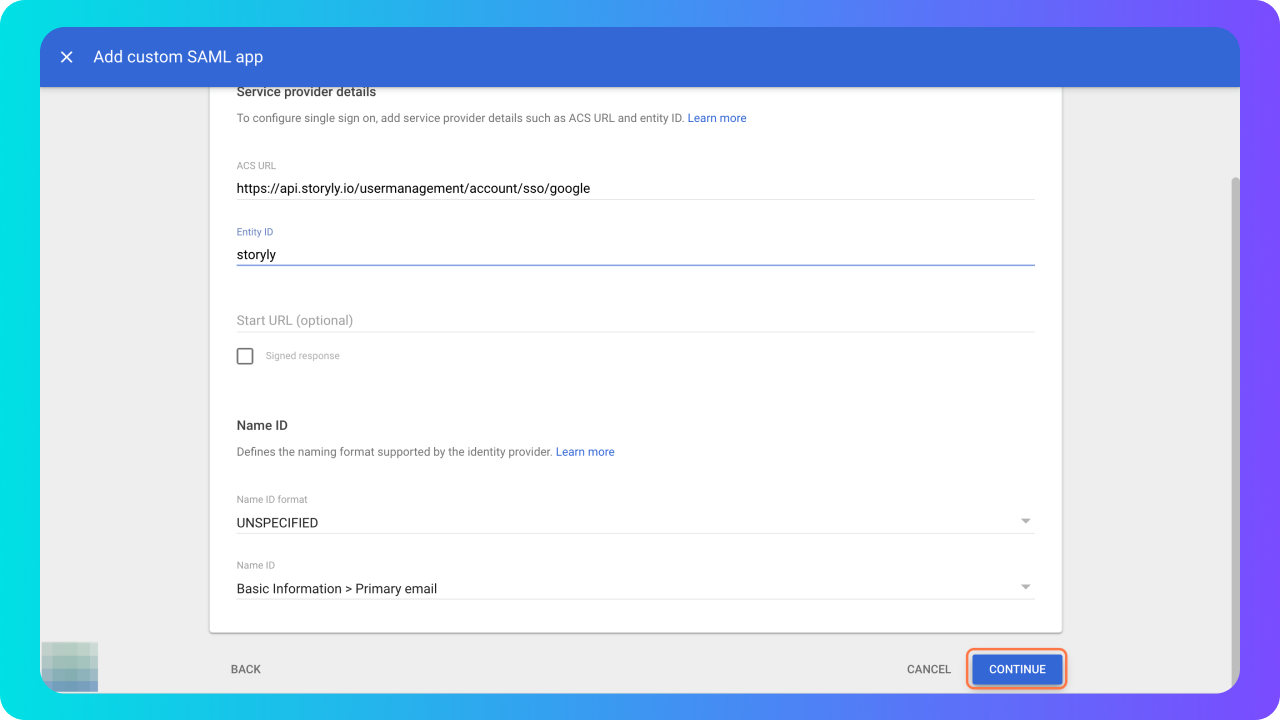
Paste the ACS URL to its field and type Storyly under the Entity ID. Once you are done, click Continue to move on.
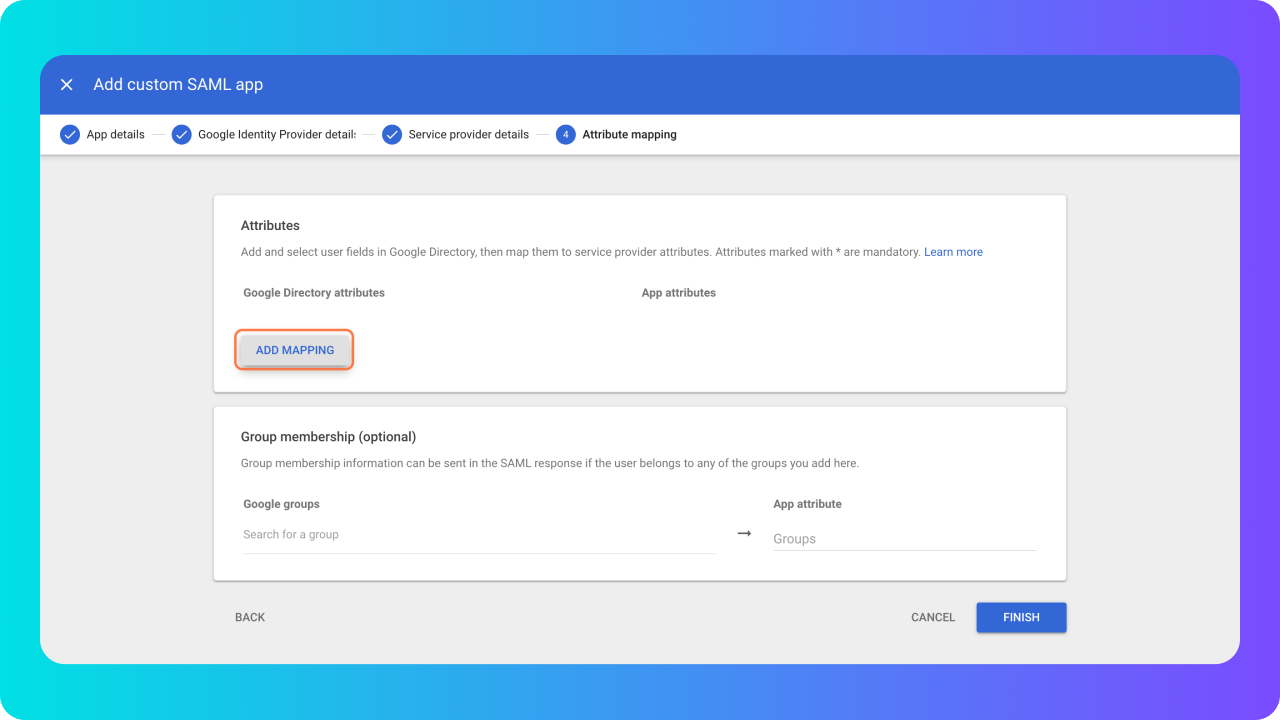
You are almost there. For the last step click on Add Mapping.
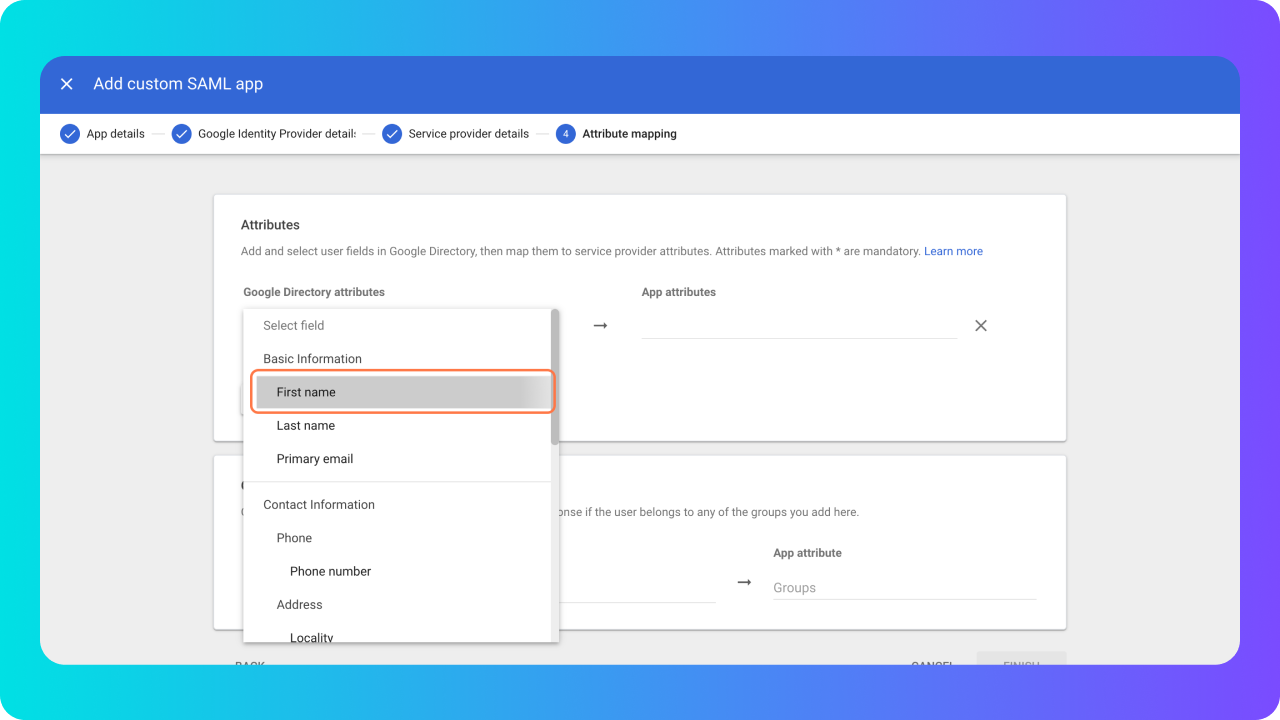
First name and Last name attributes are mandatory. Add those ones accordingly and click Finish once you've done.
App setup is completed 🚀
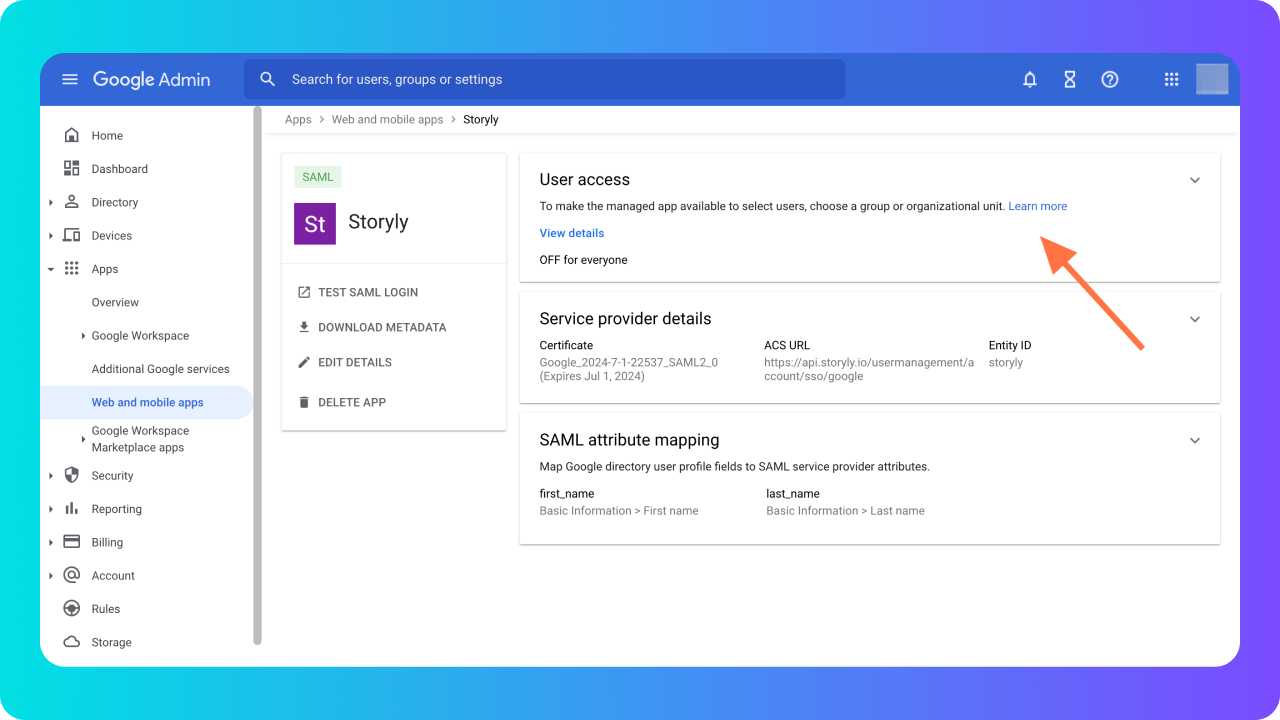
Now, you can edit the User access. Click on somewhere on the User access section.
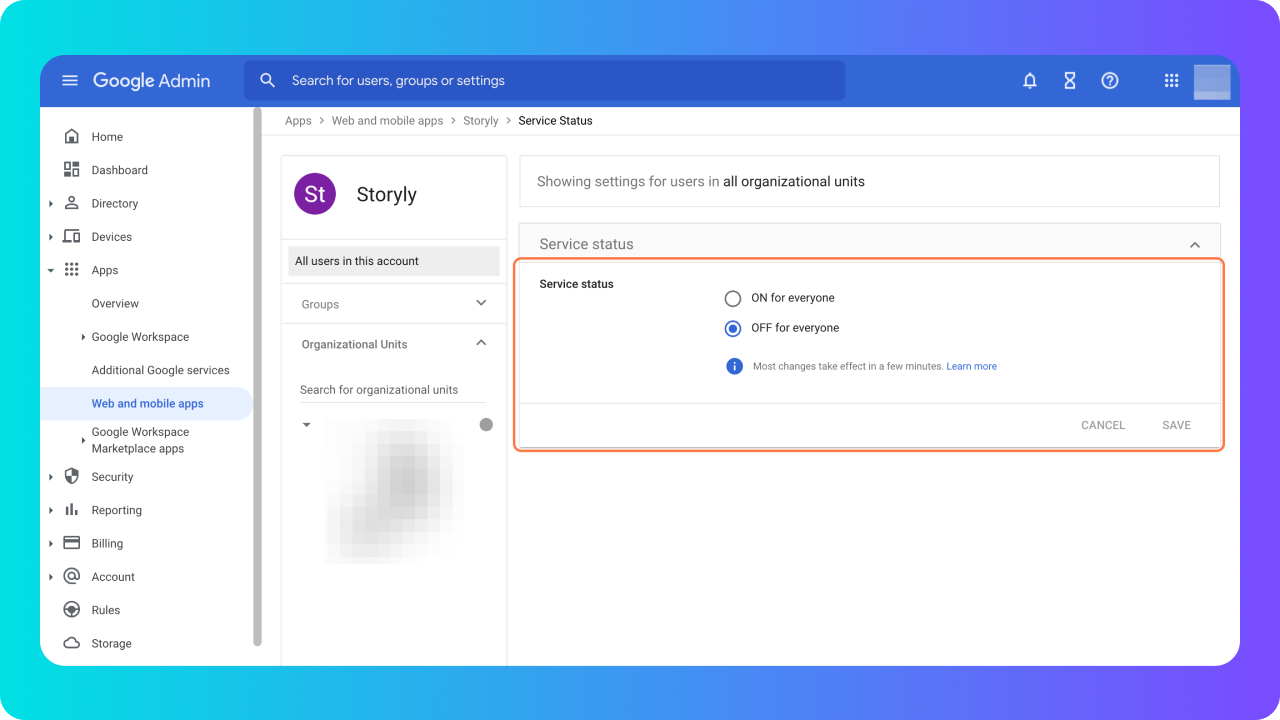
And select the ON for everyone option, then save.
Once you see Service status updated message at the bottom, all done!
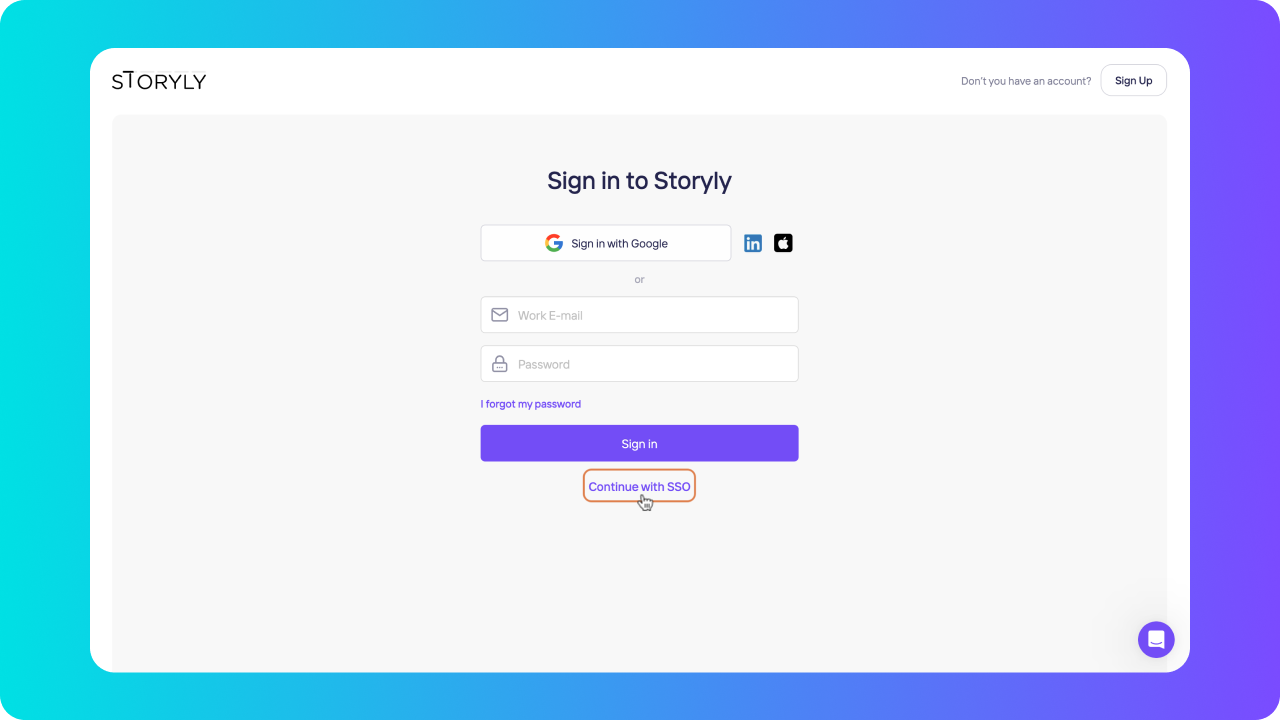
From now on, your users can select Continue with SSO option while logging into Storyly Dashboard.
Updated about 2 years ago
