Storyly Shopify App
What is Storyly for Shopify and how to install it?
Storyly is a Shopify app designed to enhance your store's revenue and elevate product discovery using a full-screen Story format, thanks to Storyly's automation power. To integrate Storyly into your store, visit the Shopify App Store, enter Storyly in the search bar, and click the install button.
How to create Stories?
Automated
Automated Shoppable Stories are designed to effortlessly boost your revenue without the need for content creation, thanks to the power of automation utilizing your collections and products.
To create automated shoppable stories, follow these steps;
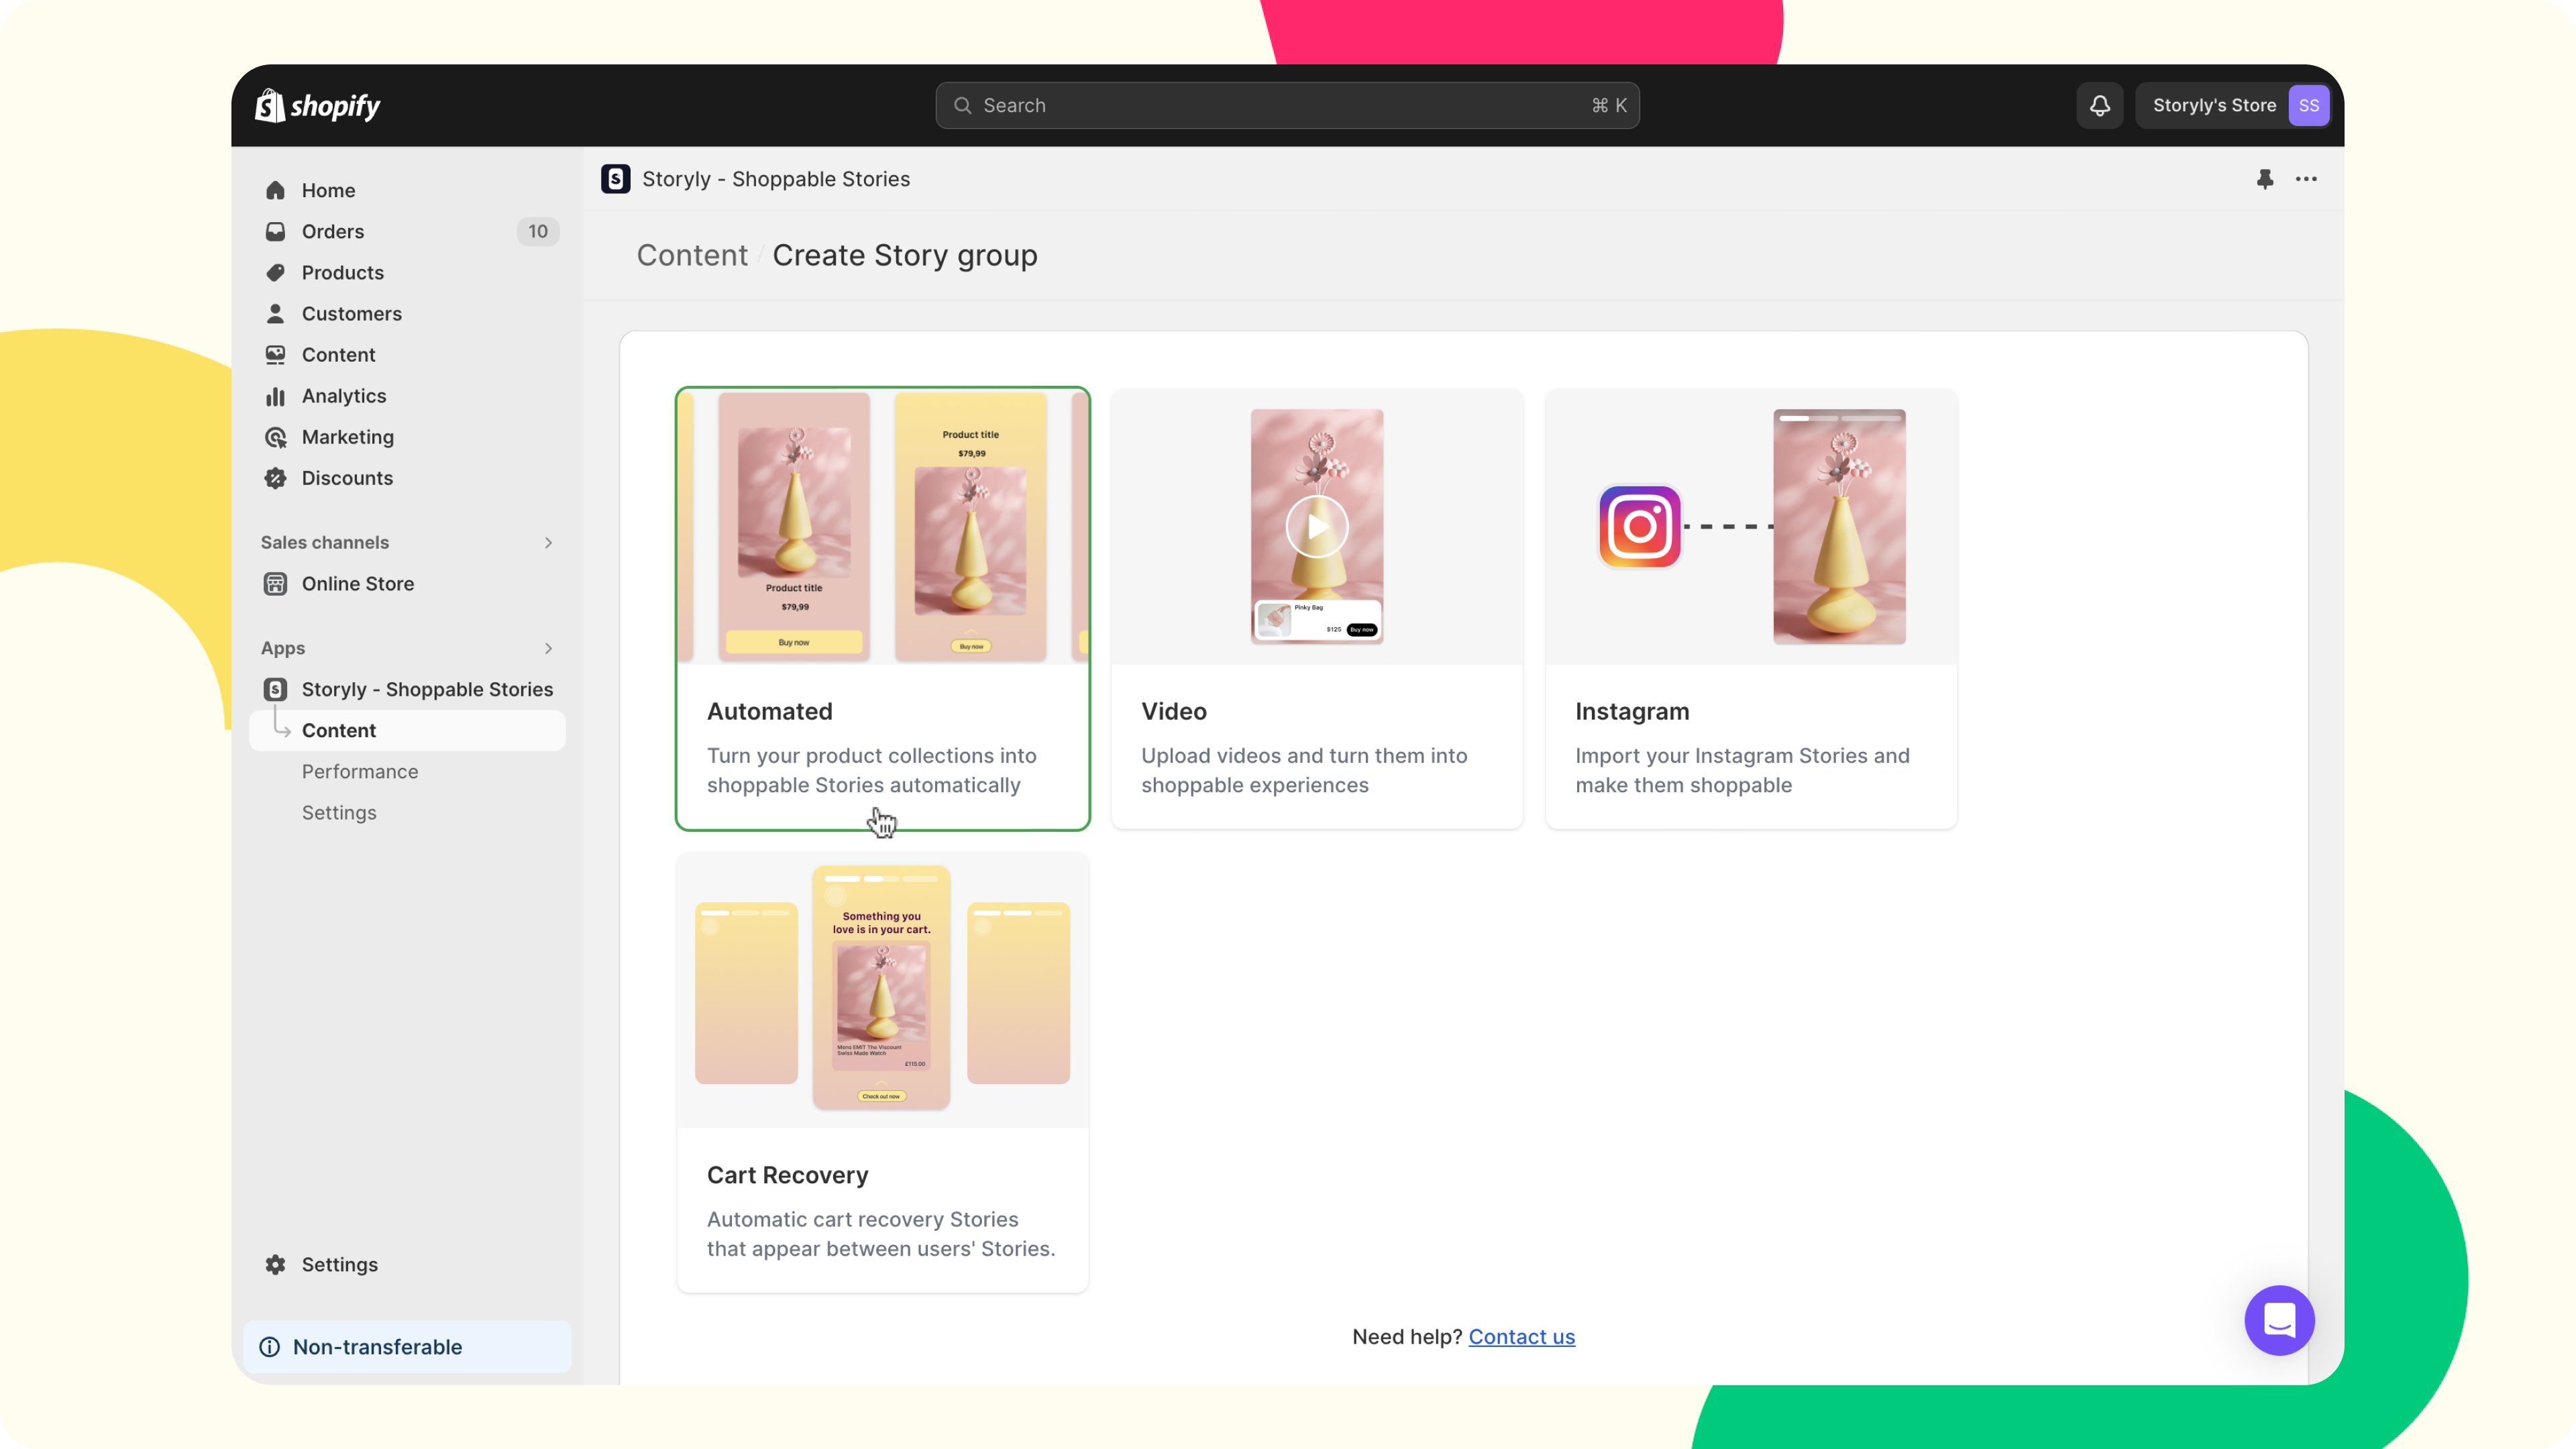
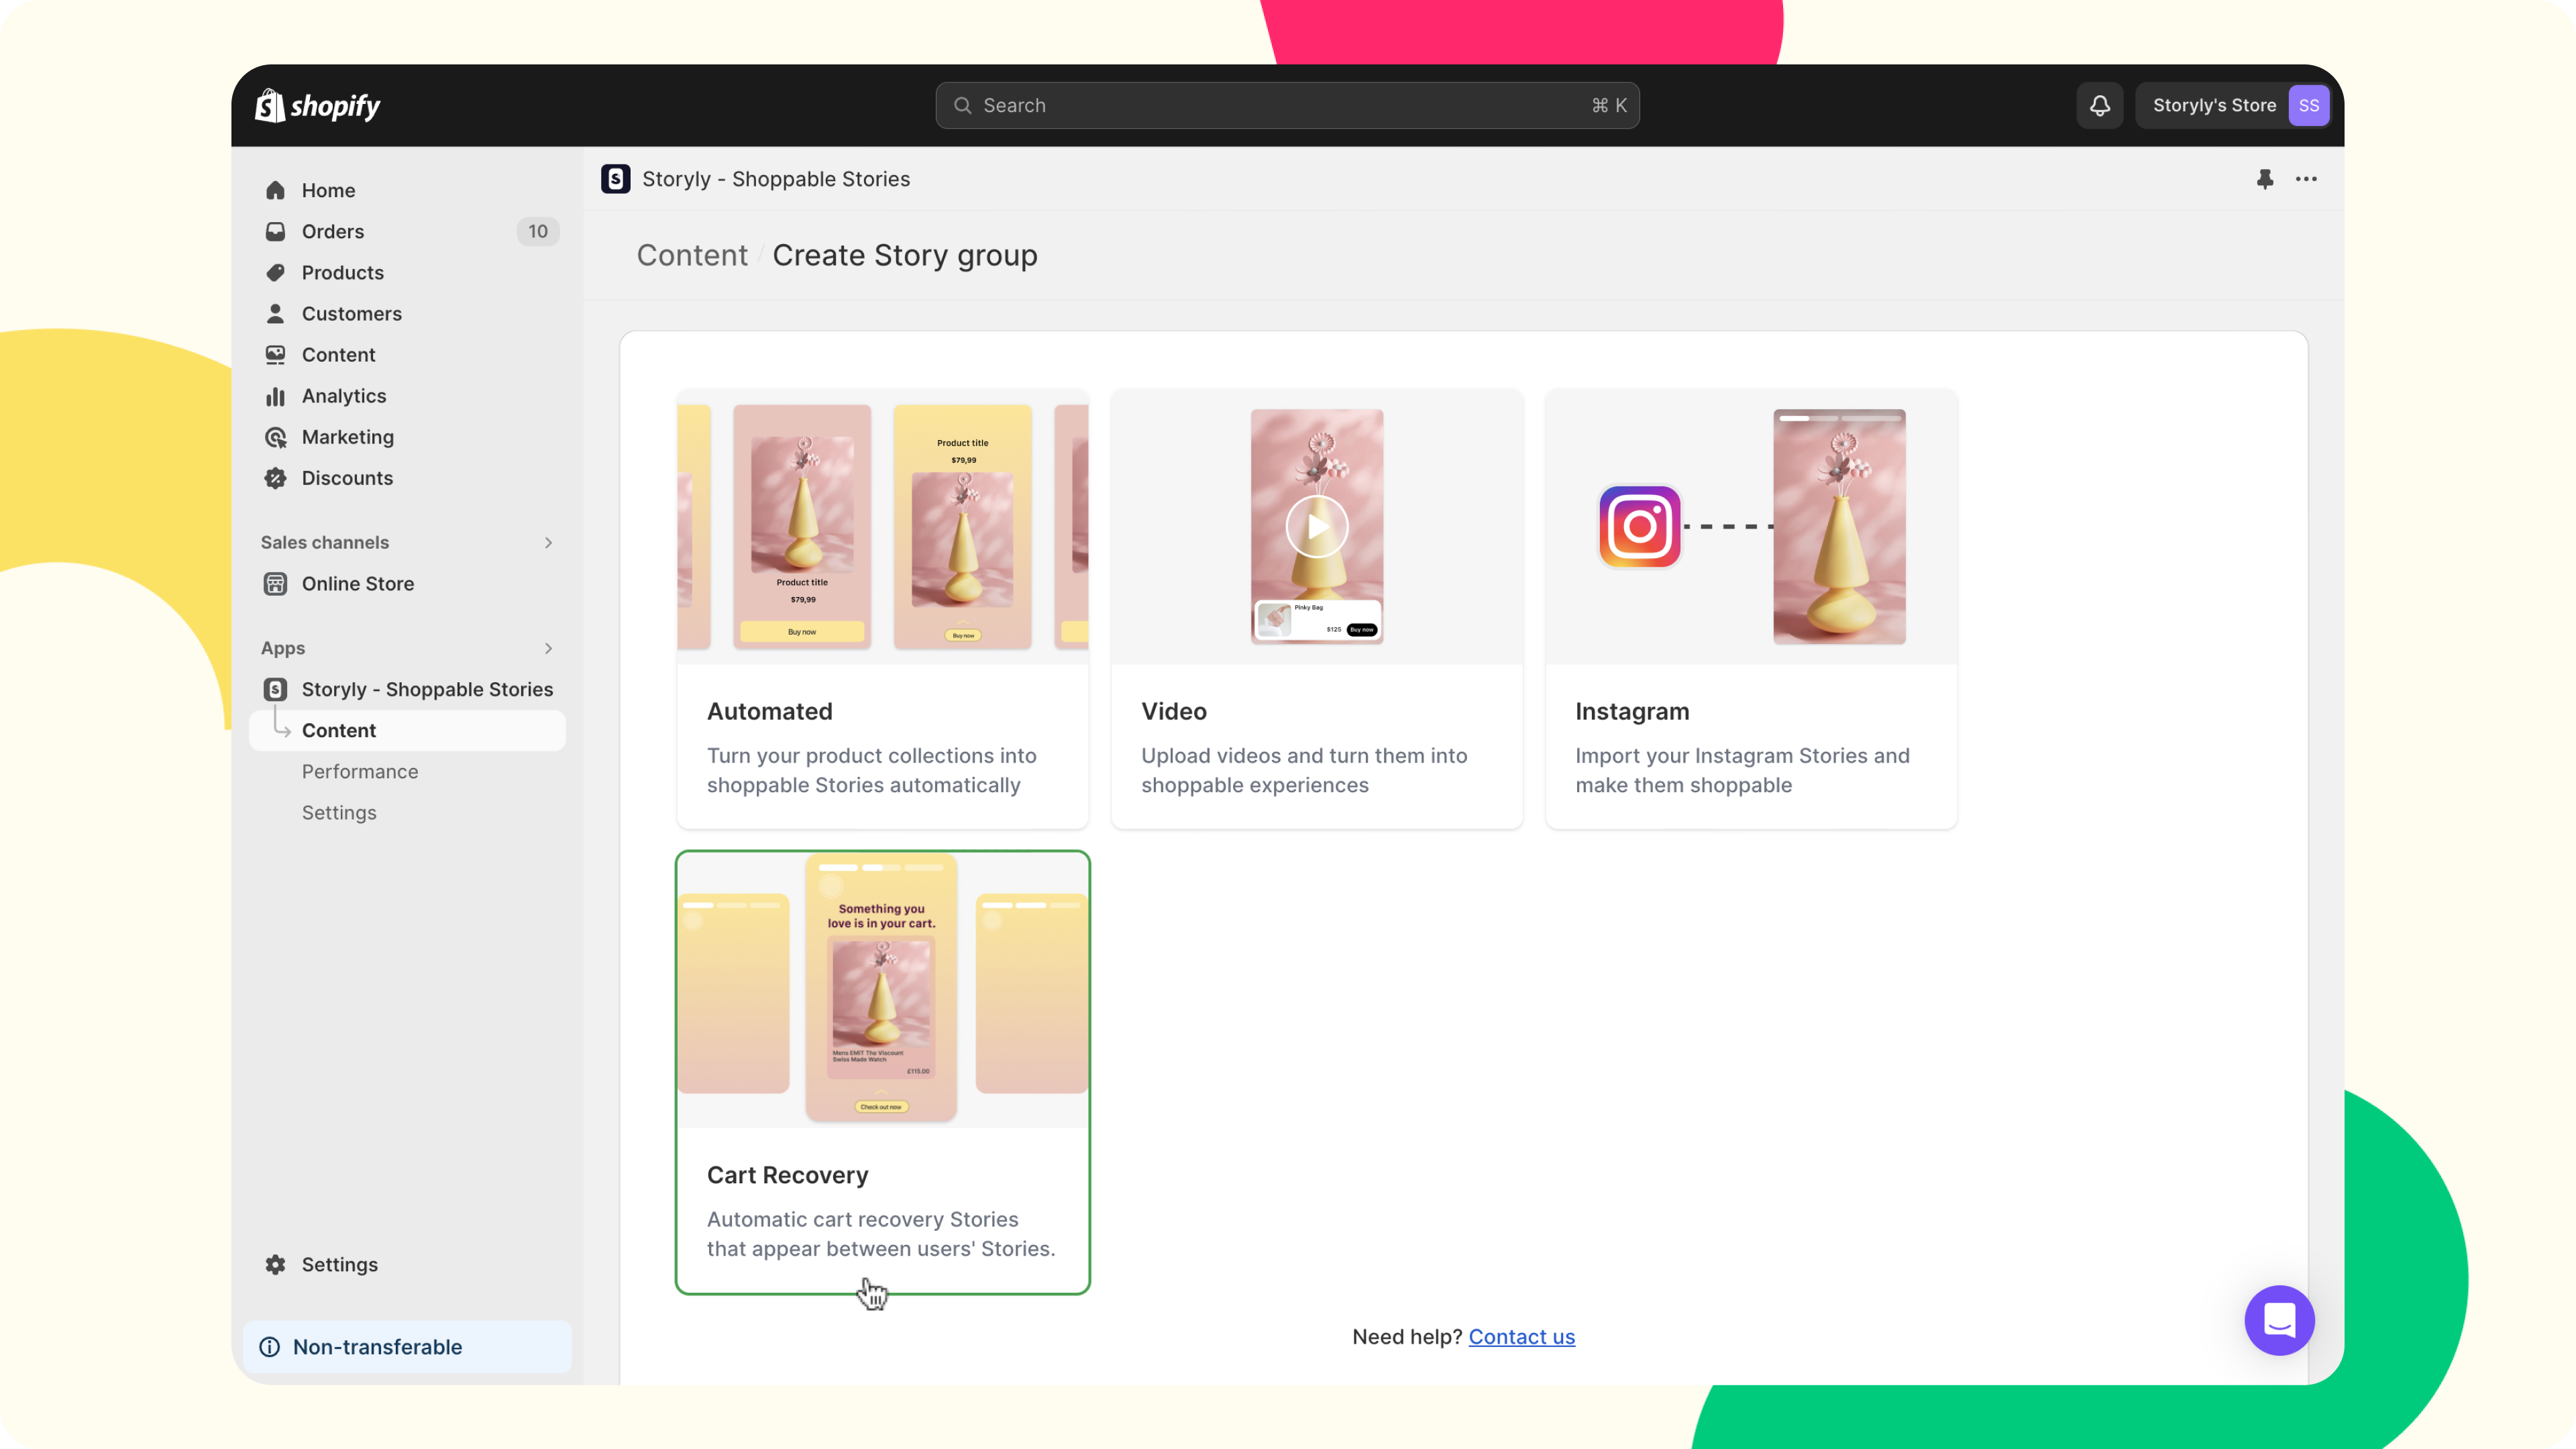
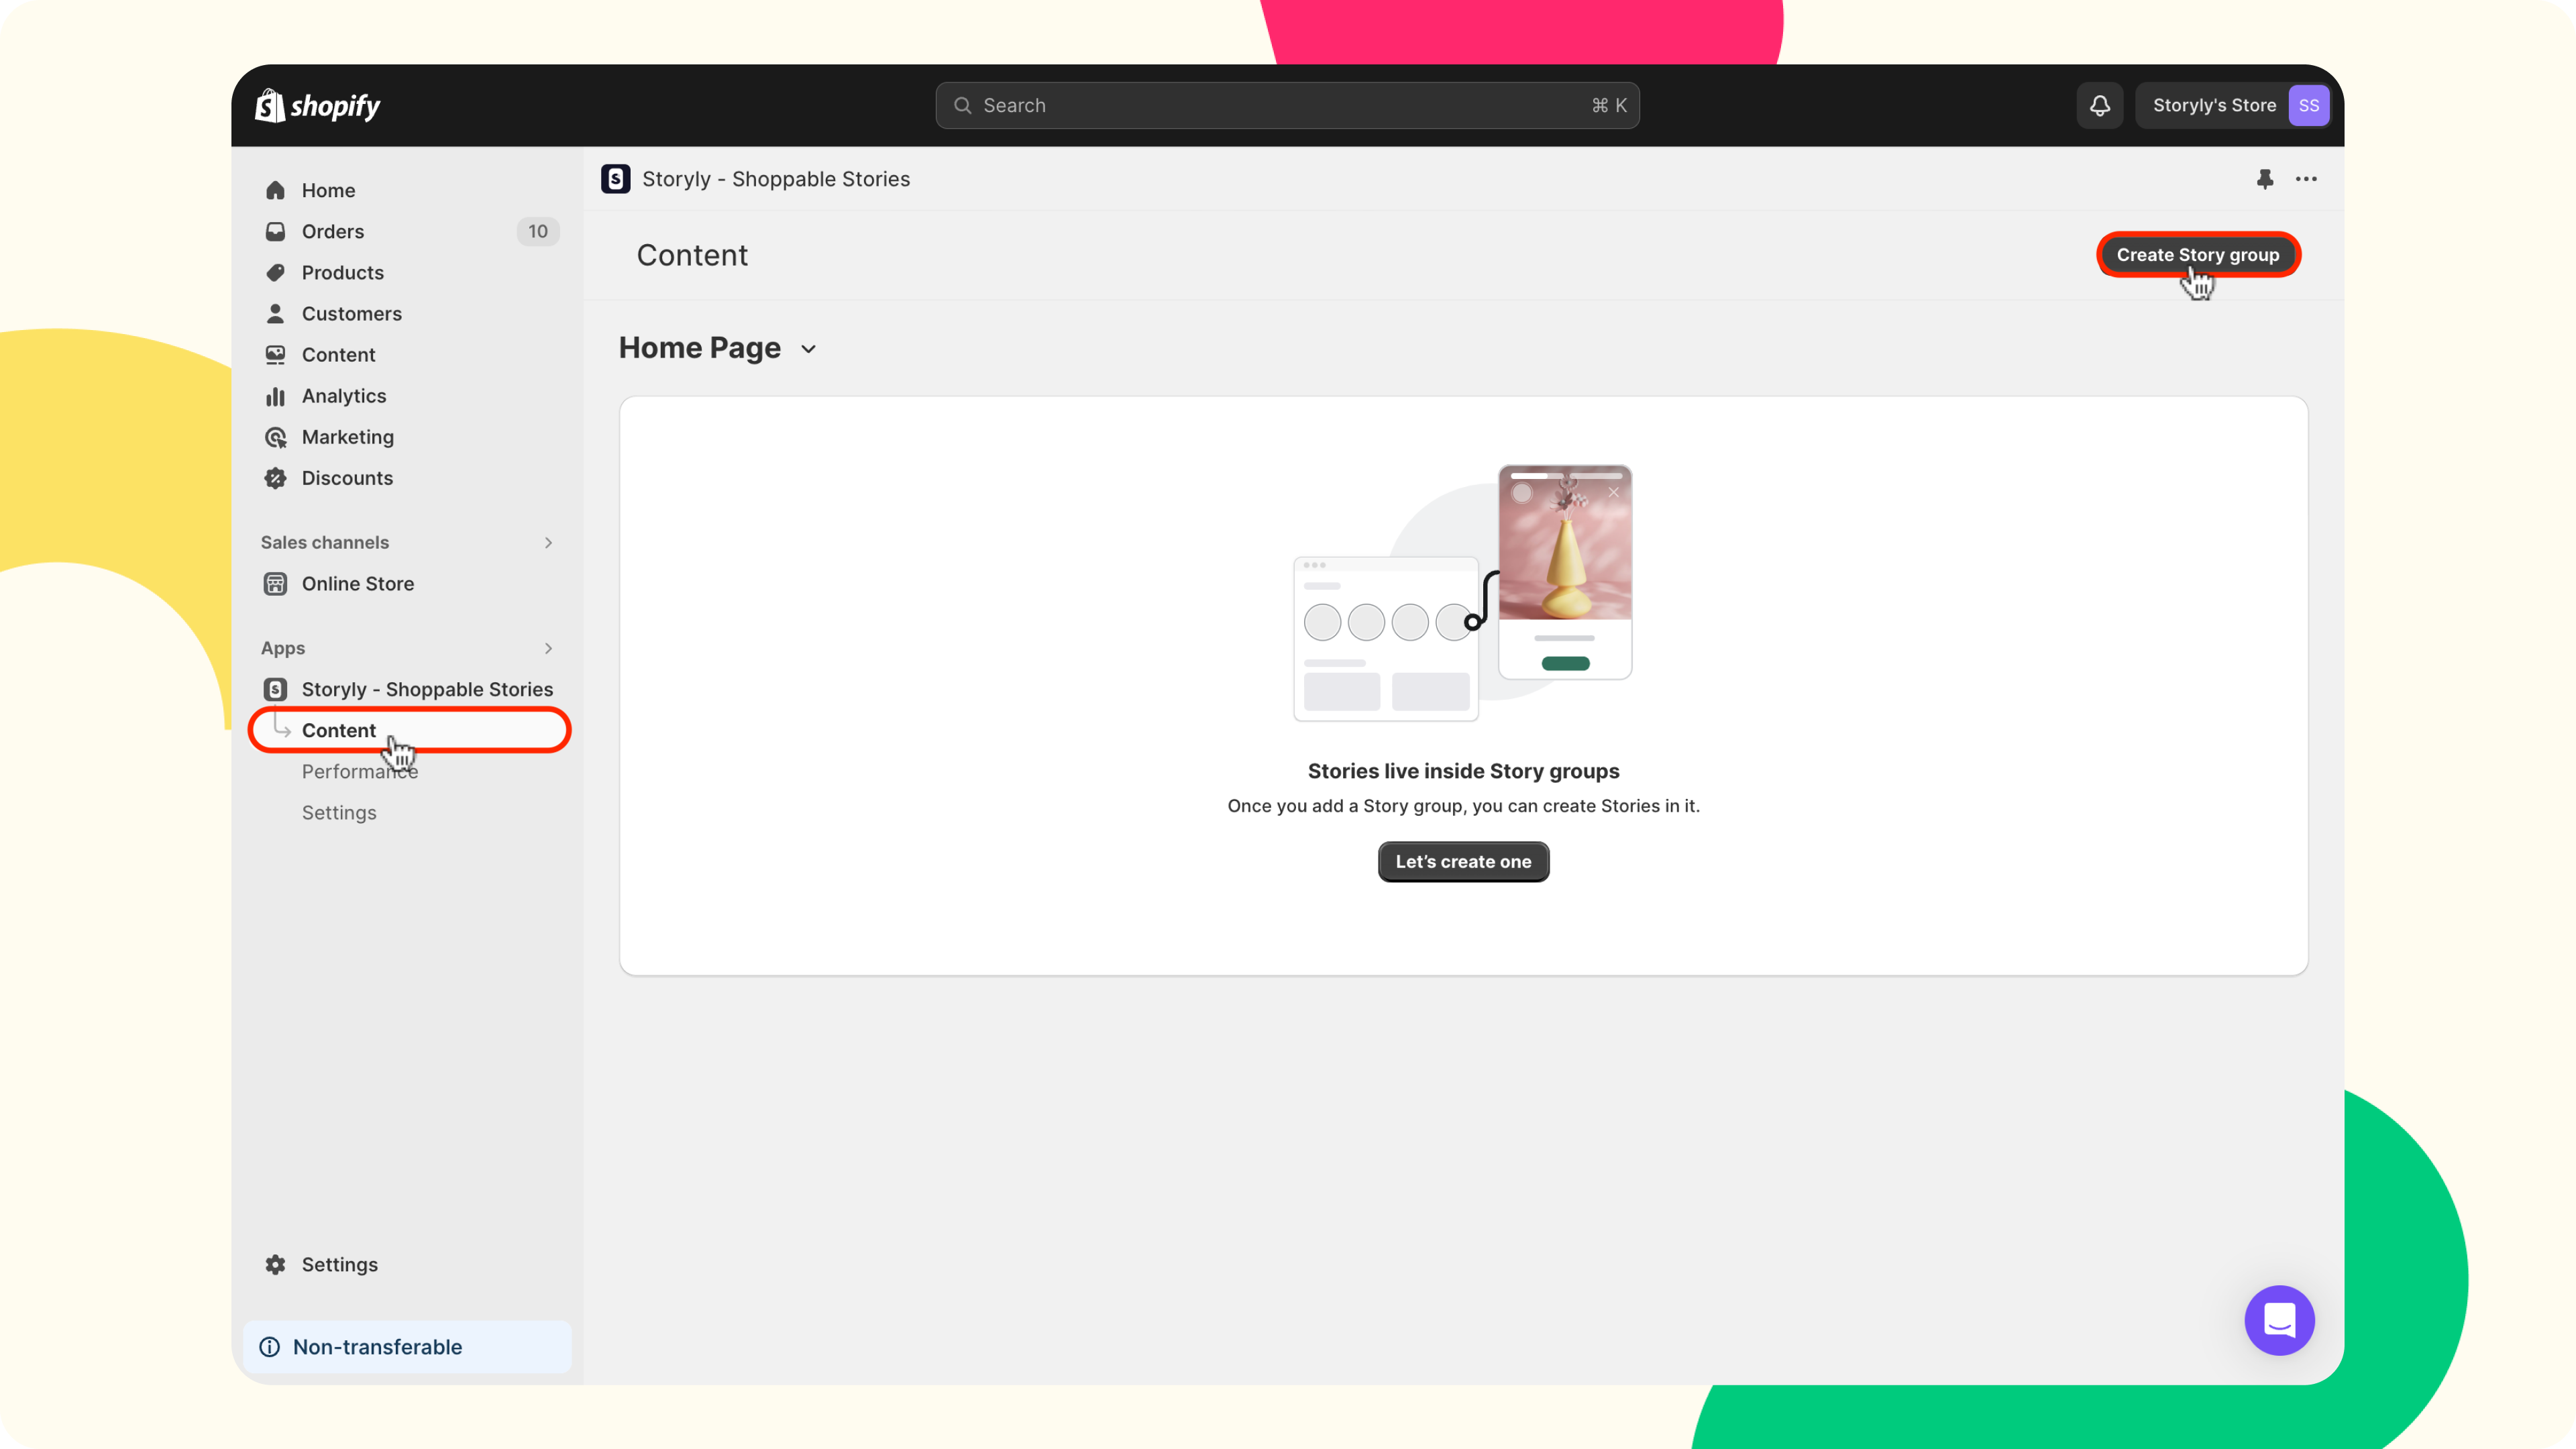
- Open the Storyly app, click on Content in the left pane, and click on the Create Story Group button on the right top.

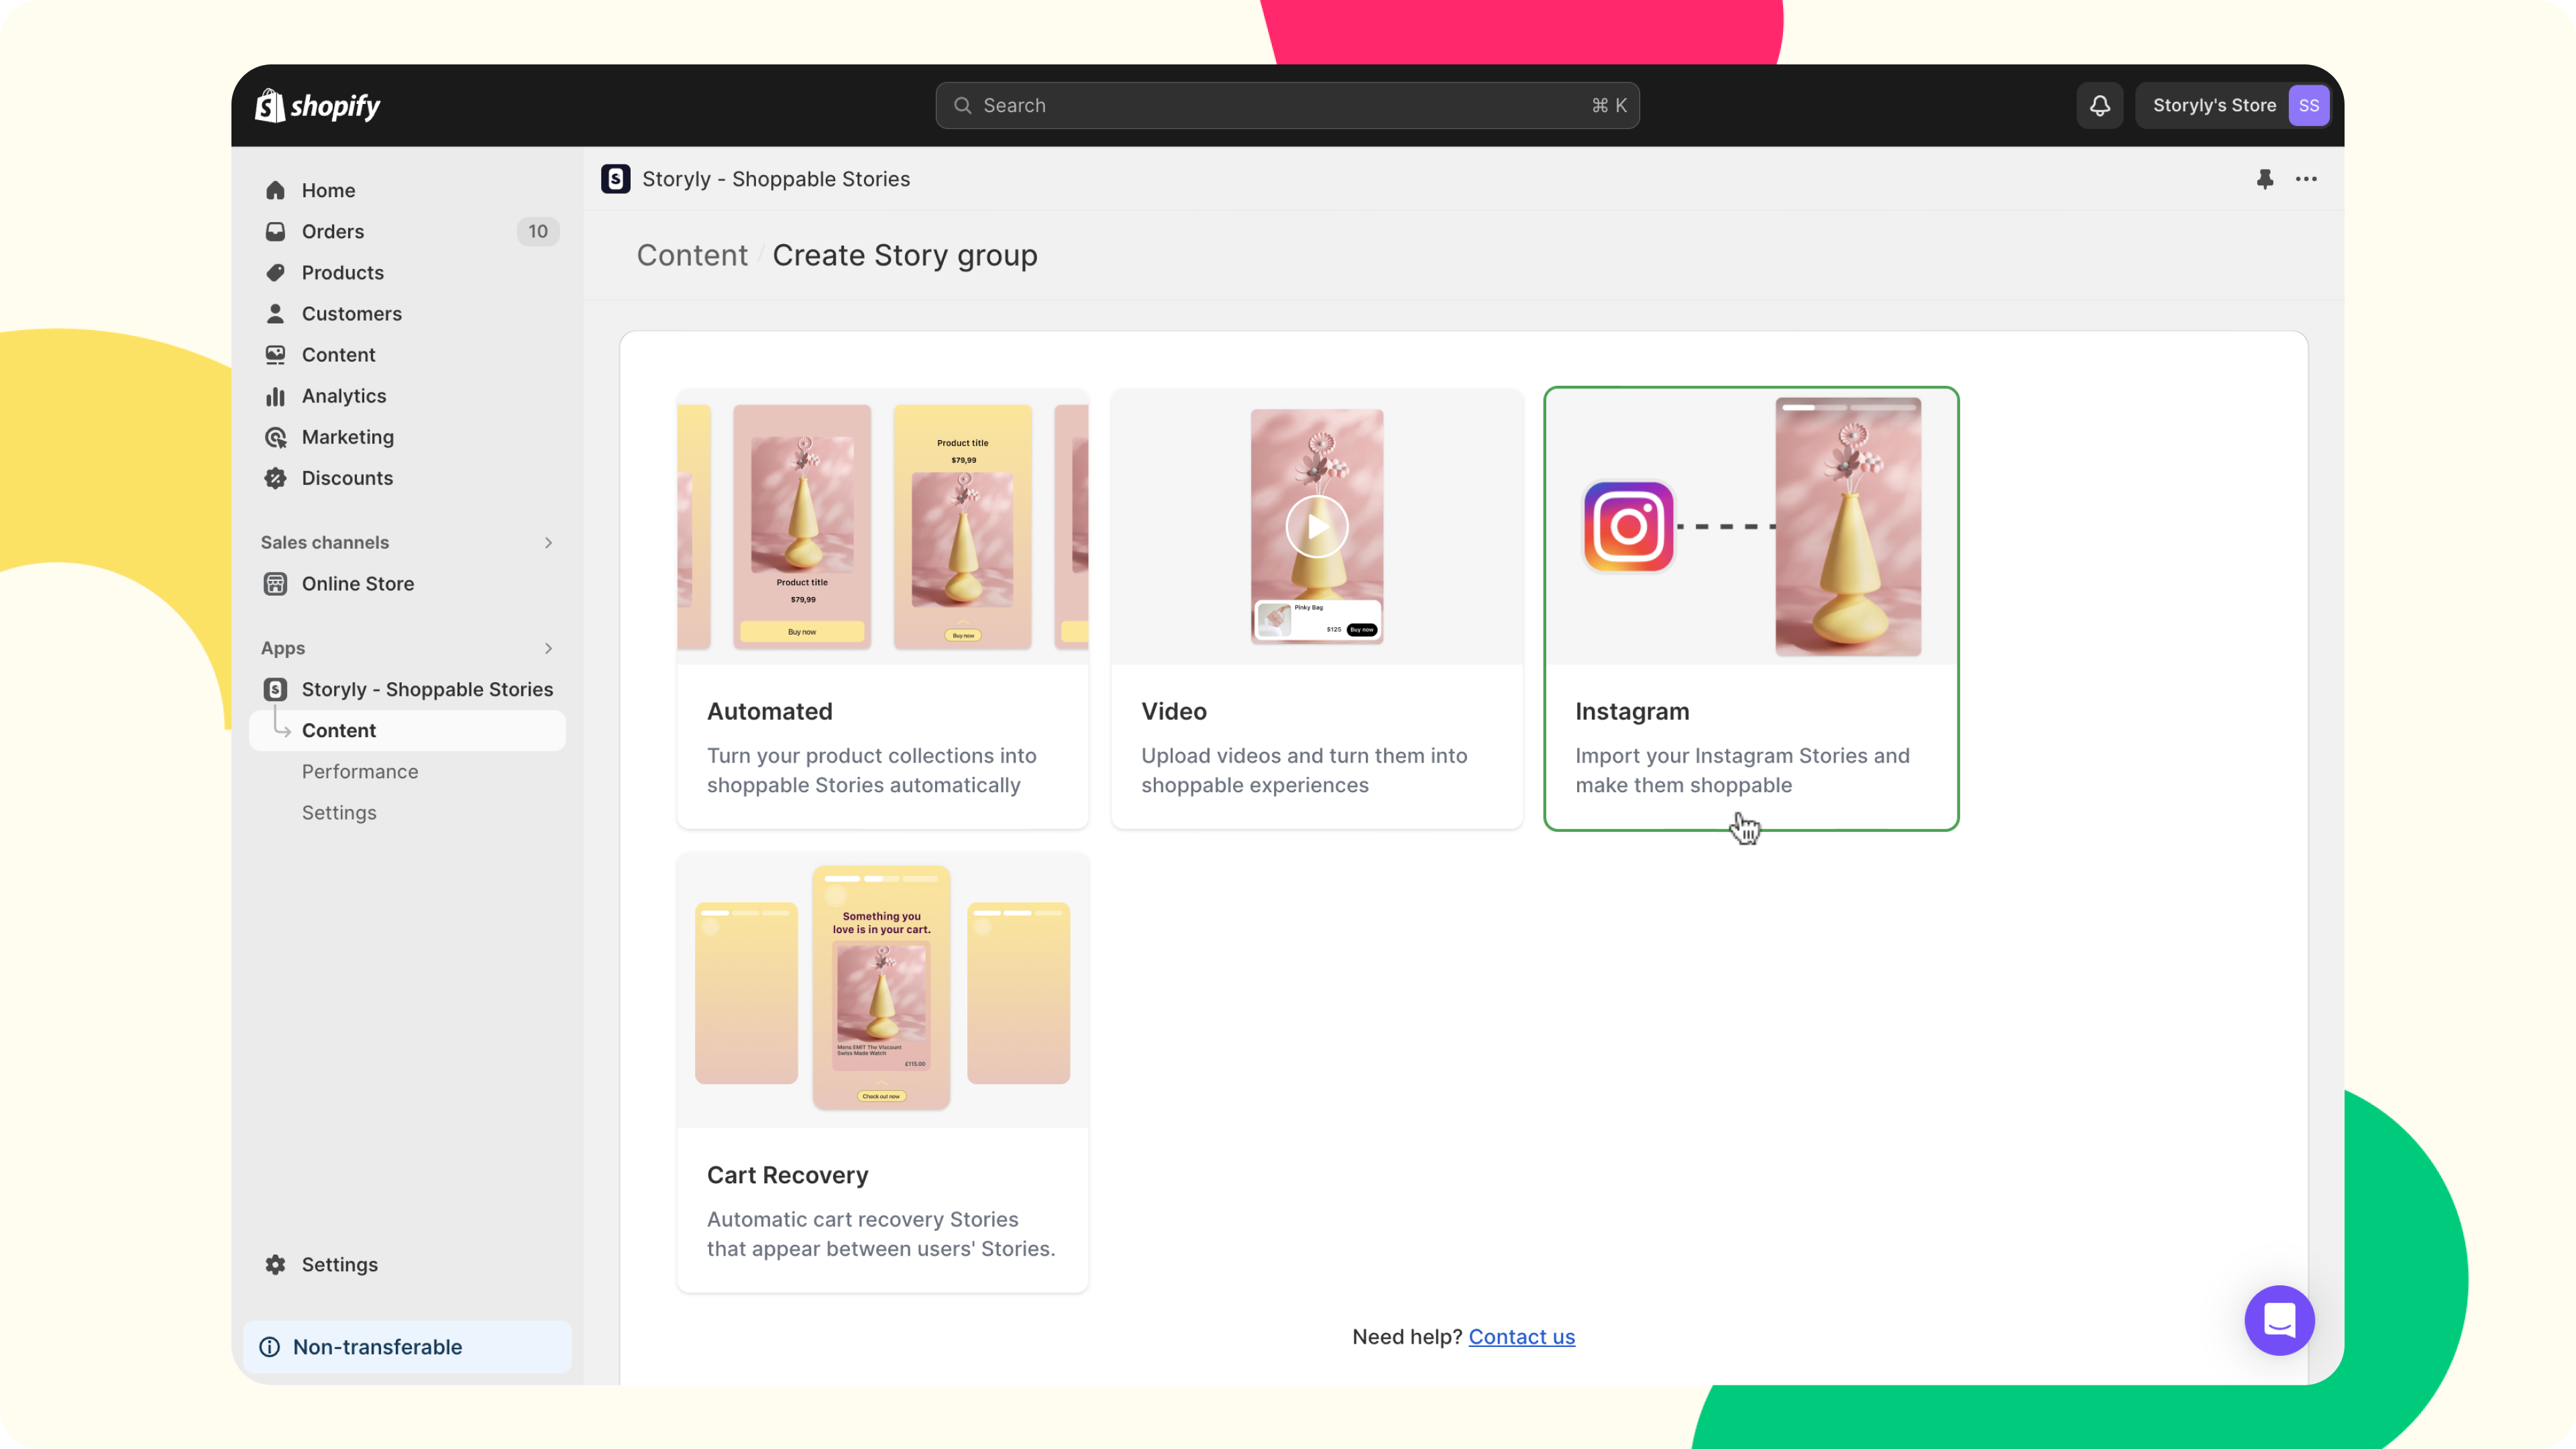
- Choose the Automated option.
- Next, input your Story Group title, such as "New Collection," and upload a cover image for your Story Group.
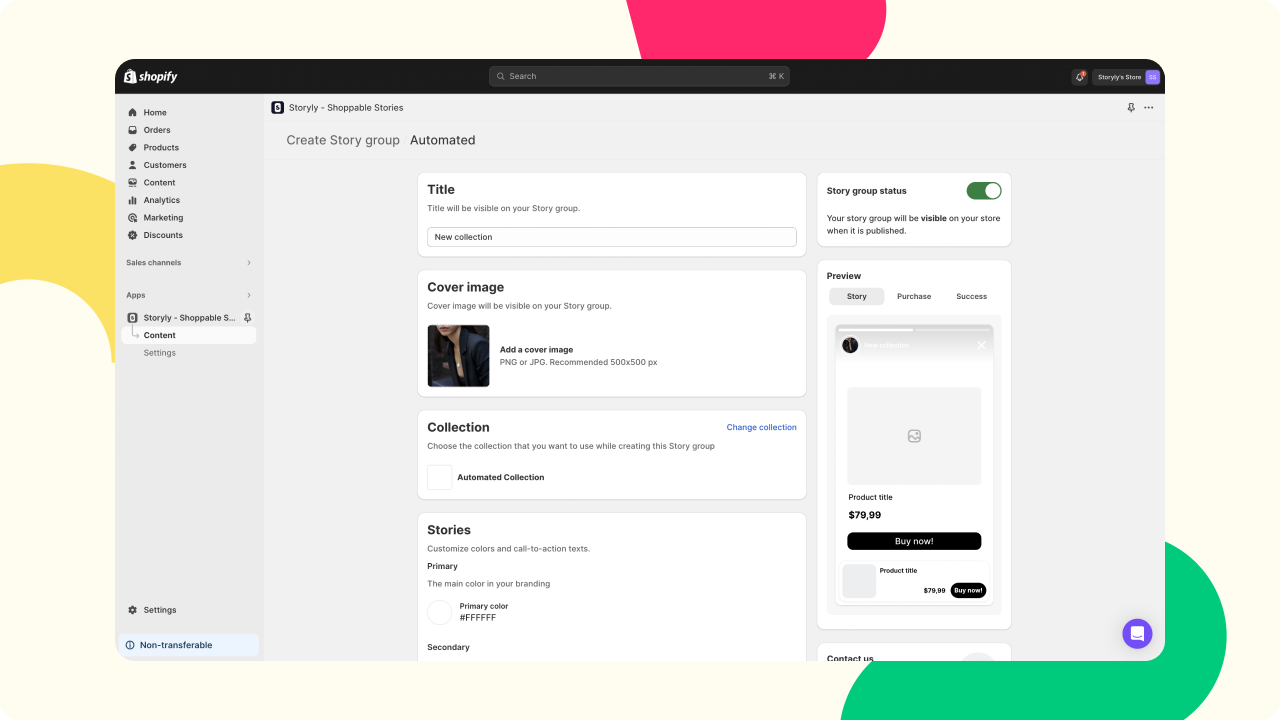
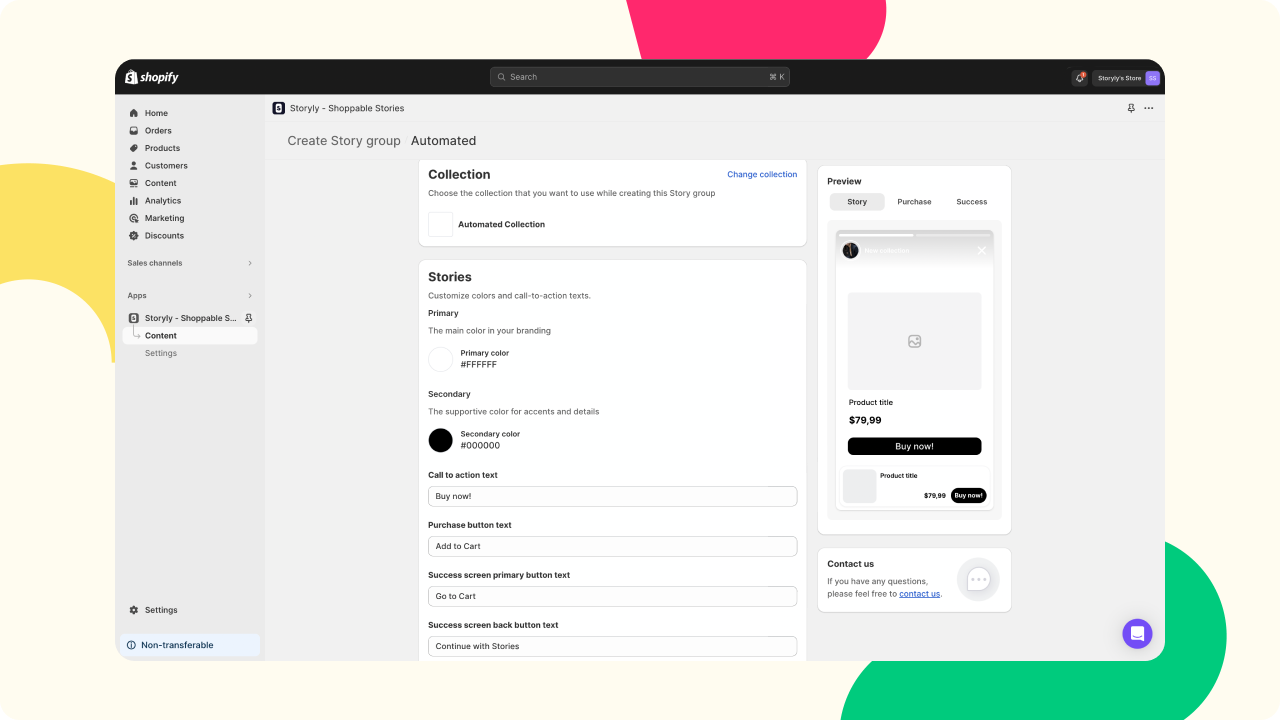
- Customize your CTA button, and select the products or collection of your choice. Our system will generate eight different stories randomly based on your preferences. Stories will be replaced with new ones every 24 hours.
Video
Shoppable videos provide dynamic experiences, allowing users to purchase your products directly from Stories without leaving the Story itself. This immersive approach mimics in-store shopping, engaging users at the peak of their interest, and potentially boosting sales and product discovery.
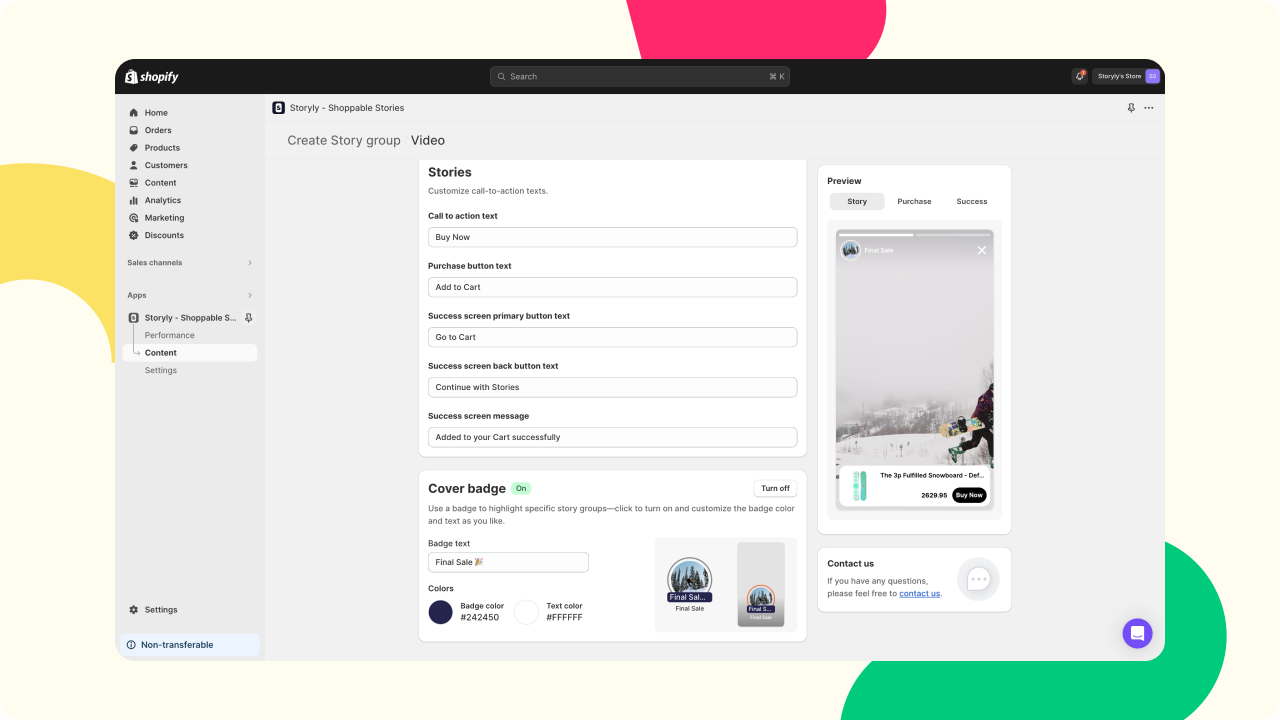
To create Shoppable Video Stories, follow these steps;
- Click on Content in the left pane, and click on the Create Story Group button on the right top.

- Choose the Video option.

- Then, input your Story Group title, like "Final Sale," upload your cover and video, and select the products.
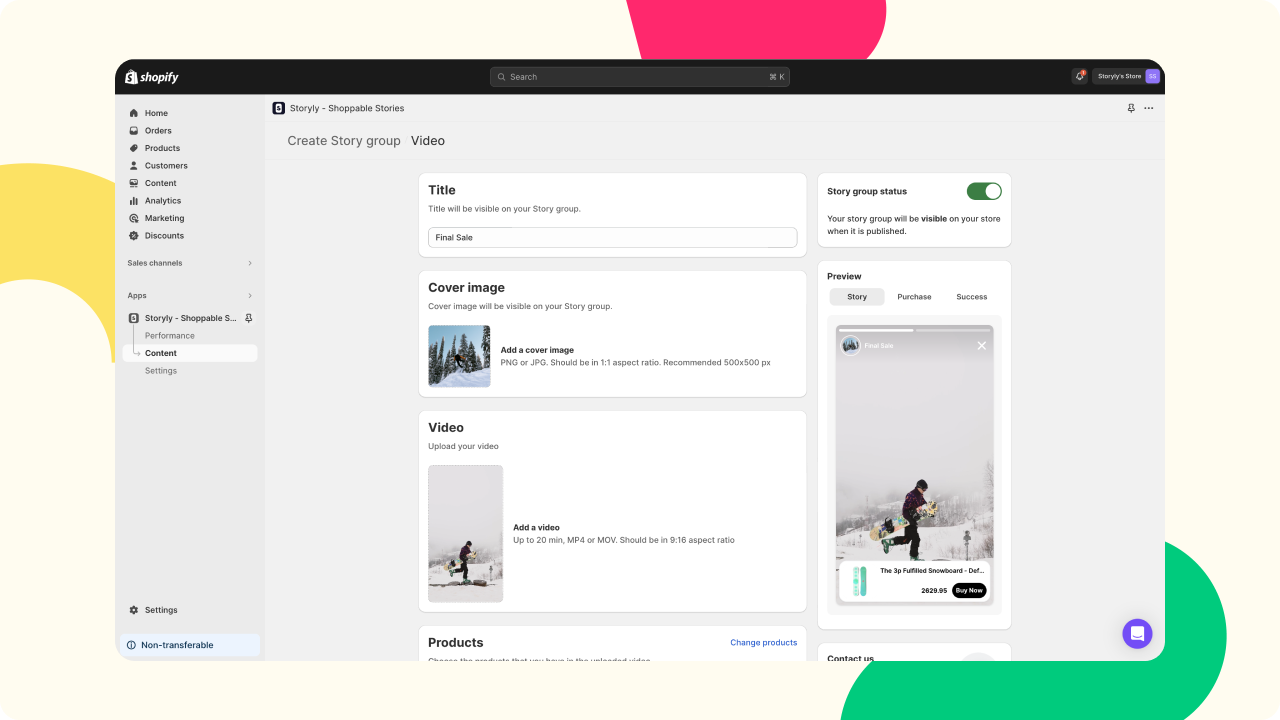
- Customize your product catalog by creating call-to-action text or a success message and hit Save.
Cart Recovery
The purpose of cart recovery Stories is to re-engage and convert customers who have added items to their cart but then left the app without completing their purchase. This is a common occurrence in mobile commerce, with cart abandonment rates averaging around 20%. However, cart abandonment Stories can be a highly effective way to recover lost sales and improve conversion rates. To bring those customers back and seal the deal, here's the scoop:
To create Cart Recovery Stories, follow these steps;
- Click on Content in the left pane, and click on the Create Story Group button on the right top.

- Choose the Cart Recovery option.
- Next, input your Story Group title, such as "Look what you've missed!" and upload a cover image for your Story Group.
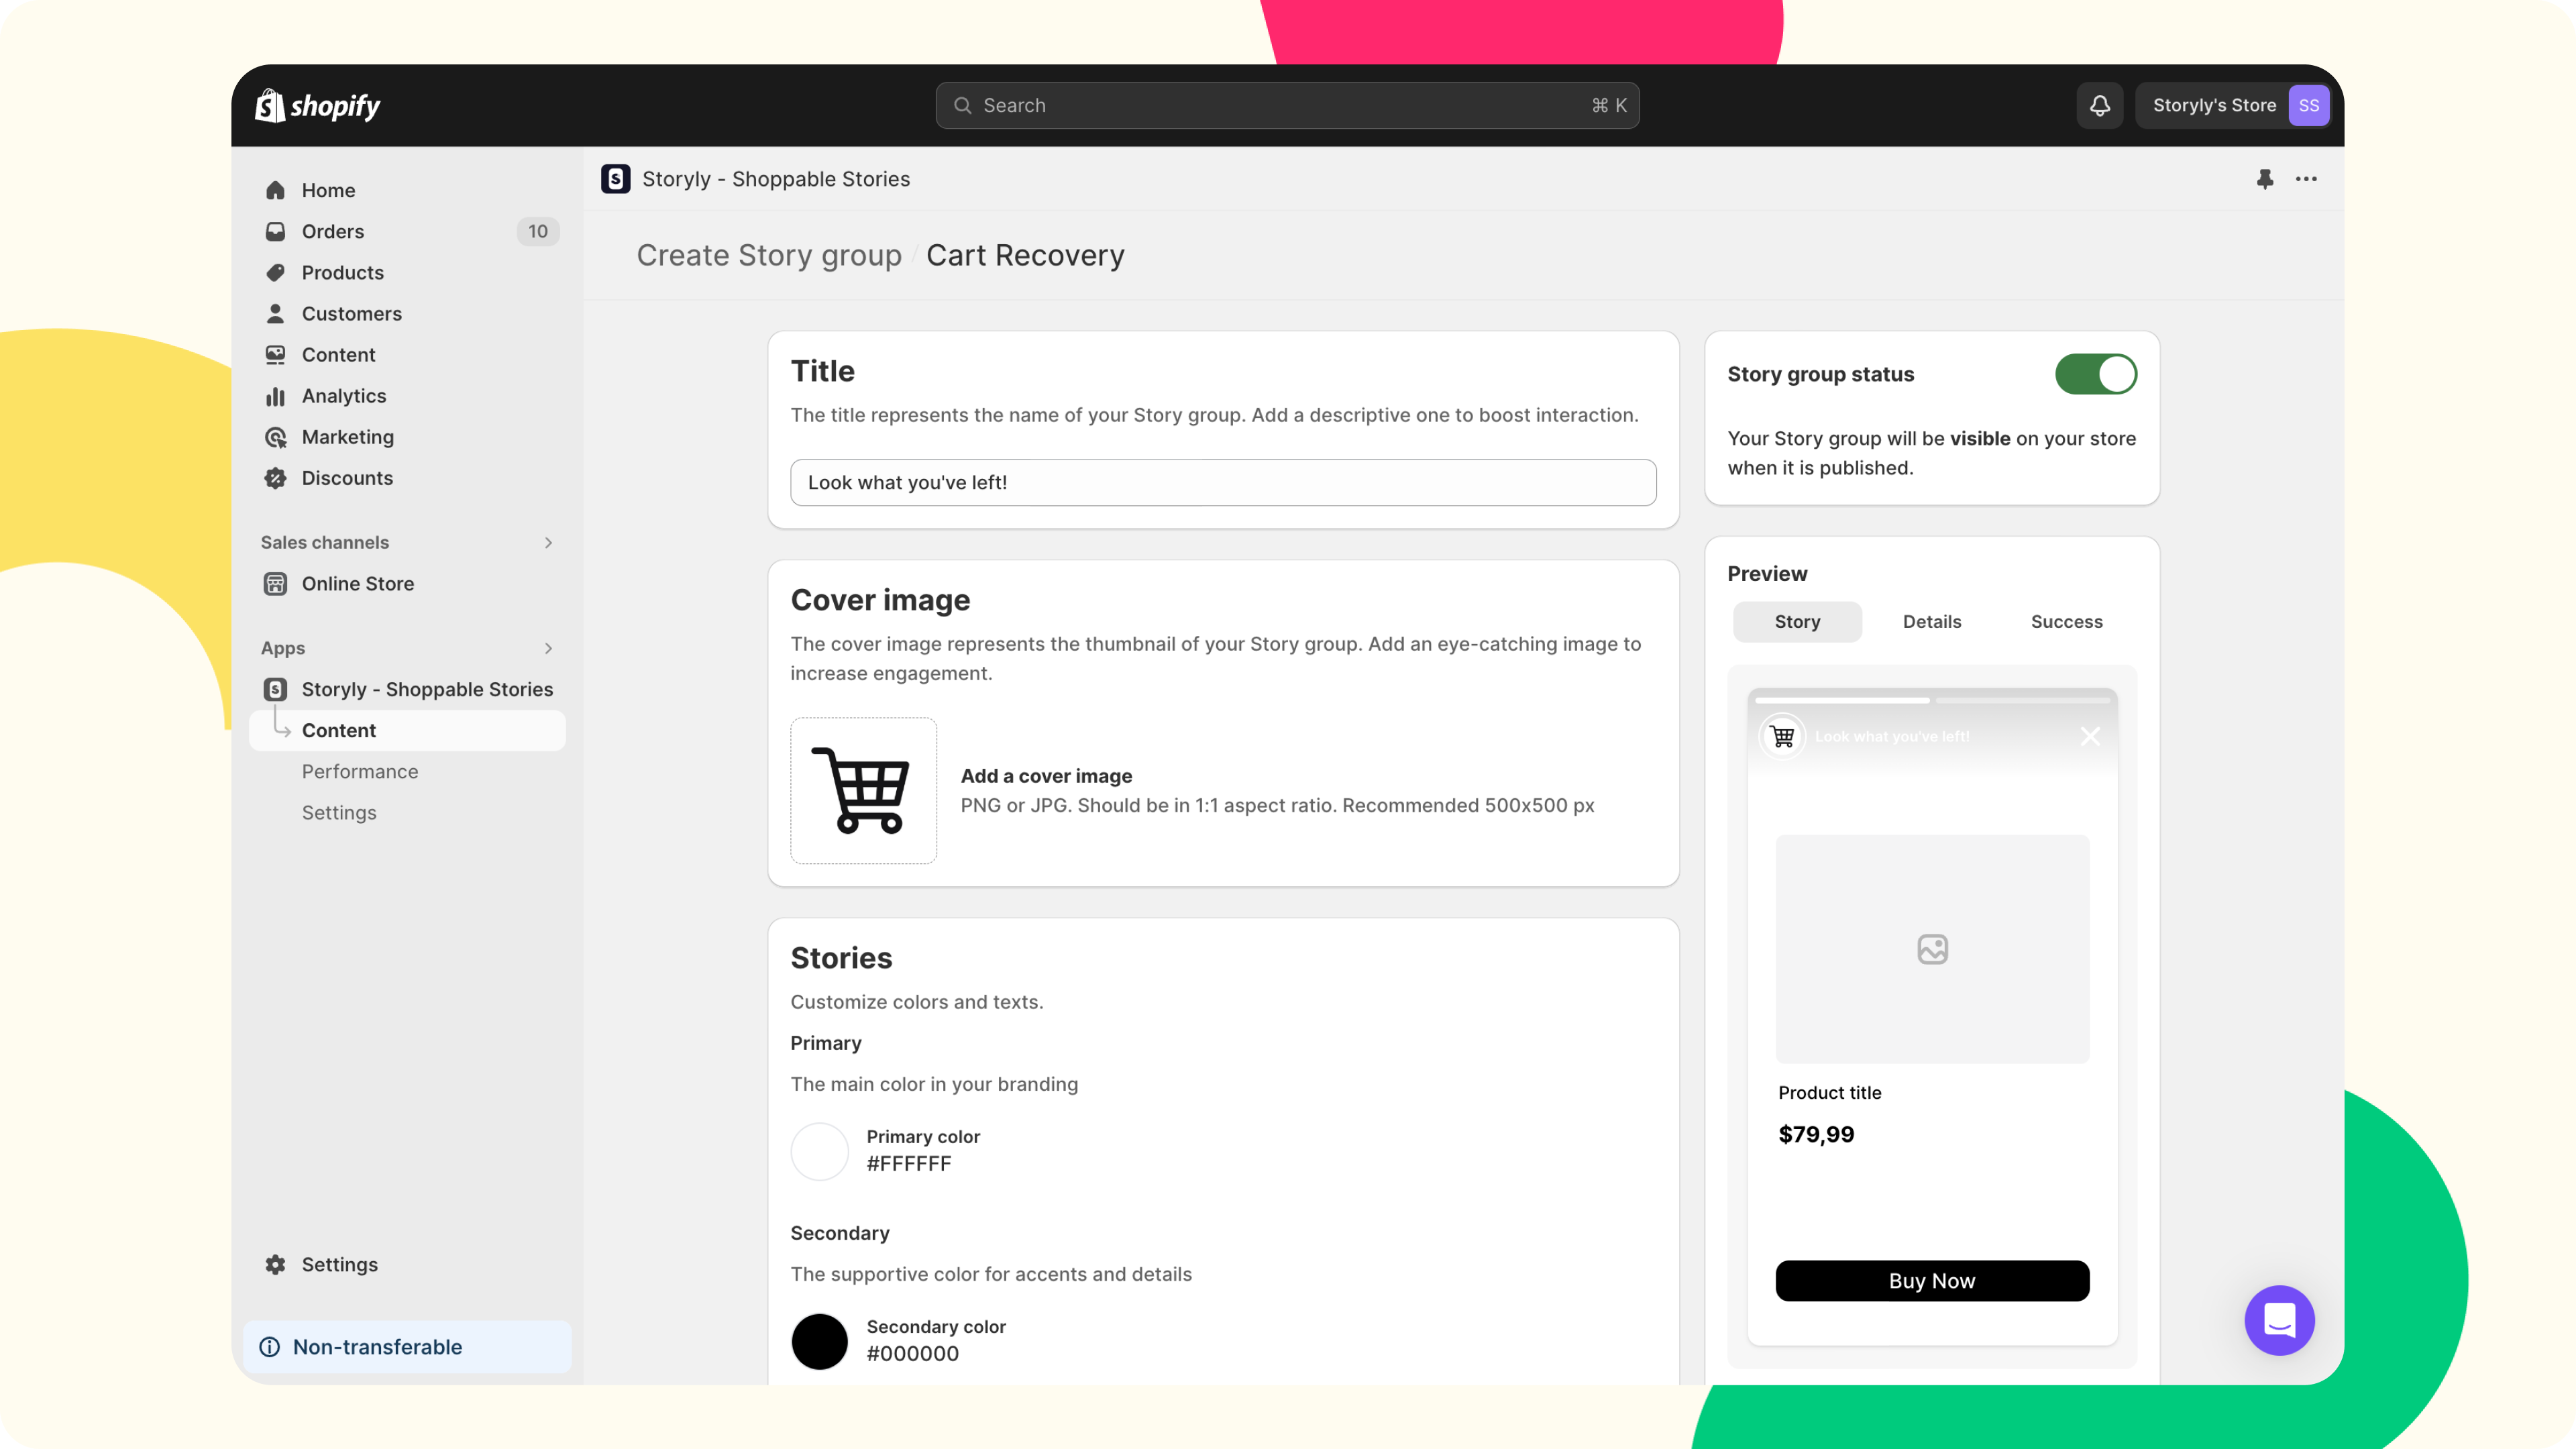
- Customize the colors that will be used in Stories and the texts related to CTA buttons.
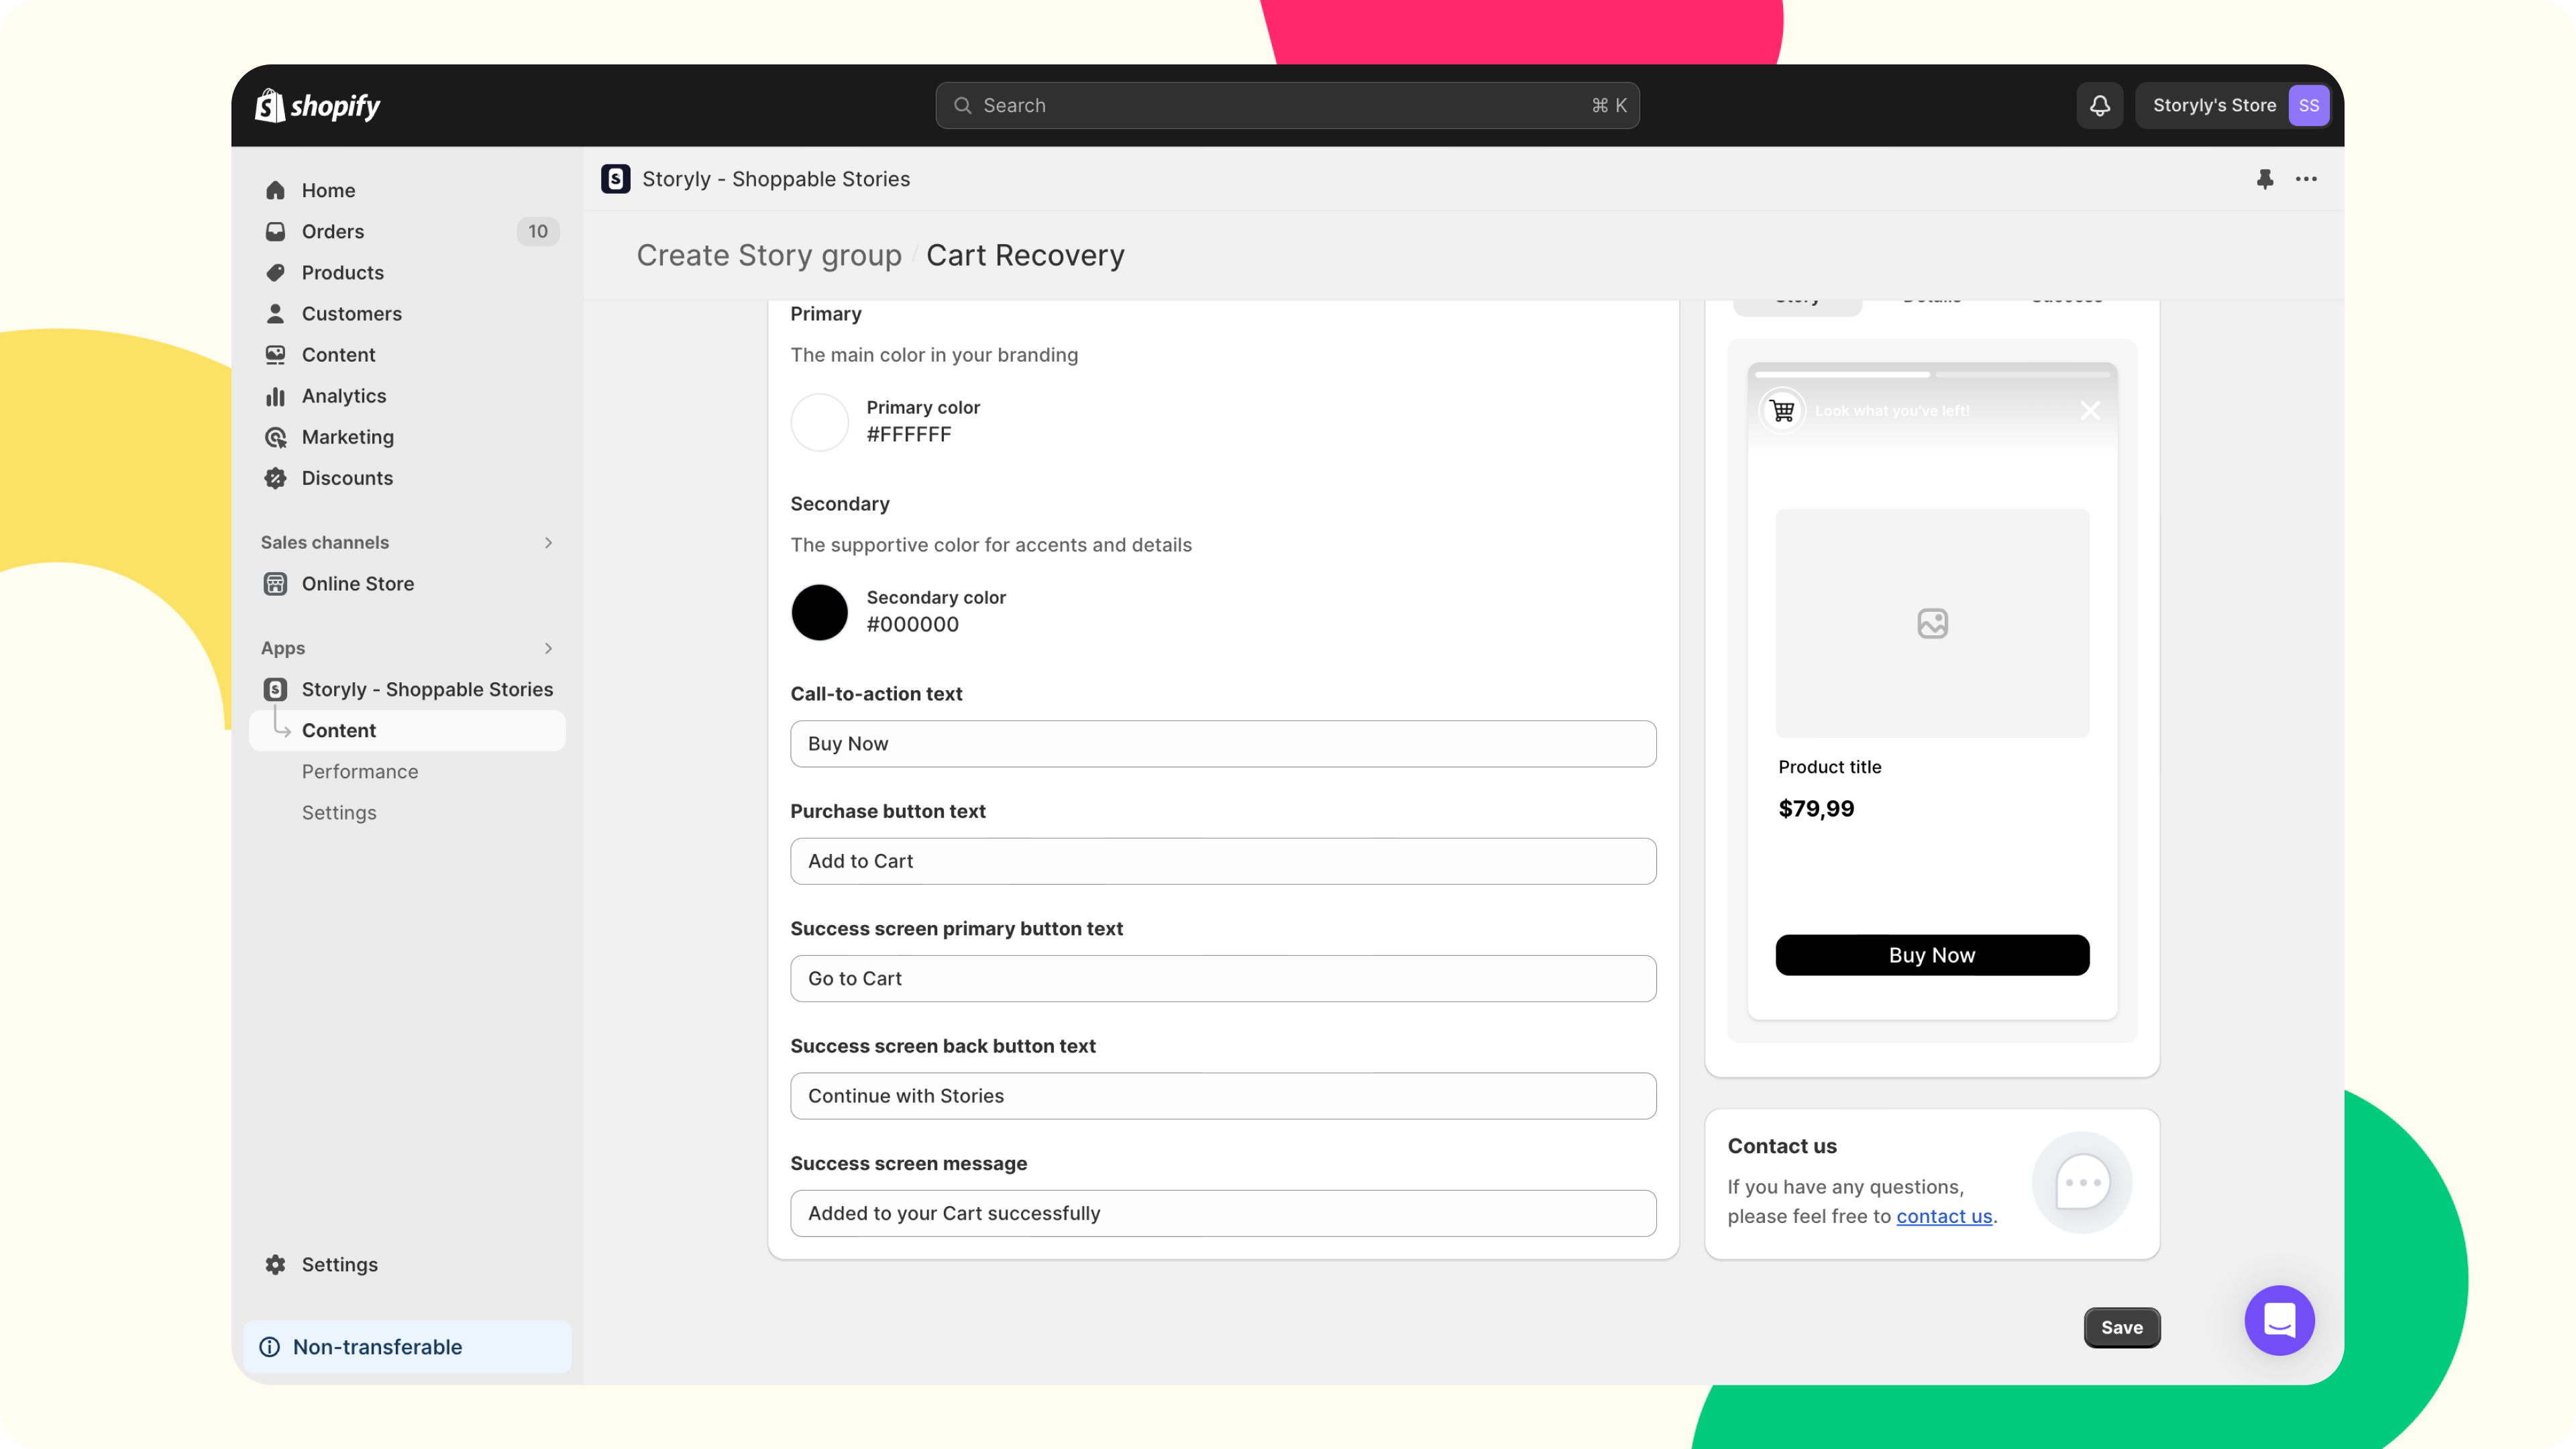
Then, if your users leave items in their cart, our system will generate automated cart reminder stories to increase the chance of conversion.
Instagram
Warning
This feature is only available for Starter package.
If you have an Instagram Business account, and if you'd like to import the Stories that you share on Instagram to your Shopify Store, you can create an Instagram Story Group and share Stories with a few easy steps.
To create Instagram Stories, follow these steps;
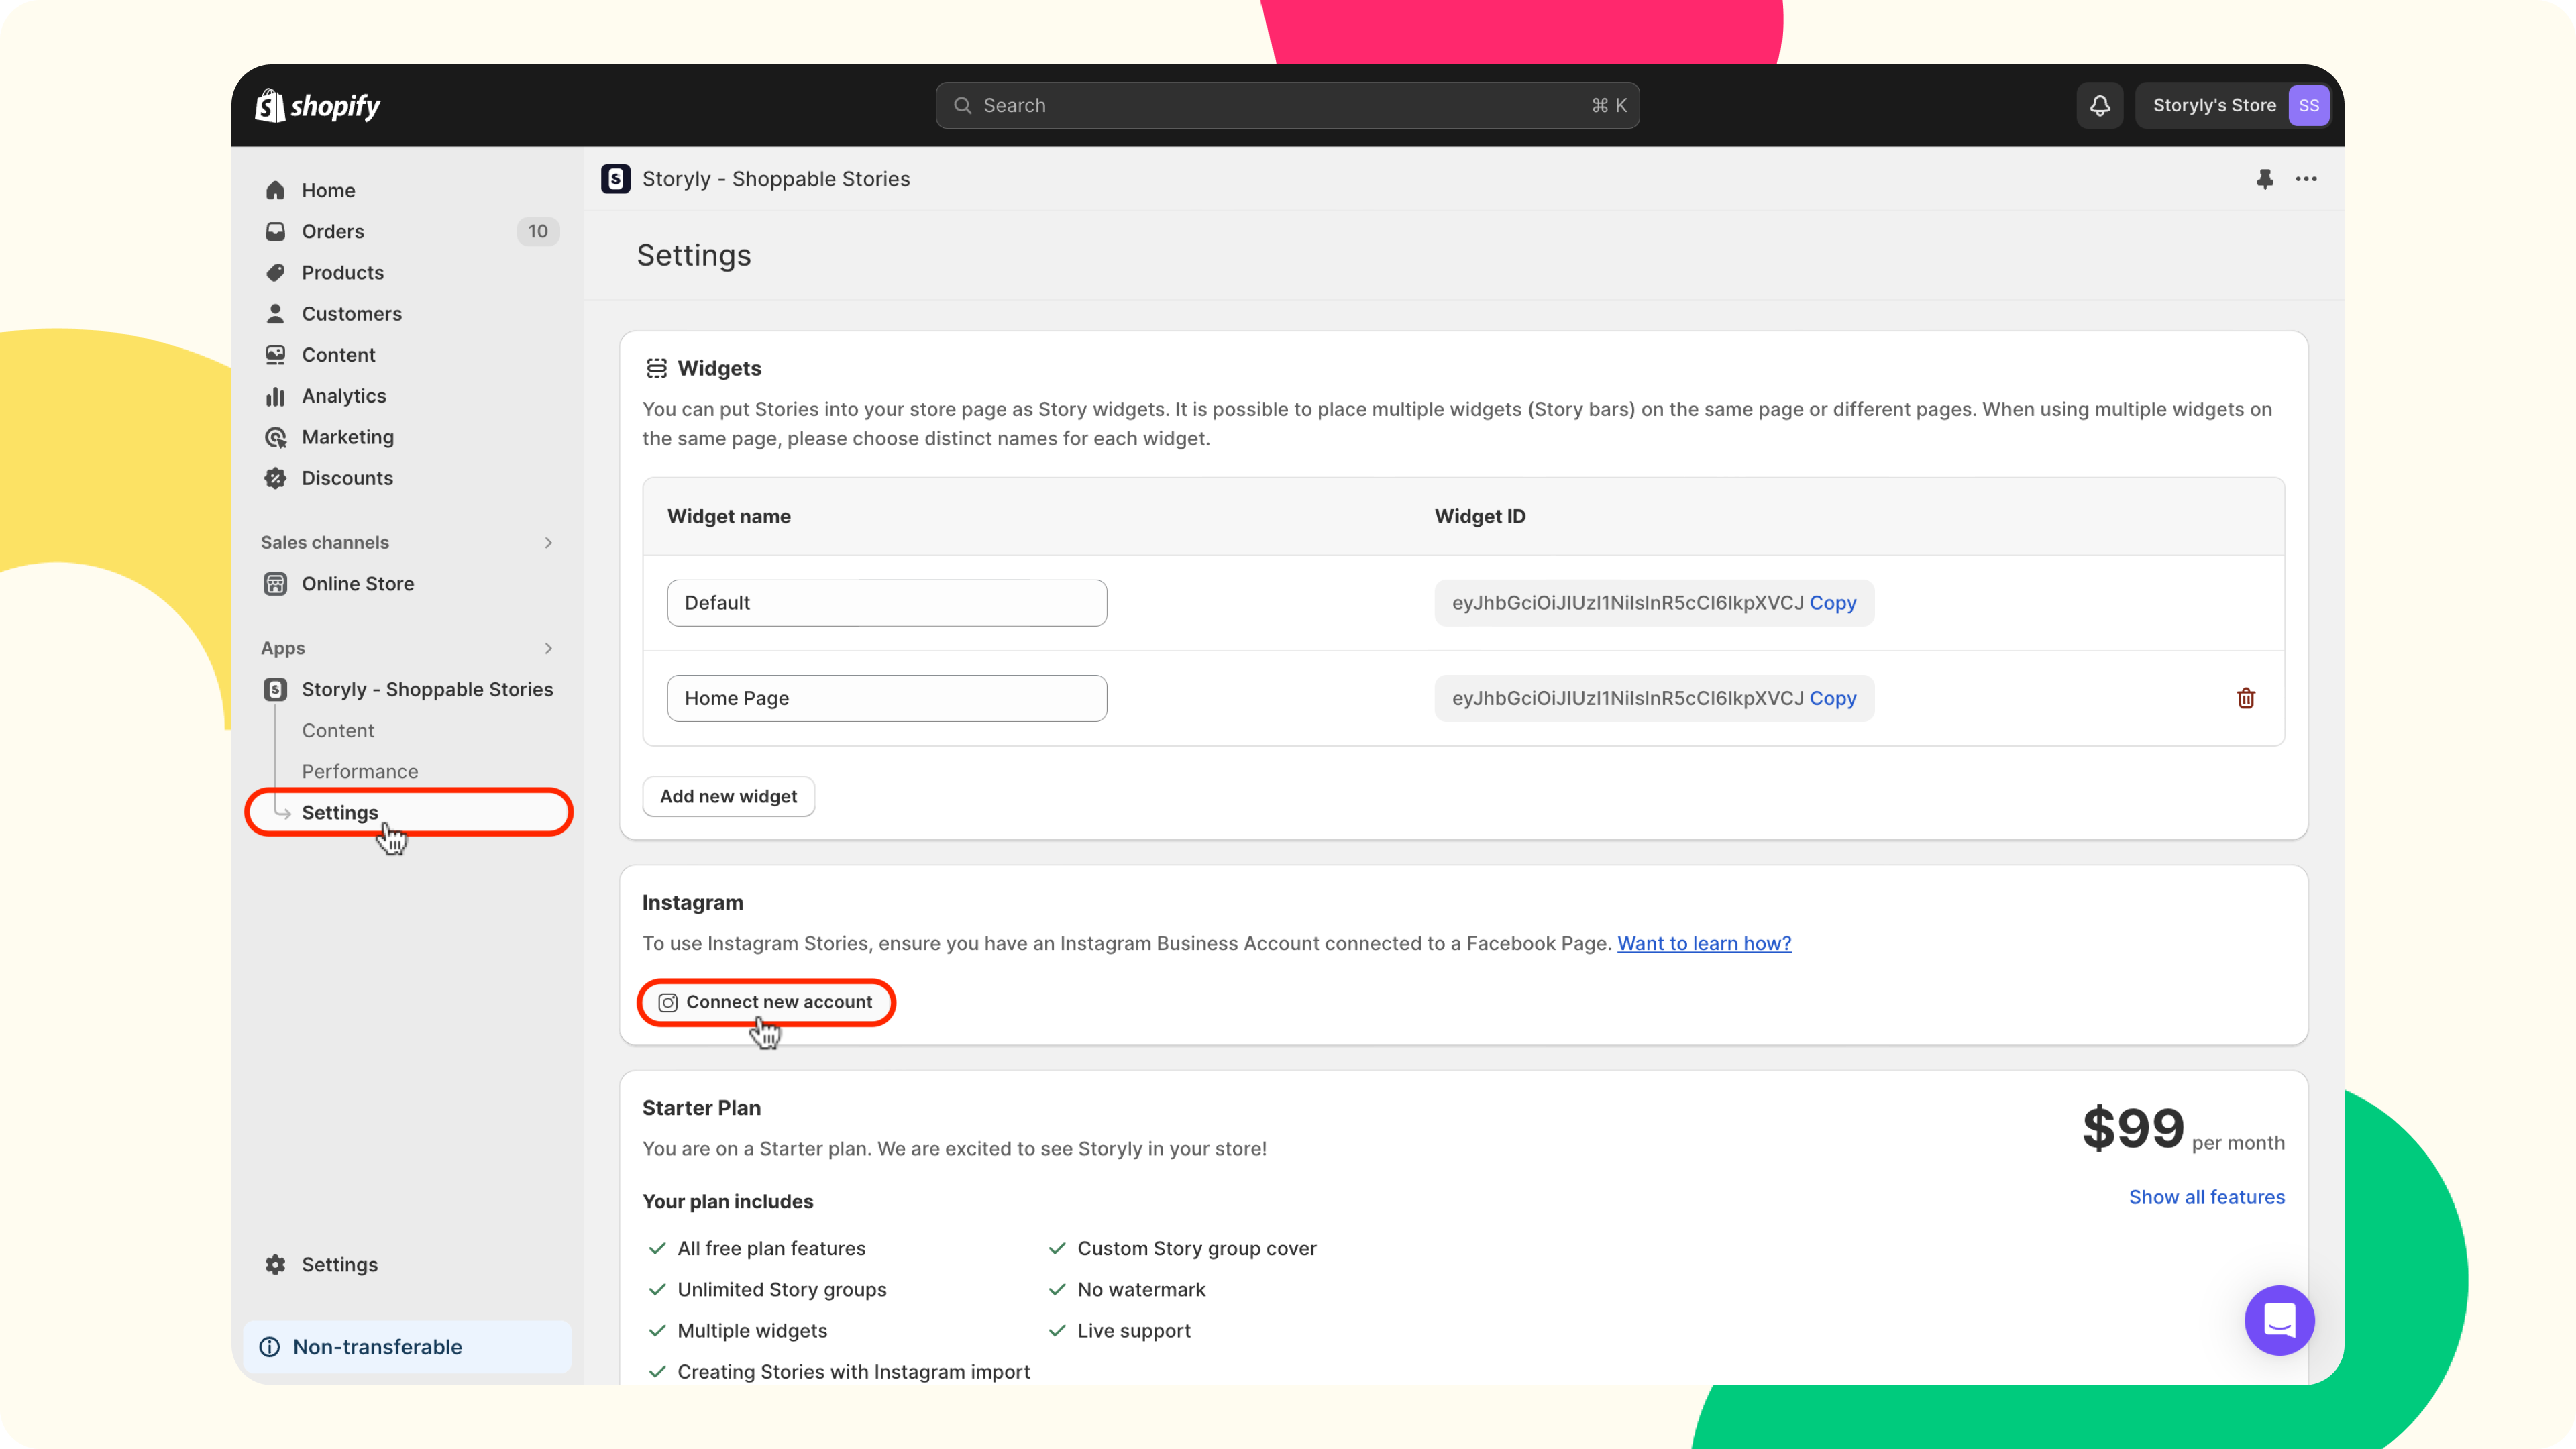
- Navigate to Settings and click on Connect new account under Instagram. You will be redirected to the login page for your Instagram Business Account.
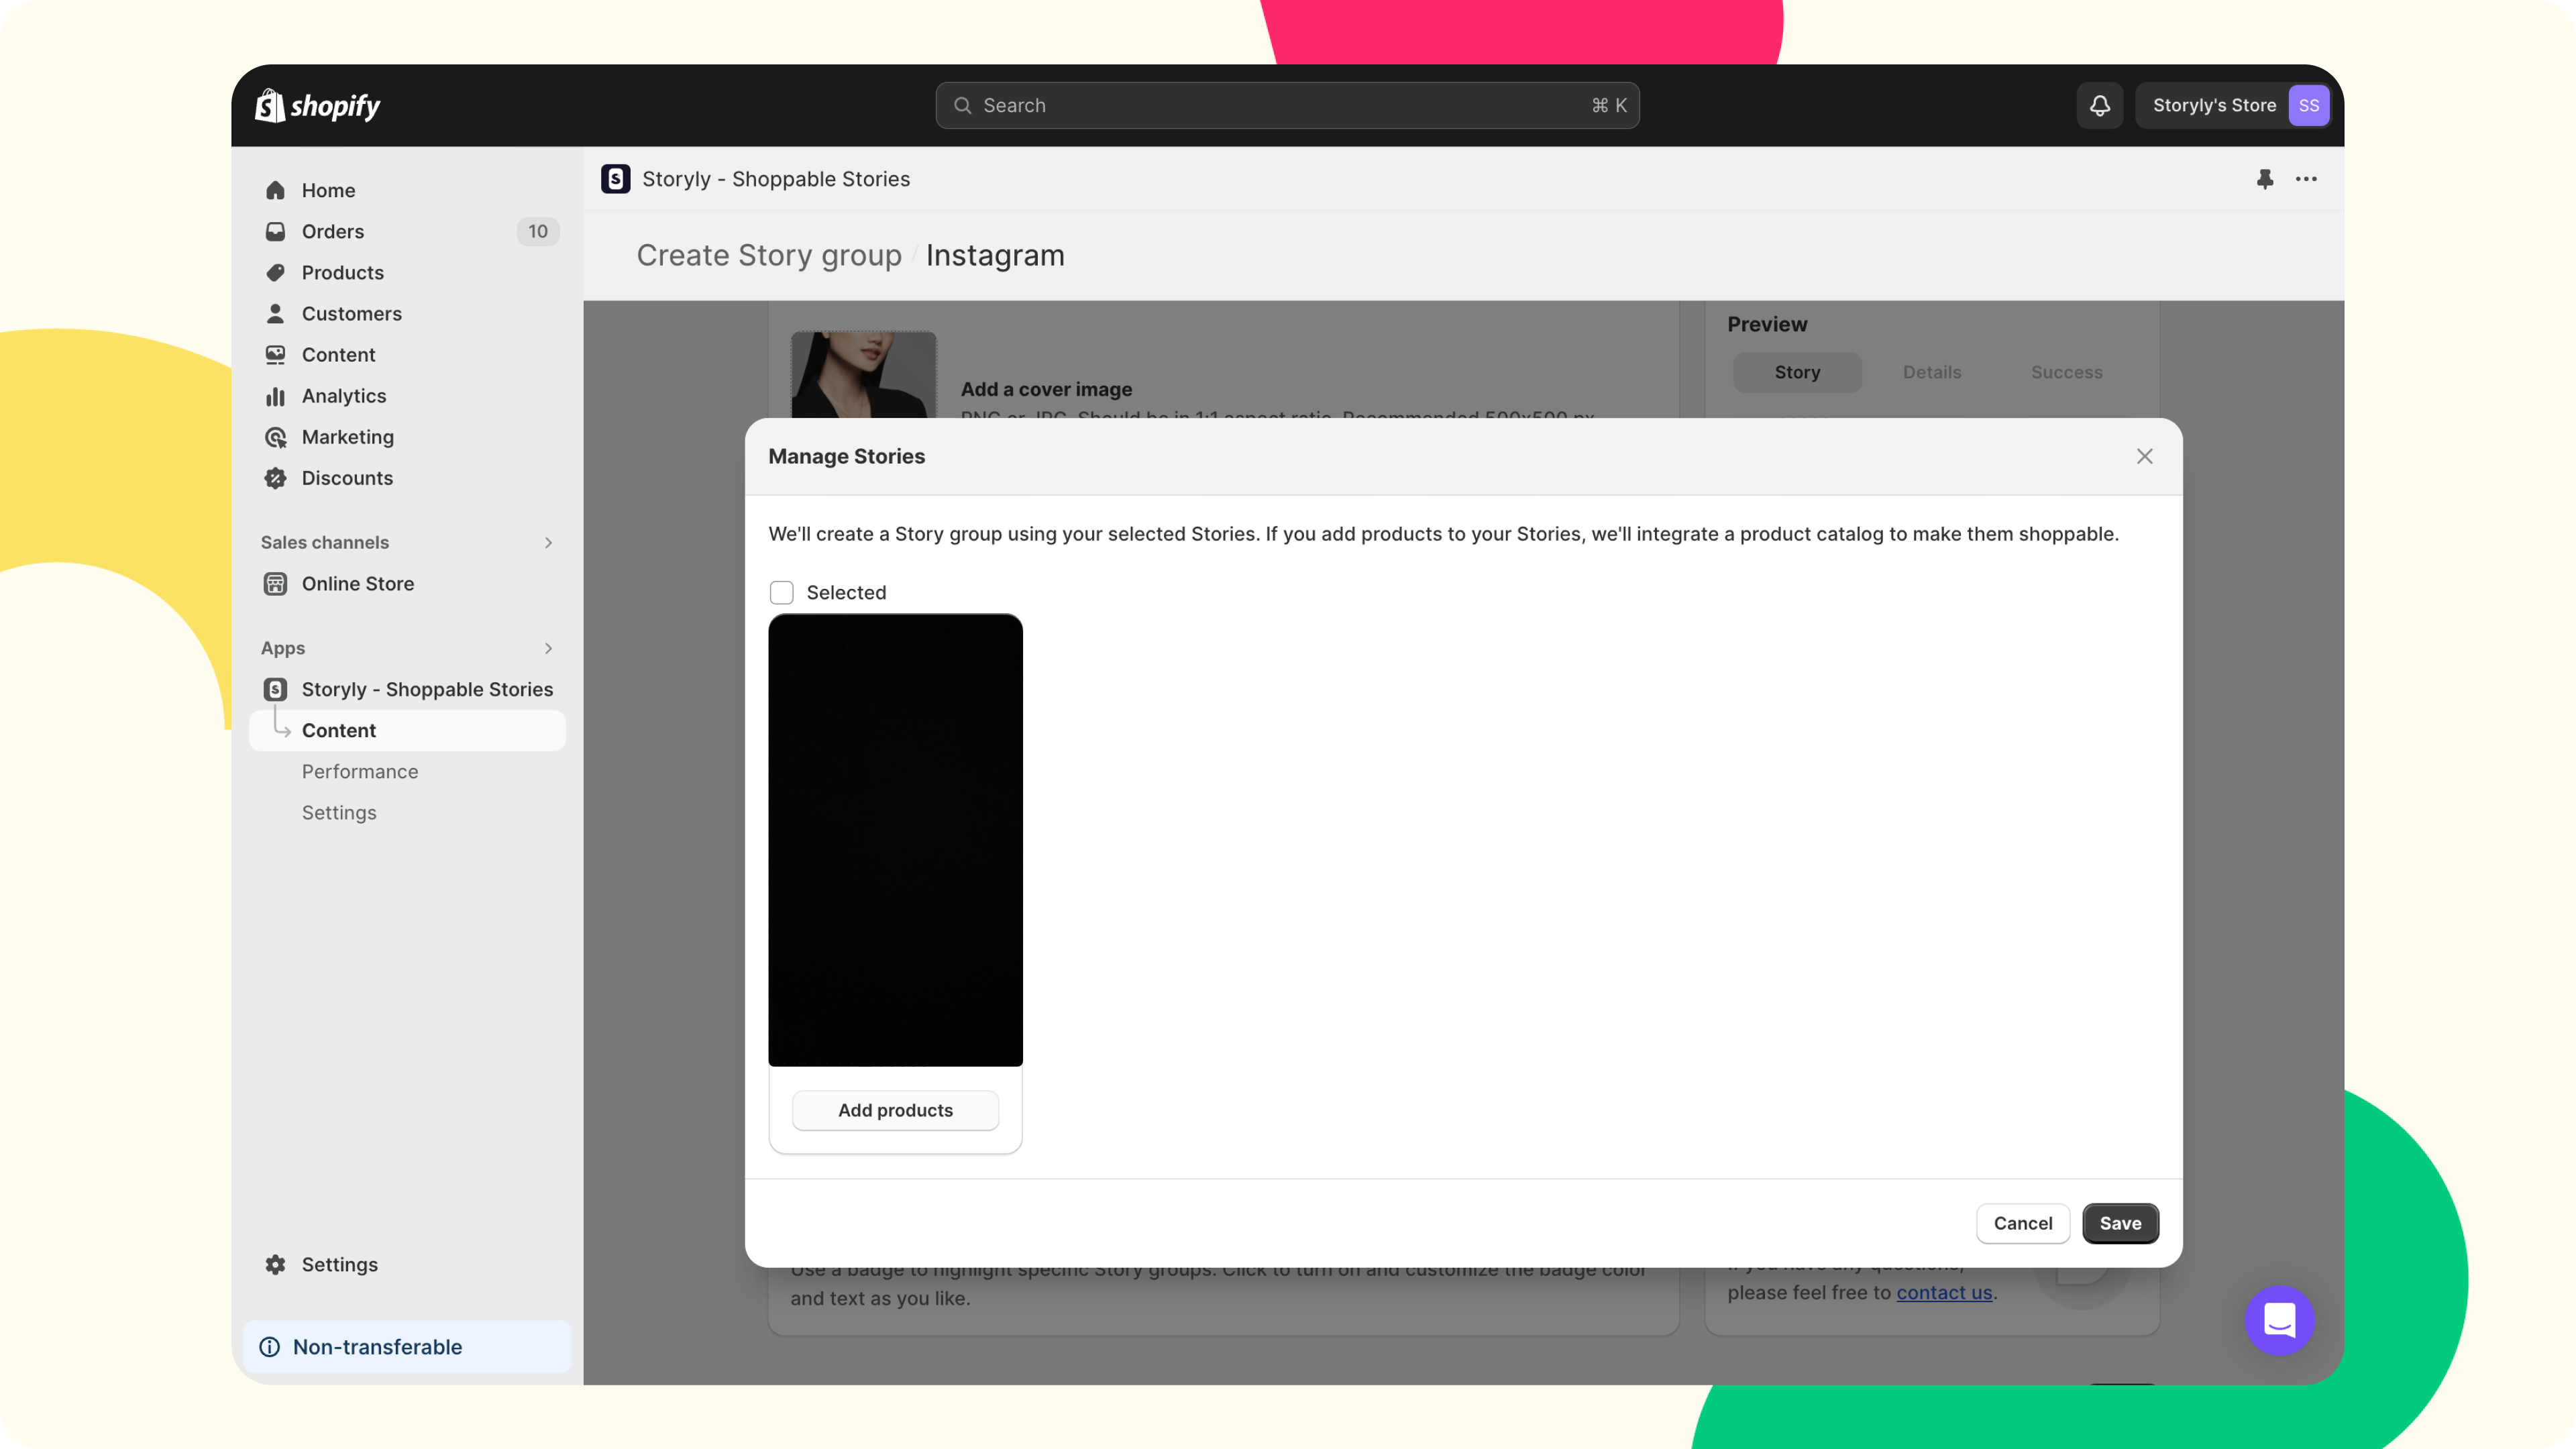
- After logging in, click on Content in the left pane, and click on the Create Story Group button on the right top.
- Choose the Instagram option.
- Then, input your Story Group title, like "Highlights," and upload a cover image for your Story Group.
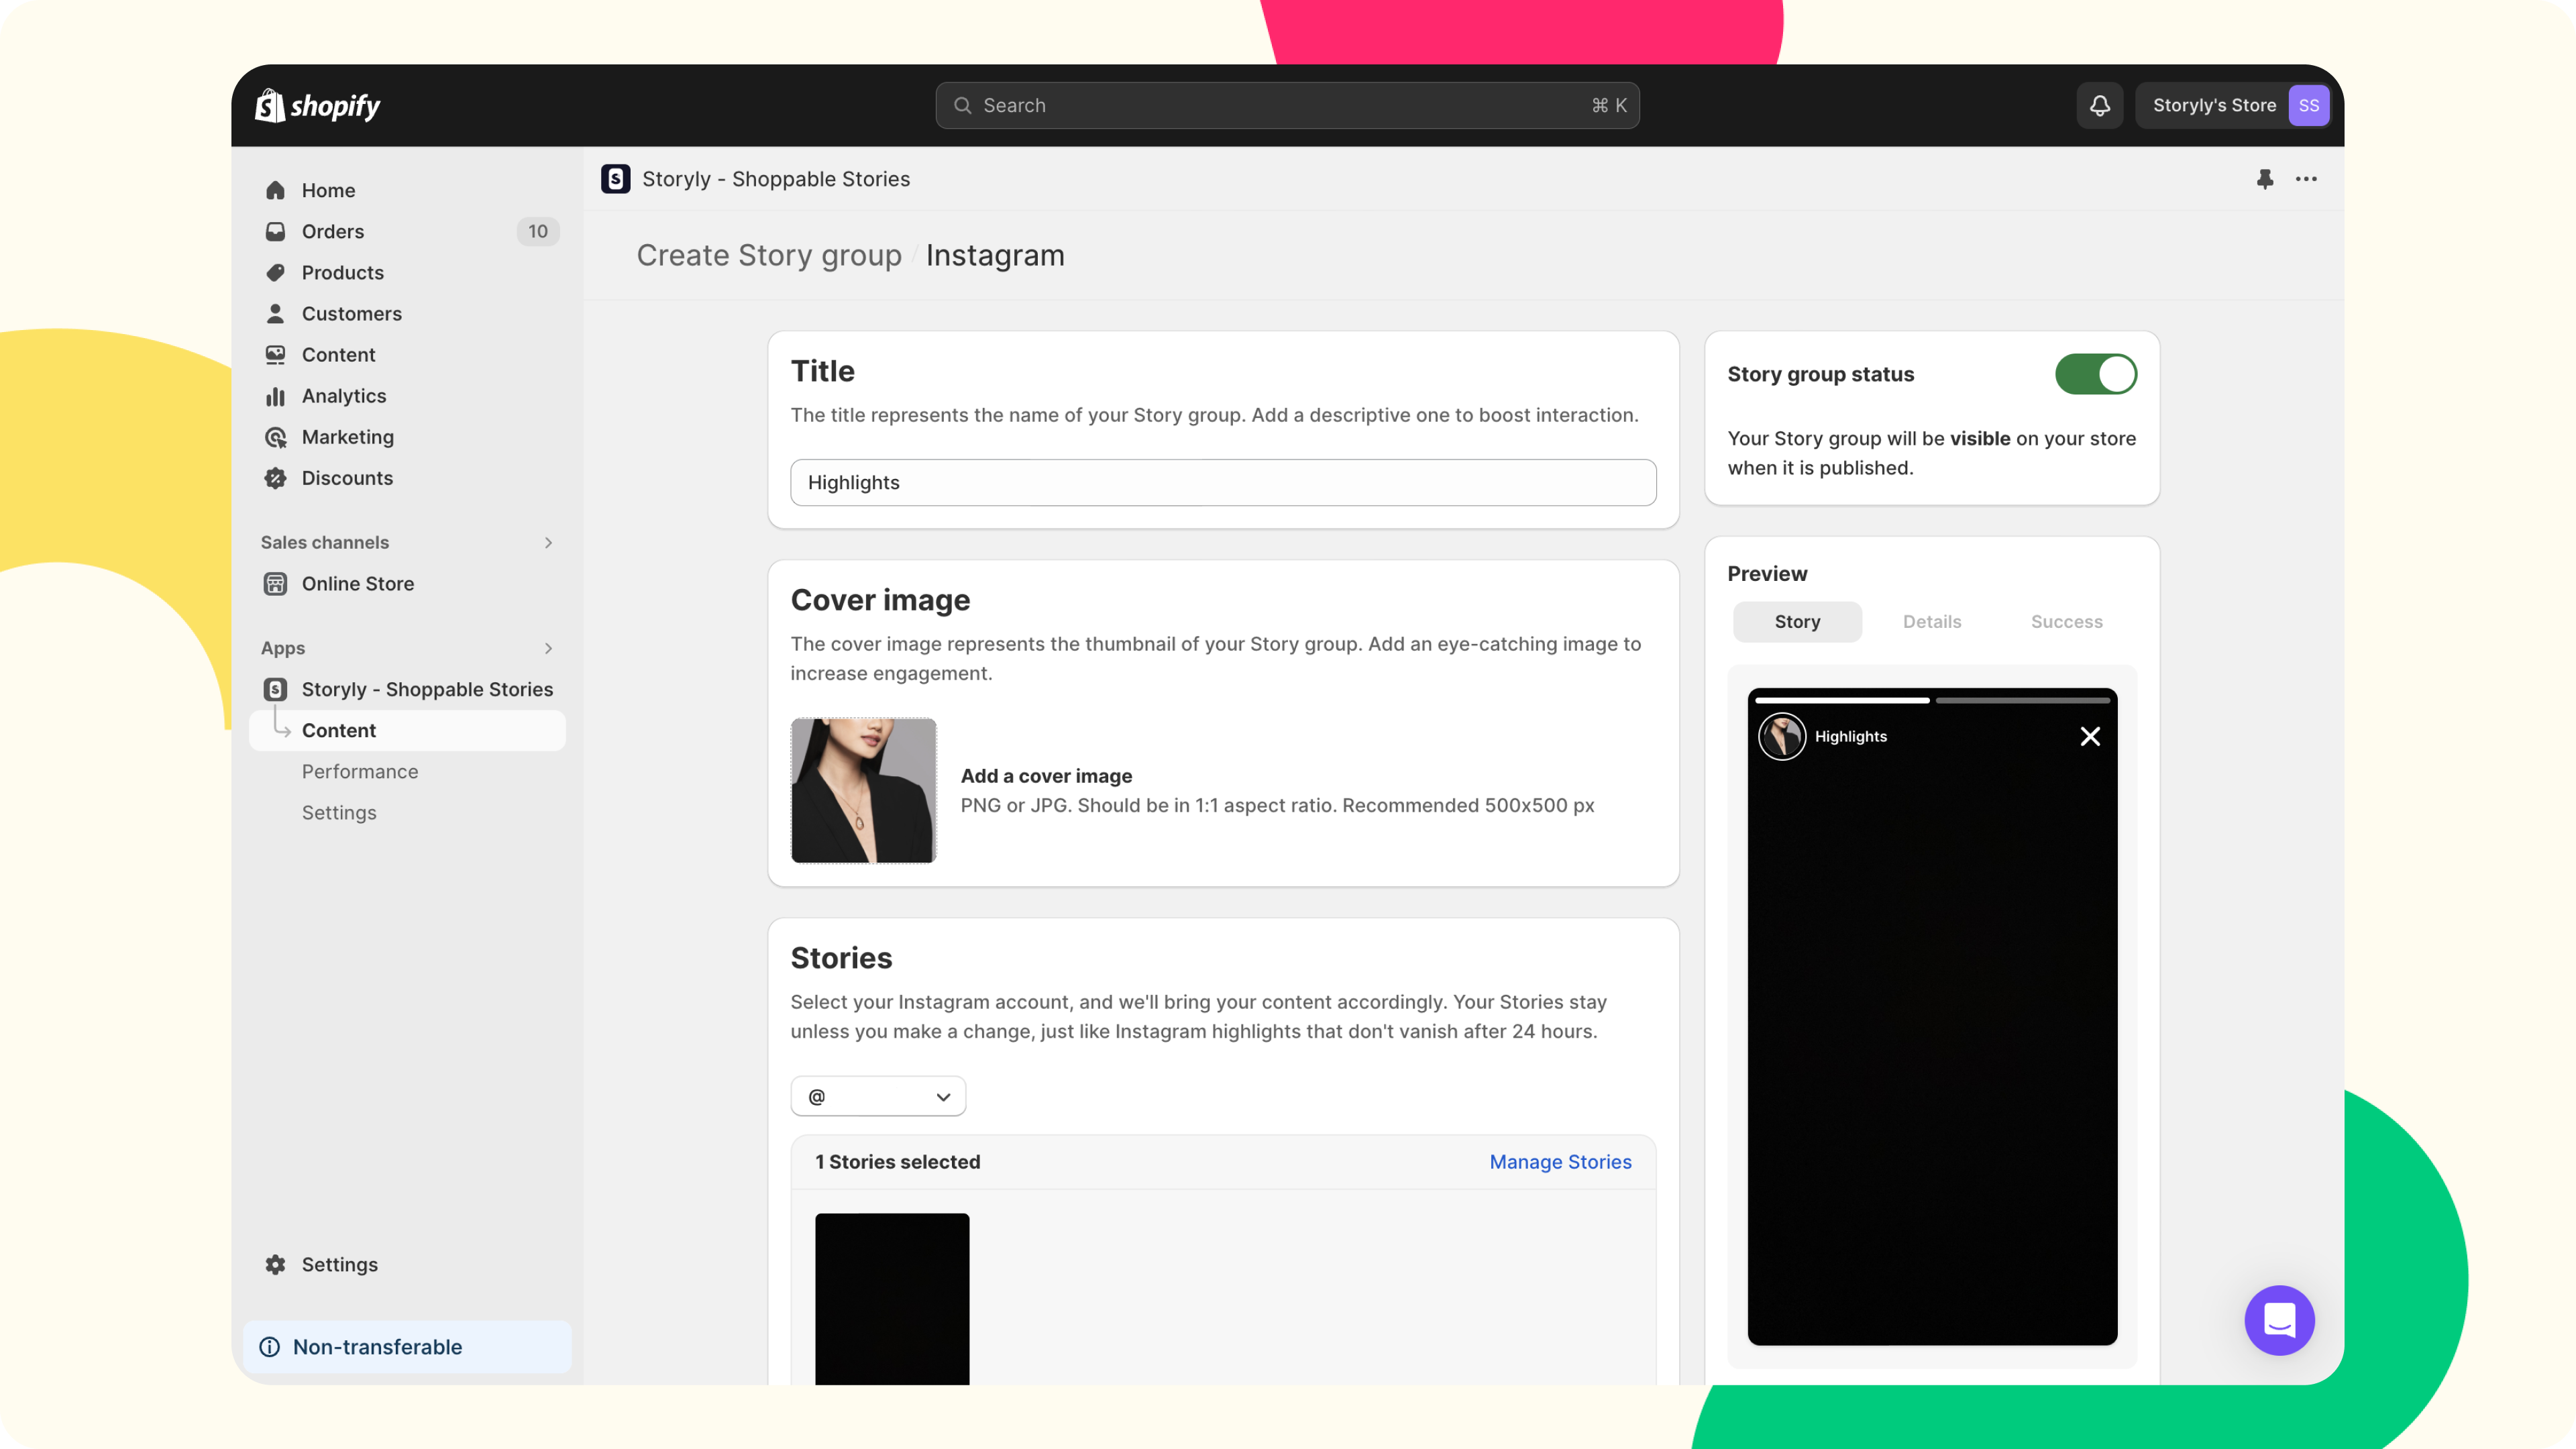
- Select the Stories that you'd like to import. Also, you have an option to add products to your Instagram Stories and make them shoppable as well. If you click on Add products, you'll be able to select the products from your collections and selected products will be shown in a Product Catalog at the bottom of the Stories.
Where and how to position Stories in the Store?
Recommended position
The Story format is like a spotlight for your users, giving your store a cool space to offer all sorts of engaging experiences. We recommend throwing your Stories on main pages like the homepage and category pages.
A little pro tip
Stick those Stories at the tippy-top of the page to really catch everyone's attention and give them a next-level experience. Your users are gonna love it! 🌟
Selecting layout
With the Storyly app, you get to choose from two cool layouts to match your brand style. The first one's the default, giving off those Instagram Stories vibes in a fun circle format. The second one's the energized layout, bringing in those TikTok and Reels feels. Both layouts are super engaging and eye-catching!
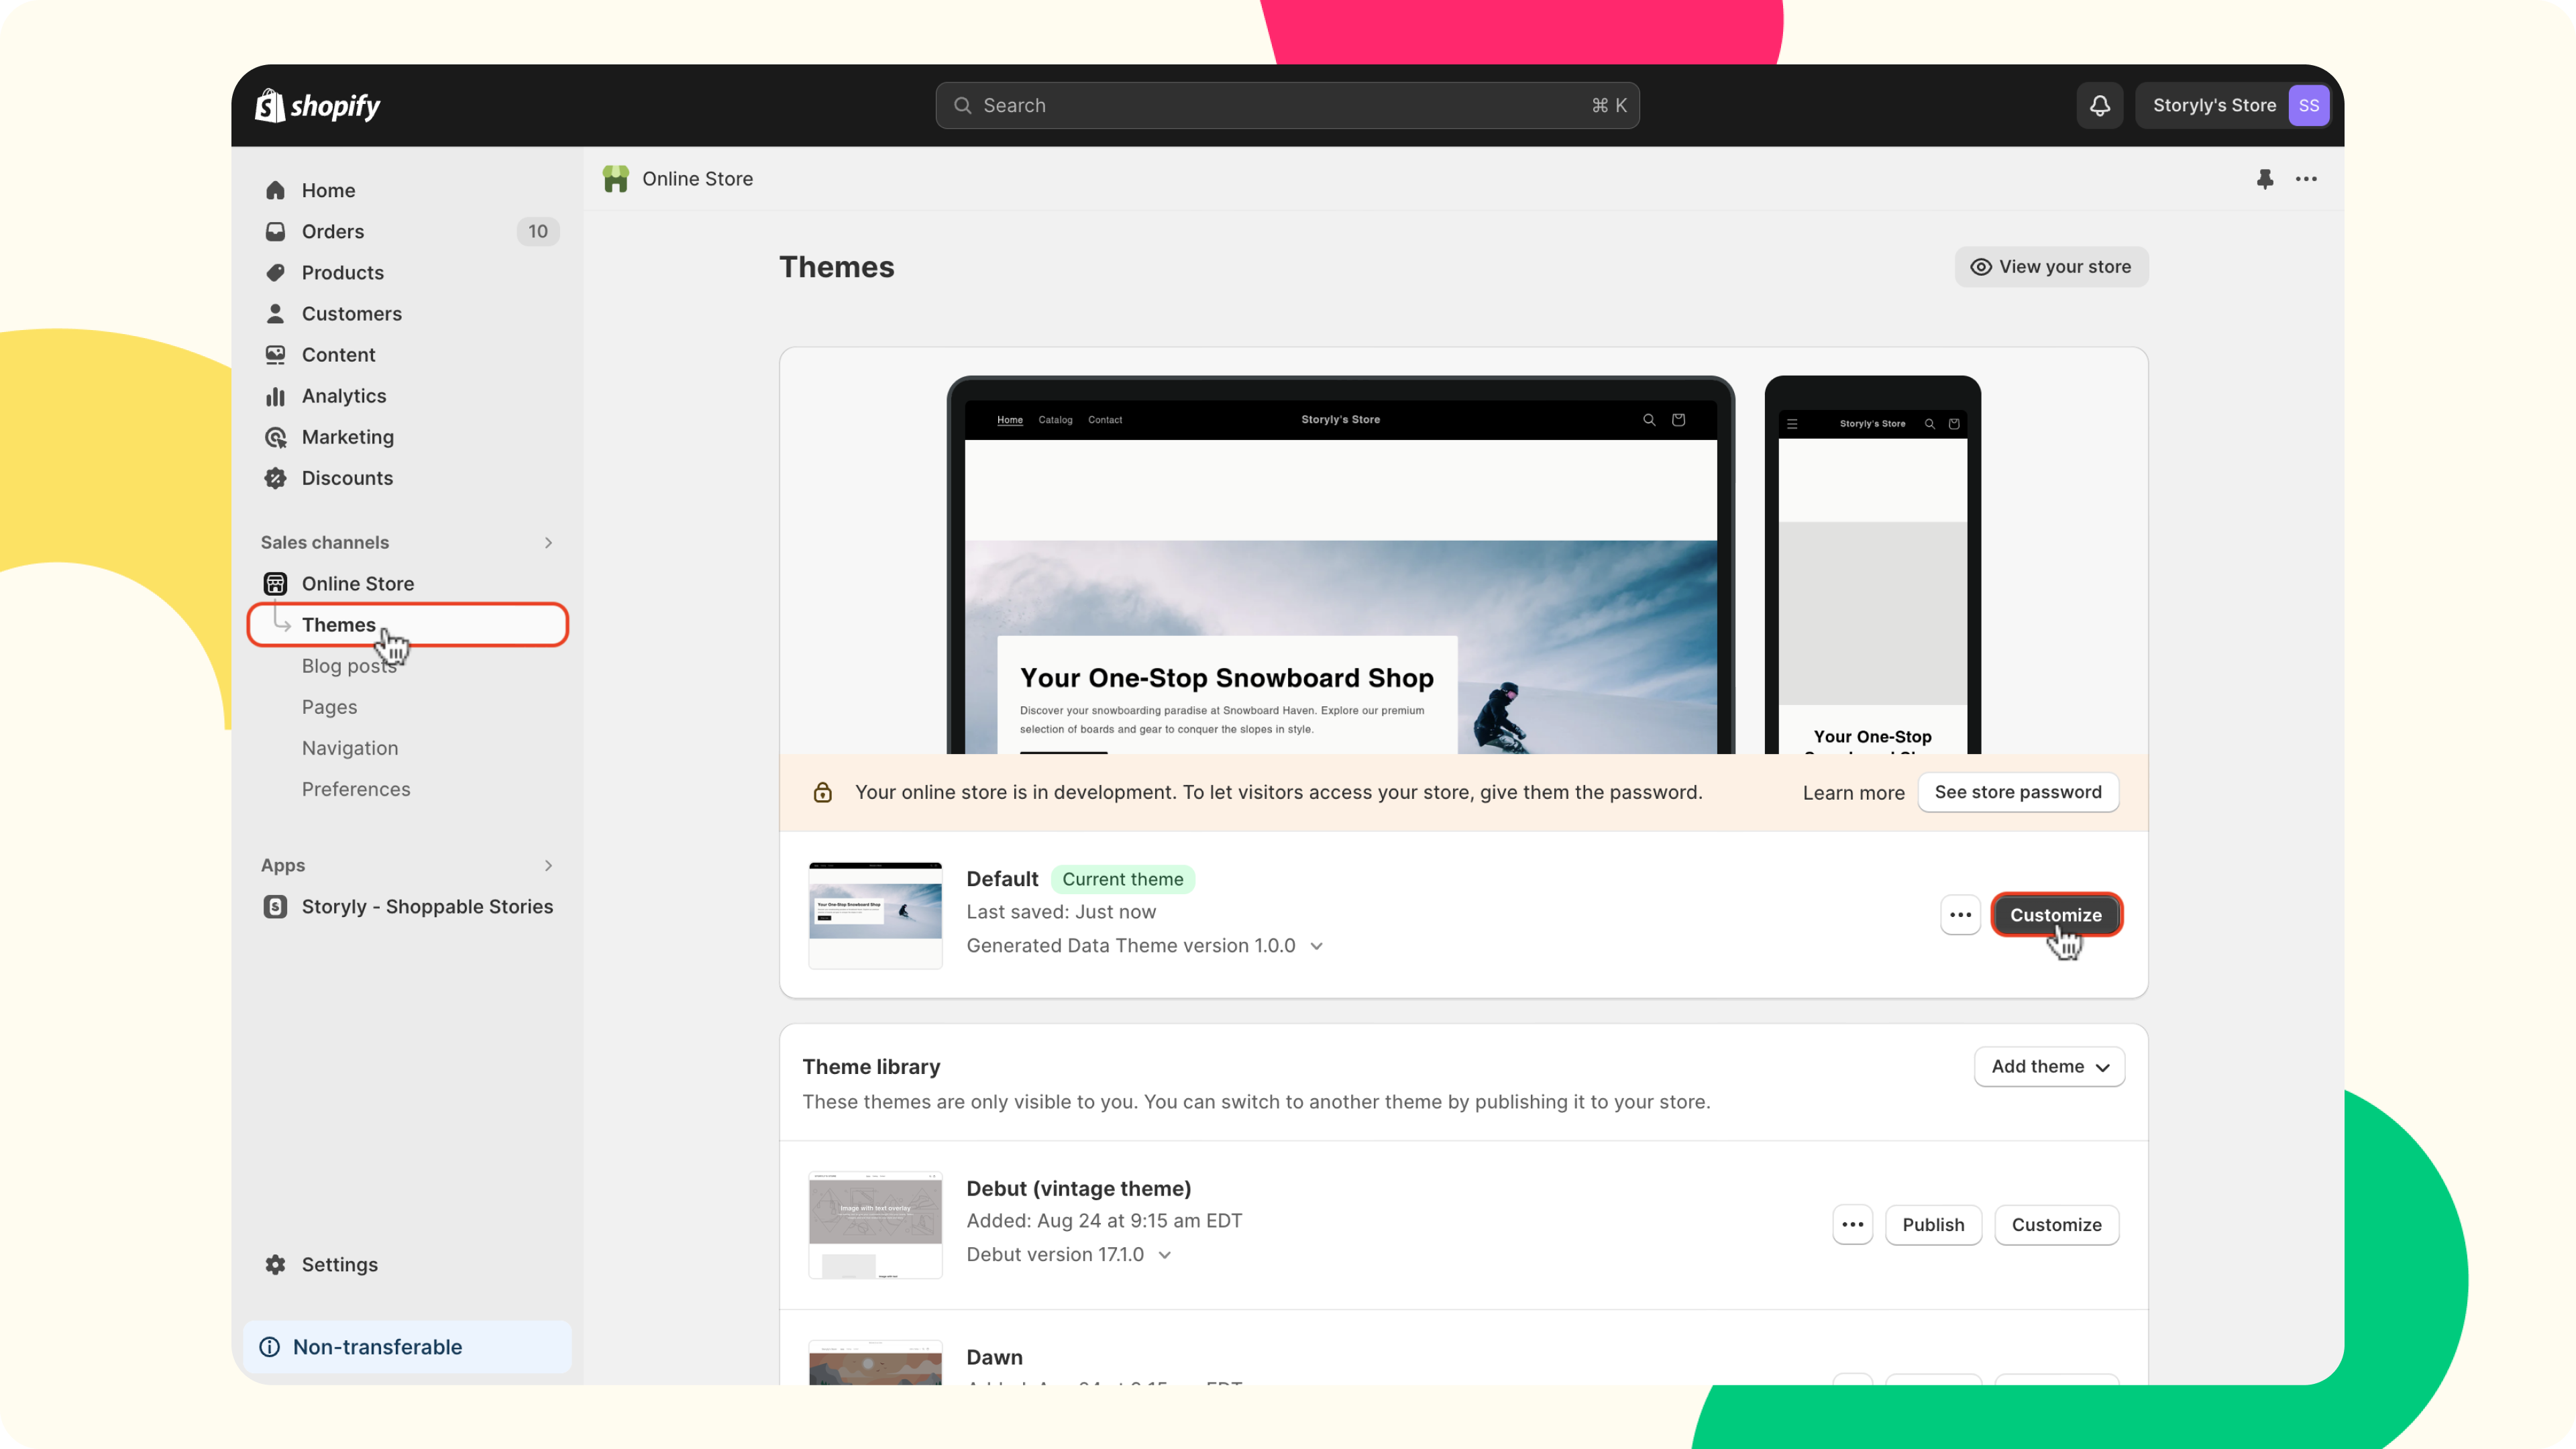
To pick the perfect one for your store, just head to Customize Themes under Themes.
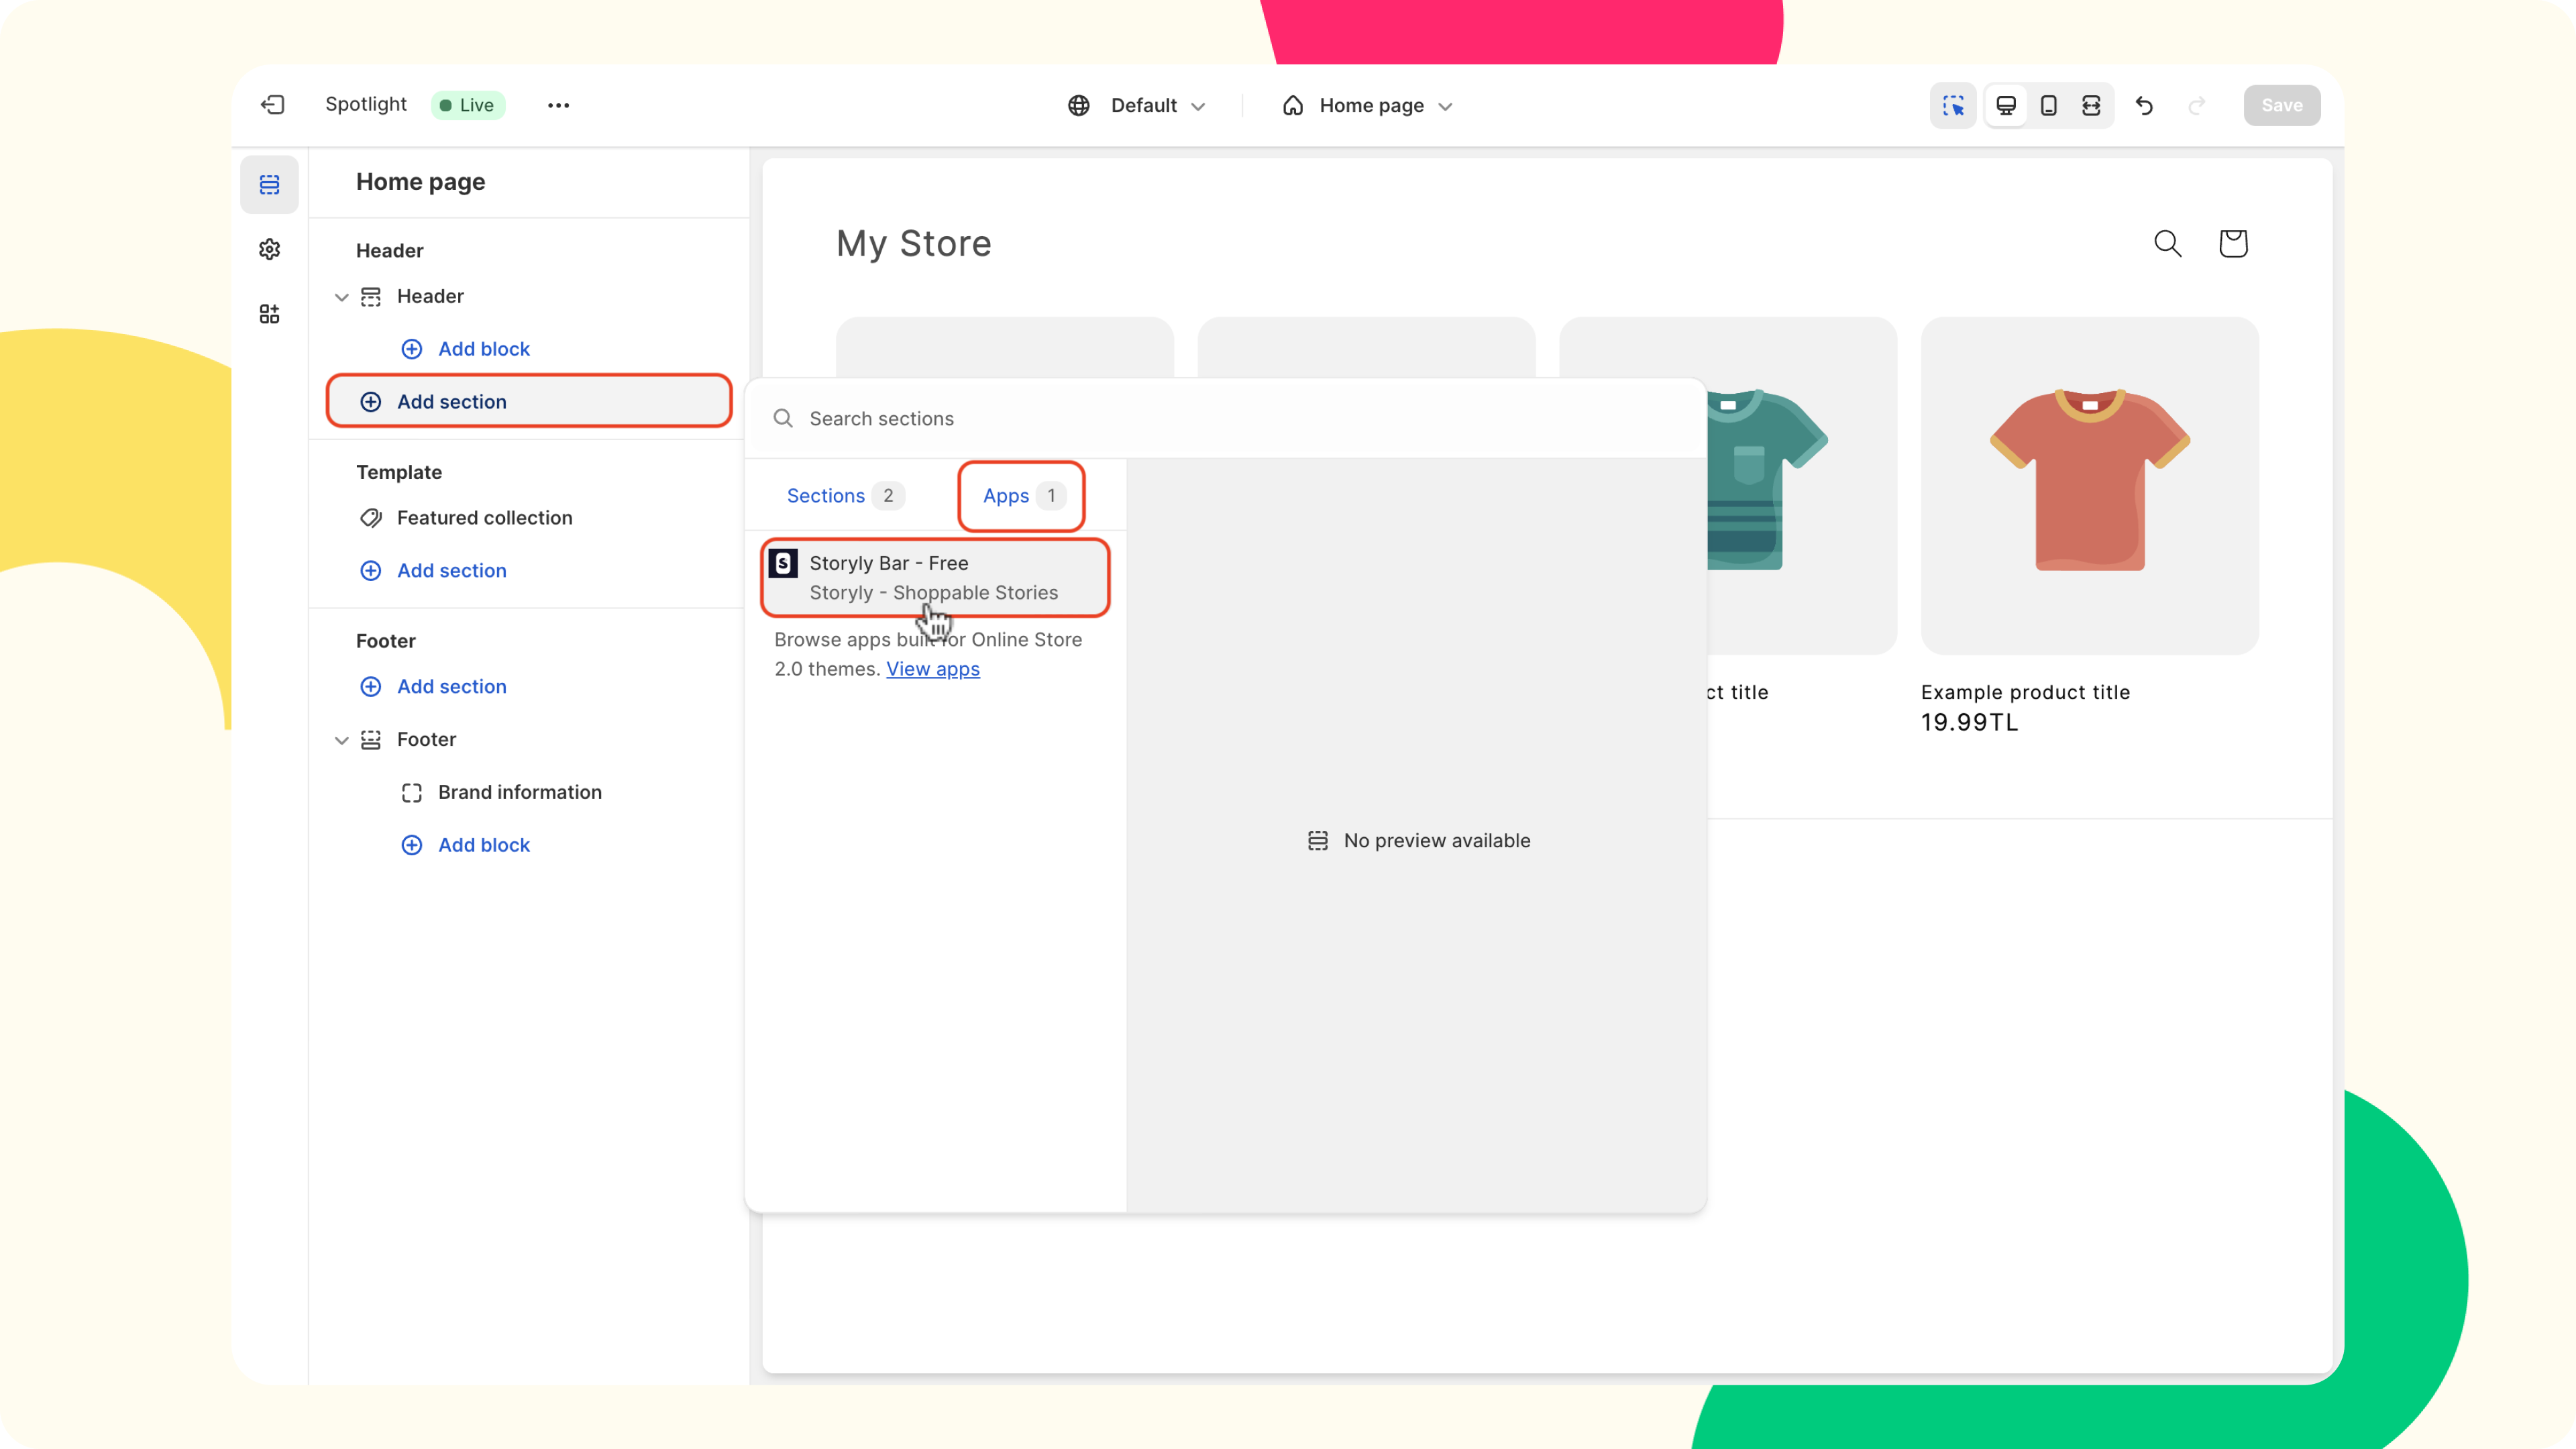
Click on Add Section, then choose Apps and find Storyly.
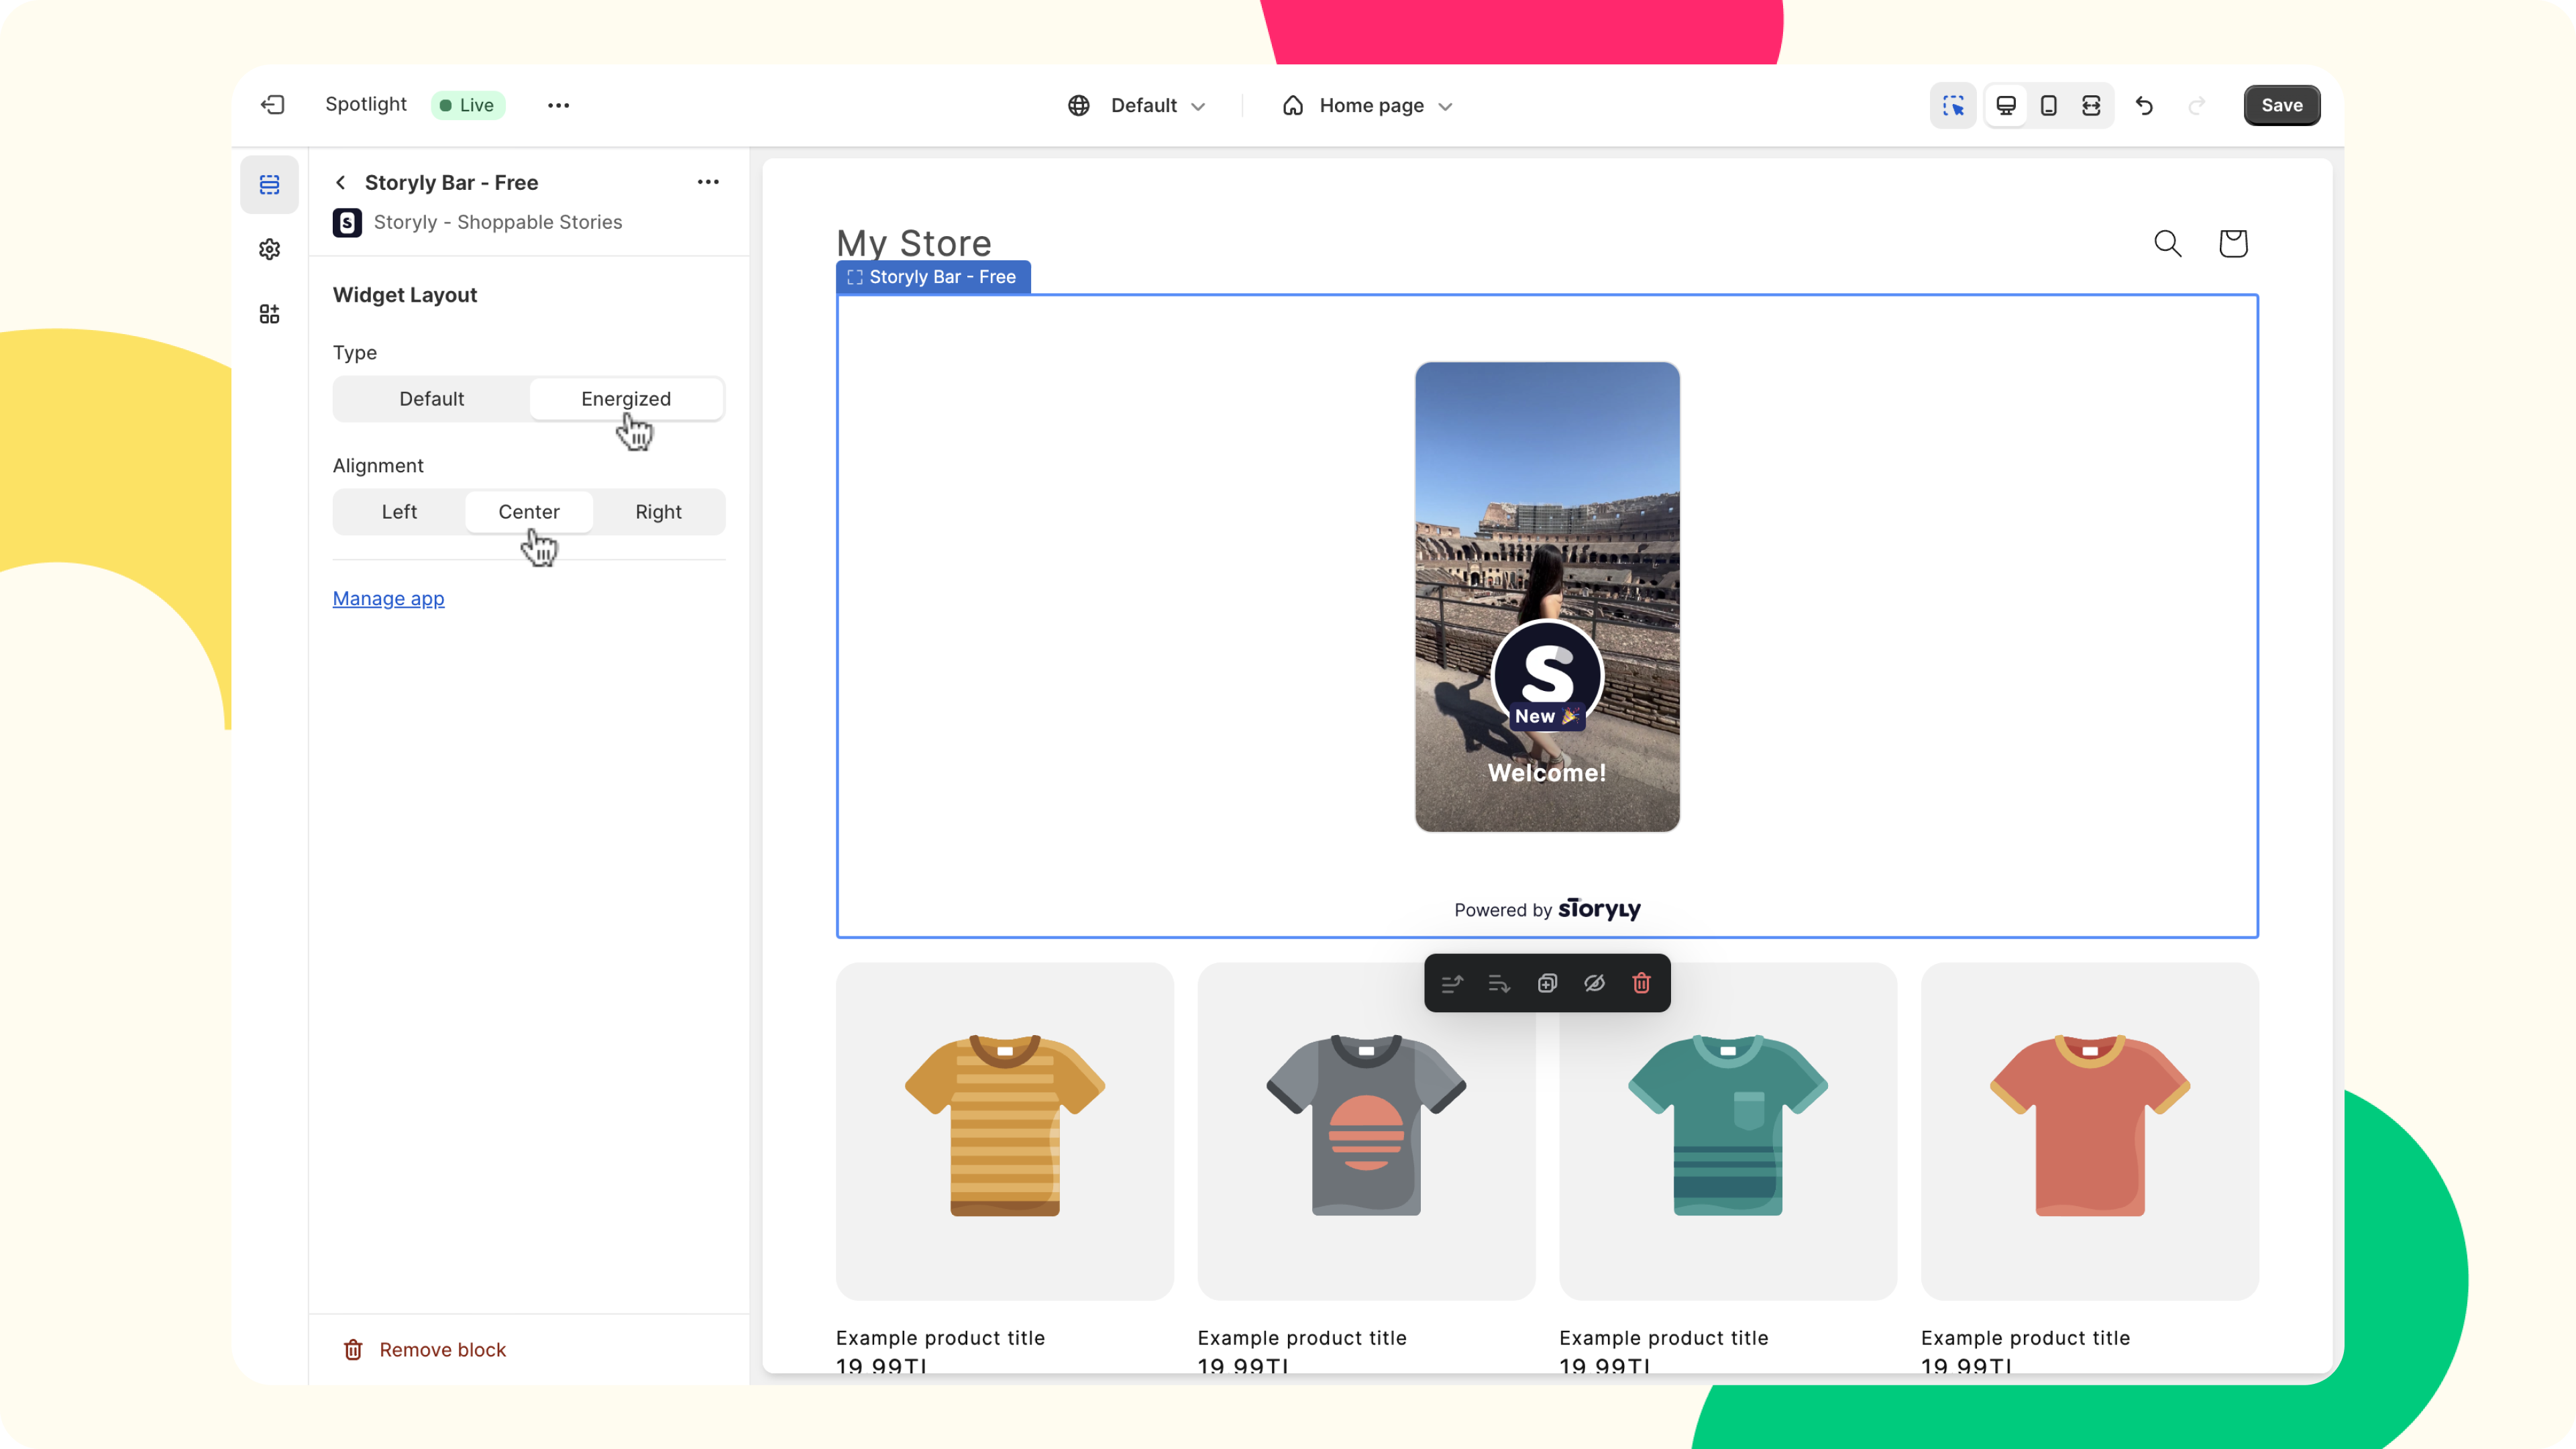
Once you've got Storyly on board, check out the two awesome options - Default and Energized on the right pane. Take your pick and give it a preview to see how it vibes with your brand! 🚀
Status of Stories - How to go live?
Once you create your Story group, you will be directed to the Storyly content page, where you'll find active, inactive, and archived options. By default, once you create a Story Group, it automatically goes active, unless you choose the opposite. However, you can even change the status from the content page by playing with the toggle.
To integrate Story Groups into your store, head to the Storyly content page. Click on Add now or swing by Themes > Customize. Boom! Add a section by selecting Storyly under Apps to incorporate the Story Bar.
Understanding Performance
After going live with Storyly, you can check how Stories are performing under the Performance tab. Once you navigate to this tab, you'll be welcomed by overall metrics such as Reach, Impression, Click, and Engagement.
- Reach: Total unique devices that caused an impression.
- Impression: An impression is counted if a Story is viewed for at least 1 second for still images and GIFs and 2 seconds for videos (based on the IAB standards).
- Click: Total number of CTA clicks for all Stories in the Story Group.
- Engagement: The ratio of people who saw fullscreen Stories against those who saw Storyly Bar.
Slightly below, you'll see the analytics per Story Group. In addition to the same metrics, there is an extra one which is called Complete.
- Complete: Total number of times users viewed all Stories in a Story Group.
Last, at the bottom, you can find the performance stats per product included in your Stories. On top of the SKU number, there are Impression, Sheet Open and Add to Cart metrics available for products.
- Bottom Sheet Open: Total number of clicks for the product.
- Add to Cart: Total number of Add to Cart actions happened for the product.
There are multiple actions you can take under Performance tab:
- You can change the date from the date picker at the top to see the performance of your Stories in the selected date range.
- You can export your Story Group and Product analytics as CSV.
Updated over 2 years ago