Importing Audiences from MoEngage
You can get your segments from your MoEngage and serve specific content for the targeted audience on Storyly!
Warning
For MoEngage <> Storyly Integration, you need to have Custom Destinations enabled for your MoEngage account. If not, please reach out to your MoEngage Account Manager.
Remember
You have to have your custom parameter setup between Storyly SDK & your app. For custom parameter setup, you can check our SDK documents:
1. To connect MoEngage Audiences with Storyly, first, you'll need to set up a custom destination on the MoEngage Dashboard. To do that, please navigate to App Marketplace on the left pane.

2. Under Categories, find Custom destinations.

3. At that screen, you'll see Add Custom Destination option. Please click on it to proceed.

4. Let's give a name to the Custom Destination and click on Add. You can upload an icon and give a description to differentiate it if you wish.

5. Once the Custom Destination is created, click on it and go to the Integrate tab. Then, let's Add Integration for this Custom Destination.

6. Before moving on with the integration, you'll need a set of parameters from Storyly Dashboard. To do that, please go to Audiences tab on Storyly Dashboard. At the Audiences page, let's click on + New Audience at the top right and select the Create Audience for MoEngage option.

You can give a name to your Audience and click on Continue.
At this step, Storyly will generate a Key and unique Token as Value for your Audience. Please copy these values, and you'll paste them on the MoEngage Dashboard while configuring the integration.
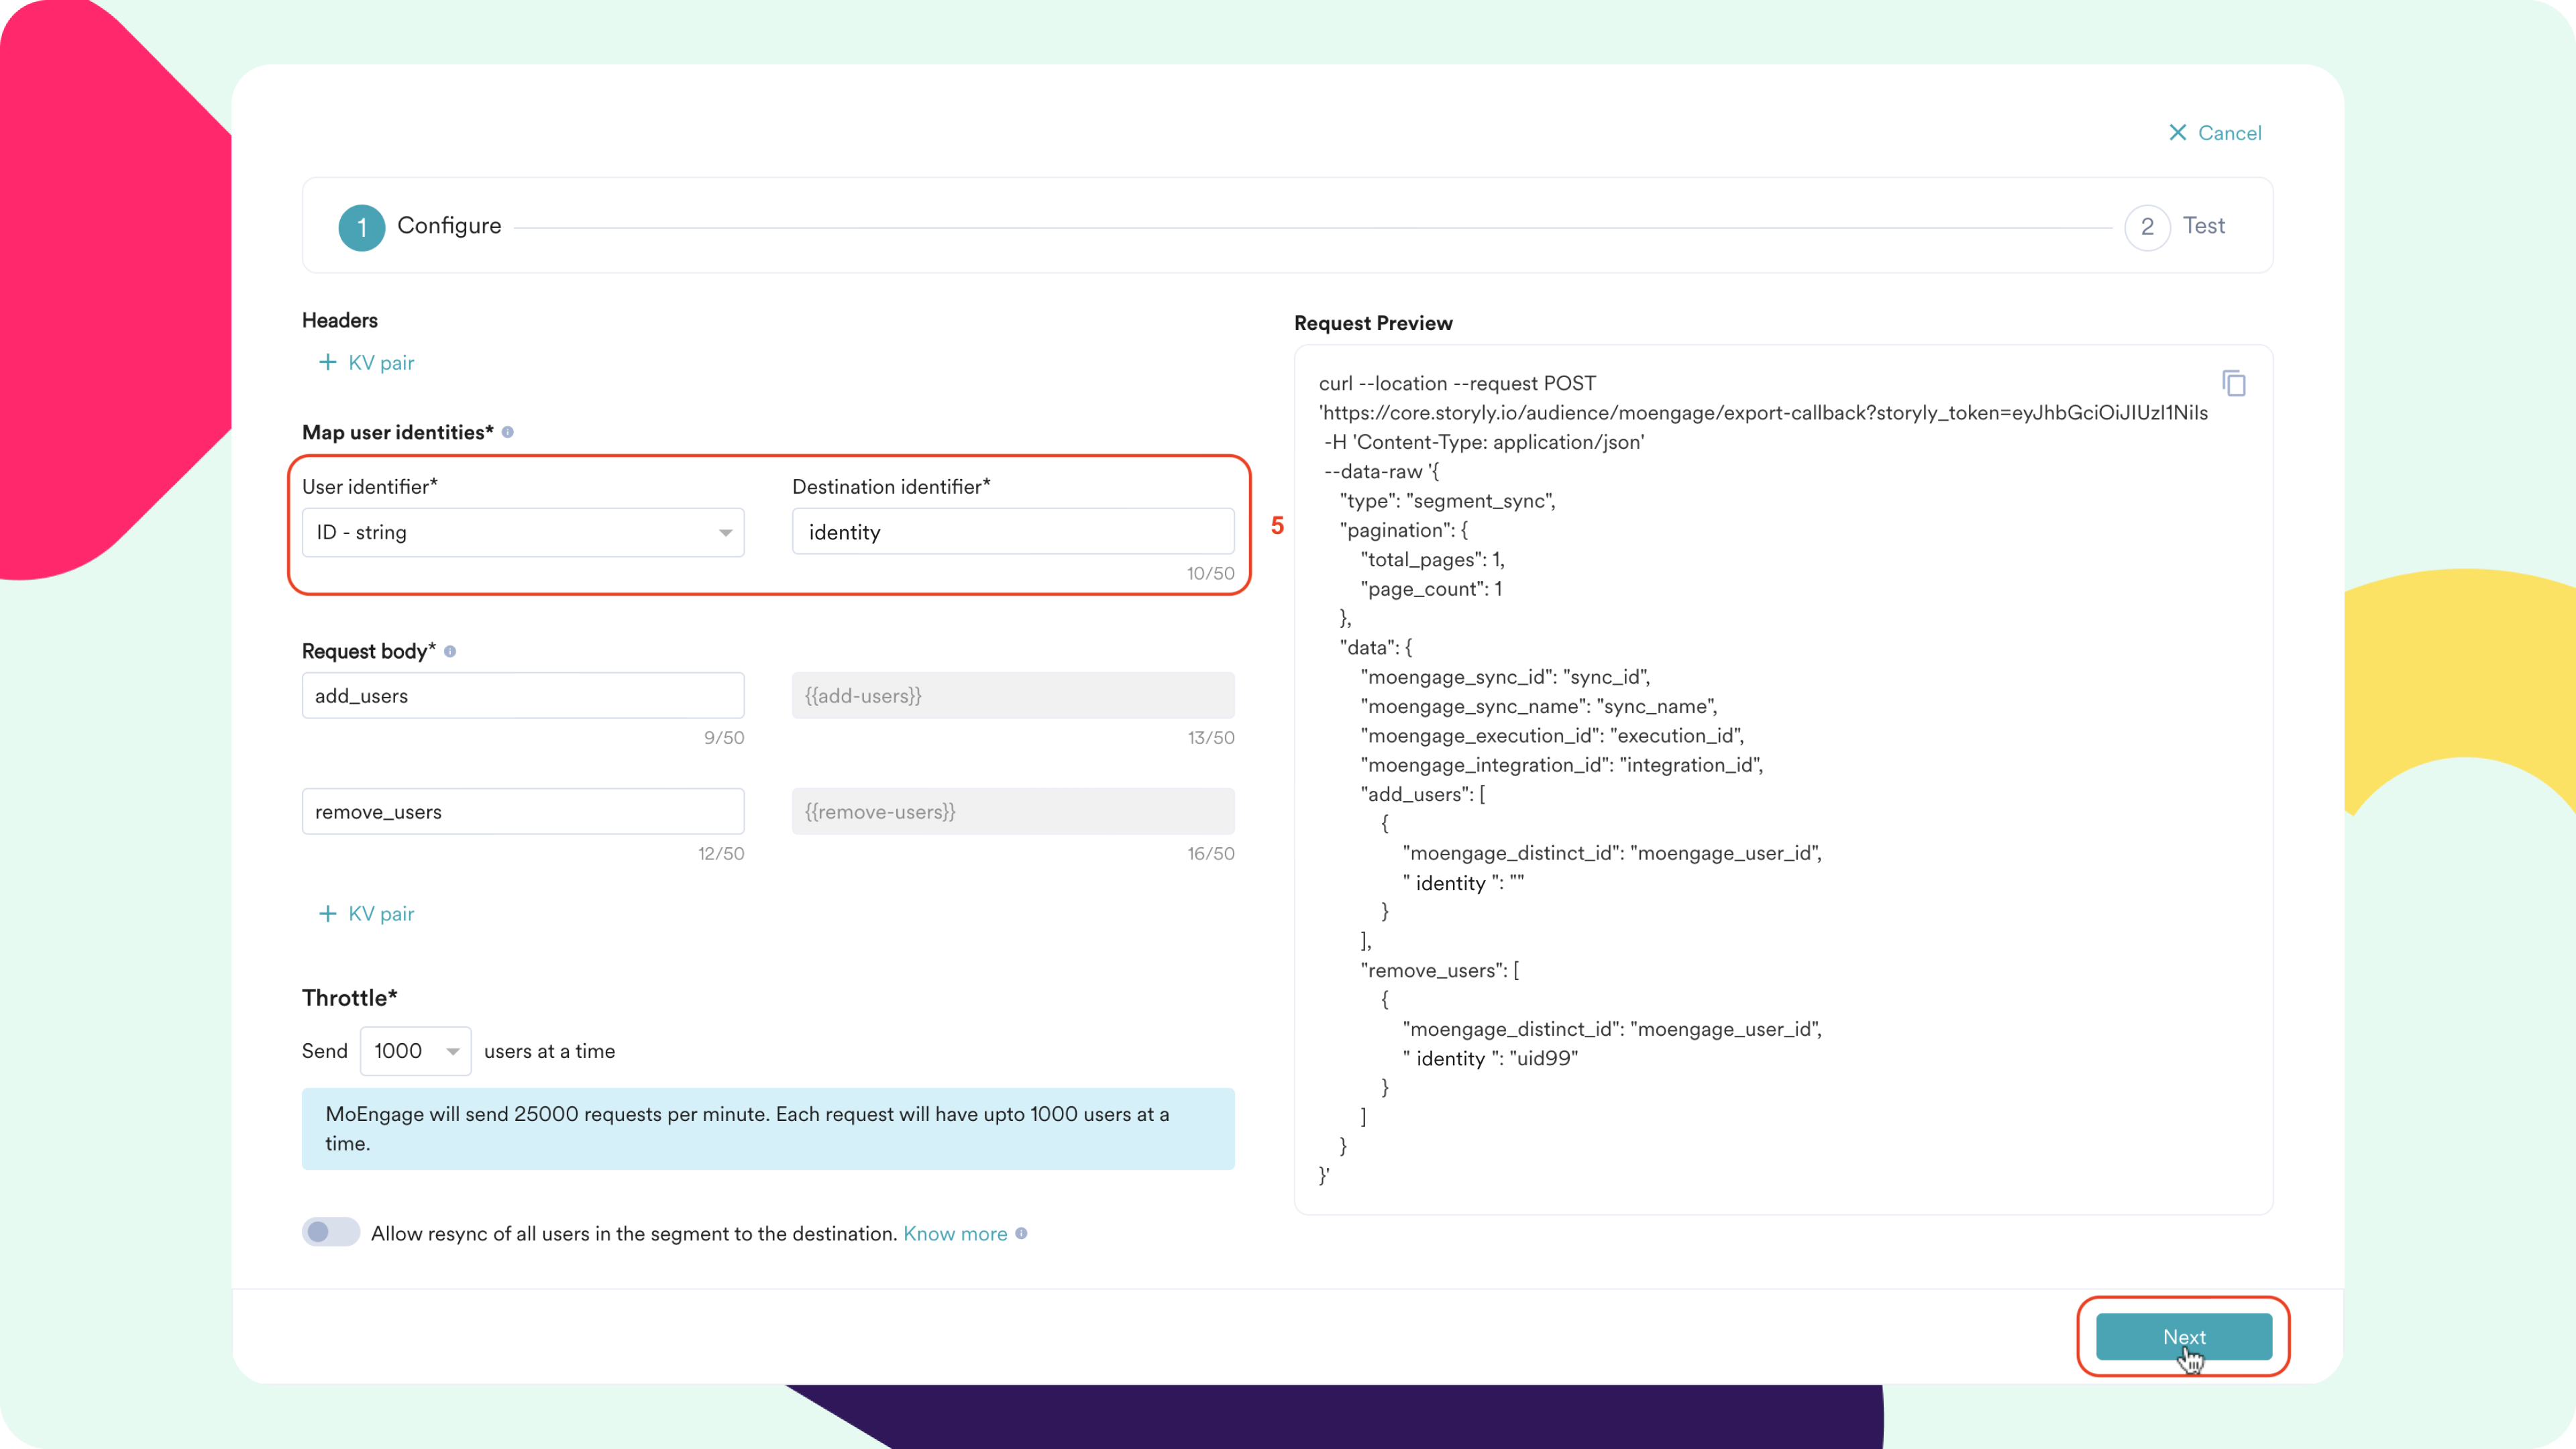
7. Let's go back to the MoEngage Dashboard and do the configuration. At the configuration screen, you'll need to fill in 5 inputs, which are:
- Integration name
- Method
- URL endpoint
- Parameters
- User identifier

- For the Integration name, you can give any name you'd like.
- For the Method, let's choose POST option.
- For the URL endpoint, you need to enter the following endpoint: https://core.storyly.io/audience/moengage/export-callback
- Under Parameters, please click on + KV pair button and paste the Key and Value that you've copied from the Storyly Dashboard in the previous step, respectively.
- For User identifier, you need to choose the identifier that you already pass to Storyly via Custom Parameter, which can be ID, e-mail, etc. Then, please just type in identity in the Destination identifier field.
8. When you hit on Next, MoEngage will give you an option for you to test the integration. You may enter a User value and click on the Test button. If the test is successful, you'll see the success message and vice versa.
If you don't want to test, you can complete the integration by clicking on the Add Integration button.

9. Once the integration is completed, you can navigate to the Segment tab, click on three dots right next to the segment that you'd like to Import, and select the Sync Segment option.

10. Please select the Destination as the Custom Destination that you've set up. After deciding on the Sync Frequency and related details, you may click on Save Sync.

After this point, your MoEngage Segment will be synced to the Storyly Audience.
11. If you'd like to see the process, you can go to the Synced Segments tab and click on the segment that you synced.

At that screen, you'll be able to see the Sync History and the number of users added and removed.
