Exporting Audiences to MoEngage
With the MoEngage integration, you can leverage the Create Audiences from the Outcome of Interactive Components feature of Storyly and send these audiences from Storyly to MoEngage as Custom Attributes.
Remember
You have to have your custom parameter setup between Storyly SDK & your app. For custom parameter setup, you can check our SDK documents:
There are a few steps you have to complete to connect the MoEngage account with Storyly.
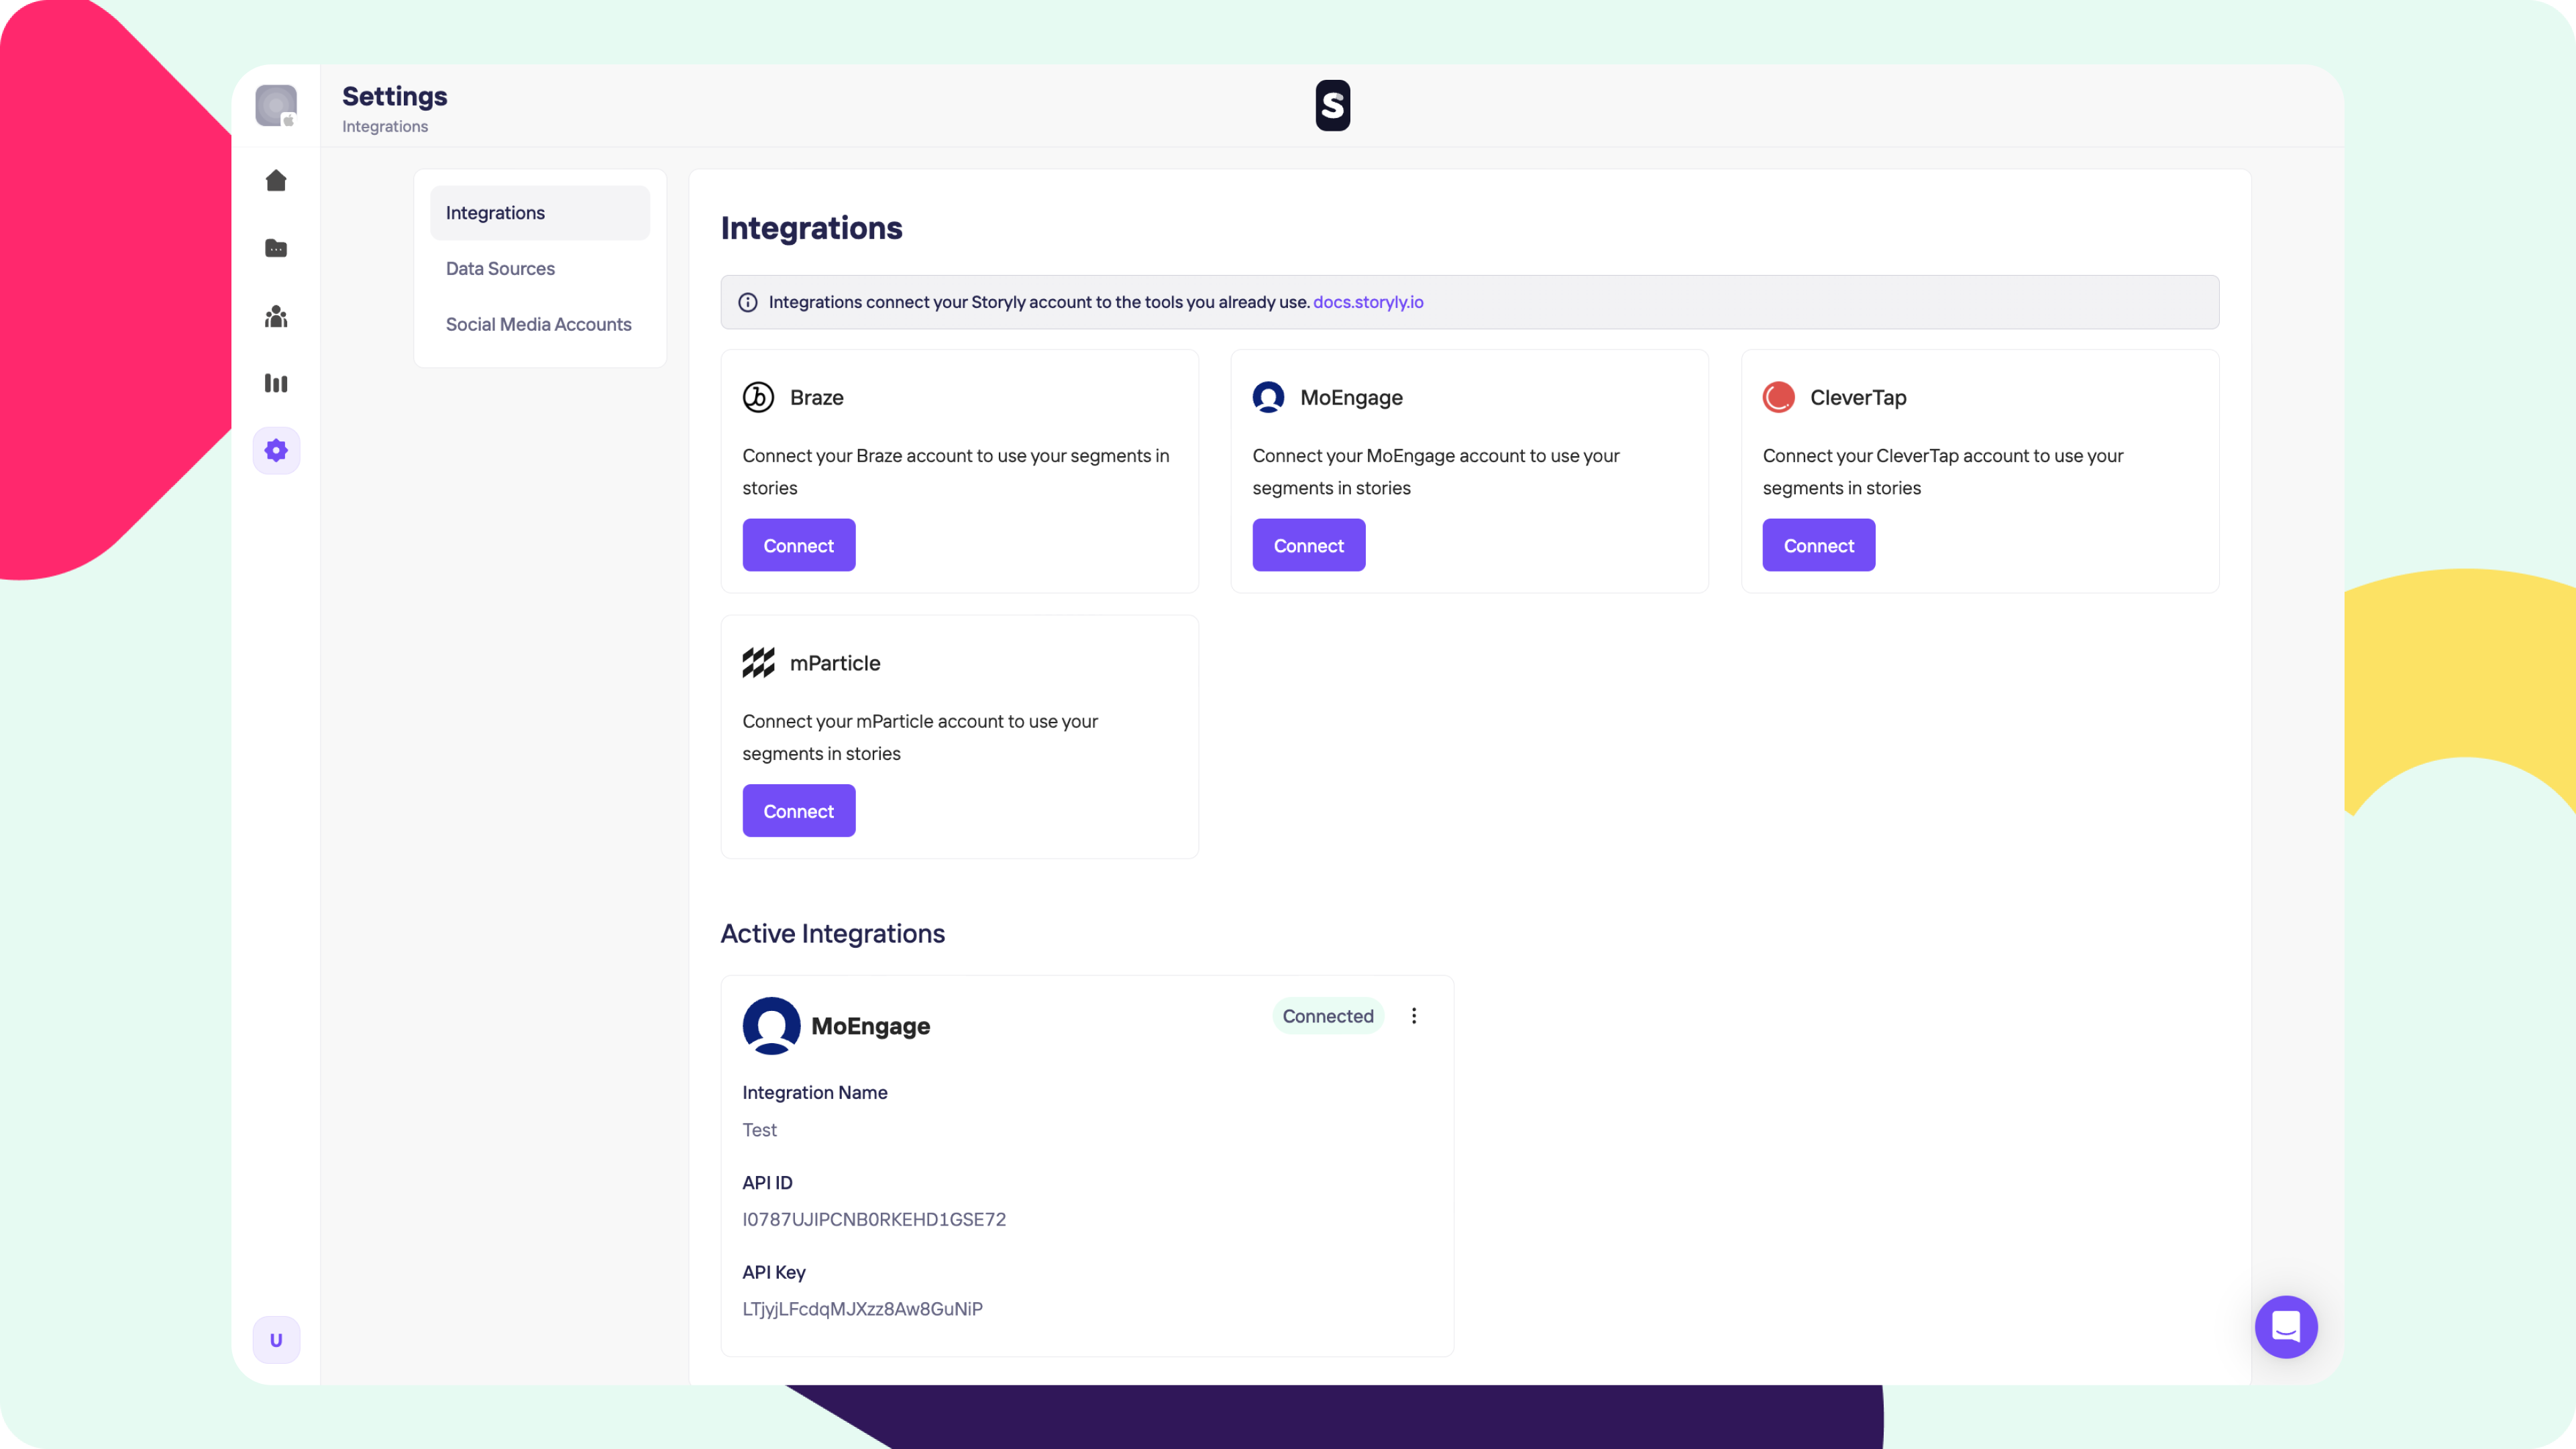
1. Let's start with connecting the MoEngage account on Storyly Dashboard. To do that, please go to Settings and find the Integrations tab. Under Integrations, you'll see MoEngage. Please click on Connect.
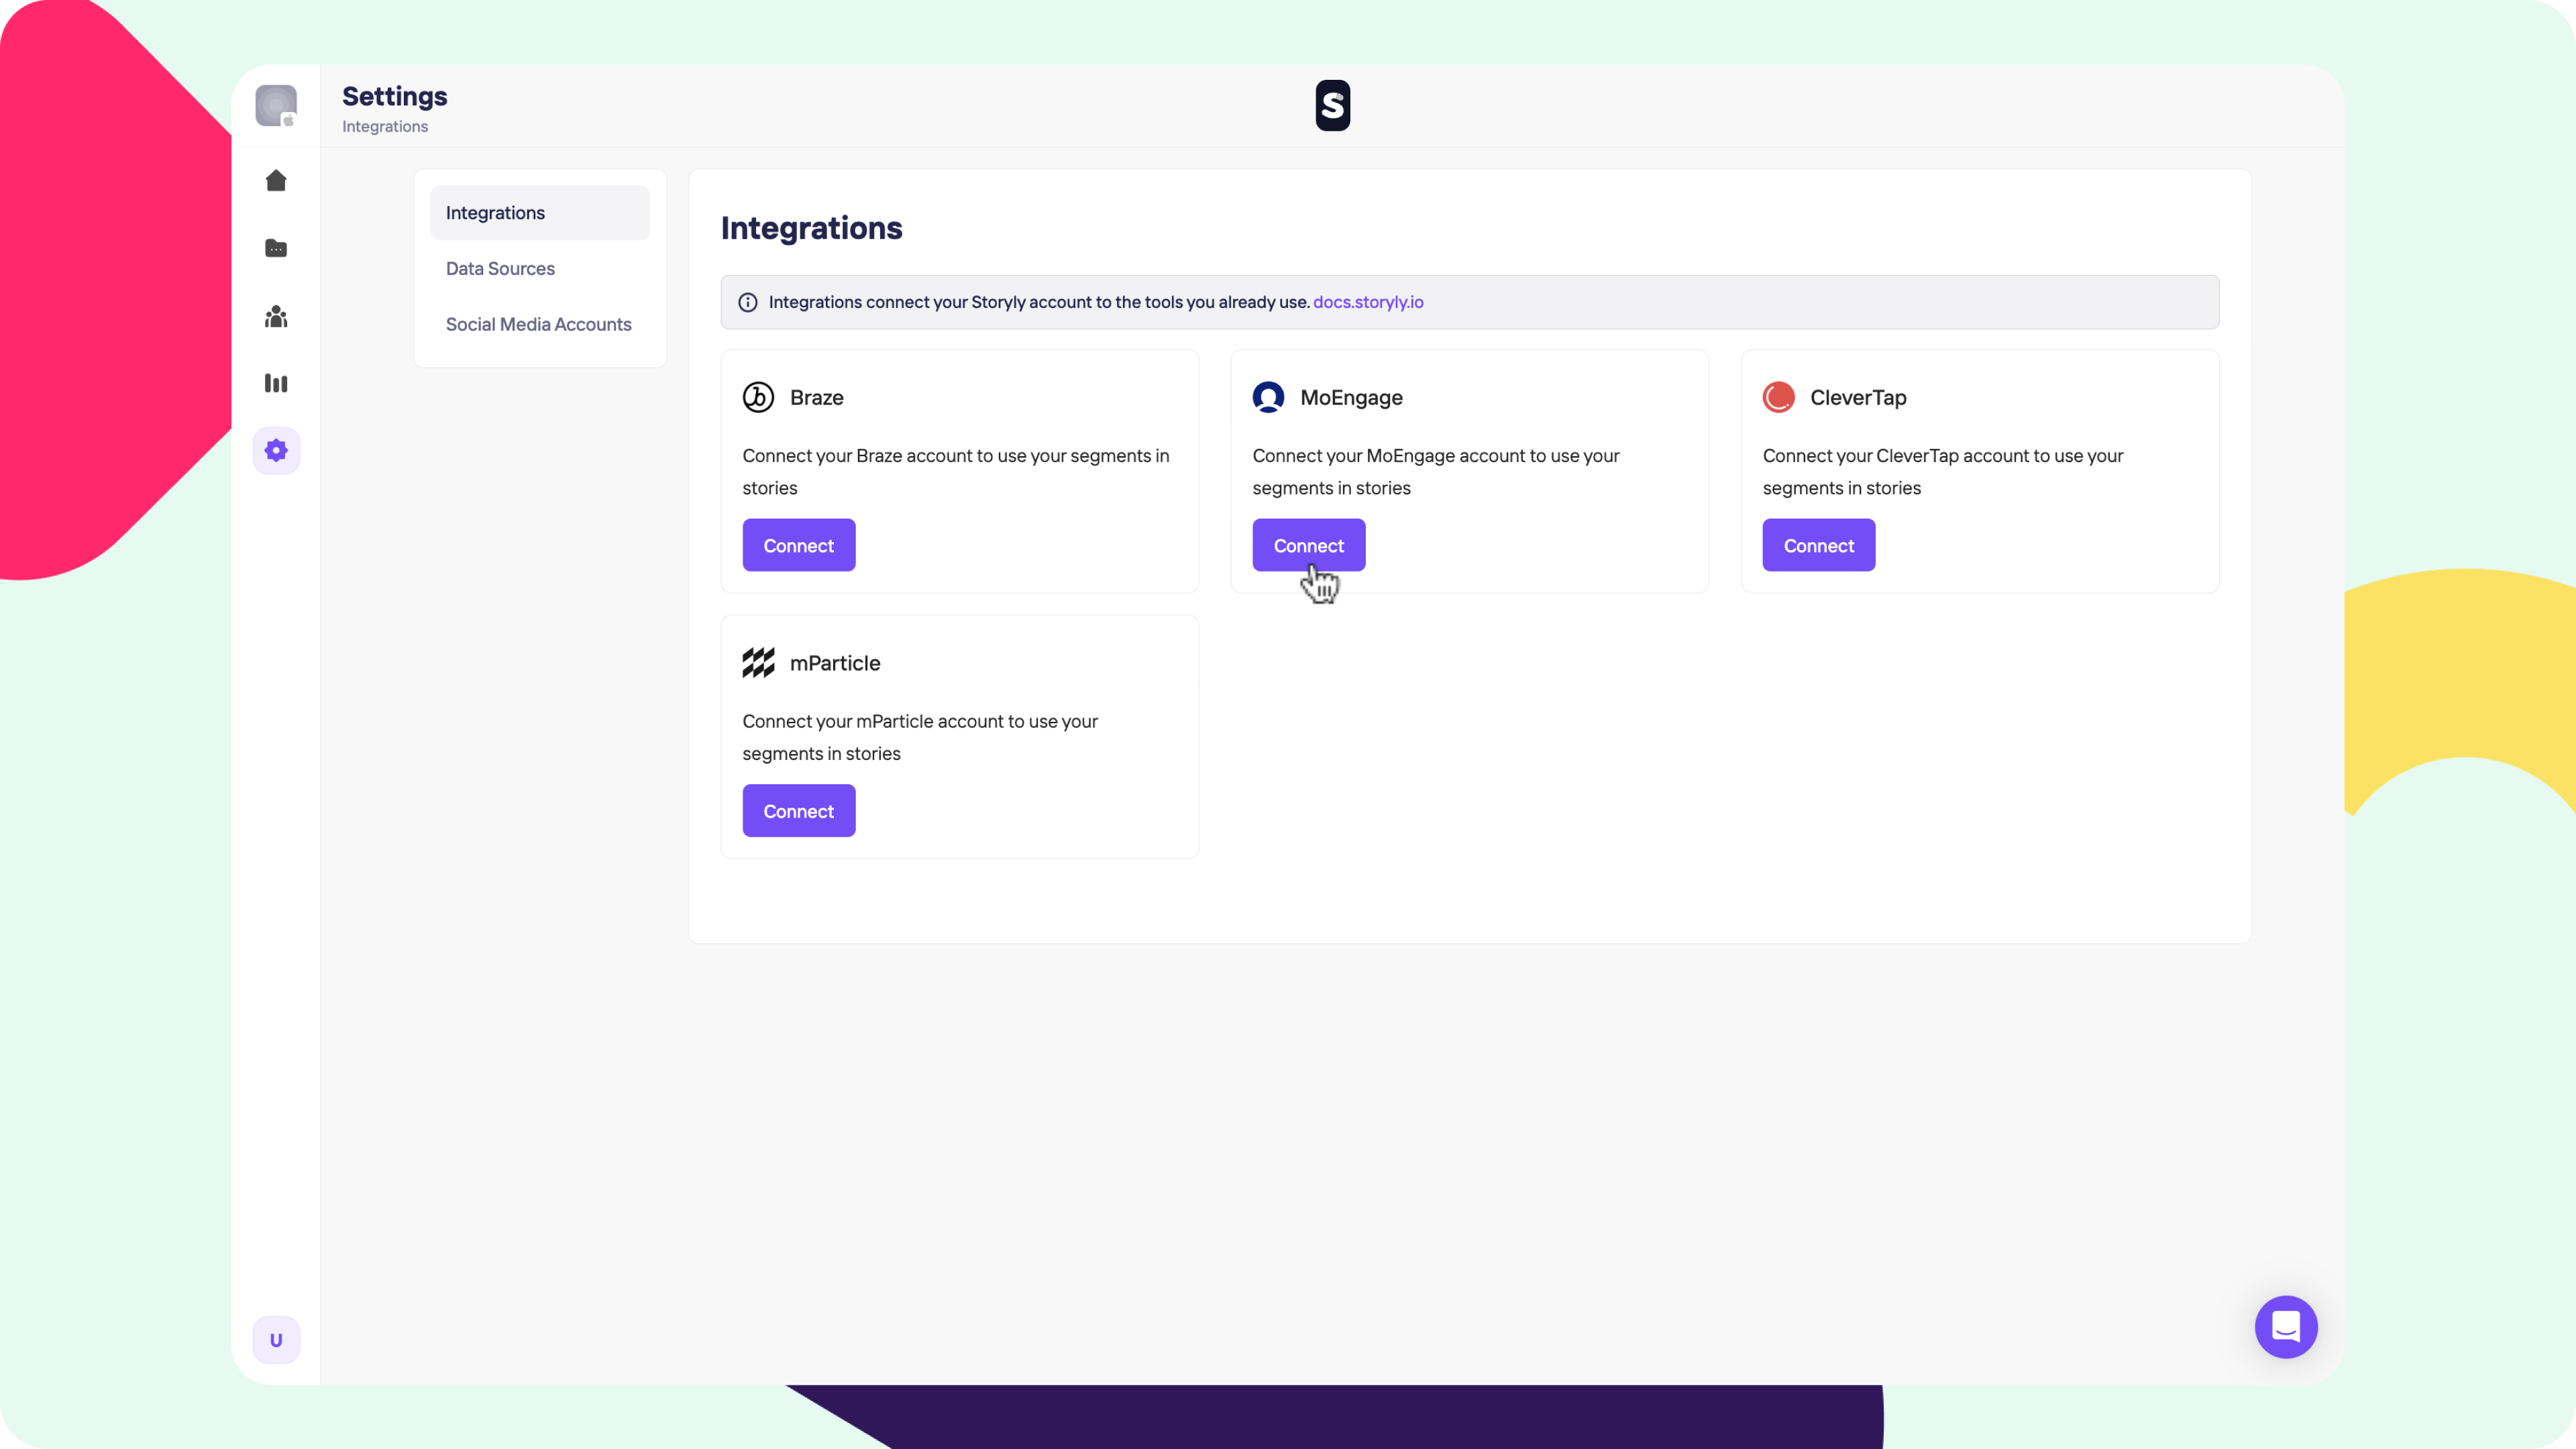
2. When you click on Connect, you'll be asked to fill in 3 fields which are:
- Integration Name
- API ID
- API Key
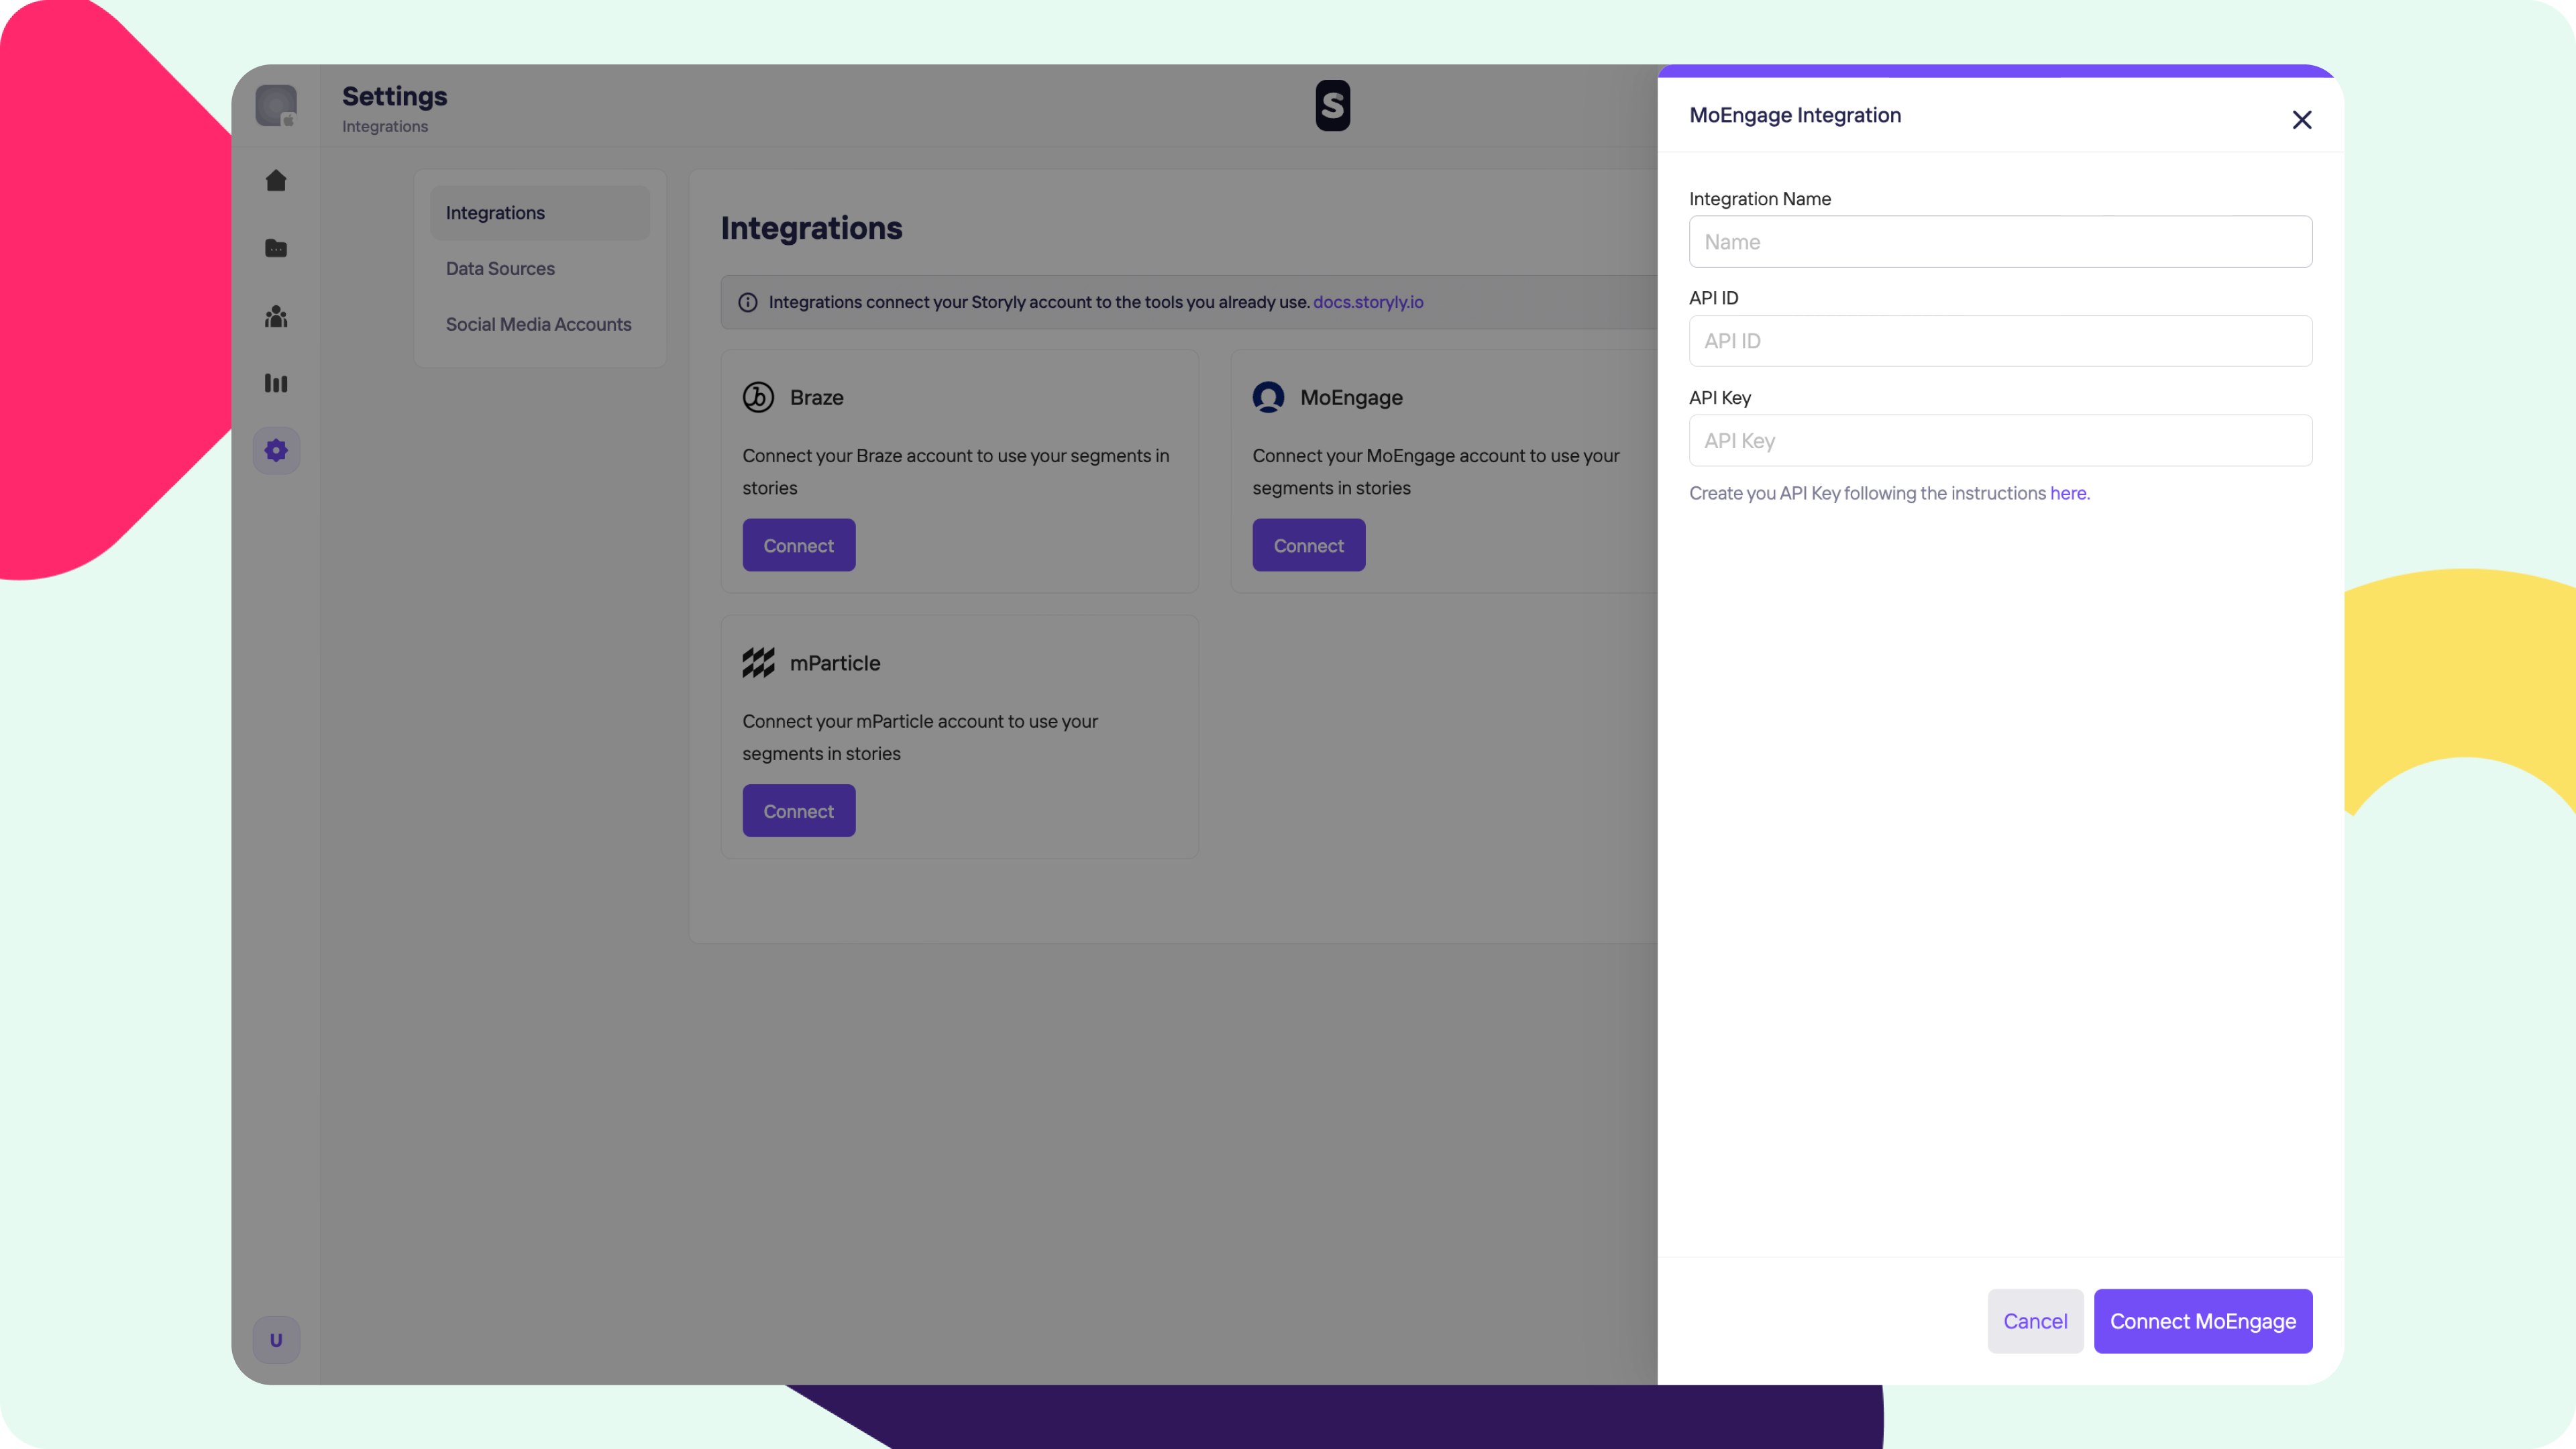
3. You may have more than 1 integration, that's why you can give any name to Integration as you want to differentiate one from another.
4. To fill in API ID and API Key, please go to the MoEngage Dashboard, click on Settings on the left pane, and find the APIs section.
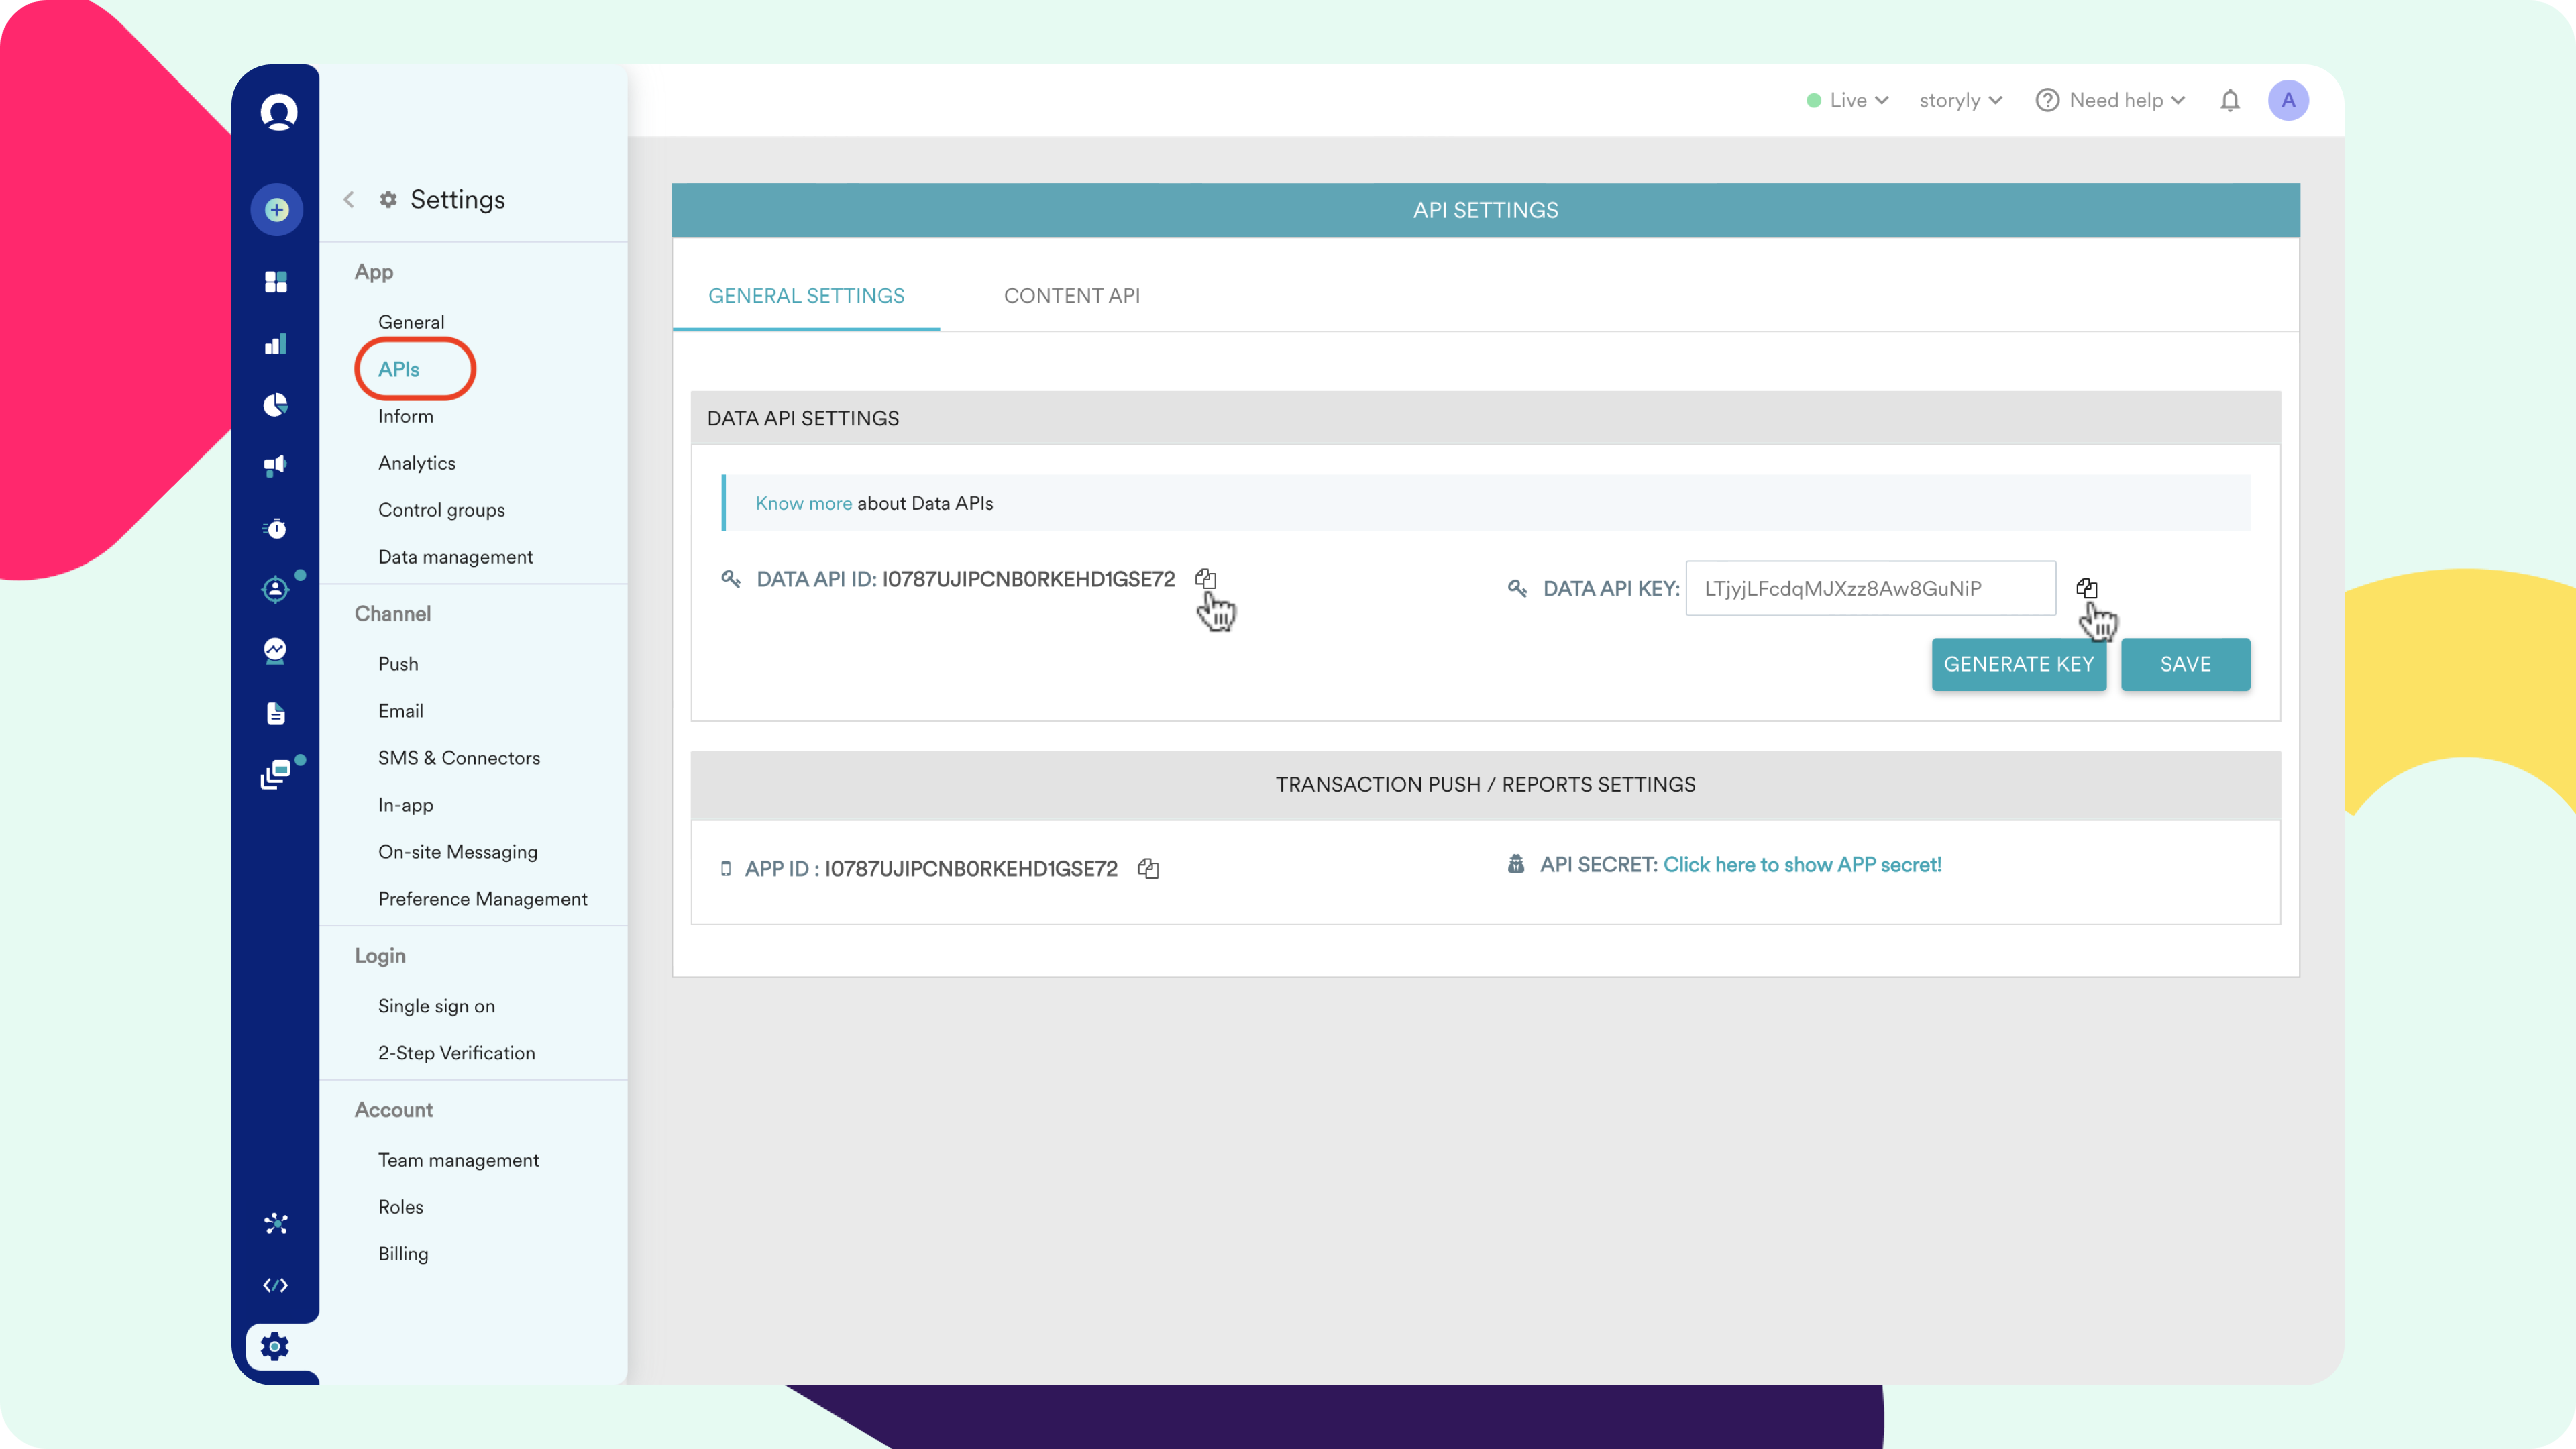
5. We'll use Data API here, so please copy DATA API ID and DATA API Key, then paste them in the corresponding fields on the Storyly Dashboard.
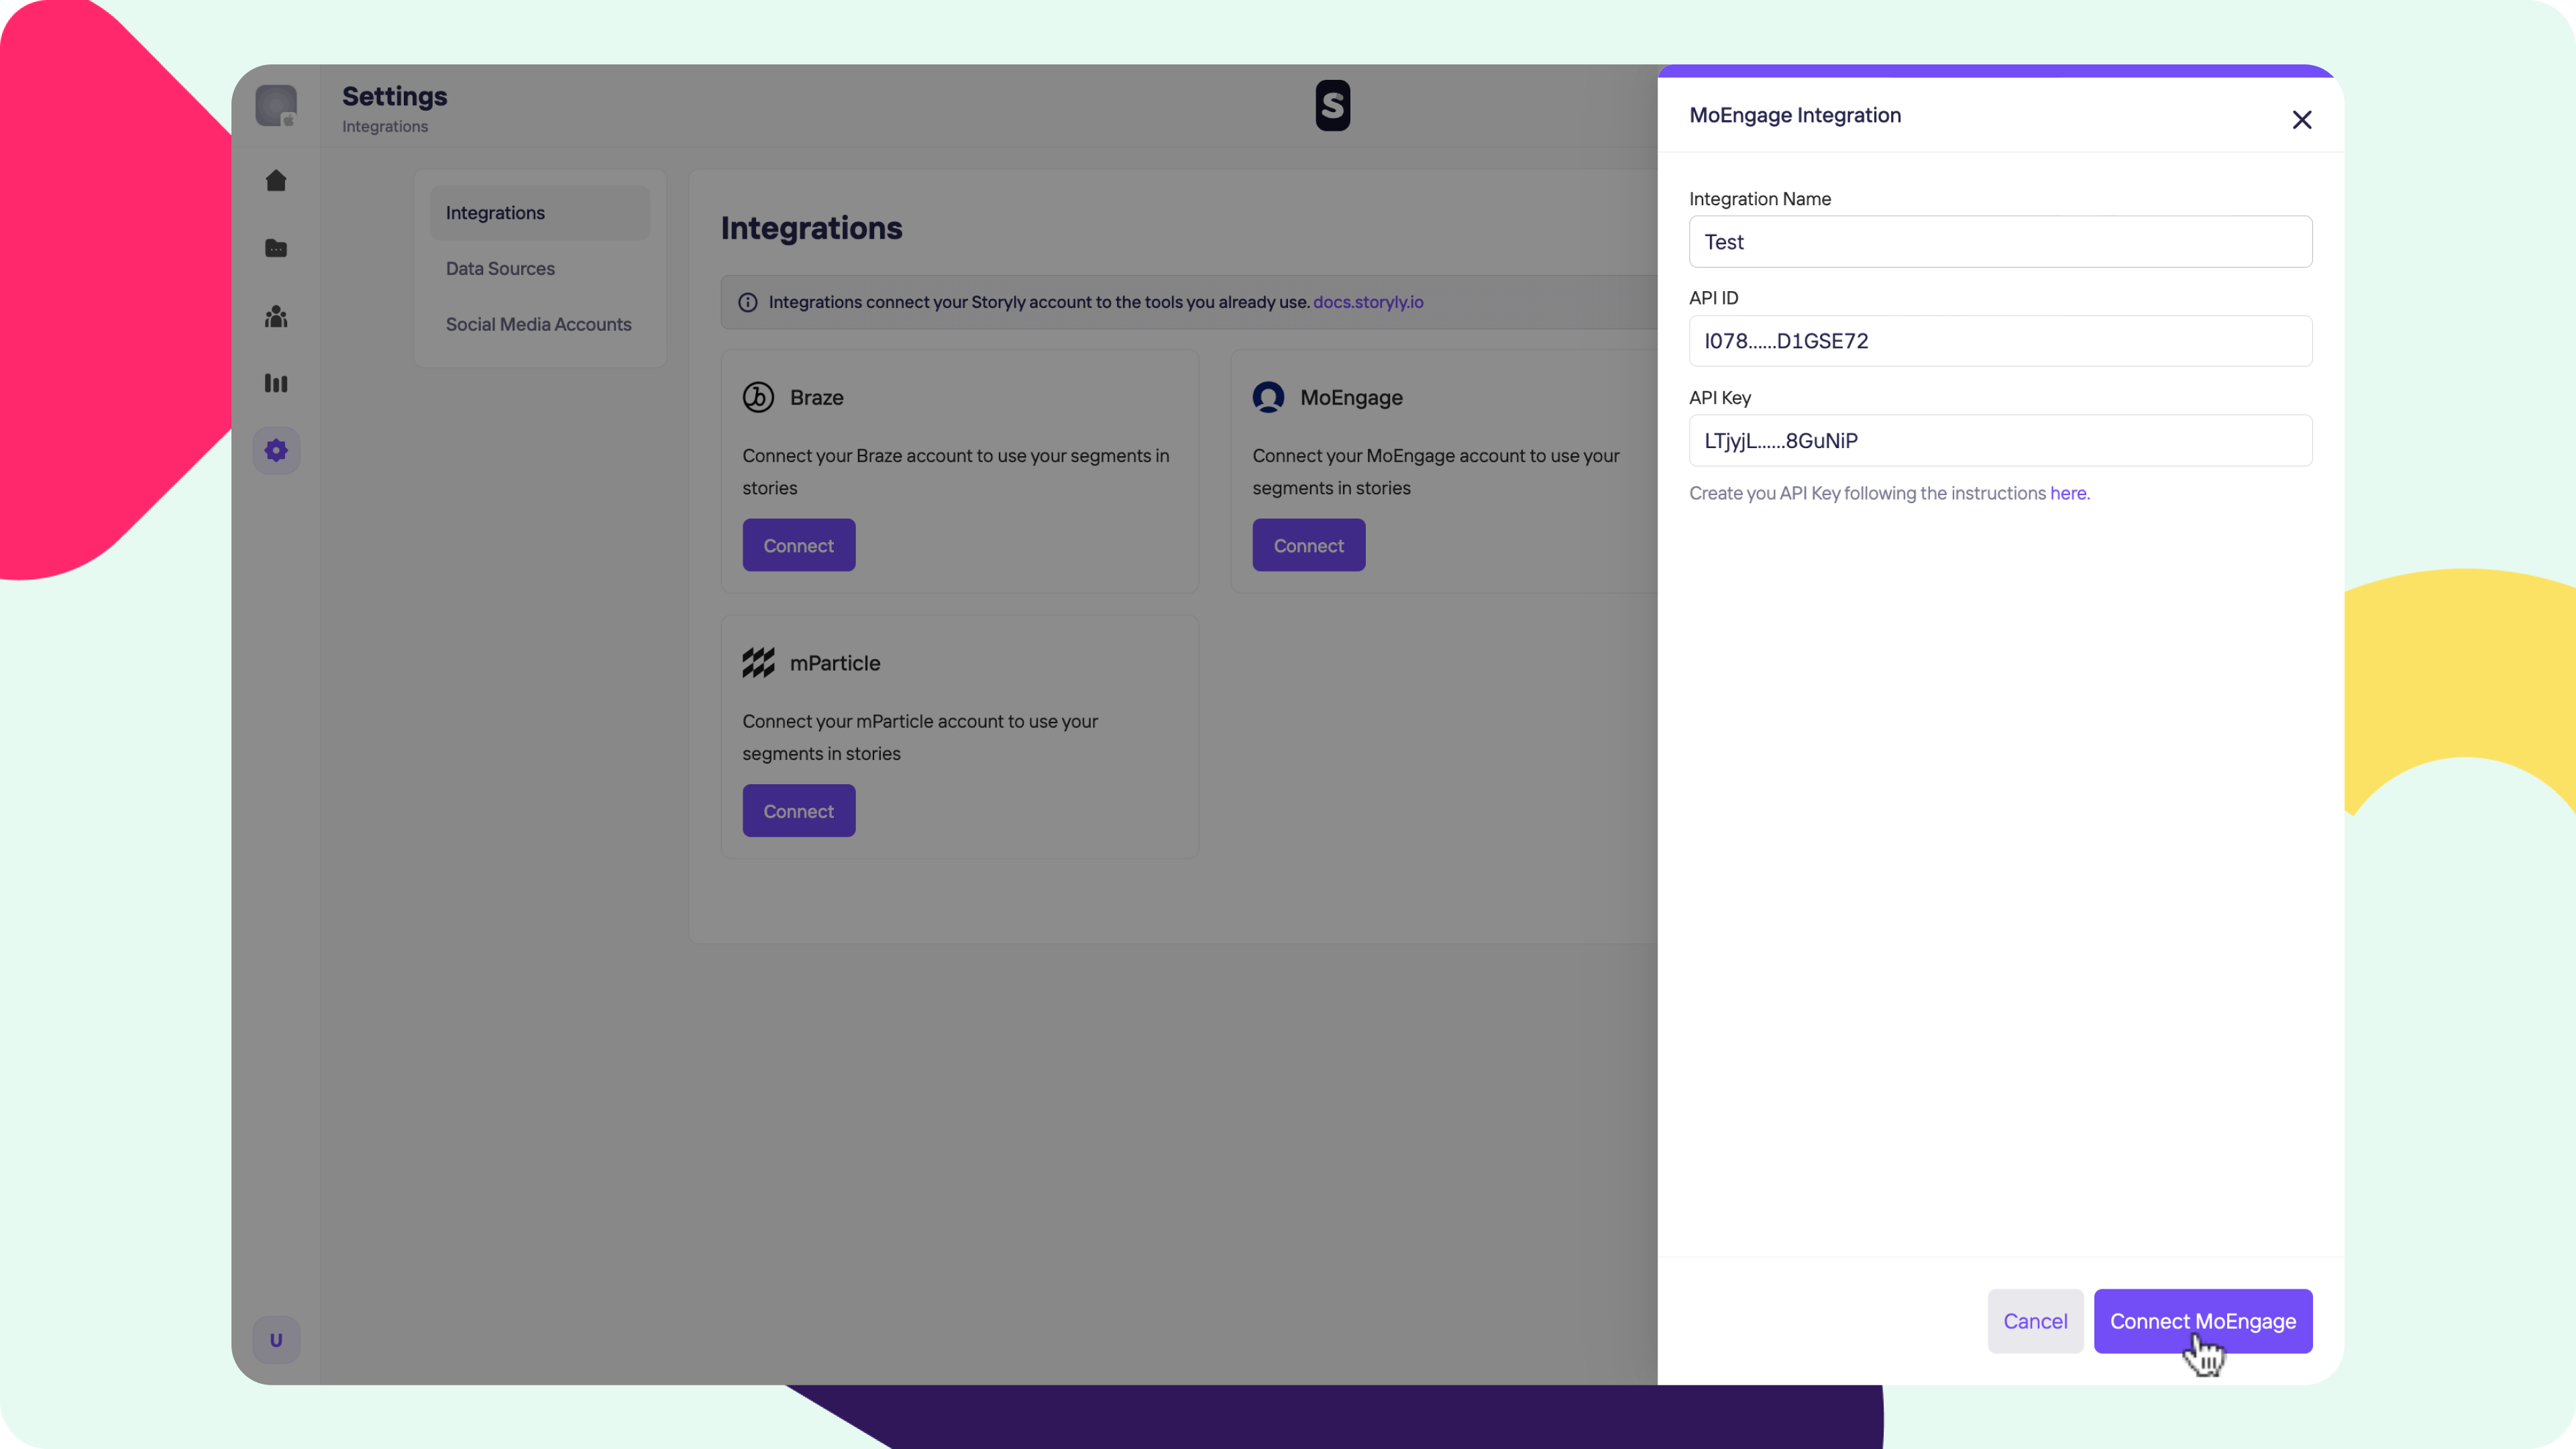
6. Once you click on Connect MoEngage, integration is completed!
From here, as referenced above, if you've created audiences from the outcome of interactive components in Storyly, you'll have the option to Export these Audiences to MoEngage.
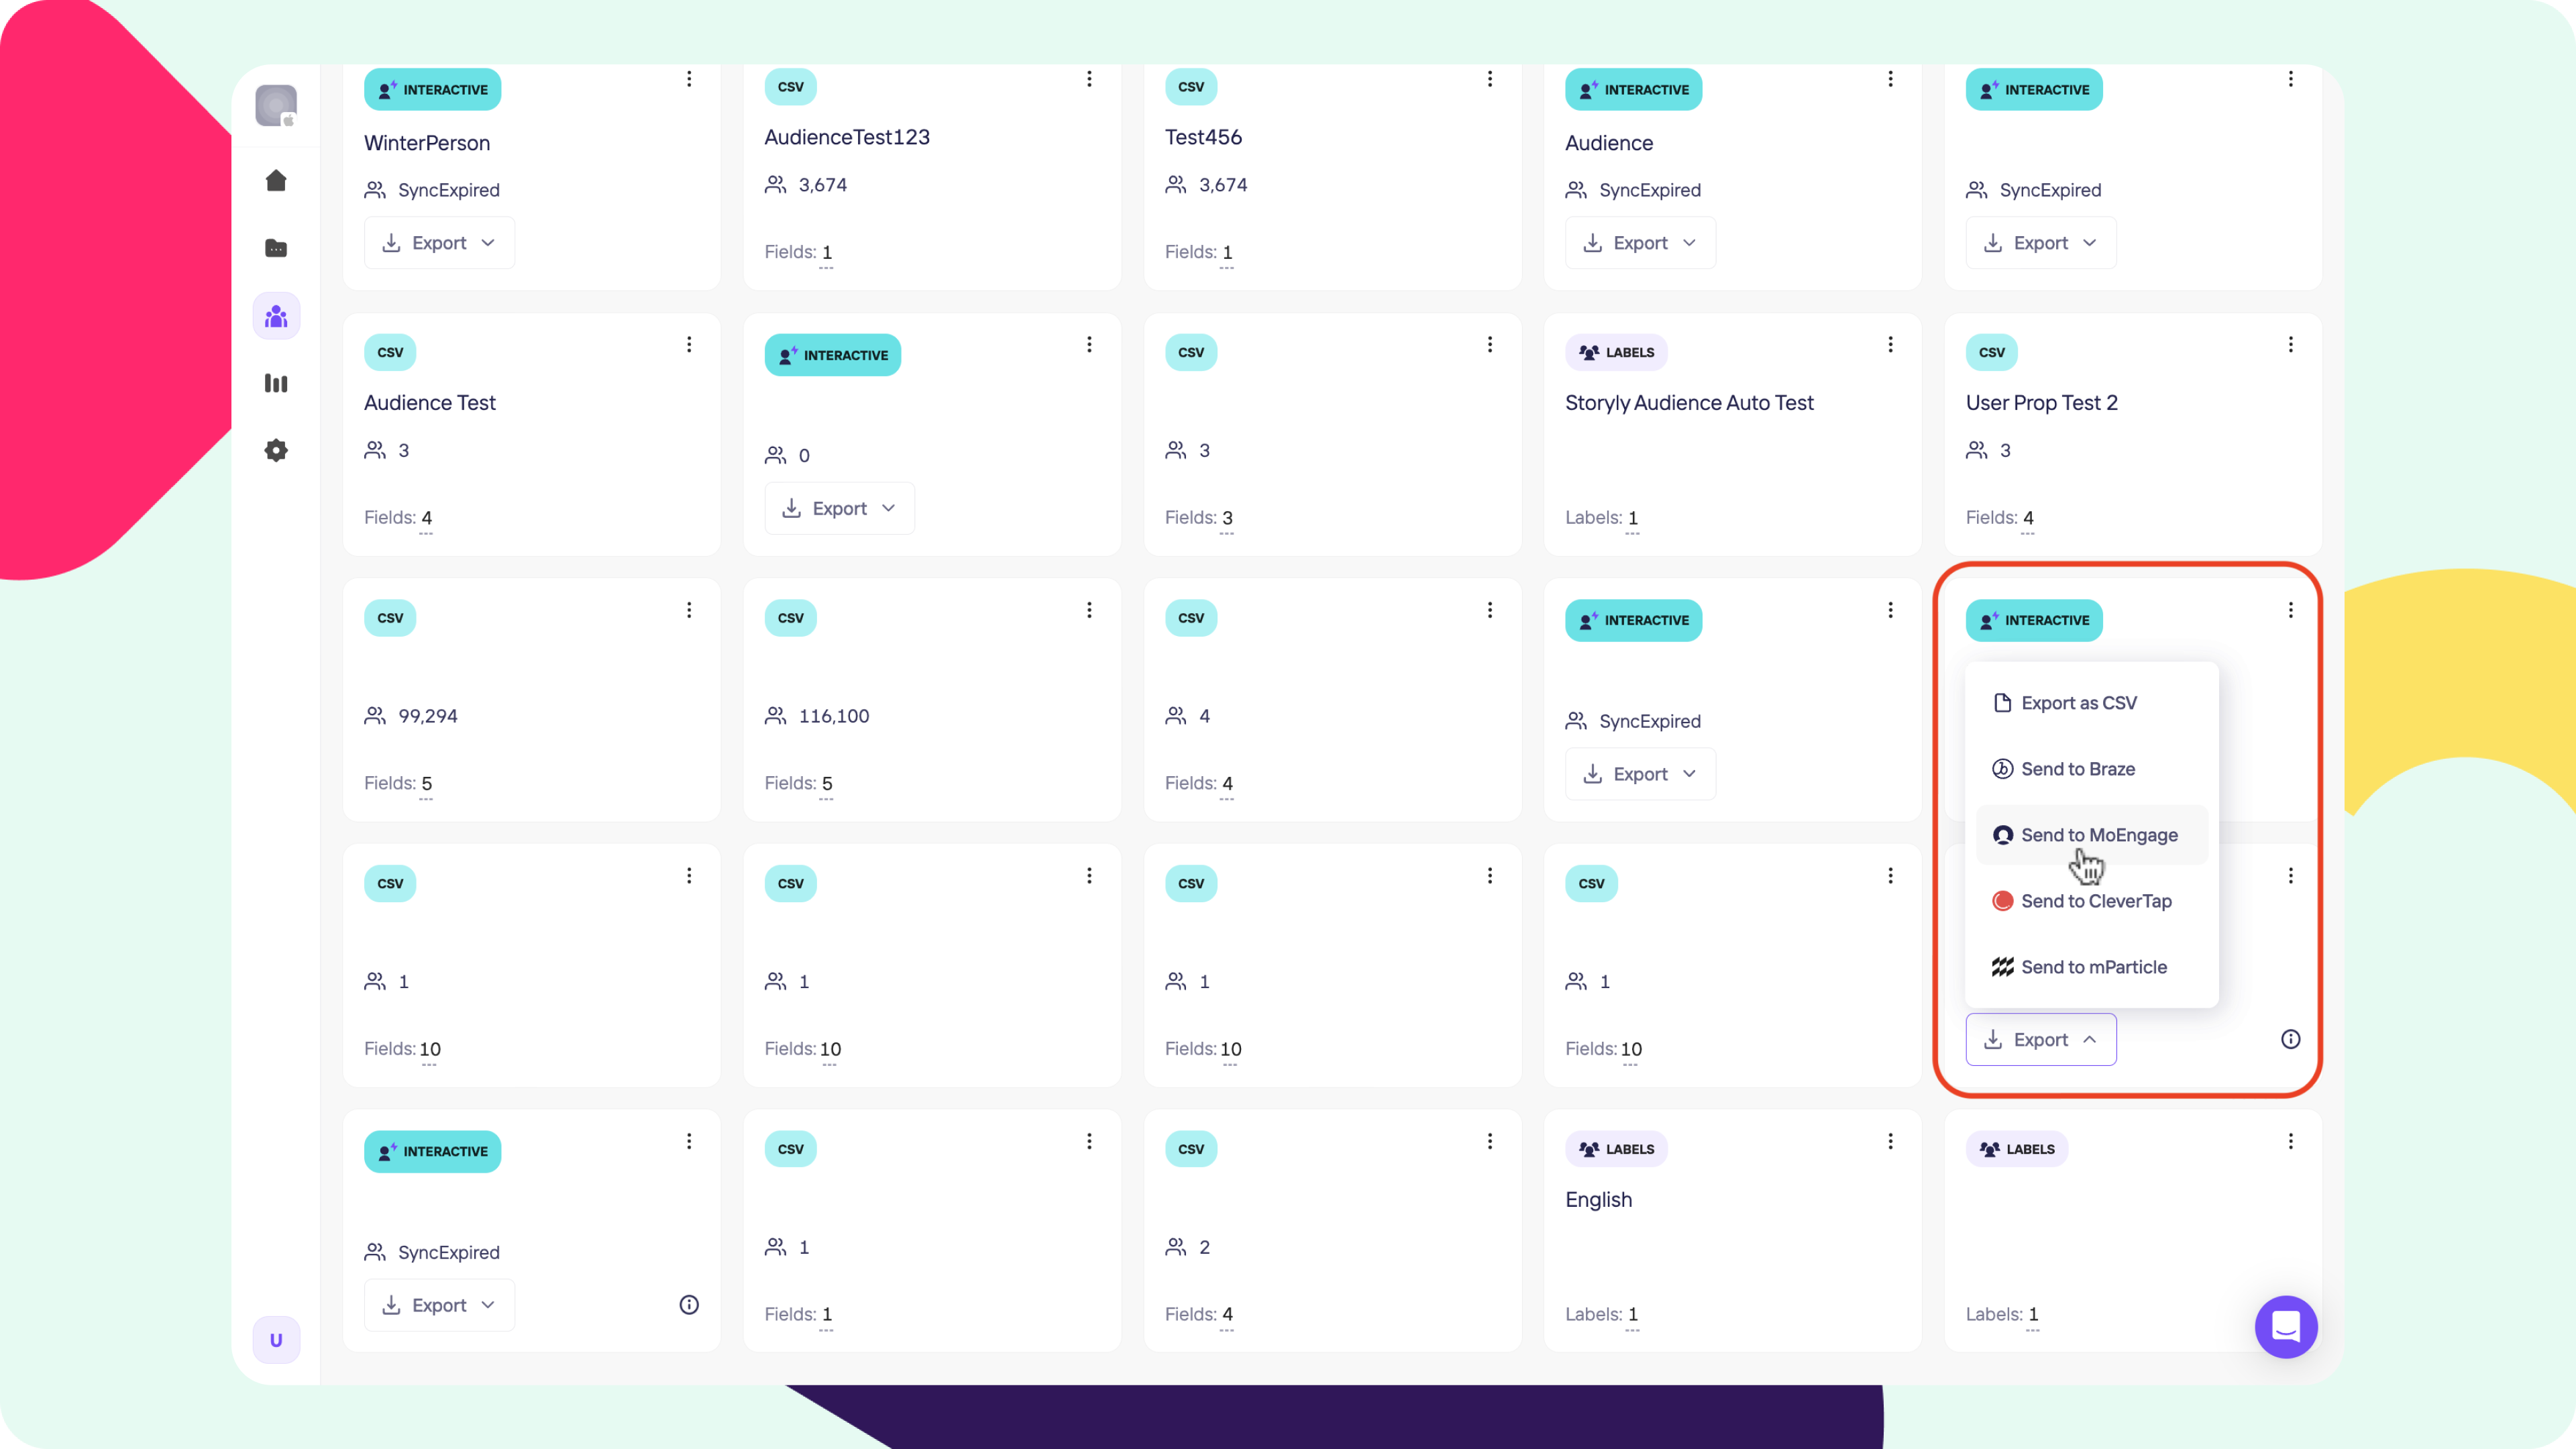
7. Under Audiences, you can see audiences that you've created. If you click on the Export button, you'll see the Send to MoEngage option.
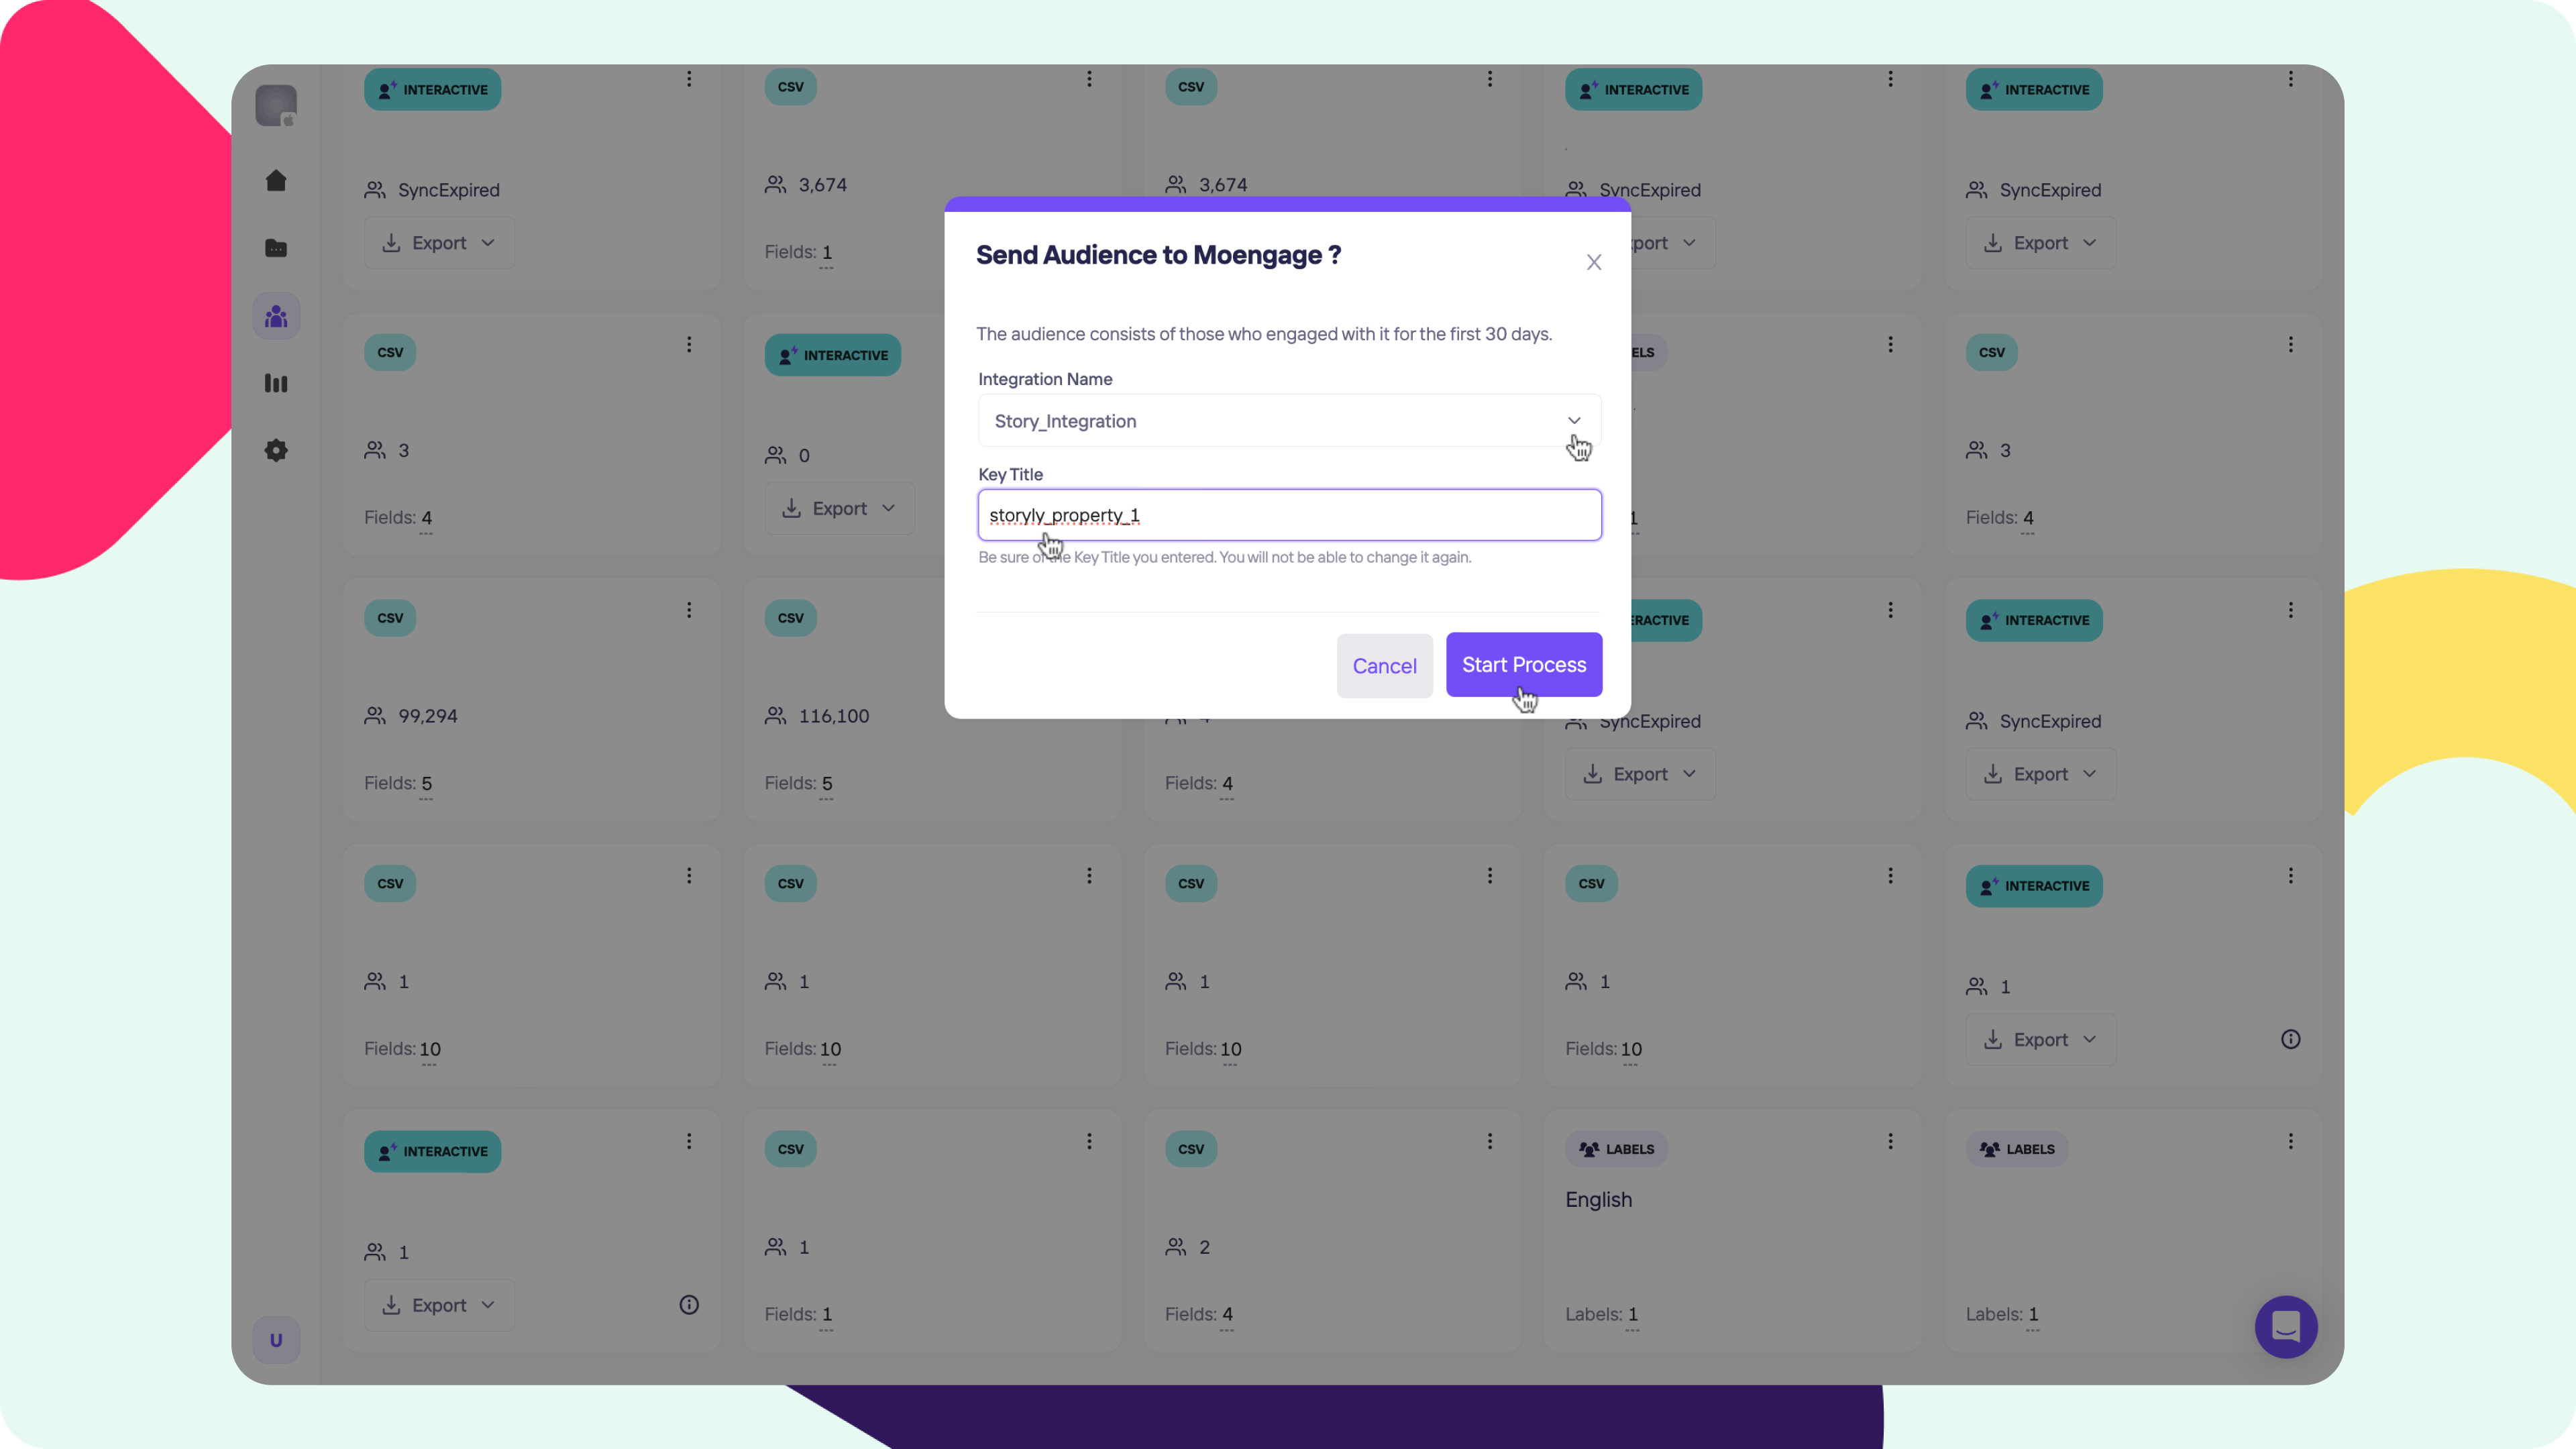
8. When you click on Send to MoEngage, you'll be asked to choose which integration you'd like to use and to give a Key Title for the Custom Attribute that you'll see on MoEngage.
9. After you click on Start Process, depending on the audience's size, it'll take a couple of minutes for the process to be completed.
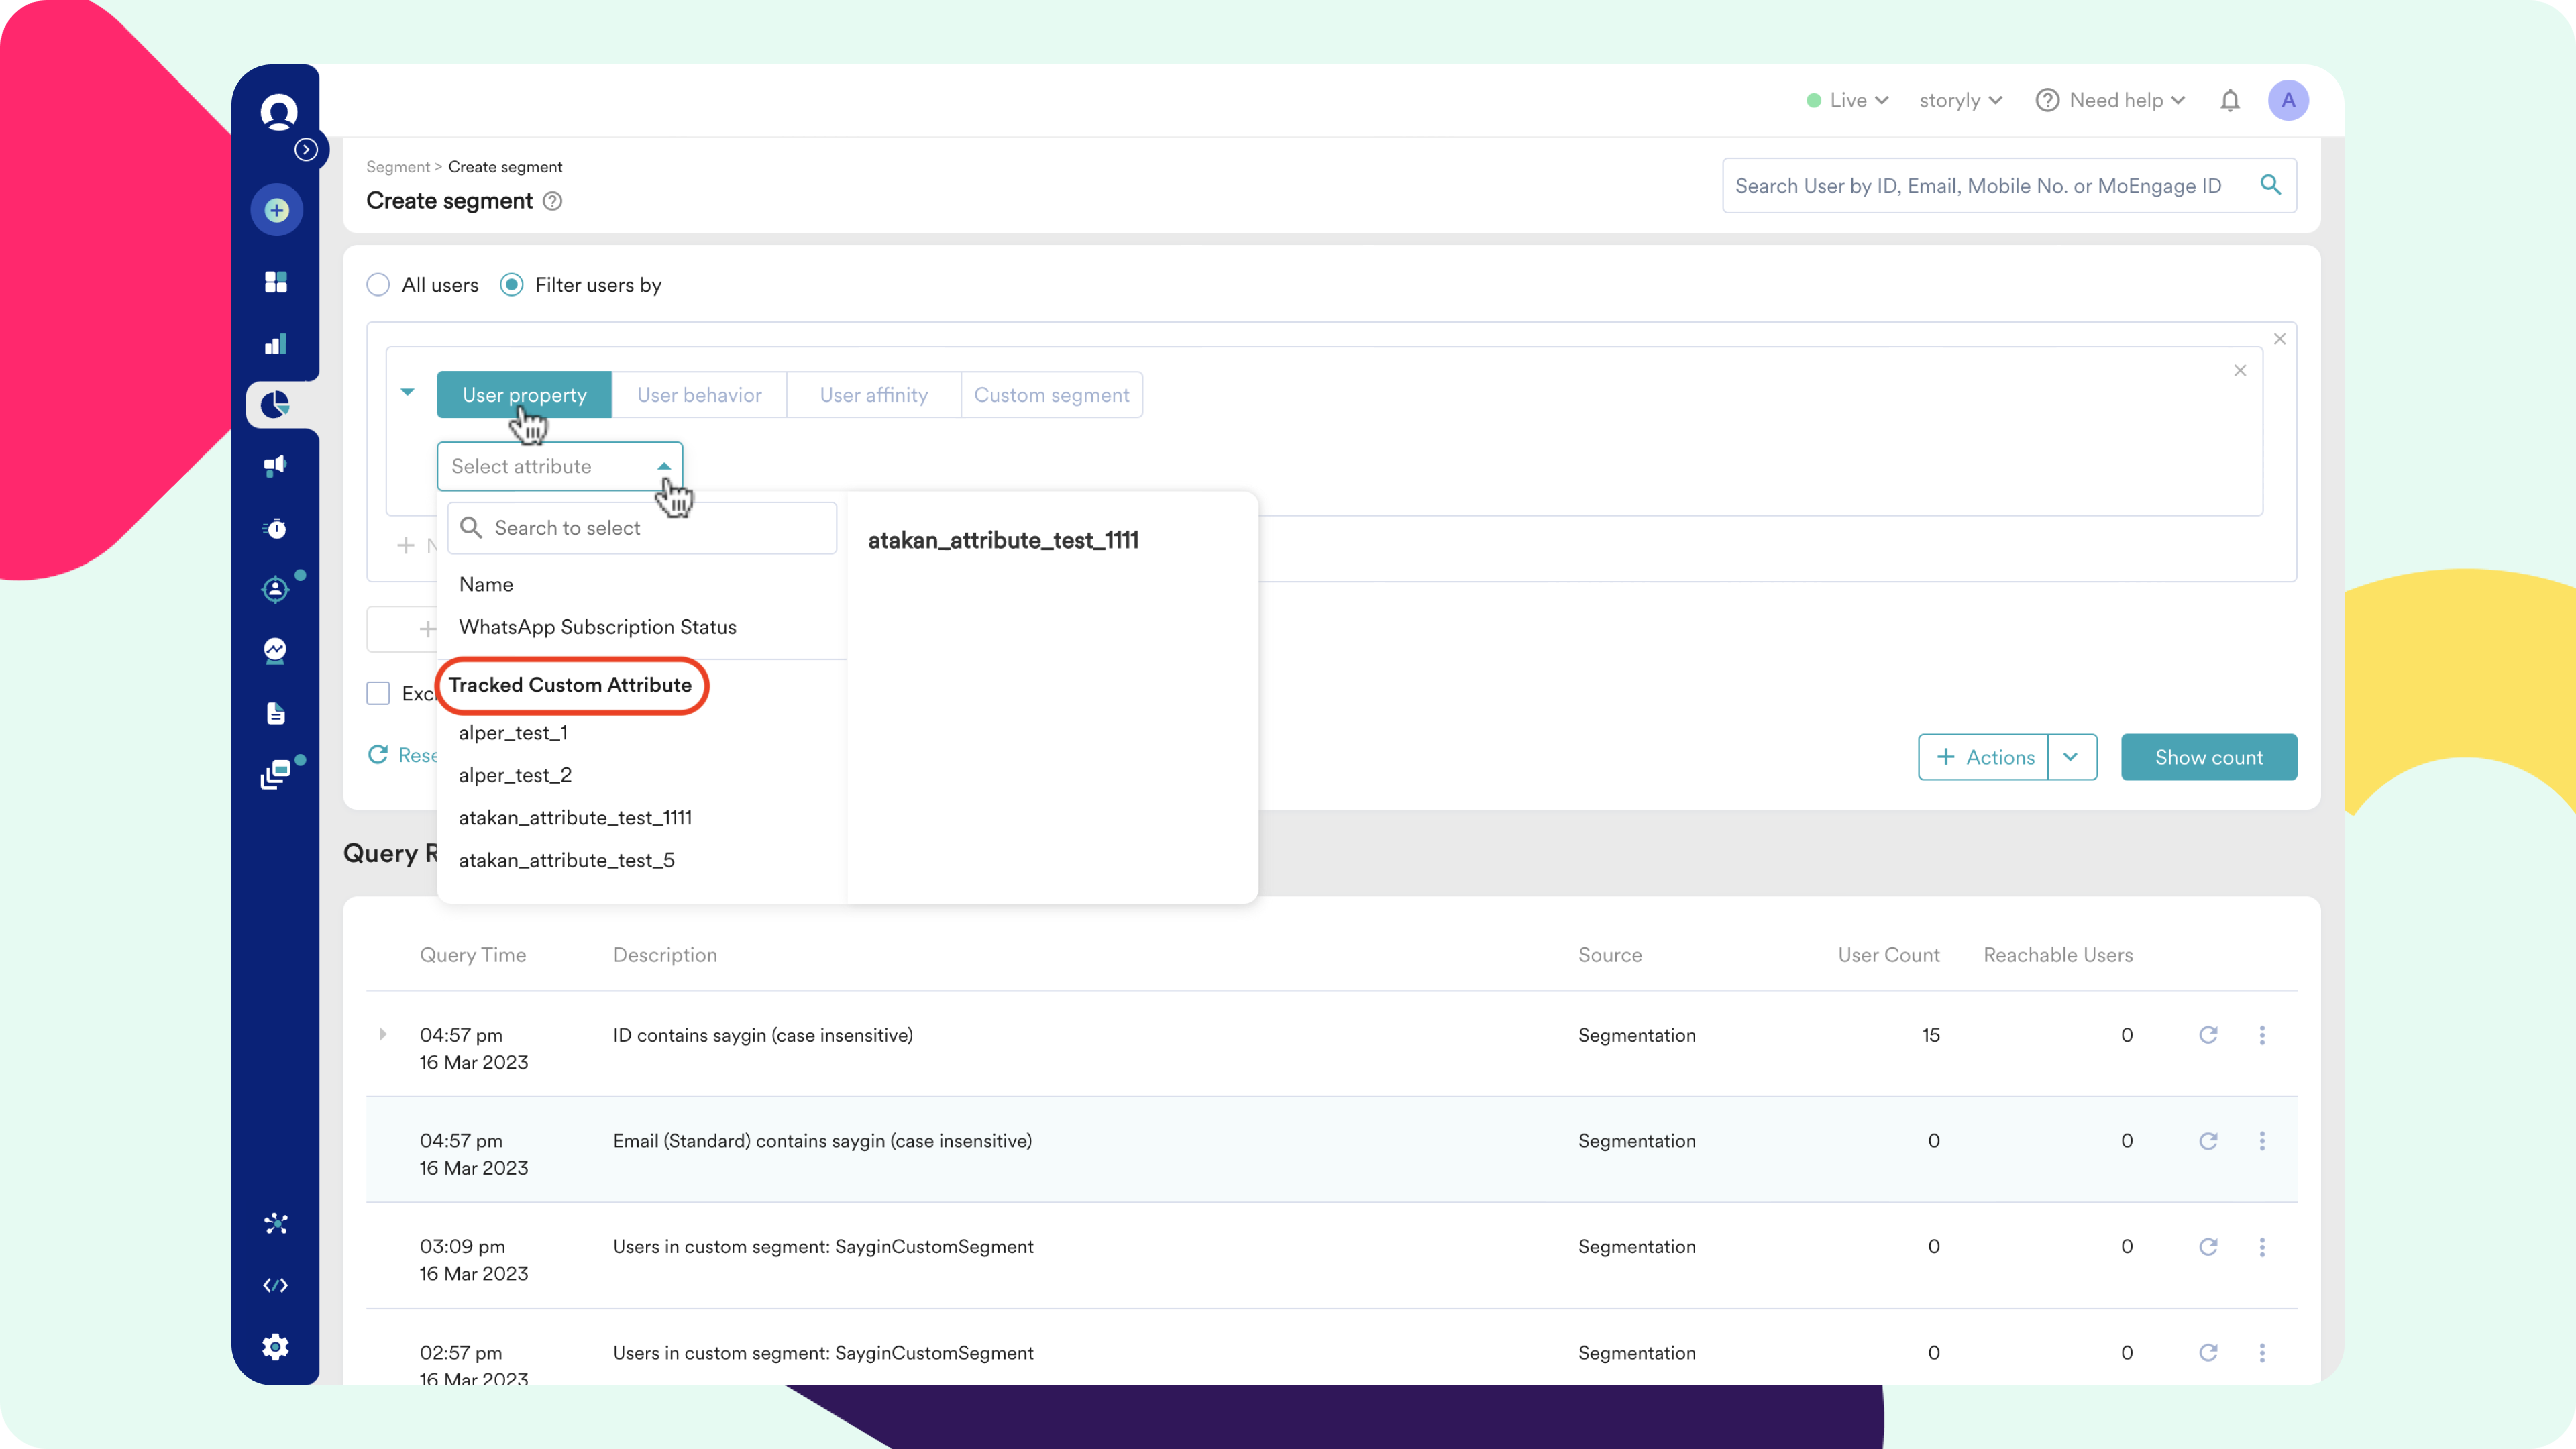
10. Once the process is completed, you can go to MoEngage Dashboard, navigate to Segments from the left pane and click on the Create Segment option.
11. In that screen, please click on User Property and scroll down to find the custom attribute that you've exported from Storyly under the Tracked Custom Attribute section.
12. After selecting the custom attribute, if you go with the "is" and type in the name of your Audience on Storyly Dashboard, you'll be able to create a segment that includes all of the users in that Audience.
