Inbox Stories
Now, you can add Storyly Web Stories to your e-mails with the embed function without needing an integration at all.
With Inbox Stories, you can create a Story in the Studio and embed it in the body of your email.
Warning
To enable Inbox Stories, please get in touch with your Customer Engagement Manager.
Embedding Inbox Stories Into an E-mail
After creating the content for your email, on the Storyly Dashboard, you'll have the Embed option.
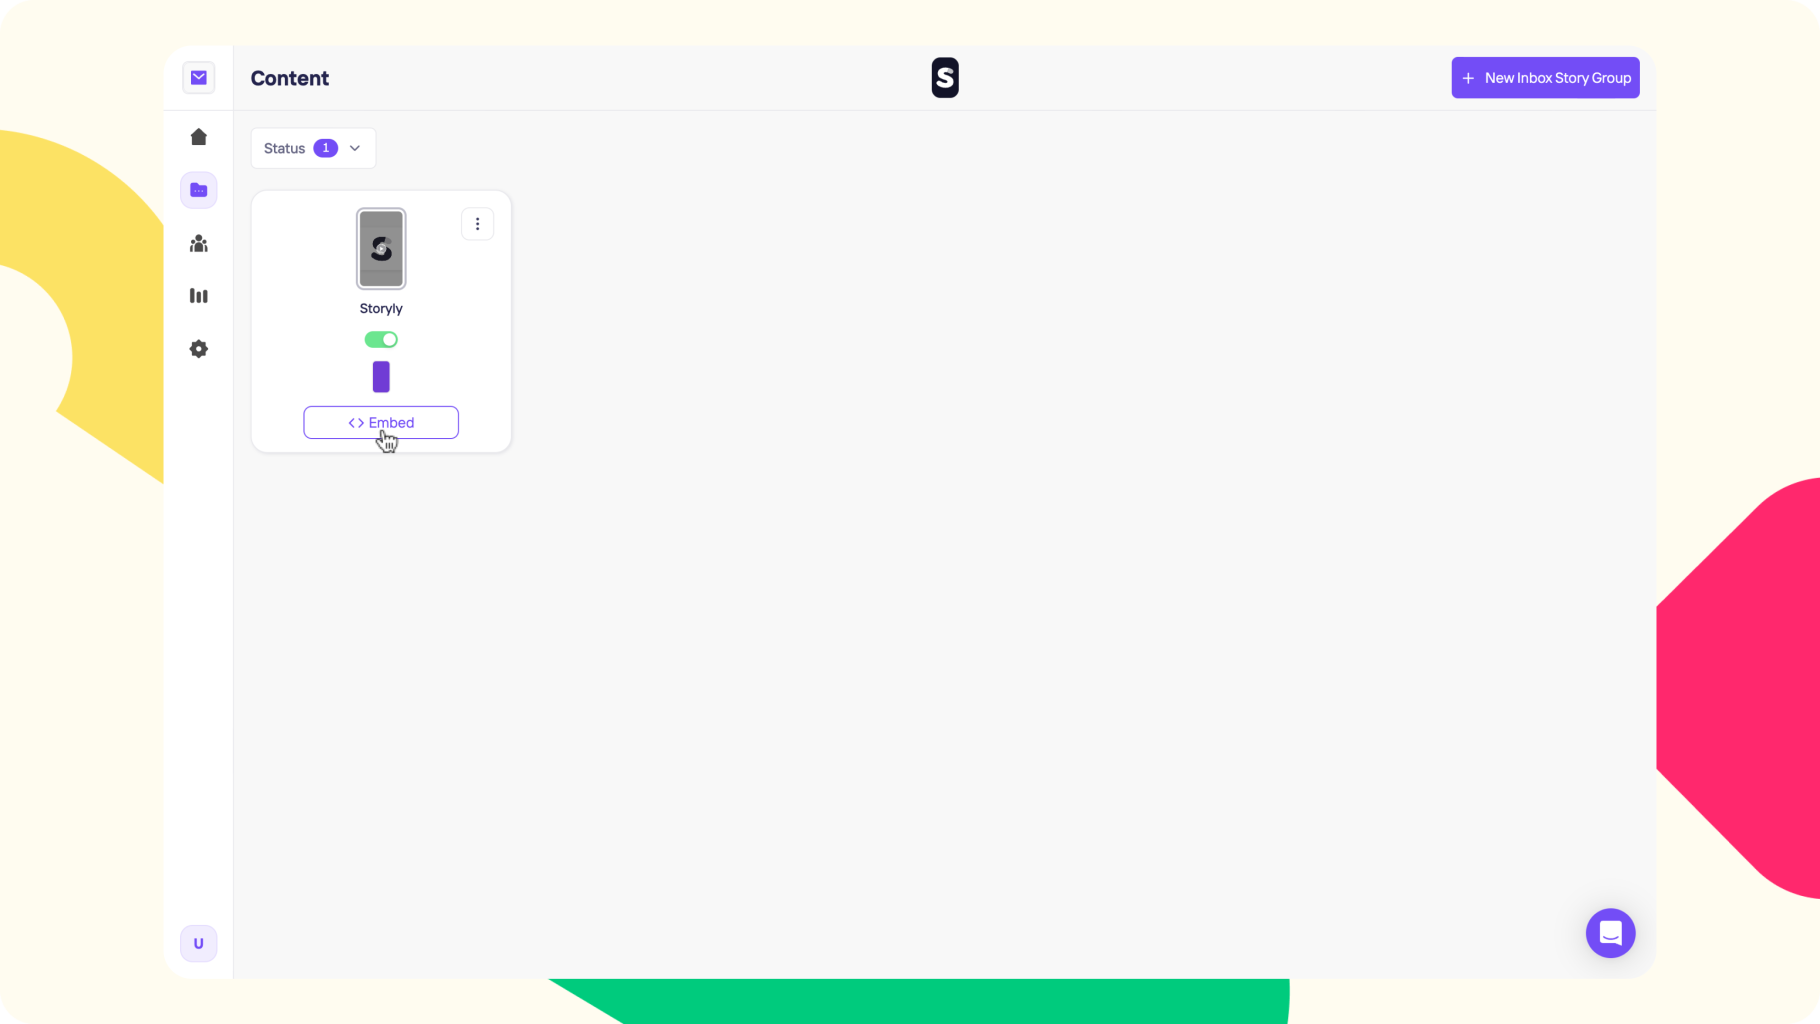
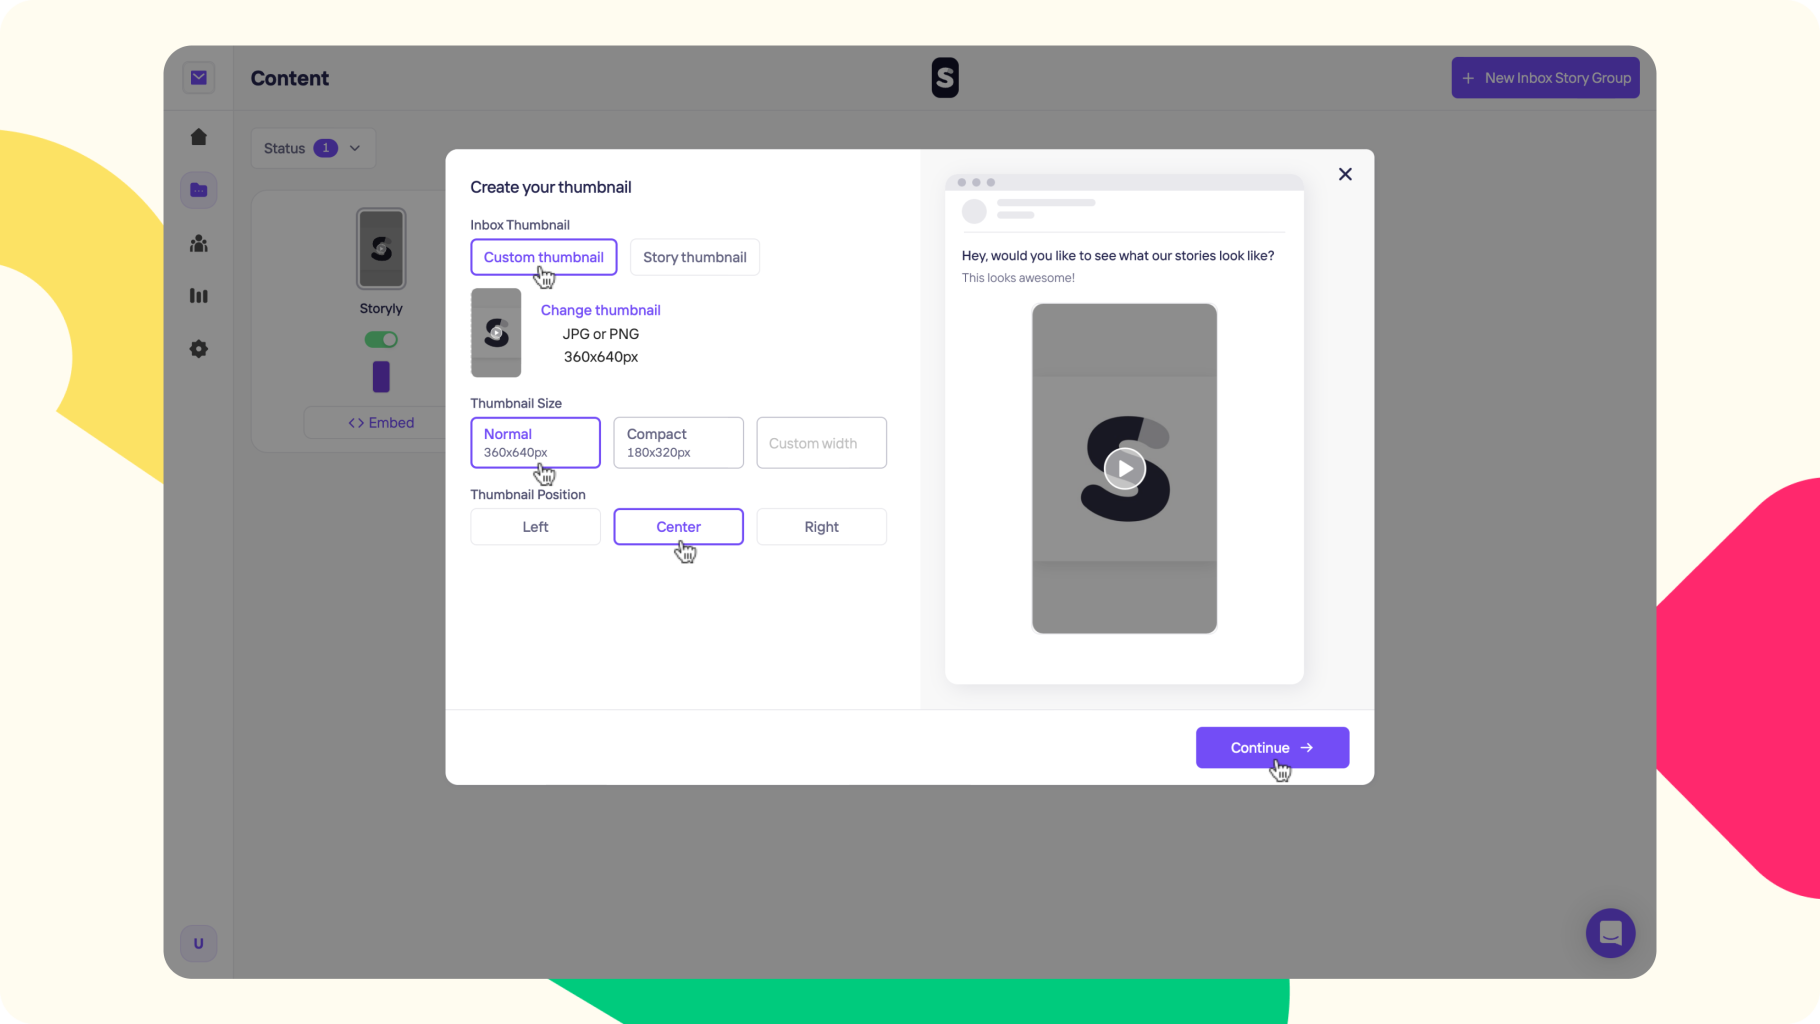
1. Once you click on it, you'll be asked to select:
- Thumbnail: You can either use a preview of one of the Stories as a thumbnail or use a custom one and upload it by yourself.
- Thumbnail Size: There are 2 default sizes; Normal & Compact. However, you can also use a custom width as well. We'll keep the proportion constant and set the height accordingly.
- Thumbnail Position: You can place the thumbnail wherever you'd prefer in the e-mail.
2. After defining the thumbnail, you can personalize the Story experience. We'll share the details below. If you don't have any plans on personalizing the content, you may click on Continue.

3. At the last step, you can:
- Add a fallback URL: This is the URL that you'd like to forward to your user after completing Stories.
- Send a test e-mail: You can only send it to your colleagues who have access to the Storyly Dashboard.
- Copy link: You may simply copy the link and paste it to your browser to see what e-mail recipients see when they click on the Inbox Stories. You may use this functionality for testing purposes.
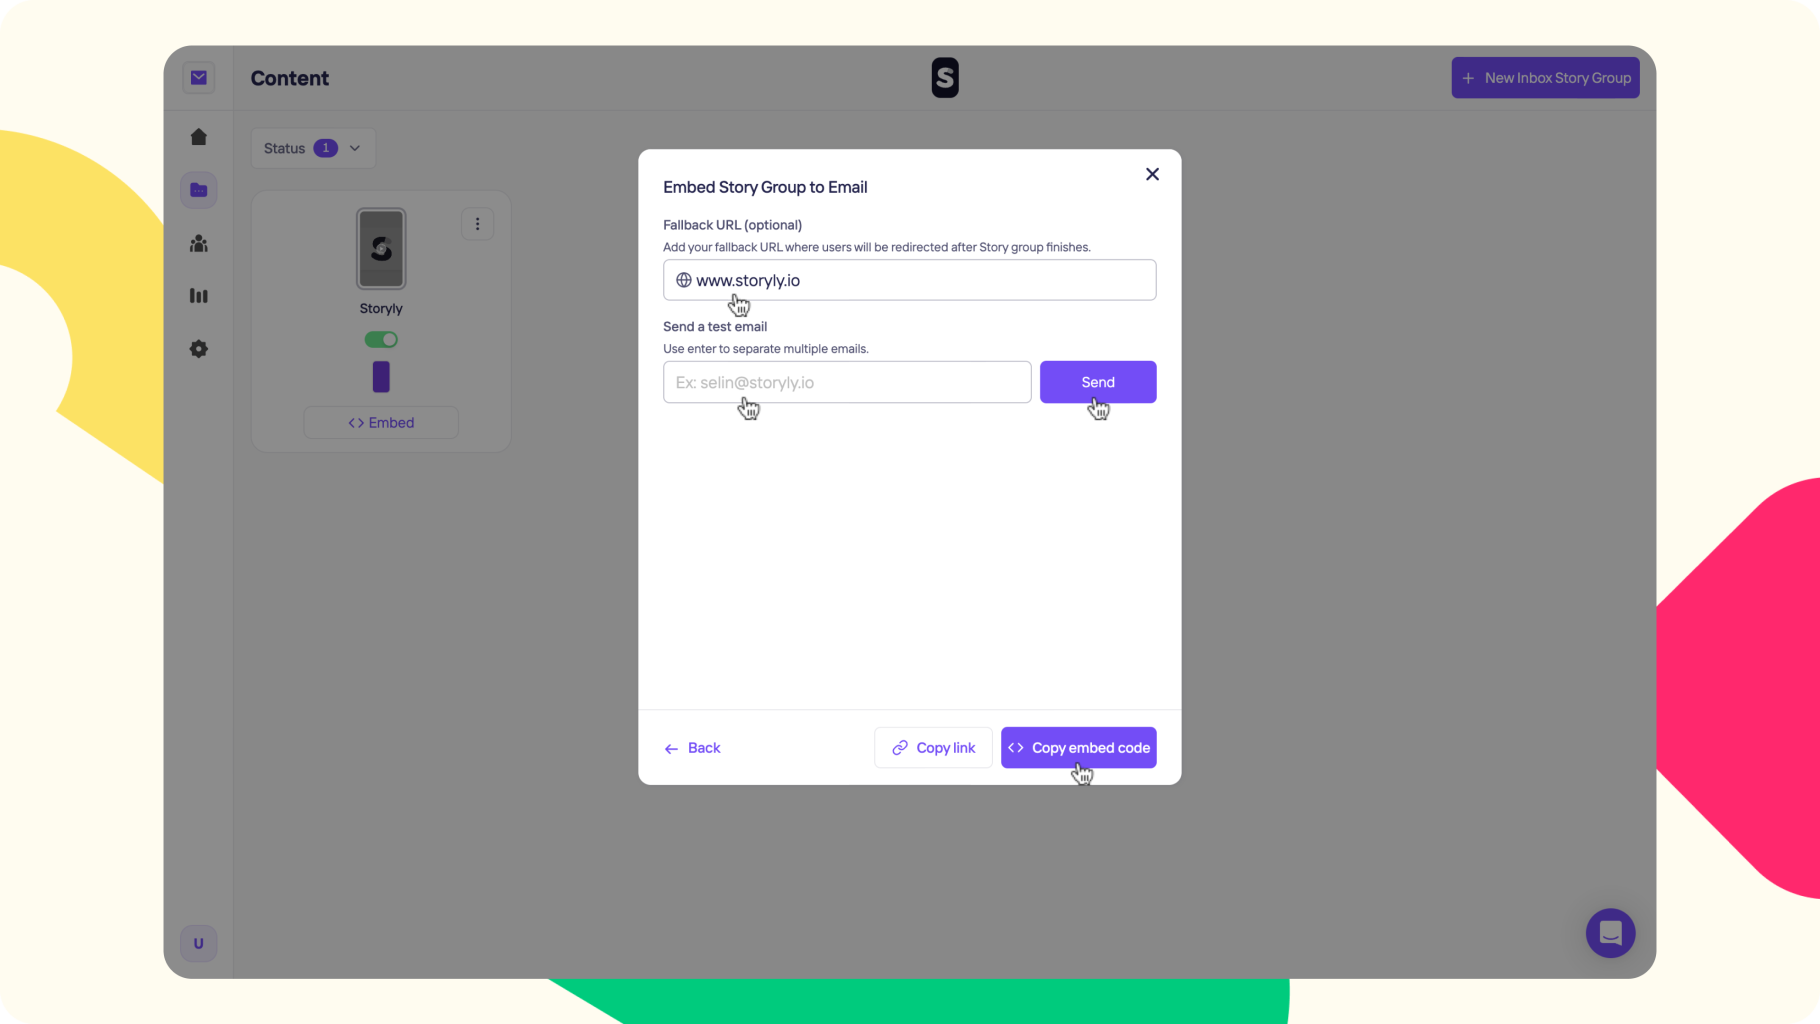
4. Once you Copy embed code, we'll give you an HTML code that you can embed into the e-mail tool that you use. Then, when you send the e-mail, recipients see Inbox Stories in this format:

Personalizing Inbox Stories
At the 2nd step when you click on Embed, there is a section for Personalization.
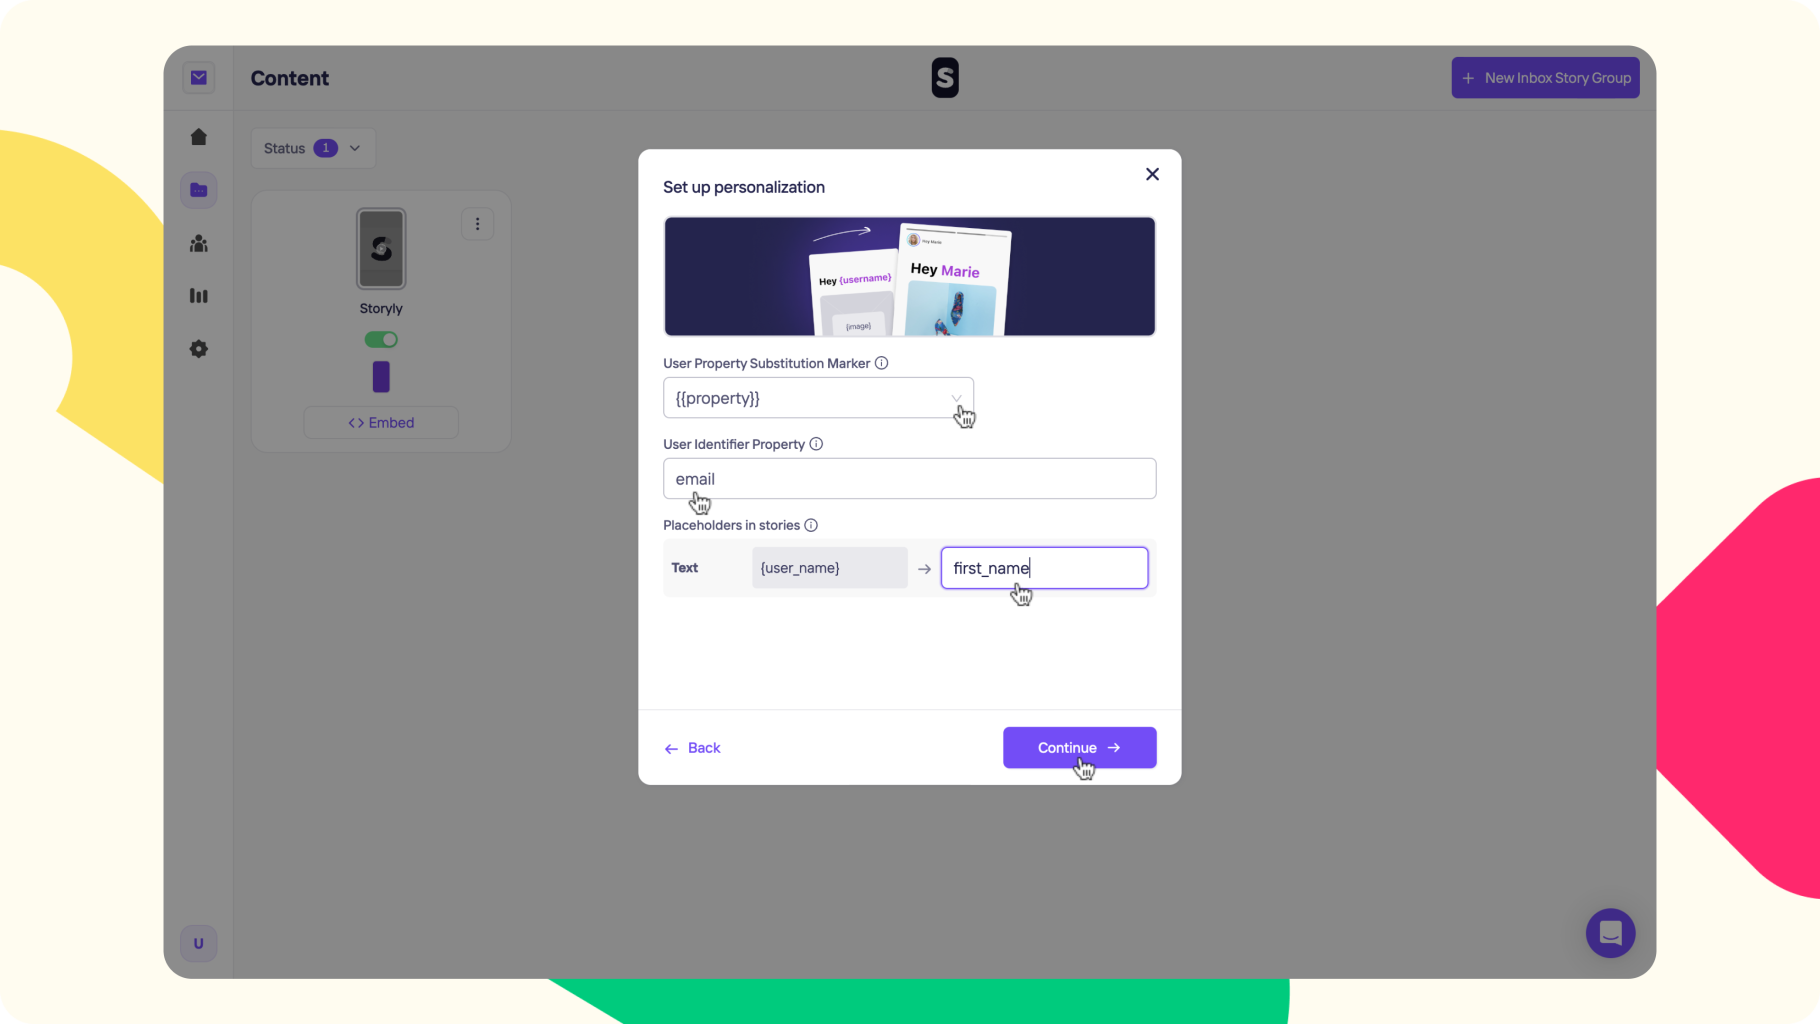
On this screen, if you'd like to send personalized content with Inbox Stories, after placing User Properties in Stories, you may follow these steps to complete the experience:
1. You can select your e-mail provider's markers. These are the dynamic placeholders that your e-mail provider offers for information like user name, user surname, etc.
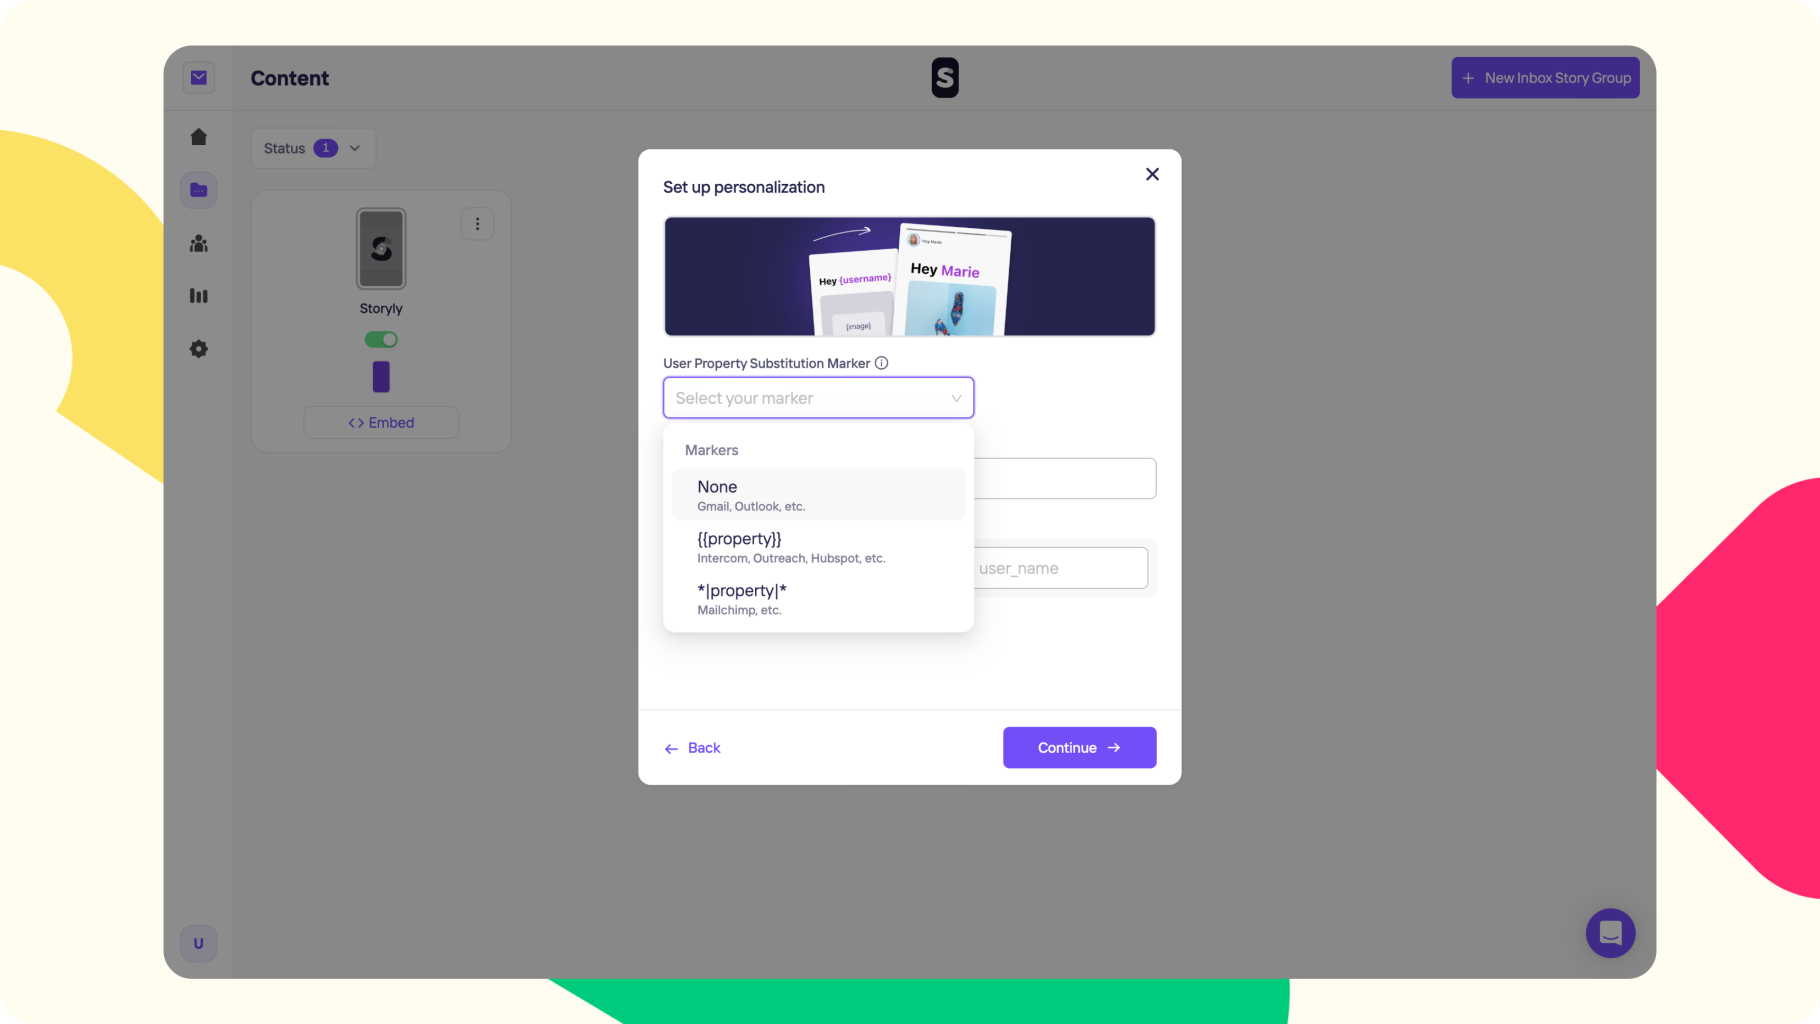
2. After selecting the e-mail provider's marker, you can match placeholders in Stories with the dynamic placeholders on your e-mail tool.
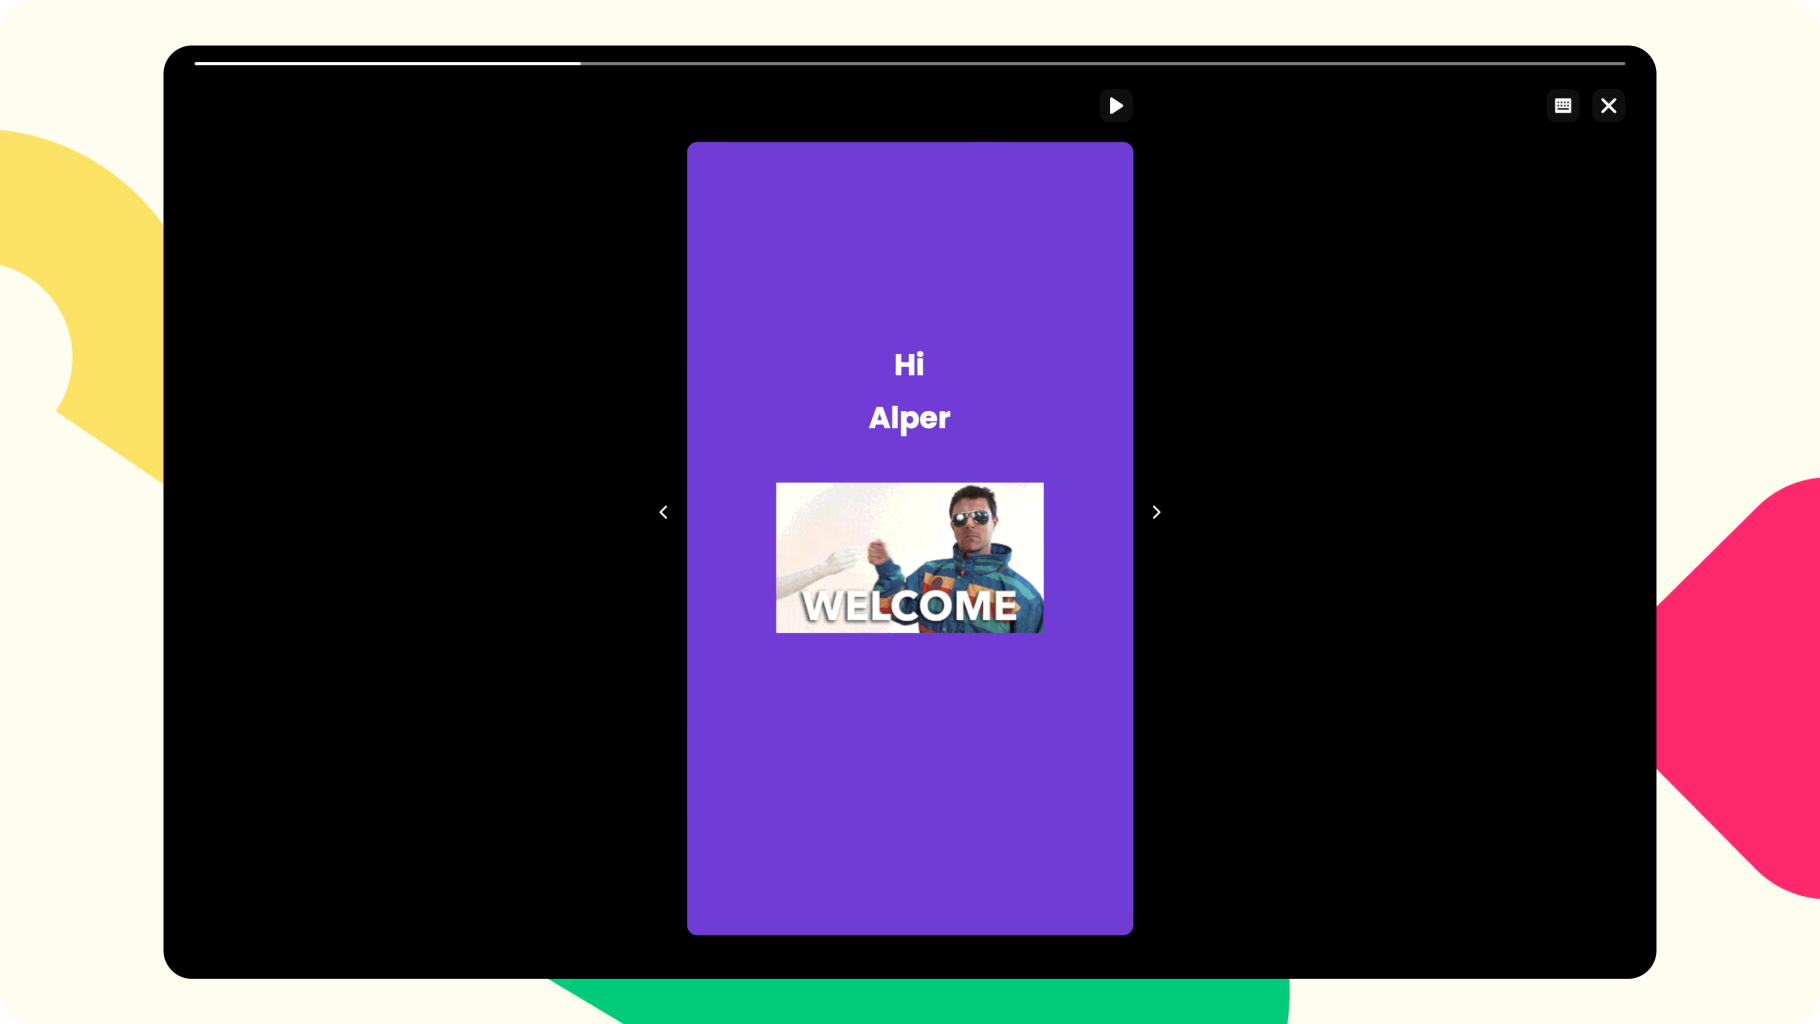
3. Last, in case you place any Interactive Components in Stories, such as Poll, Quiz, or Emoji Slider, you can pass an User Identifier Property from your e-mail tool. That way, you can see who answered and what's their answer on the Storyly Dashboard > Analytics > Interactions tab.
So, if you use e-mail as the User Identifier Property, when a recipient gives an answer, you'll see the e-mail of the user when you export interactions in CSV format.
4. Once you set everything up on your e-mail tool, the recipient will see the Story in a personalized way (with the user name in this case), as shown below.