Using Microsoft SSO for Storyly Sign In
Using single sign-on to sign in Storyly is a premium solution. To be able to use Microsoft SSO for yourself and your team, there are multiple steps you have to complete.
Reach out to us!
If you'd like to use Azure AD log in for Storyly, please reach out to us.
First, you have to create a custom app on the Azure portal. To do that, please follow the steps given below:
1. From the main screen, select Microsoft Entra ID.

2. On the Overview page of directory, select Enterprise applications from the left menu.
Tip
Before navigating to Enterprise applications, please first copy the Tenant ID. You'll need the Tenant ID at the 7th step.

3. In the Enterprise applications menu, click on + New application.

4. Then, select + Create your own application.
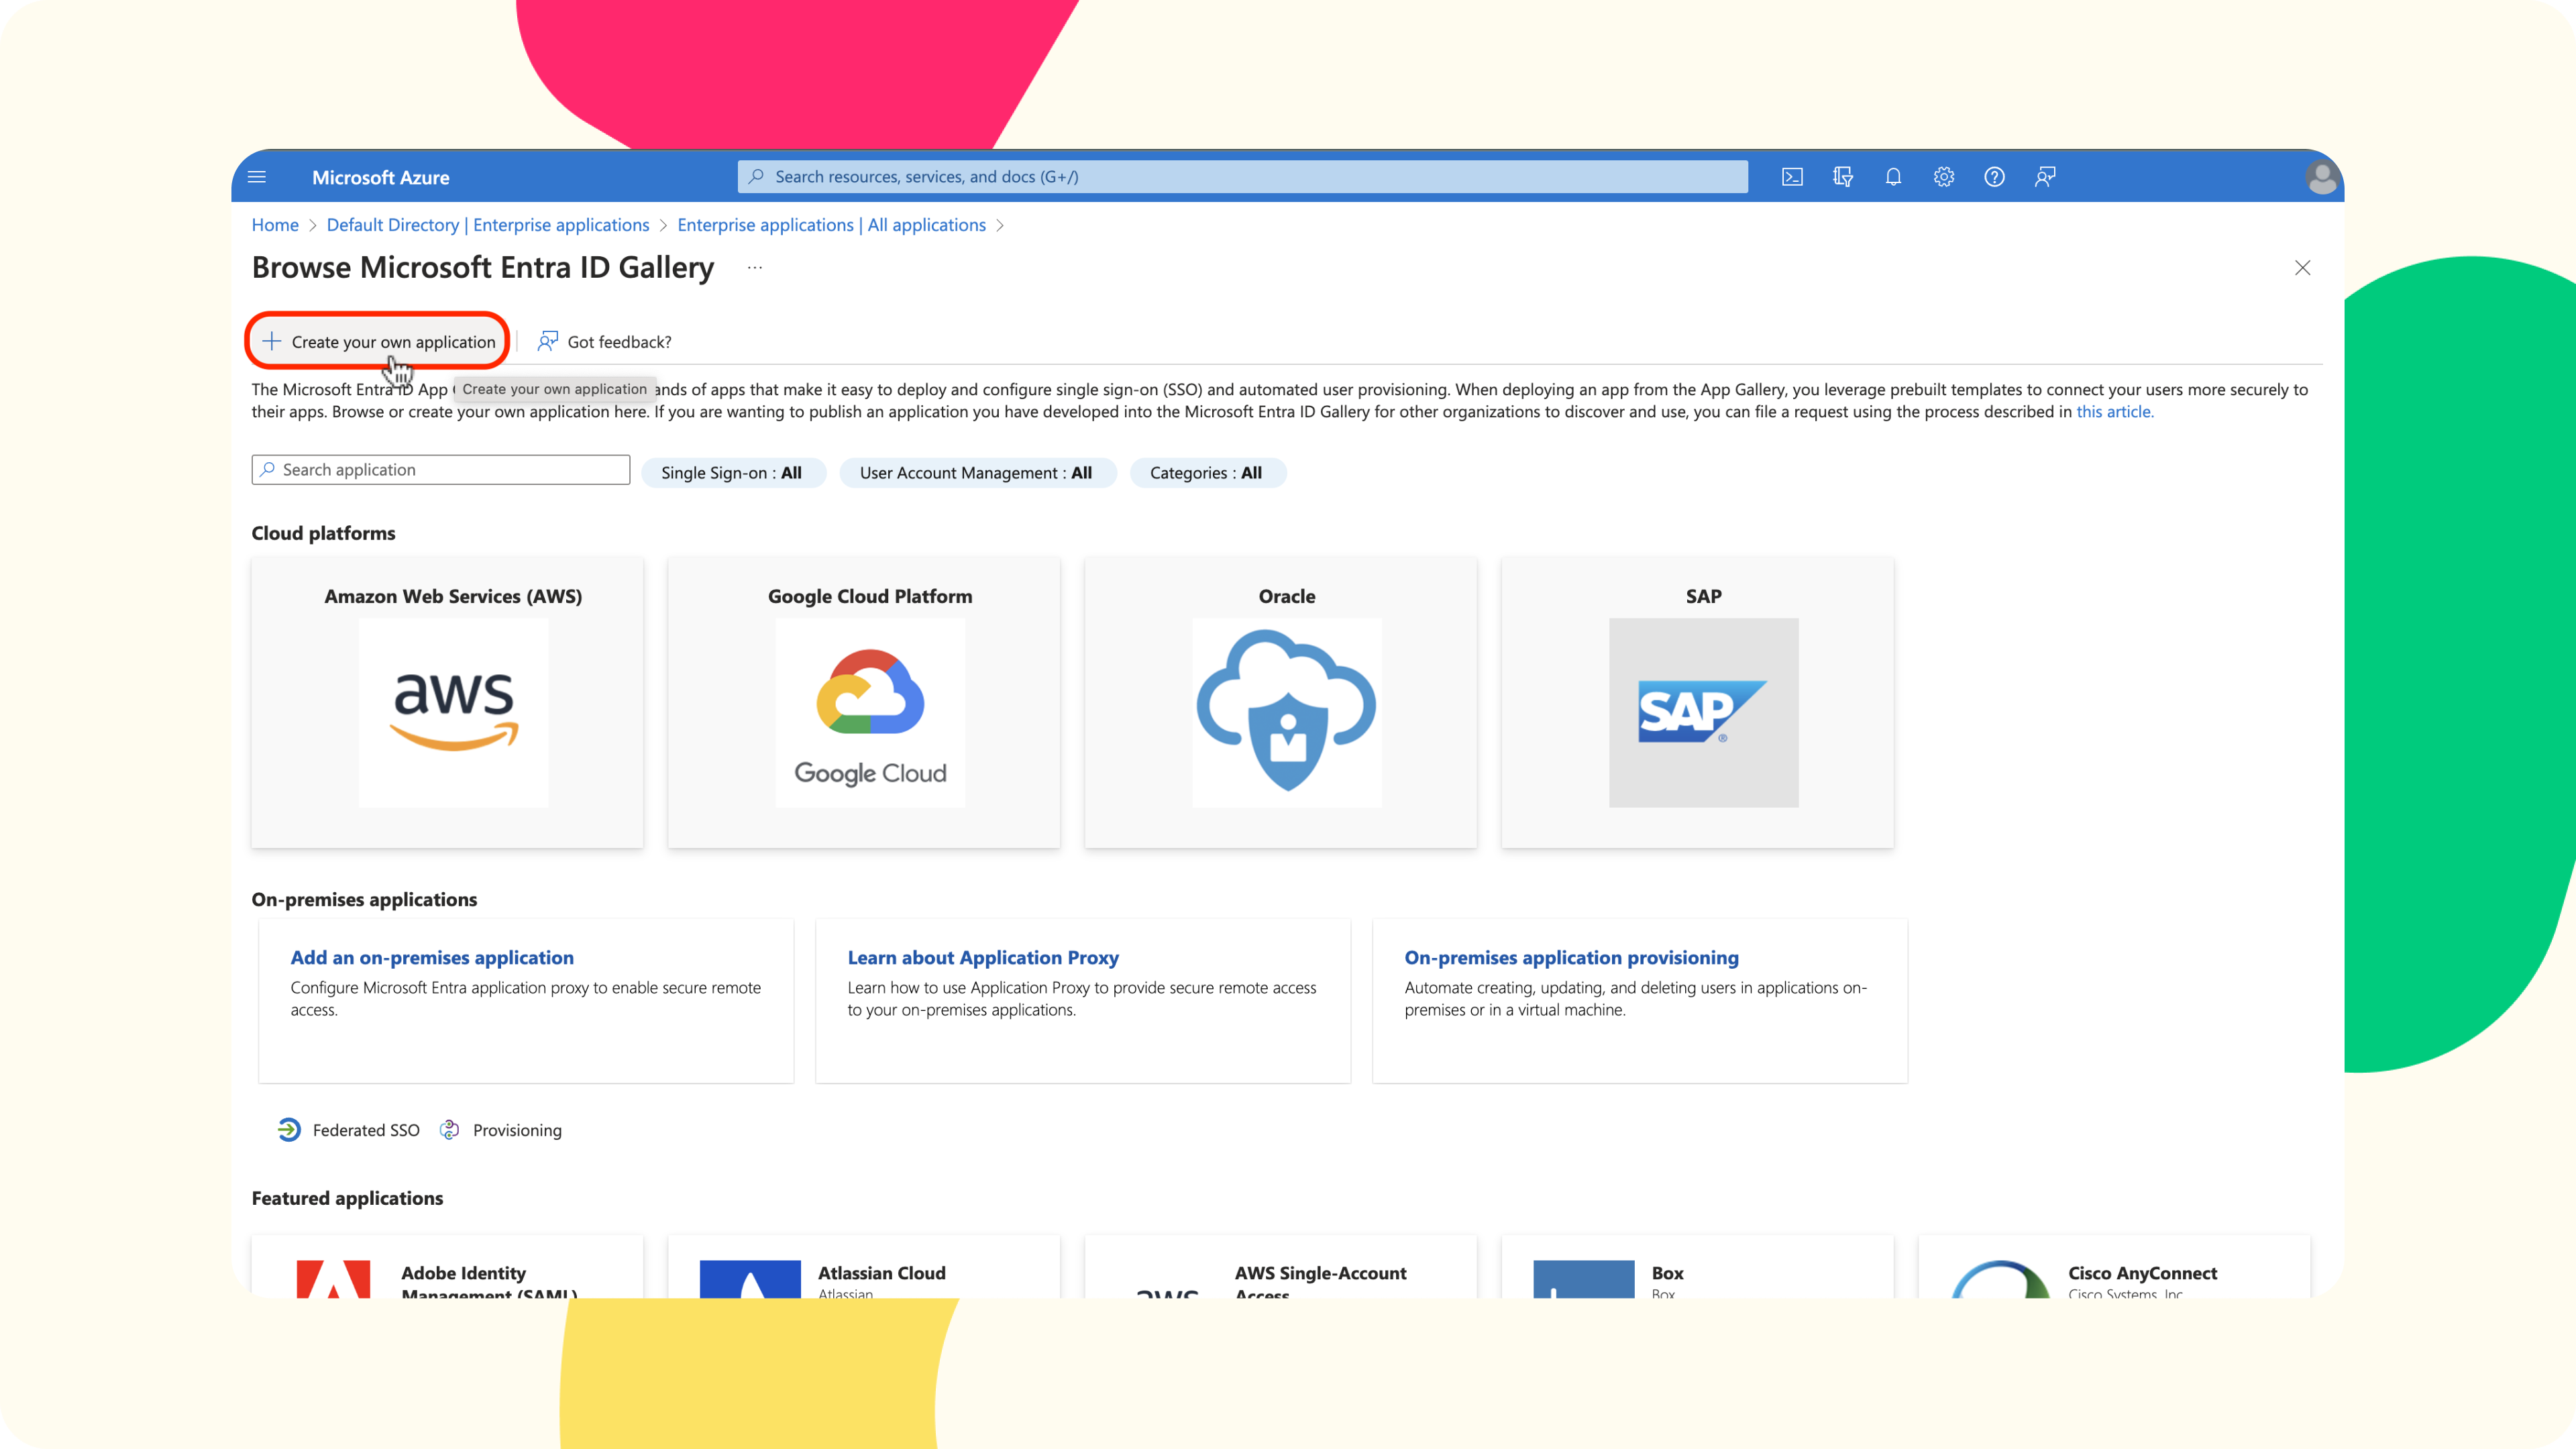
5. At this part, you can give any name to your application. After giving it a name, please select the Non-gallery option and hit the Create at the bottom.

After this point, the app is created on Azure. Now let's continue with the setup on the Storyly side.
6. On the Storyly Dashboard, under Settings on the left pane, please navigagte to Account Management. Under the Account tab, you'll see the SSO dropdown at the bottom. Please click Connect for Azure AD.

7. You'll paste the Tenant ID that you've copied at the 1st step.
If not already copied, please go to Azure Portal and copy your Tenant ID from the Overview page. You can also search for Tenant Properties to find your Tenant ID.
8. After pasting your Tenant ID, click on Sign in with Azure AD.

9. Please copy and save the SCIM Endpoint (https://core.storyly.io/usermanagement/sso/scim/) and SCIM Authentication Token before you leave the screen or before clicking Done.

Now, your Storyly account is SSO Enabled.
10. Next stop, you have to connect that SCIM Endpoint to your Azure account. Please go back to Azure Portal.
From Enterprise Applications, choose the custom app you’ve created before. On the left menu, click on Provisioning and Get Started.

11. On the Provisioning screen, as the Provisioning Mode, you'll select Automatic. Then, paste the SCIM Endpoint and SCIM Authentication Token you’ve already copied from Storyly.
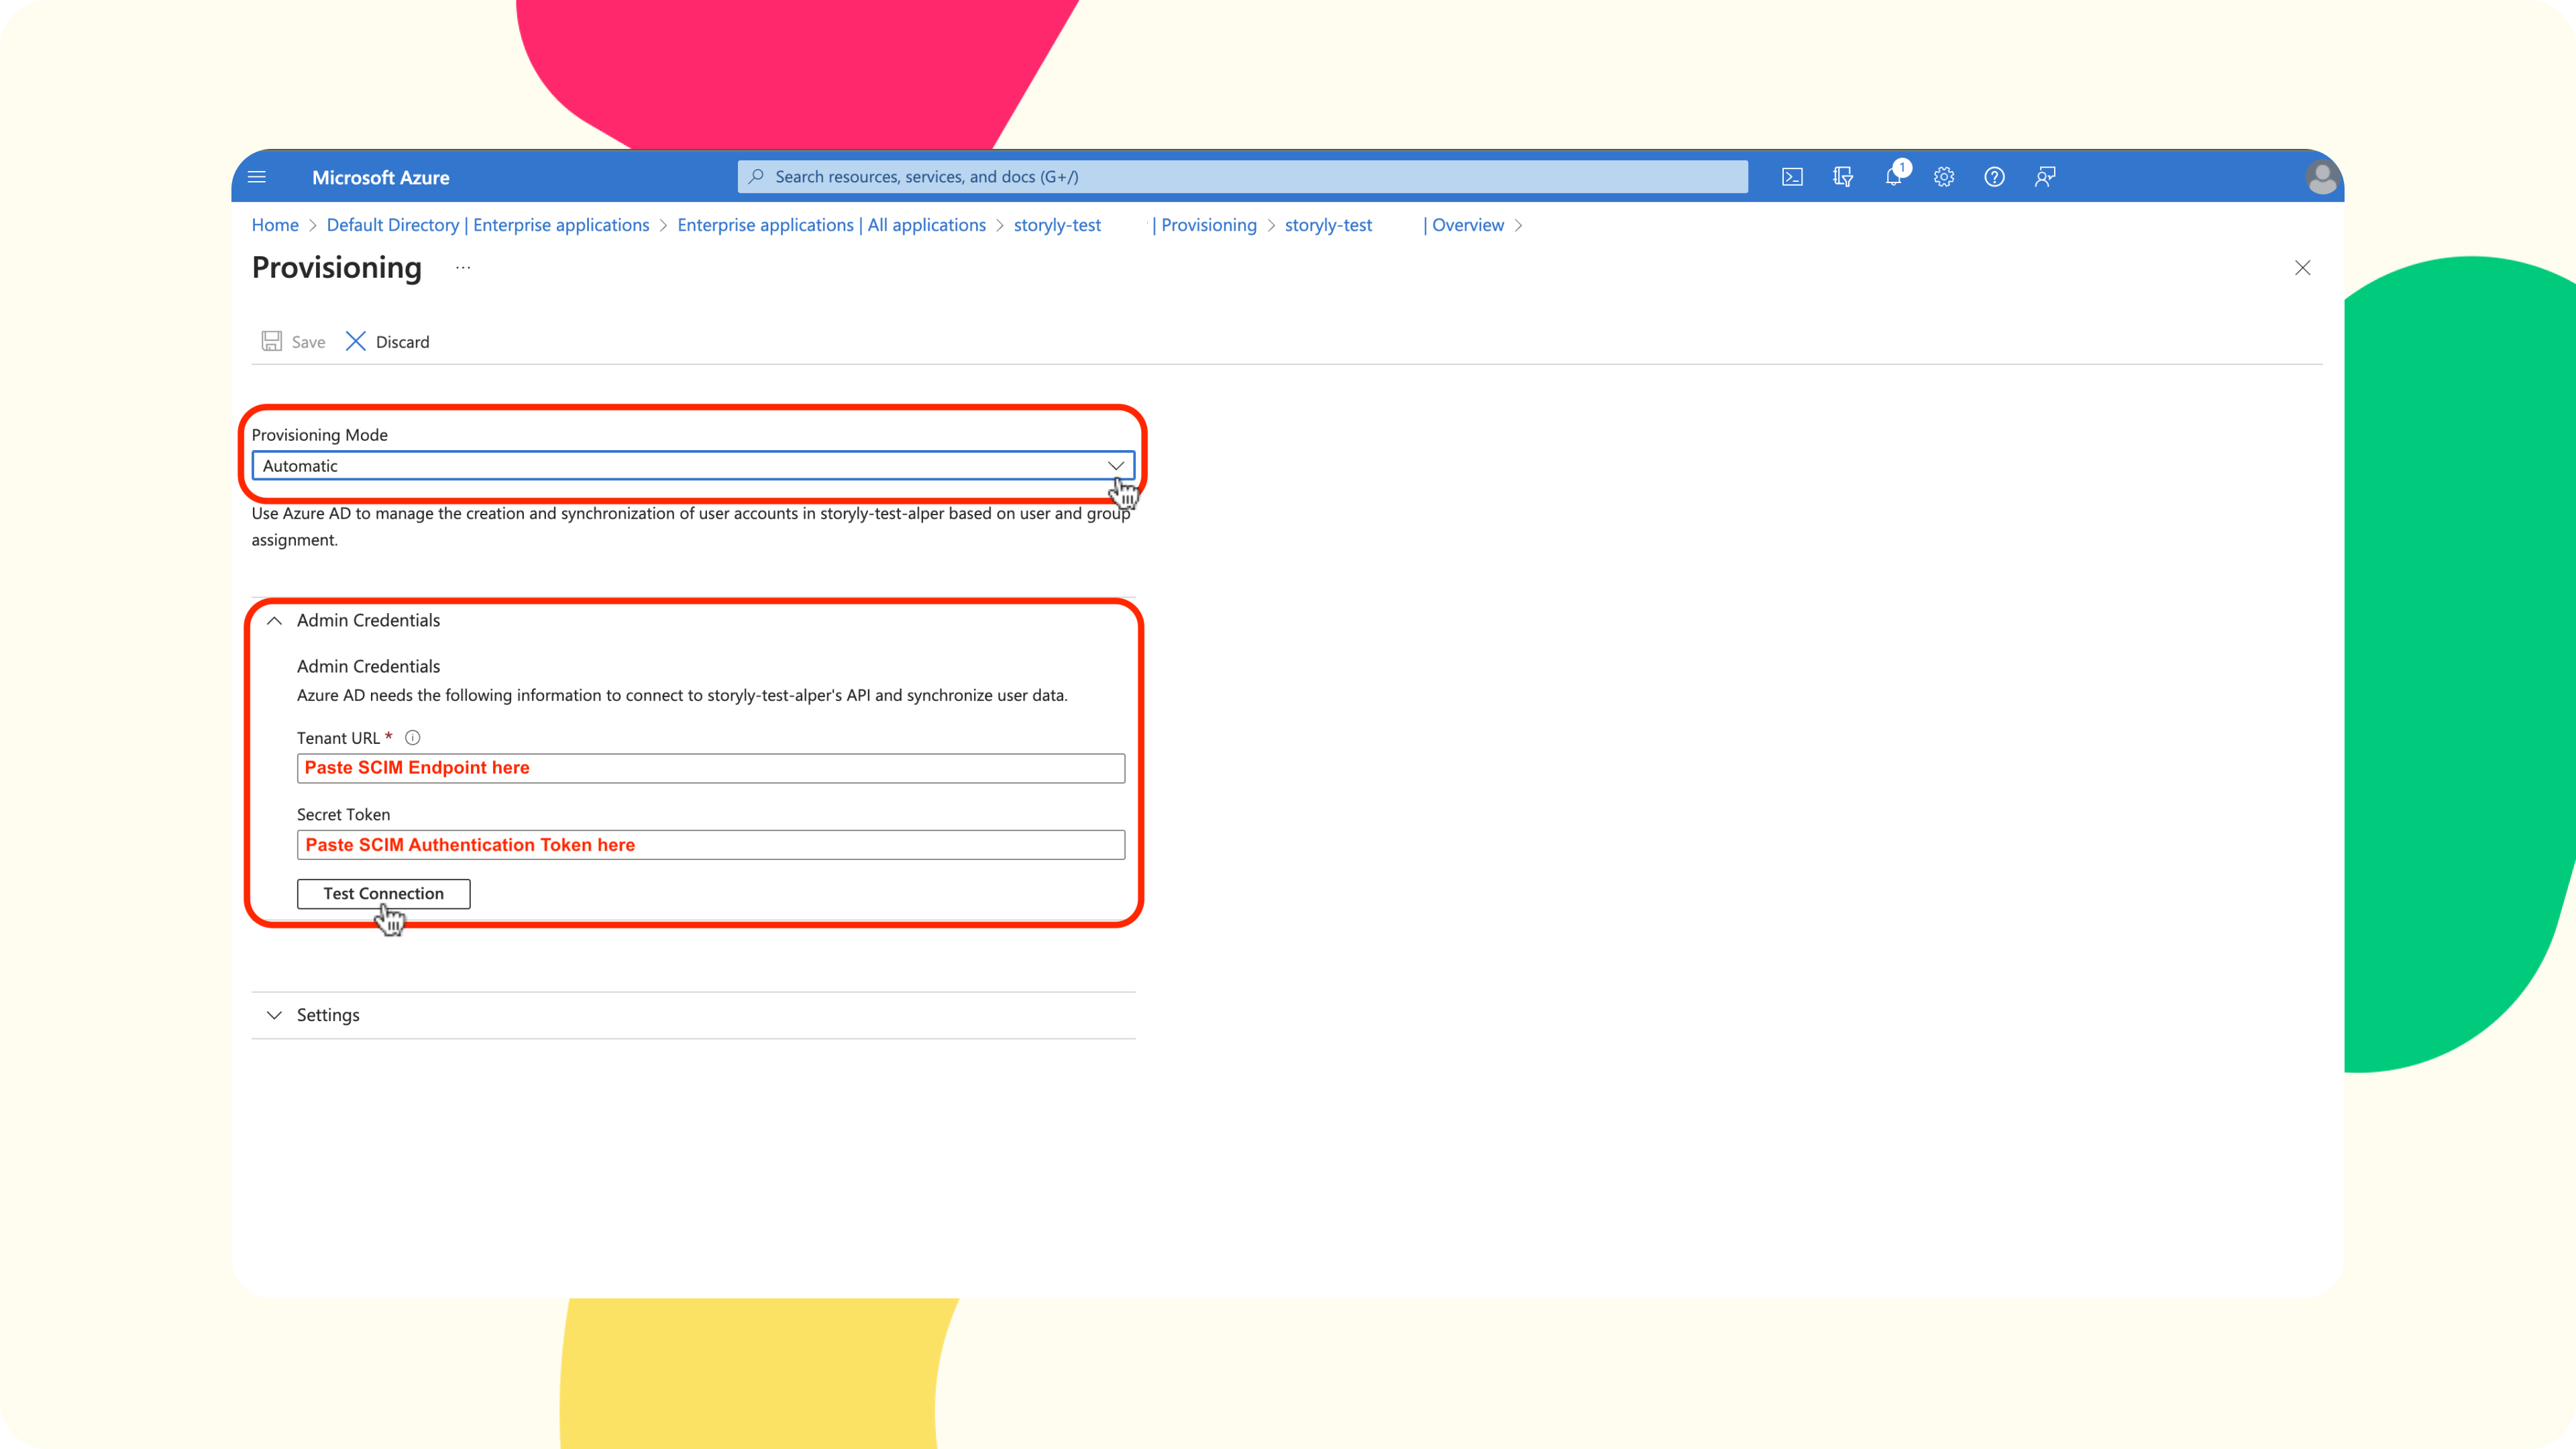
Click test connection, and expect to see successful information on the top right as follows. Once the connection is successful, click Save. Otherwise, please contact to Storyly team.
12. Last, you need to add users to Storyly from Azure.
From Enterprise Applications select the app you've created. Click on Users and groups from the left menu and select Add user/group. Select your users already existing on Azure and add them.

Now your users have been added to your application, and the information will be posted to Storyly with the next Provisioning Cycle.
- For that, you need to initiate the Provisioning Automatically, as described in the following steps.
- From Enterprise Applications → Custom App You Created → Provisioning screen:
- If you regenerate your SCIM Token on Storyly, you might click “Edit Provisioning” here and update your Token.
- You may start/stop/ restart provisioning (automatic addition/deletion of the users) from there.
- You may see the error logs, previous provisioning info, or the cycle information on this screen.
- If you would like to quickly provision the user you’ve added, you might click Provision on Demand. Search for the user you’ve just added, and then click the Provision button at the bottom.
- If you come up with a problem here, try to remove the user from the Storyly app you’ve created, and re-add the same user again. If the problem continues, please contact with Storyly Team.
Remember!
When you connect Microsoft Entra ID with Storyly, your existing teammates on Storyly will be deleted. They'll be replaced with the teammates you've added on Azure platform.