Comprehensive Guide on Having Stories on Your Shopify Website
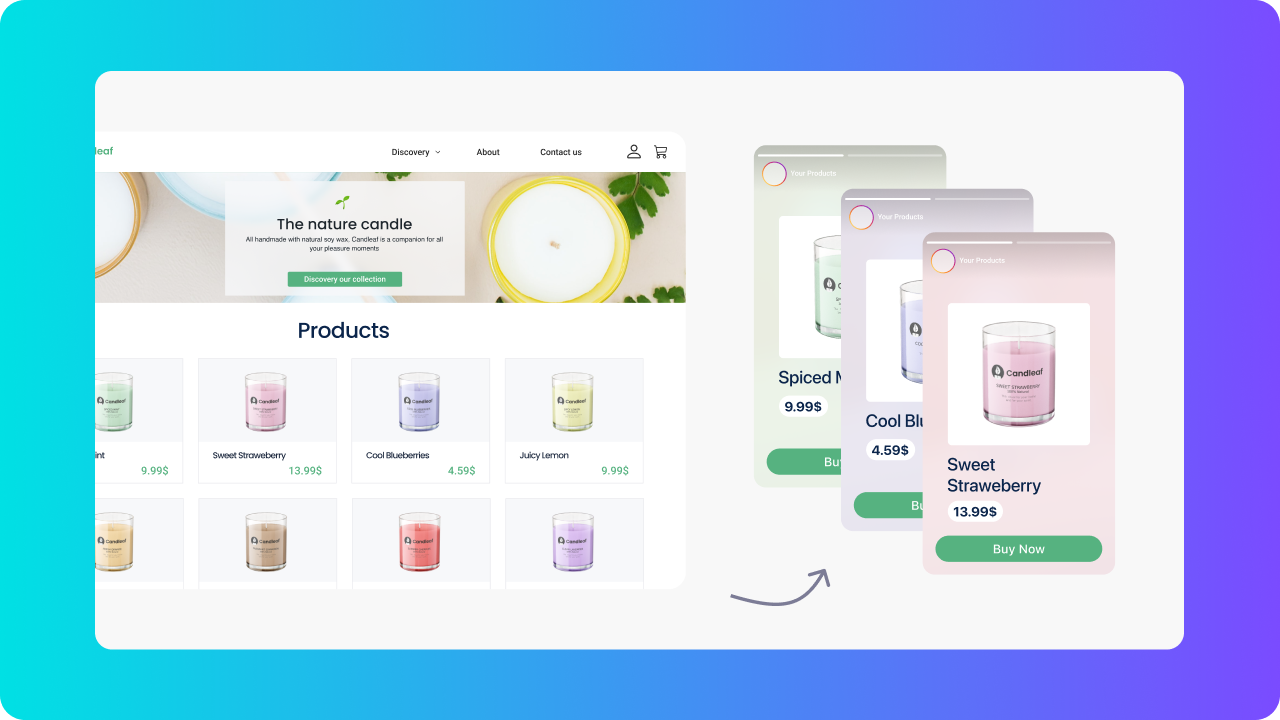
Now on Storyly, you can connect your Shopify account and start creating automated product stories out of your Shopify listings.
To be able to connect your Shopify store and show stories on your website, there are couple steps you have to complete.
Creating Content with Shopify Feed
First, let’s start by connecting your account with Storyly.
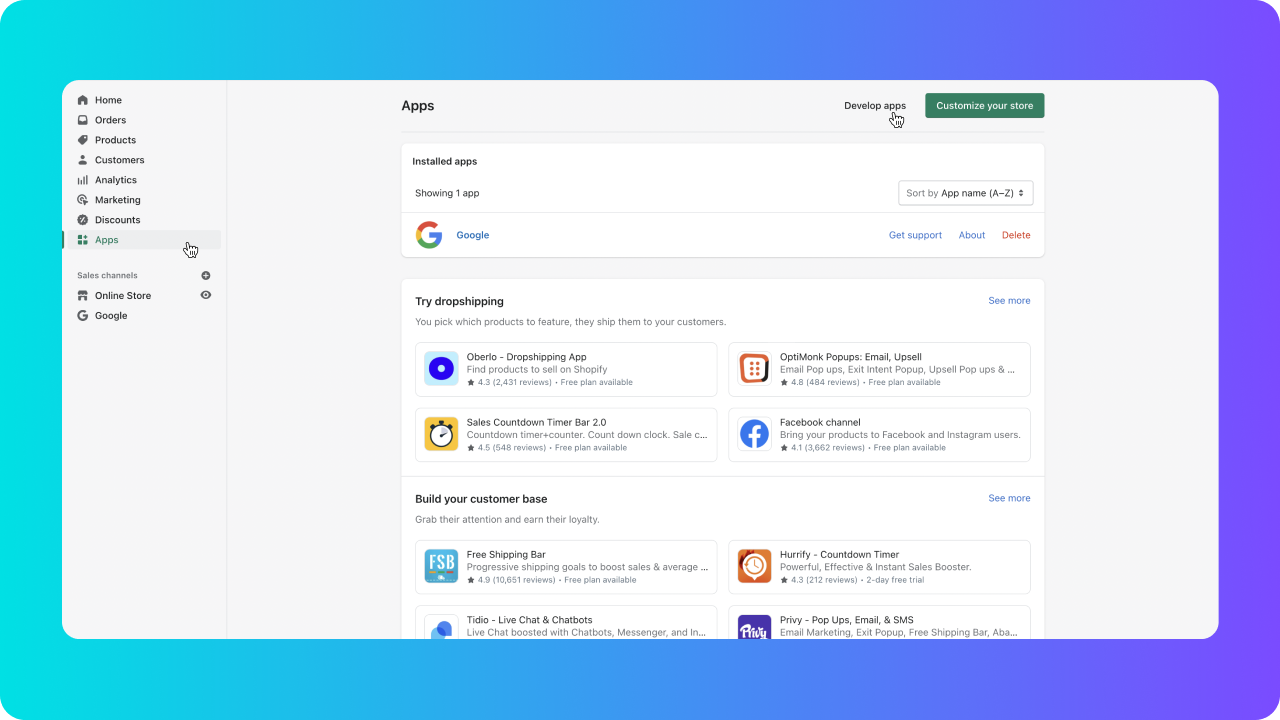
1. Go to your Shopify account. Click on Apps on the left menu and on top right, click Develop Apps.
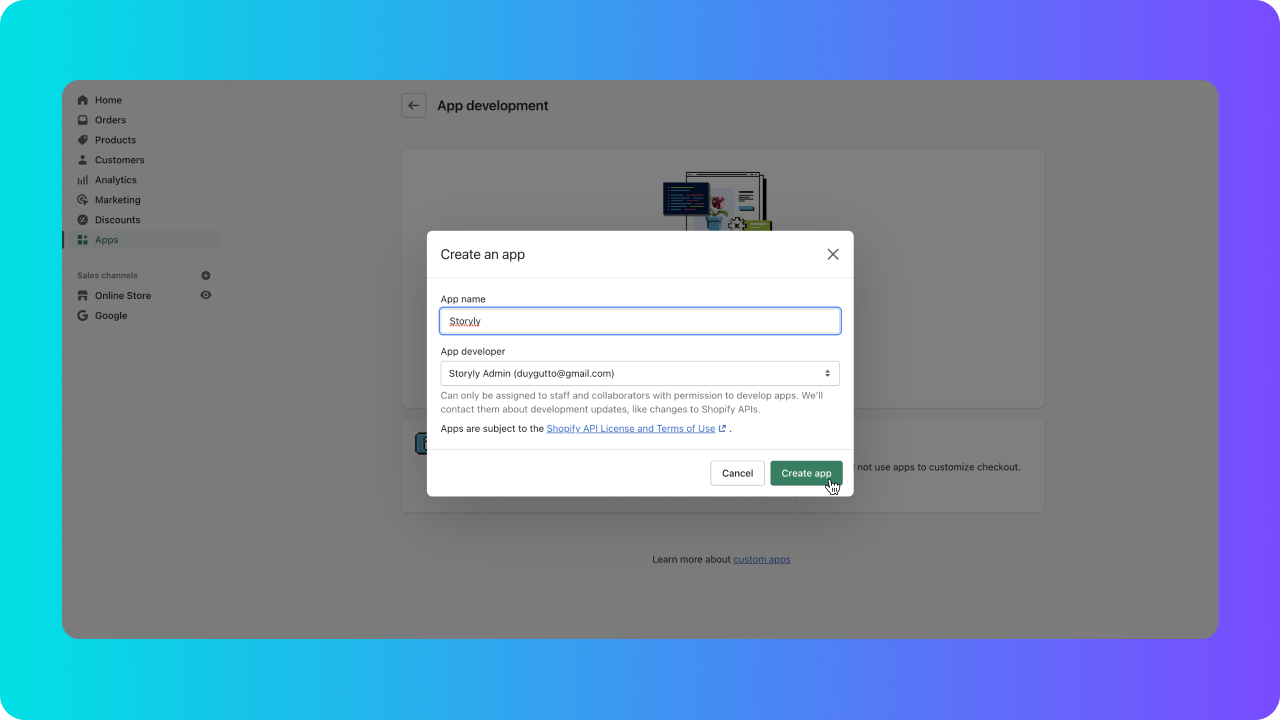
2. Click Create an App and give a name to your app, such as, Storyly.
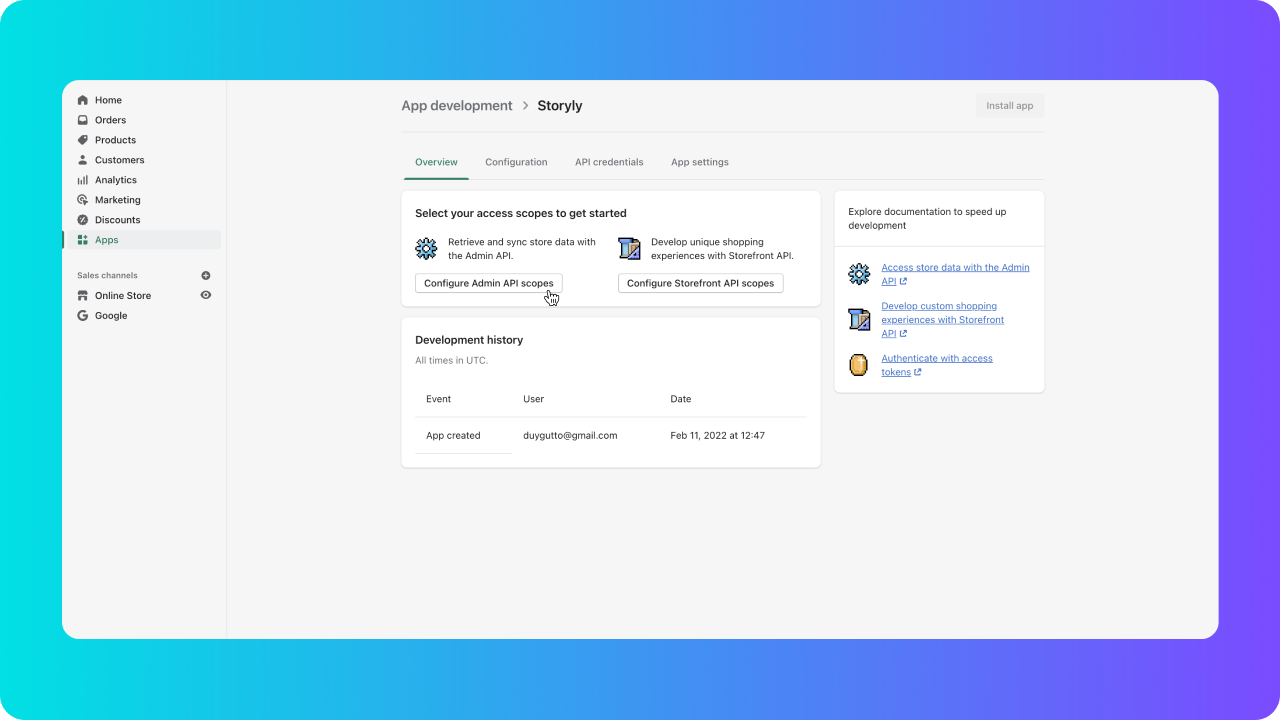
3. To Storyly get your product listings, you have to give related permissions on Shopify side. Click on Configure Admin API Scopes.
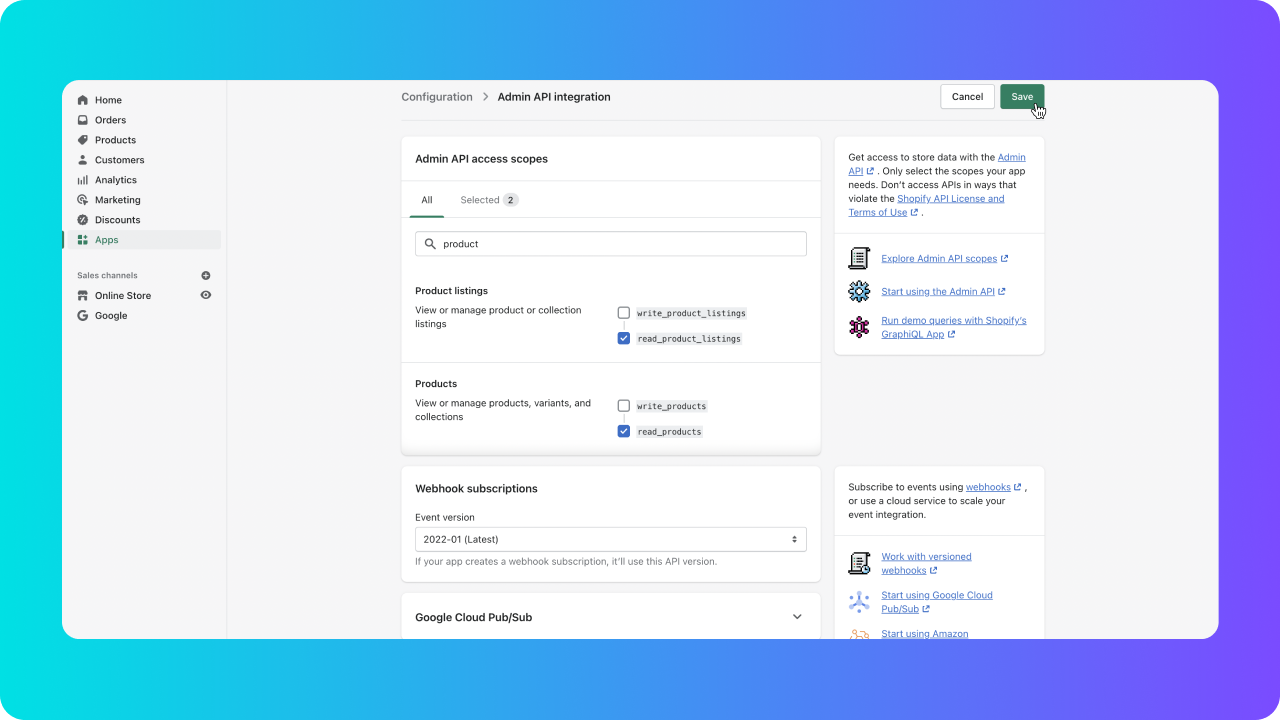
4. This step, you’ll be giving Read permissions for product related scopes. Make sure your Webhook Subscriptions is set to Latest. You have set the related permissions! Now click on Save and move to the last step.
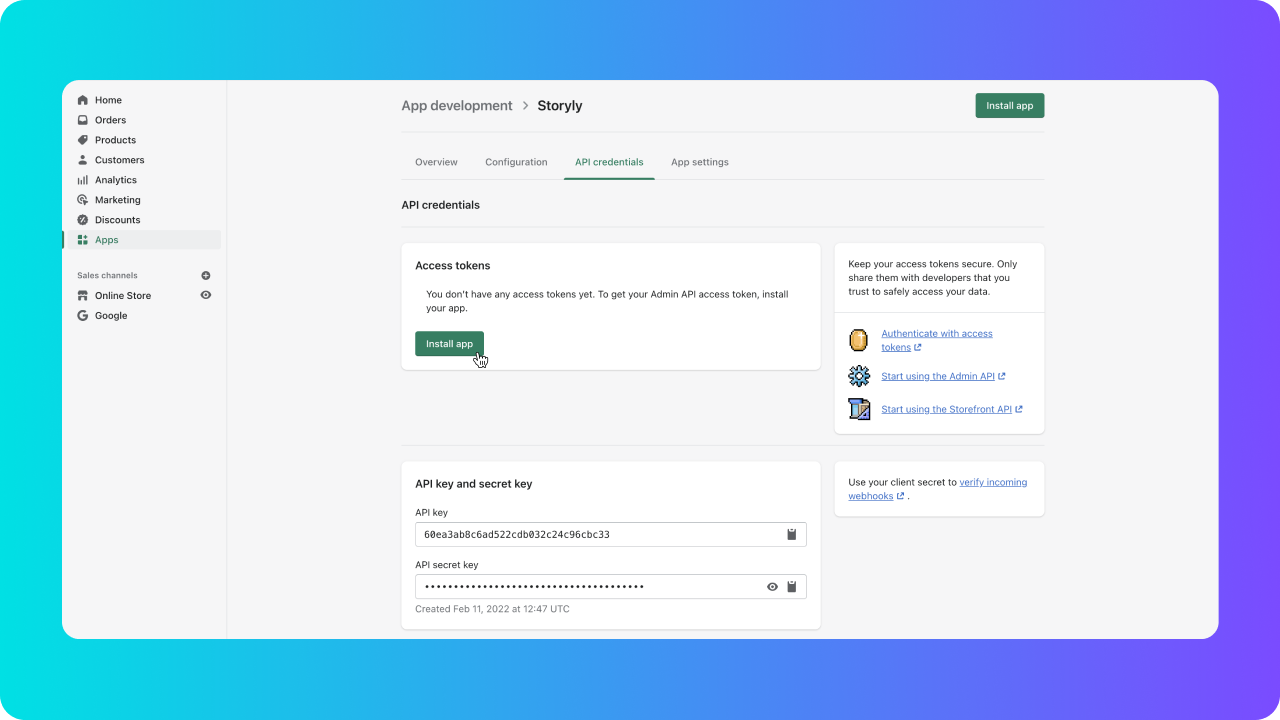
5. Go to API Credentials tab and click Install app. Once the app is installed, you’ll be given a token, this token is only can be used one time.

6. So, when you reveal the token and copied it, you have to go to Storyly dashboard and navigate to Settings > Integrations > Data Sources and click on Add Feed.
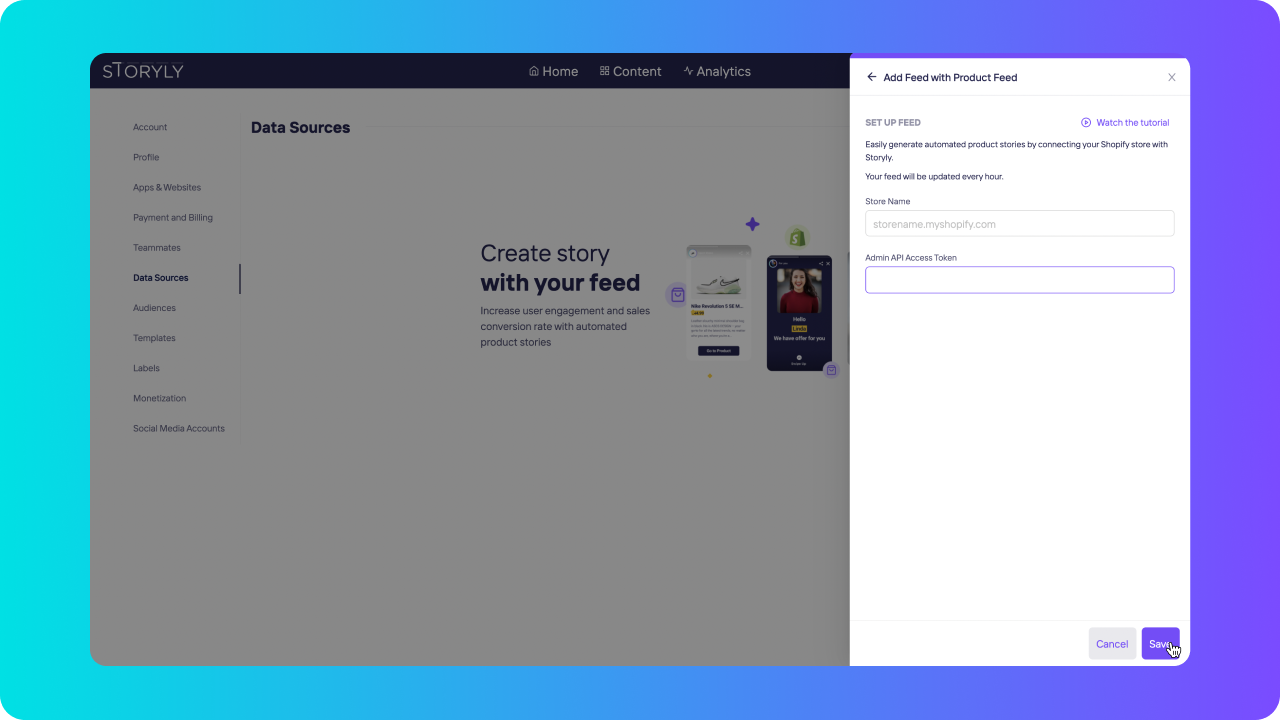
7. Select Create with Shopify. Type your Shopify store name and paste the token you’ve generated to API Token section.
8. Afterwards you can Save your feed and we’ll create a product listing for you in Storyly to automate your content creation.
Tip
For more information about how to create stories with feeds you can view our detailed help document: Using Template Studio & Data Source Management for Automated Feed Stories
Tip
If you forgot to paste your token to Storyly side and now its not visible, you simply click on Uninstall App and Install App again to get a new token.
Integrating Storyly on your Shopify Website
To show immersive stories your Shopify website there are few steps you have to complete.
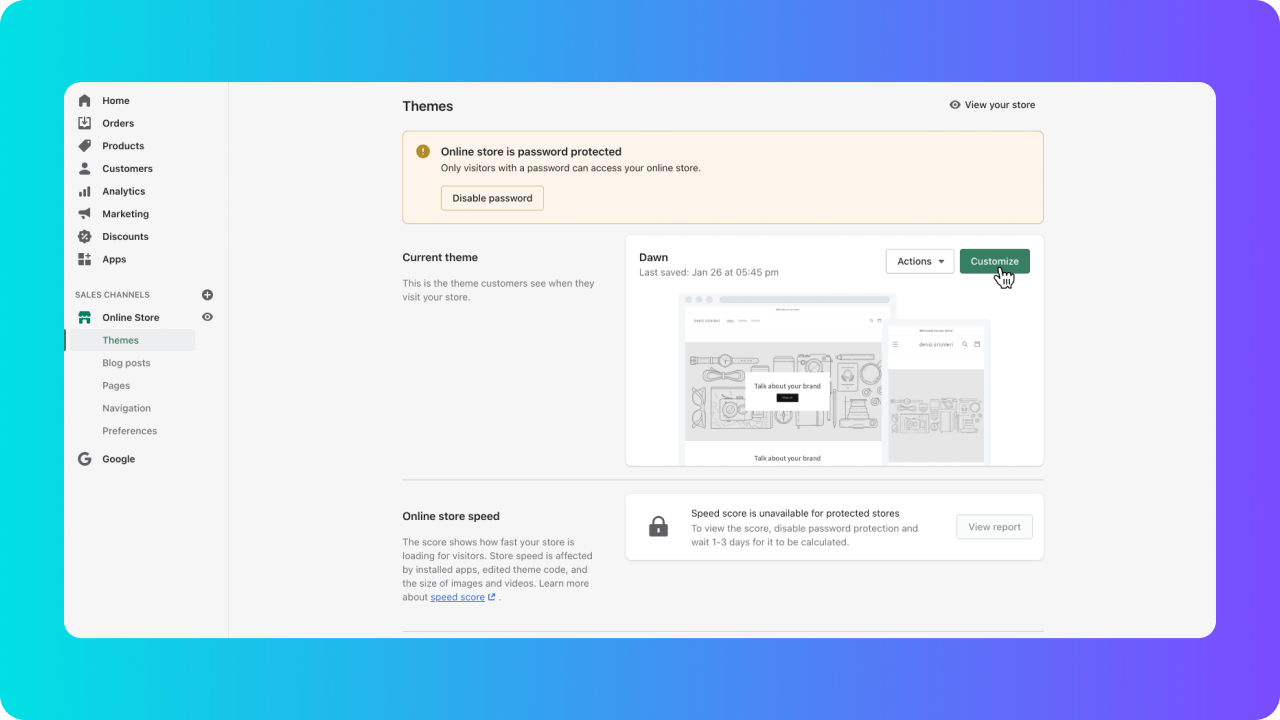
1. First, click on Online Store and on your current theme click Customize.
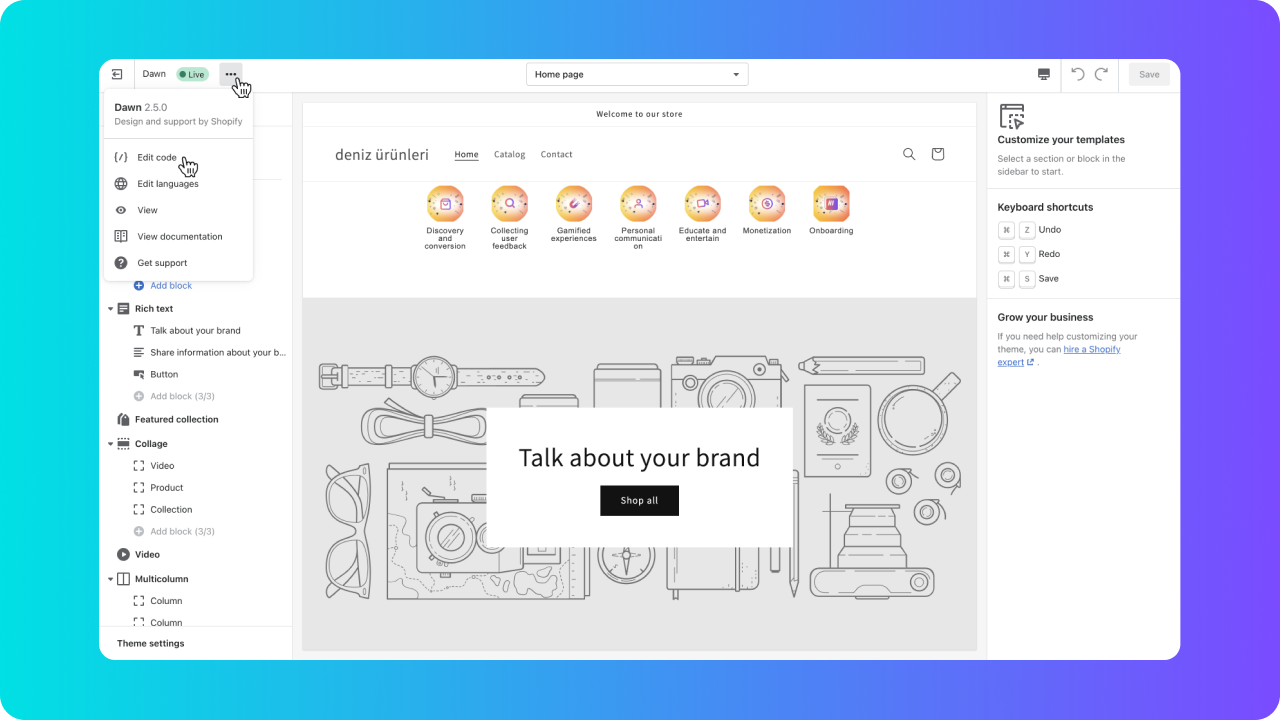
2. On top left, click on the three dots and choose Edit Code.
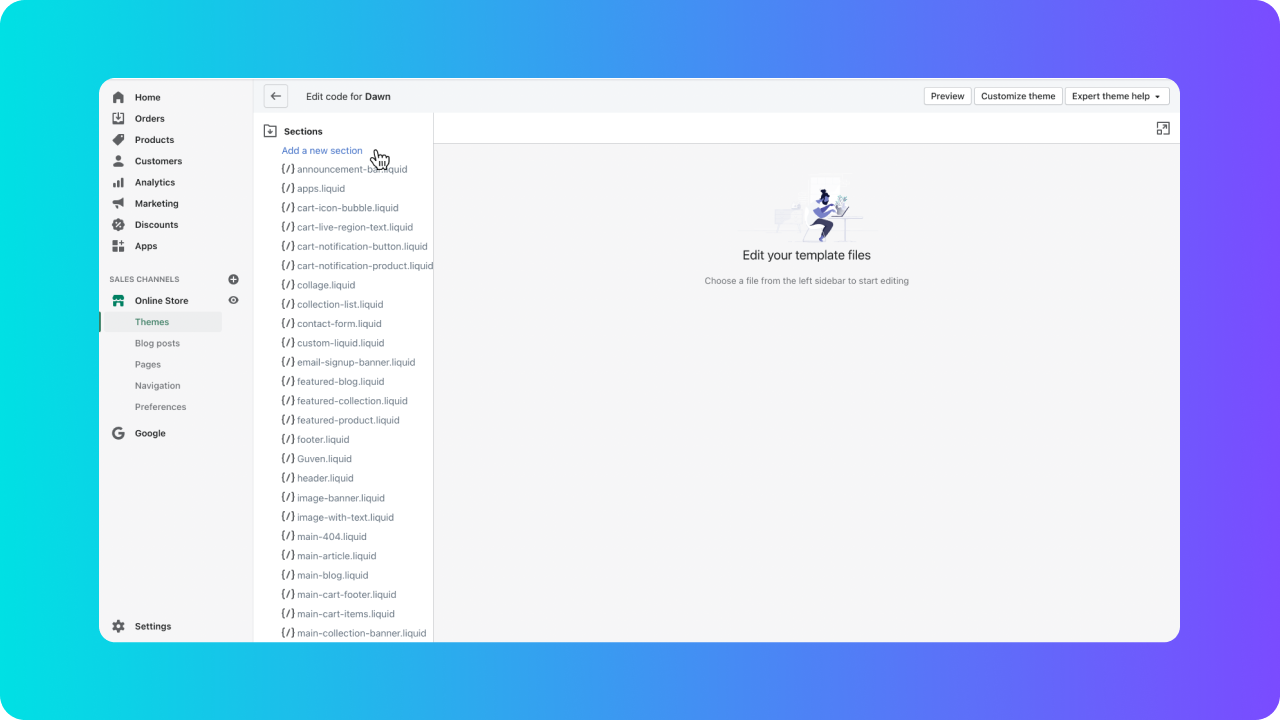
3. Scroll down to Section and select Add New Section.
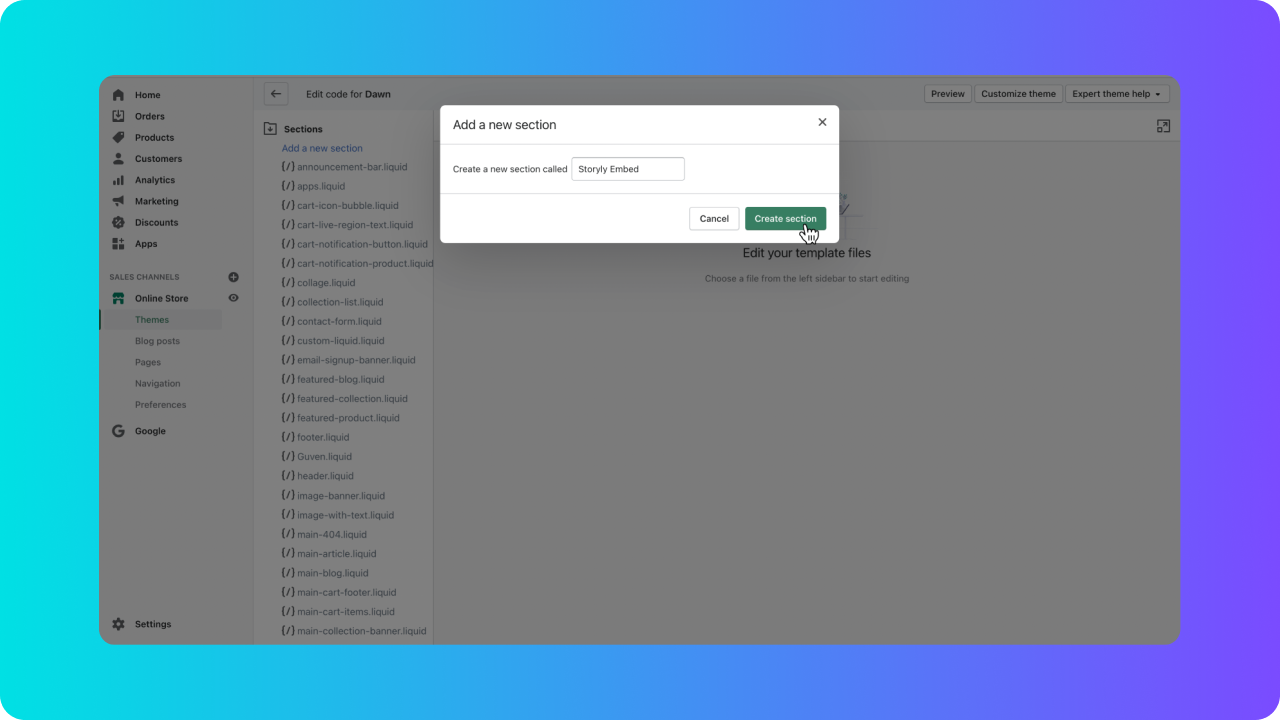
4. Name your section as storyly-embed and create it.
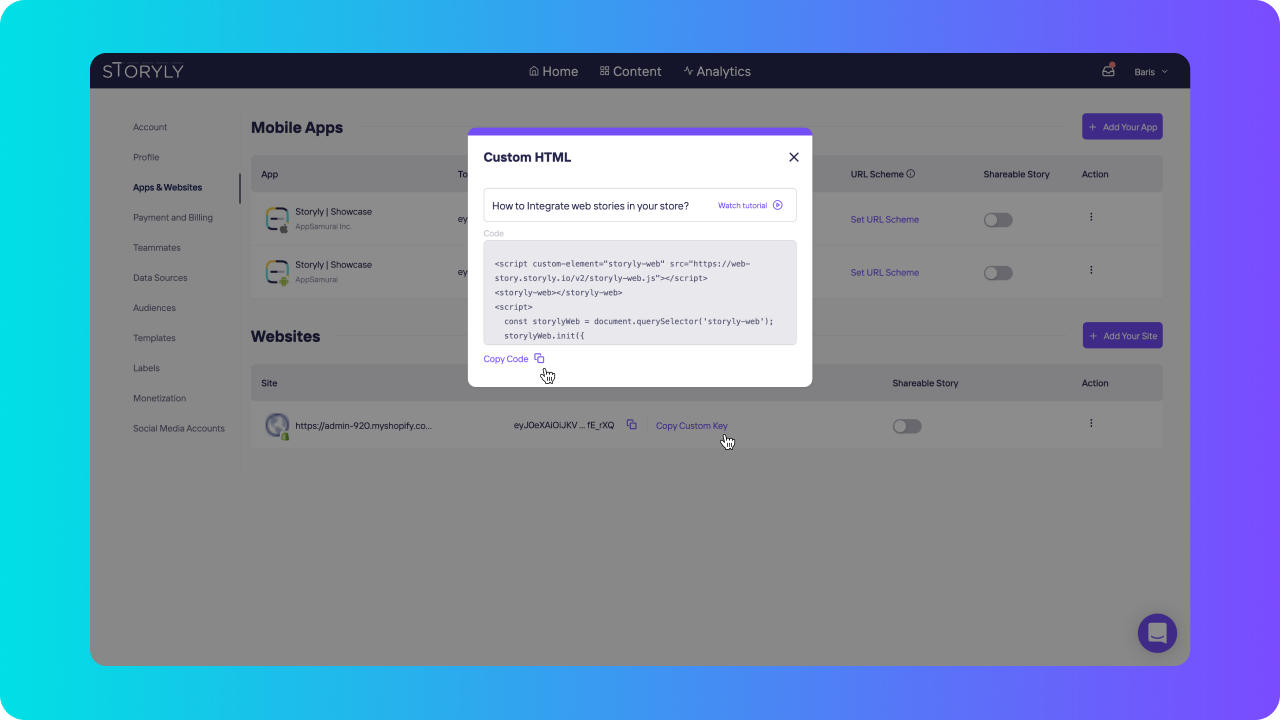
5. Delete all the codes already written there and go to Storyly dashboard. On Storyly Dashboard, navigate to Settings > Account Management > Apps & Websites and copy your Shopify custom HTML from there.
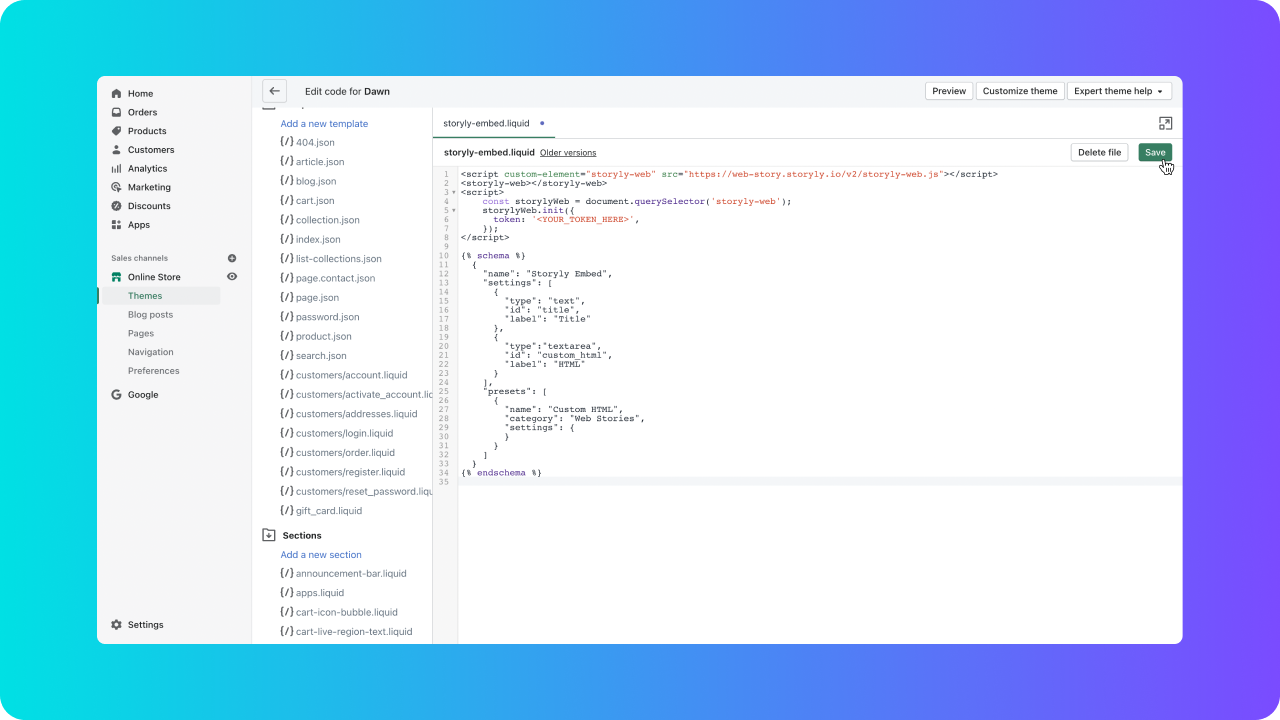
6. Let’s get back to Shopify and paste this custom HTML to the section you’ve created. Once you are done, click Save on right side.
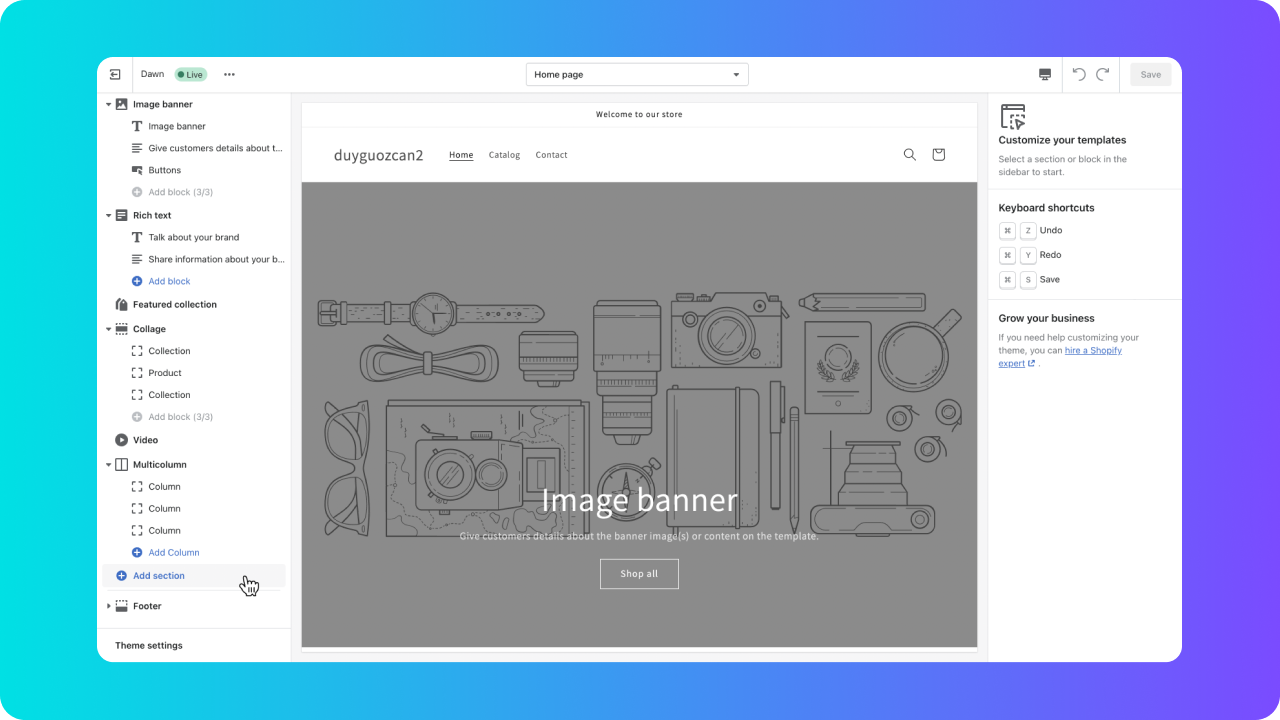
7. Go back and click Customize on your theme again. Scroll down and click on Add Section. You can use search and type Custom HTML or you can just scroll to see that.
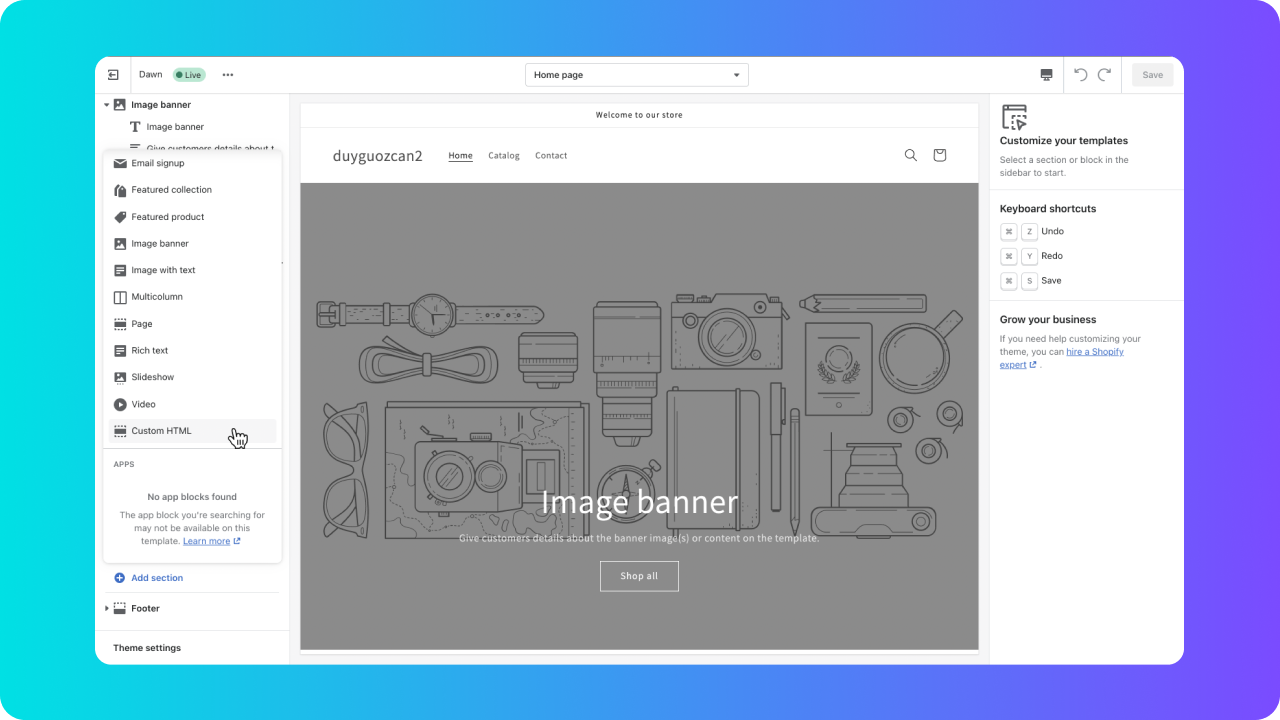
8. When you find the Custom HTML section, click on it and it’ll be added. Then you can drag it and put wherever you like on your website. That will be the place where your stories at.
9. Don’t forget to click Save when you’ve added stories on your Shopify website.
